Love this? Save it for later!
Share the inspiration with your friends
I was standing in line at a tiny, slightly chaotic bookstore café, the kind where the floorboards creak and the air smells like old paper and cinnamon. It was the first real cold snap of December, and I was clutching a peppermint mocha like it was a lifeline. The barista, a woman with flour dusted on her apron and glasses perched on her nose, was telling the person in front of me about a cookie that “tastes like Christmas morning.” I wasn’t trying to eavesdrop, but honestly, she had me at “peppermint.” She described them as soft, crackled, and fudgy, with a hint of coffee that makes the chocolate taste deeper. I mean, I had to know more. So I did something I never do—I interrupted. “Excuse me,” I said, feeling my cheeks flush. “Could you… tell me about those cookies?” She laughed, not a mean laugh, but the kind that says, I knew it. She scribbled the recipe on a napkin, right there between latte orders. The napkin is now stained and crinkled, tucked into my favorite cookbook. And these cookies? They are the reason I look forward to the first frost every single year. Let me tell you, that chance encounter in a dusty bookstore changed my holiday baking forever.
There’s something magical about a cookie that looks like a snowy landscape before you even take a bite. The powdered sugar crackles across the dark, fudgy surface, mimicking the first dusting of snow on a winter morning. These Cozy Peppermint Mocha Crinkle Cookies are that magic. They are the perfect blend of rich, dark chocolate, a whisper of espresso, and the cool, crisp bite of peppermint. They are the cookie you bring to a holiday party and watch disappear. They are the cookie you sneak from the tin at 10 PM with a mug of tea. They are, without a doubt, the most requested cookie in my holiday rotation. Maybe you’ve been there—searching for that one dessert that feels both special and comforting, festive but not fussy. This is it.
Why You’ll Love This Recipe
Let me be honest with you. I have tested a lot of crinkle cookie recipes over the years. Some were too cakey, some were too flat, and some just didn’t have that deep, complex flavor I was chasing. After countless batches—some that ended up in the trash, if I’m being real—I landed on this version. It’s been tested by my family, my neighbors, and a very discerning group of friends at a cookie swap. It has earned its spot in my permanent collection.
- Quick & Easy: The dough comes together in about 15 minutes. The hardest part is waiting for it to chill, but that hands-off time is a gift. You can prep the dough the night before and bake them fresh the next day.
- Simple Ingredients: No trips to a specialty baking store. You likely have everything in your pantry right now. Cocoa powder, flour, sugar, eggs, butter, and a little instant coffee or espresso powder.
- Perfect for the Holidays: These are the ultimate cookie for cookie swaps, holiday parties, or a cozy night in. They look impressive, but they are secretly simple to make.
- Crowd-Pleaser: I have yet to meet someone who doesn’t love these. Kids love the peppermint crunch, and adults appreciate the sophisticated mocha flavor. They are the diplomat of the dessert table.
- Unbelievably Delicious: The texture is the real star here. The outside is crackled and delicate, while the inside stays soft, fudgy, and almost brownie-like. The combination of rich chocolate, aromatic coffee, and cool peppermint is a flavor symphony.
What makes this recipe different from every other crinkle cookie out there? It’s the balance. Many recipes use too much flour, making them puffy and dry. Others skimp on the cocoa, leaving you with a pale, sad cookie. My version uses a higher ratio of cocoa to flour, plus a touch of instant espresso powder that doesn’t make the cookie taste like coffee—it makes the chocolate taste more like chocolate. It deepens the flavor, adding a subtle richness that you can’t quite place but absolutely crave. This isn’t just another holiday cookie; it’s the one you’ll remember.
This recipe is more than good—it’s the kind that makes you close your eyes after the first bite. It’s comfort food reimagined for the winter season. It’s the edible equivalent of wrapping your hands around a warm mug on a cold day. And it’s perfect for impressing guests without any stress, or turning a simple Tuesday evening into something a little more memorable.
What Ingredients You Will Need
This recipe uses simple, wholesome ingredients to deliver a bold, complex flavor and that signature soft-yet-crackly texture. Most of these are pantry staples, which is one of the reasons I love making these cookies on a whim.
For the Cookie Dough
- Unsalted butter, softened: (1/2 cup, 1 stick, or 113 grams) Using unsalted butter gives you full control over the salt level in the cookie. I always use a high-quality European-style butter for a richer flavor, but any brand works fine.
- Granulated sugar: (1 cup, or 200 grams) This is the main sweetener. It also helps create that beautiful crackly top when the cookies are rolled in powdered sugar.
- Large egg: (1, room temperature) A room-temperature egg incorporates into the butter-sugar mixture much more smoothly, creating a better emulsion and a softer cookie.
- Pure vanilla extract: (1 teaspoon) Use the real stuff if you can. It adds a warmth that complements the chocolate and peppermint perfectly.
- Peppermint extract: (1/2 teaspoon, or to taste) This is the star of the show. Be careful—a little goes a long way. I prefer using a pure peppermint extract rather than a mint extract, which can sometimes taste artificial. I recommend the brand Nielsen-Massey for a clean, crisp flavor.
- All-purpose flour: (1 1/2 cups, or 180 grams) Spoon and level your flour for the most accurate measurement. Scooping directly from the bag can pack in too much flour, leading to dry cookies.
- Unsweetened cocoa powder: (1/2 cup, or 50 grams) I use a high-quality Dutch-process cocoa powder for its deep, dark color and smooth, mellow flavor. It makes for a much more fudgy cookie. Look for brands like Valrhona or Guittard if you want to splurge.
- Instant espresso powder: (1 tablespoon) This is my secret weapon. It doesn’t make the cookie taste like coffee. Instead, it enhances the chocolate flavor, making it taste darker, richer, and more complex. You can use instant coffee granules in a pinch, but espresso powder is finer and dissolves better.
- Baking powder: (1 teaspoon) This gives the cookies their lift and helps create the characteristic crinkles.
- Salt: (1/4 teaspoon) A pinch of salt balances the sweetness and brings out the flavors of the chocolate and peppermint.
For Rolling & Decoration
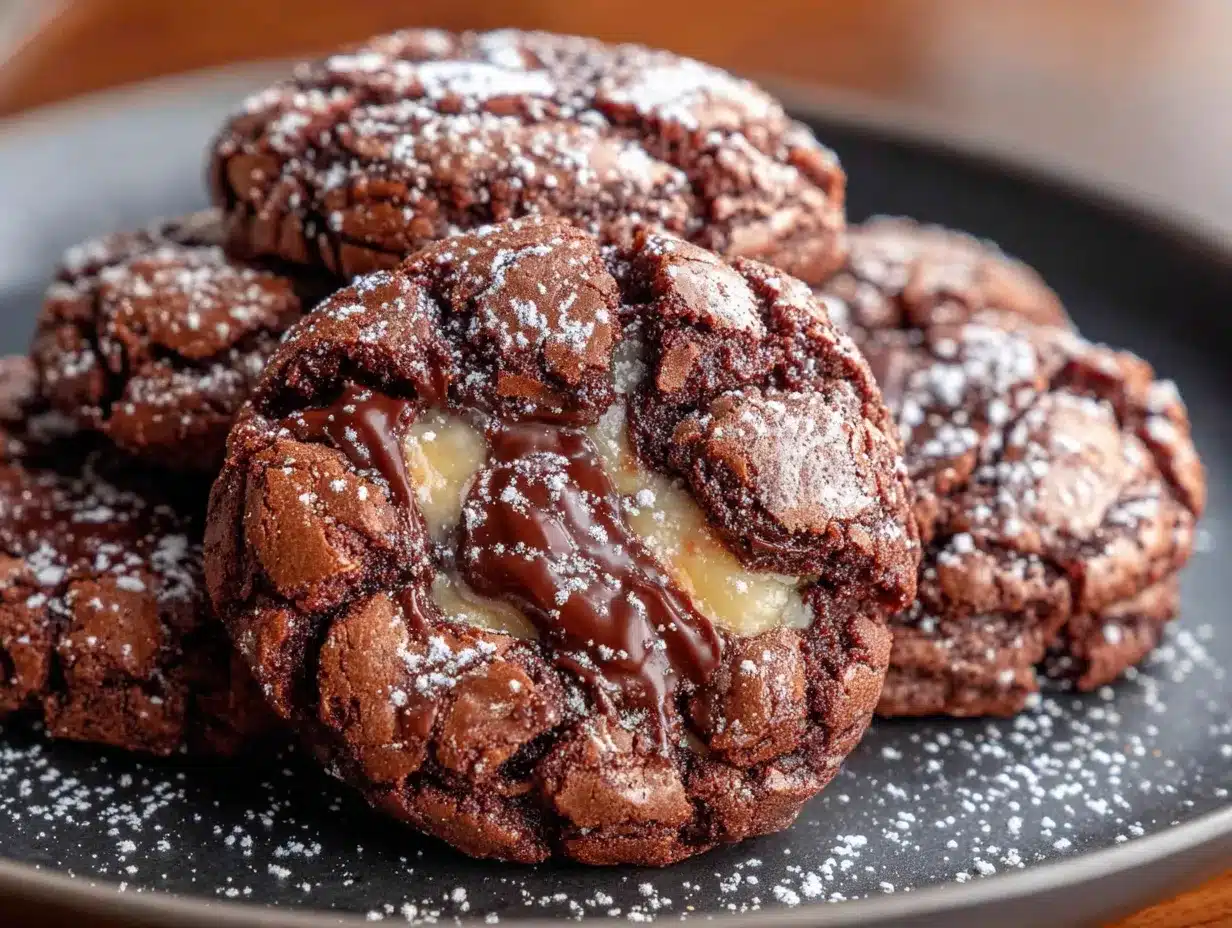
- Powdered sugar: (1/2 cup, or 60 grams) This is for rolling the dough balls. It creates the iconic snowy, crackled crust. Make sure it’s fresh and free of lumps.
- Crushed candy canes or peppermint candies: (1/4 cup, or about 4-5 small candy canes) This adds a wonderful crunch and a pop of festive color. I like to crush them in a zip-top bag with a rolling pin—it’s oddly satisfying and contains the mess.
Substitution Guidance: If you need a gluten-free option, you can substitute the all-purpose flour with a high-quality 1-to-1 gluten-free baking flour blend. I’ve had good results with the King Arthur brand. For a dairy-free version, use a plant-based butter stick (like Earth Balance). The texture might be slightly different, but the flavor will still be amazing. If you don’t have instant espresso powder, you can omit it, but your cookies will have a less complex chocolate flavor. You can also add an extra 1/4 teaspoon of vanilla extract to compensate.
Equipment Needed
You don’t need a professional bakery setup for these cookies, which is part of their charm. Here’s what you’ll need:
- Large mixing bowls: One for the wet ingredients and one for the dry ingredients. Stainless steel or glass bowls are my preference.
- Electric hand mixer or stand mixer: While you can cream the butter and sugar by hand with a wooden spoon, an electric mixer makes it much easier and gives you a fluffier texture. I’ve done it both ways, and the mixer is a lifesaver for your arm.
- Rubber spatula: Essential for scraping down the sides of the bowl and folding in the dry ingredients without overmixing.
- Measuring cups and spoons: Accurate measurements are key in baking. Use dry measuring cups for the flour and sugar, and a liquid measuring cup for any liquids (though we don’t have many here).
- Kitchen scale (optional but recommended): Weighing your ingredients, especially the flour and cocoa powder, is the most accurate way to bake. It prevents dense or dry cookies.
- Baking sheets: Two or three standard half-sheet pans. I like light-colored aluminum pans for even browning. Dark pans can cause the bottoms to burn.
- Parchment paper or silicone baking mats: This is non-negotiable for me. It prevents sticking and makes cleanup a breeze. Silicone mats also help the cookies spread more evenly.
- Cooling rack: A wire rack is essential for letting the cookies cool completely so they set properly.
- Small bowl: For the powdered sugar you’ll use for rolling.
- Zip-top bag and rolling pin (or food processor): For crushing the candy canes.
If you don’t have a stand mixer, don’t worry. A hand mixer works perfectly. If you don’t have a food processor for the candy canes, the zip-top bag and rolling pin method is actually more fun and less noisy.
Preparation Method
Alright, let’s get to the good part. Making these cookies is a process, but it is a rewarding one. Take your time, especially with the chilling step—it’s the secret to that perfect crinkle.
- Cream the butter and sugar. In a large mixing bowl, beat the softened butter and granulated sugar together with an electric mixer on medium speed until the mixture is light, fluffy, and pale in color. This should take about 2-3 minutes. Scrape down the sides and bottom of the bowl with your rubber spatula once or twice. You want to incorporate air here, which will help the cookies puff up.
- Add the wet ingredients. Beat in the room-temperature egg, vanilla extract, and peppermint extract until they are fully combined. The mixture might look a little curdled or separated at first—don’t panic. That’s normal. Keep mixing until it comes back together into a smooth, glossy batter. This should take about 1 minute.
- Whisk the dry ingredients. In a separate, medium-sized bowl, whisk together the all-purpose flour, unsweetened cocoa powder, instant espresso powder, baking powder, and salt. Whisking ensures that the leavening agents and salt are evenly distributed throughout the flour. It also breaks up any lumps in the cocoa powder.
- Combine wet and dry. Gradually add the dry ingredients to the wet mixture. Mix on low speed, or fold in by hand with your spatula, until just combined. Be very careful not to overmix. Overmixing develops the gluten in the flour, which will make your cookies tough and cakey instead of soft and fudgy. Stop as soon as you don’t see any more streaks of flour. The dough will be thick, sticky, and smell incredible.
- Chill the dough. This step is crucial. Cover the bowl with plastic wrap and refrigerate the dough for at least 2 hours, or up to overnight. Chilling the dough solidifies the fat (butter), which prevents the cookies from spreading too much in the oven. It also allows the flavors to meld and deepen. I’ve made the mistake of skipping this step before, and I ended up with flat, sad puddles instead of beautiful, puffy cookies. Don’t be like me. Chill the dough.
- Preheat and prepare. When you’re ready to bake, preheat your oven to 350°F (175°C). Line two baking sheets with parchment paper or silicone baking mats. Place the powdered sugar in a small, shallow bowl.
- Shape and roll. Using a cookie scoop or a tablespoon, portion out the chilled dough into 1.5-tablespoon-sized balls (about 20-25 grams each). Roll each ball firmly between your palms to create a smooth sphere. The dough will be slightly sticky, but the chill should make it manageable. Working with one ball at a time, roll it generously in the powdered sugar until it is completely coated. This thick coating is what creates the dramatic crinkles. Place the coated dough balls on the prepared baking sheets, spacing them about 2 inches apart. They will spread, but not too much.
- Bake. Bake the cookies for 10-12 minutes. The edges should look set, and the tops will be crackled and puffed. The centers will still look slightly soft and underdone—that’s exactly what you want. They will continue to set on the hot baking sheet as they cool. If you overbake them, you’ll lose that fudgy center.
- Cool and garnish. Let the cookies cool on the baking sheet for 5 minutes. This is important, as they are very fragile right out of the oven. After 5 minutes, carefully transfer them to a wire cooling rack to cool completely. While the cookies are still warm, sprinkle the crushed candy canes over the top. The residual heat will help them stick.
A personal tip: I always bake one test cookie first to check the spread. If it spreads too much, I pop the dough back in the fridge for another 30 minutes. If it doesn’t spread enough, I might press it down slightly with the back of a spoon before baking the rest. It’s a small step that saves a whole batch.
Cooking Tips & Techniques
I’ve made these cookies more times than I can count, and I have the flour-dusted countertops to prove it. Here are the lessons I learned the hard way, so you don’t have to.
- The Chill is Non-Negotiable: I cannot stress this enough. I once tried to rush the process and baked a batch after only 30 minutes of chilling. They spread into thin, crispy discs. Pretty, yes. Crinkly and fudgy? No. The chill solidifies the butter, ensuring the cookies bake up thick and soft. Plan ahead. Make the dough the night before. Your future self will thank you.
- Don’t Overmix the Dough: This is a common mistake. When you add the flour mixture, mix only until it disappears. If you keep mixing, you’ll develop gluten, and your cookies will be tough, not tender. A few flour streaks are okay; you can fold them in by hand with the last few turns of the spatula.
- The Powdered Sugar Coat is Everything: Be generous with the powdered sugar. Roll each dough ball until it looks like a little snowball. The thick coating is what cracks and separates as the cookie bakes, creating that beautiful, signature look. If you skimp, you’ll get a pale, barely-crackled cookie.
- Use a Cookie Scoop for Uniform Size: Using a cookie scoop ensures all your cookies are the same size, which means they will bake evenly. No more burnt edges on tiny cookies while the big ones are still raw in the middle.
- Watch the Oven, Not the Clock: Ovens run differently. My old oven baked these in exactly 10 minutes. My new one takes 12. Start checking at the 9-minute mark. The edges should be set, and the tops should look crackled and dry. The center will still look soft. Pull them out then. They will finish baking on the hot sheet.
- Let Them Cool on the Sheet: This is a hard one for impatient bakers like me. The cookies are incredibly fragile when they come out of the oven. Let them rest on the baking sheet for a full 5 minutes. This allows them to firm up enough to be transferred without falling apart. I learned this lesson the messy way.
Variations & Adaptations
One of the best things about this recipe is how flexible it is. Once you have the basic dough down, the possibilities are endless. Here are a few of my favorite twists.
- Double Chocolate Mint: Fold in 1/2 cup of dark chocolate chips or chunks into the dough before chilling. It turns these cookies into a decadent, double-chocolate experience. The melted pockets of chocolate are divine.
- White Chocolate Peppermint: Swap the crushed candy canes for a drizzle of melted white chocolate after the cookies have cooled. The sweetness of the white chocolate pairs beautifully with the peppermint and dark cocoa. It also looks incredibly elegant on a cookie platter.
- Mocha Lover’s Dream: Increase the instant espresso powder to 2 tablespoons. This will give the cookies a more pronounced coffee flavor that coffee lovers will go crazy for. You can also sprinkle a little flaky sea salt on top before baking to enhance the mocha experience.
- Gluten-Free Adaptation: I’ve made these with a 1-to-1 gluten-free baking flour blend (like Bob’s Red Mill or King Arthur) with excellent results. The texture is slightly more delicate, but the flavor is spot on. Make sure to chill the dough for the full 2 hours, or even a bit longer, as gluten-free doughs can be stickier.
- Vegan Version: To make these vegan, use a plant-based butter stick and a flax egg (1 tablespoon ground flaxseed mixed with 3 tablespoons water, let sit for 5 minutes). The texture will be a bit more cakey, but they will still be delicious and have that beautiful crackled top.
I once made a batch with a mix of dark chocolate chips and crushed pretzels for a sweet-and-salty version. It was a happy accident, and honestly, it might be my new favorite way to make them. Don’t be afraid to experiment!
Serving & Storage Suggestions
These cookies are best enjoyed slightly warm, when the centers are still soft and the chocolate is at its most flavorful. But honestly, they are pretty incredible at any temperature.
Serving: I love serving these on a festive platter with a dusting of extra powdered sugar and a few whole candy canes for decoration. They are the perfect companion to a hot cup of coffee, a mug of spiced hot chocolate, or a glass of cold milk. For a truly indulgent dessert, sandwich two cookies around a scoop of vanilla ice cream for the ultimate peppermint mocha ice cream sandwich. They also make wonderful gifts. Pack them in a festive tin lined with parchment paper, and they will be the star of any holiday gift basket.
Storage: Store the cooled cookies in an airtight container at room temperature. They will stay fresh and soft for up to 5 days. I like to place a slice of bread in the container with the cookies. The bread absorbs excess moisture and keeps the cookies from drying out. Replace the bread slice every couple of days if the cookies last that long.
Freezing: These cookies freeze beautifully. You have two options. First, you can freeze the baked cookies. Let them cool completely, then place them in a single layer in a freezer-safe bag or container. They will keep for up to 3 months. Thaw them at room temperature for about 30 minutes before serving. Second, you can freeze the unbaked dough balls. Roll the dough into balls, but don’t coat them in powdered sugar yet. Place the balls on a baking sheet and freeze until solid (about 1 hour). Transfer the frozen dough balls to a freezer bag. When you’re ready to bake, roll the frozen dough balls in powdered sugar and bake as directed, adding 1-2 minutes to the baking time. This is my favorite method for having fresh cookies on demand.
Reheating: To revive a day-old cookie, pop it in a 300°F (150°C) oven for 3-5 minutes. It will soften the center and make it taste freshly baked. You can also microwave a cookie for 10-15 seconds for a quick fix.
Nutritional Information & Benefits
Let’s be real—these are a treat, a holiday indulgence meant to be enjoyed without guilt. But that doesn’t mean they can’t have some redeeming qualities. The nutritional information below is an estimate based on a single cookie (assuming the recipe makes about 24 cookies).
| Nutrient | Amount Per Cookie |
|---|---|
| Calories | ~145 |
| Fat | 6g |
| Saturated Fat | 3.5g |
| Carbohydrates | 22g |
| Sugar | 15g |
| Fiber | 1g |
| Protein | 2g |
Health Benefits of Key Ingredients:
- Cocoa Powder: Rich in antioxidants called flavonoids, which can help improve heart health and reduce inflammation. Dark chocolate in any form is a little bit of a health food, if you ask me.
- Peppermint: Known for its digestive benefits and its ability to soothe headaches. The aroma alone can be invigorating and refreshing.
- Coffee (Espresso Powder): A source of antioxidants and a natural mood booster. It also enhances cognitive function. It’s the reason these cookies are perfect with your morning coffee!
Dietary Considerations: This recipe is vegetarian. For gluten-free and vegan options, see the variations section above. Please be aware that peppermint extract can be strong for some individuals, so adjust to your taste. The cookies contain dairy (butter) and gluten (flour) in their standard form.
I believe in balance. Life is too short to skip dessert, especially during the holidays. Enjoy these cookies as a part of a balanced, joyful life. They are made with love, and that’s the best ingredient of all.
Conclusion
So, there you have it. The story of a cookie born from a chance encounter in a cozy bookstore, refined through countless kitchen experiments, and now shared with you. These Cozy Peppermint Mocha Crinkle Cookies are more than just a recipe—they are a moment. They are the smell of cocoa and peppermint filling your kitchen on a cold December afternoon. They are the joy of pulling a tray of perfectly crackled cookies out of the oven. They are the warmth of sharing something delicious with the people you love.
I truly hope you give these a try. Don’t be afraid to make them your own. Add more peppermint, less coffee, a handful of chocolate chips. The best recipes are the ones that adapt to you. And please, when you make them, I want to hear about it. Did they bring back a memory? Did you invent a new variation? Did you eat three in a row while standing at the counter? (No judgment here—I’ve been there.)
Leave a comment below and tell me all about it. Share a photo of your beautiful, crackled cookies on Pinterest and tag me. Your baking adventures make my day. Until next time, keep your kitchen warm, your cocoa powder high-quality, and your cookie jar full. Happy baking, my friend!
Frequently Asked Questions
Why did my crinkle cookies not crackle?
This is the most common issue, and it usually comes down to one of three things. First, the dough wasn’t chilled long enough. The chill is essential for the cookies to puff up and the top to crack. Second, you didn’t roll the dough balls in enough powdered sugar. You need a thick, generous coating. Third, your oven might be too cool. Make sure it’s preheated to 350°F (175°C) and that you’re using an oven thermometer to verify the temperature.
Can I use mint extract instead of peppermint extract?
Technically, yes, but the flavor will be different. Peppermint extract is made from peppermint oil and has a cool, sharp, clean flavor. Mint extract is usually a blend of different mint oils (like spearmint) and can taste more like toothpaste or gum. For the classic peppermint mocha flavor, stick with pure peppermint extract.
My cookies spread too much. What went wrong?
This usually means the dough was too warm when it went into the oven. Make sure you chilled it for at least 2 hours. Also, check your butter. If your butter was too soft or melted when you creamed it, the cookies will spread more. Finally, check your flour measurement. Too little flour can cause excessive spreading. Spoon and level your flour, or better yet, use a kitchen scale.
Can I make the dough ahead of time and freeze it?
Absolutely! This is one of my favorite time-saving tricks. Make the dough, roll it into balls, and place them on a baking sheet. Freeze the balls until solid, then transfer them to a freezer bag. When you’re ready to bake, roll the frozen dough balls in powdered sugar and bake as directed, adding 1-2 extra minutes to the baking time. You’ll have fresh, warm cookies in no time.
How do I crush candy canes without making a huge mess?
The easiest method is to place the candy canes in a sturdy zip-top bag. Seal the bag, removing as much air as possible. Then, use a rolling pin or a heavy skillet to gently crush them. You can also pulse them a few times in a food processor, but be careful not to turn them into dust. You want small, crunchy pieces, not powder.
Pin This Recipe!
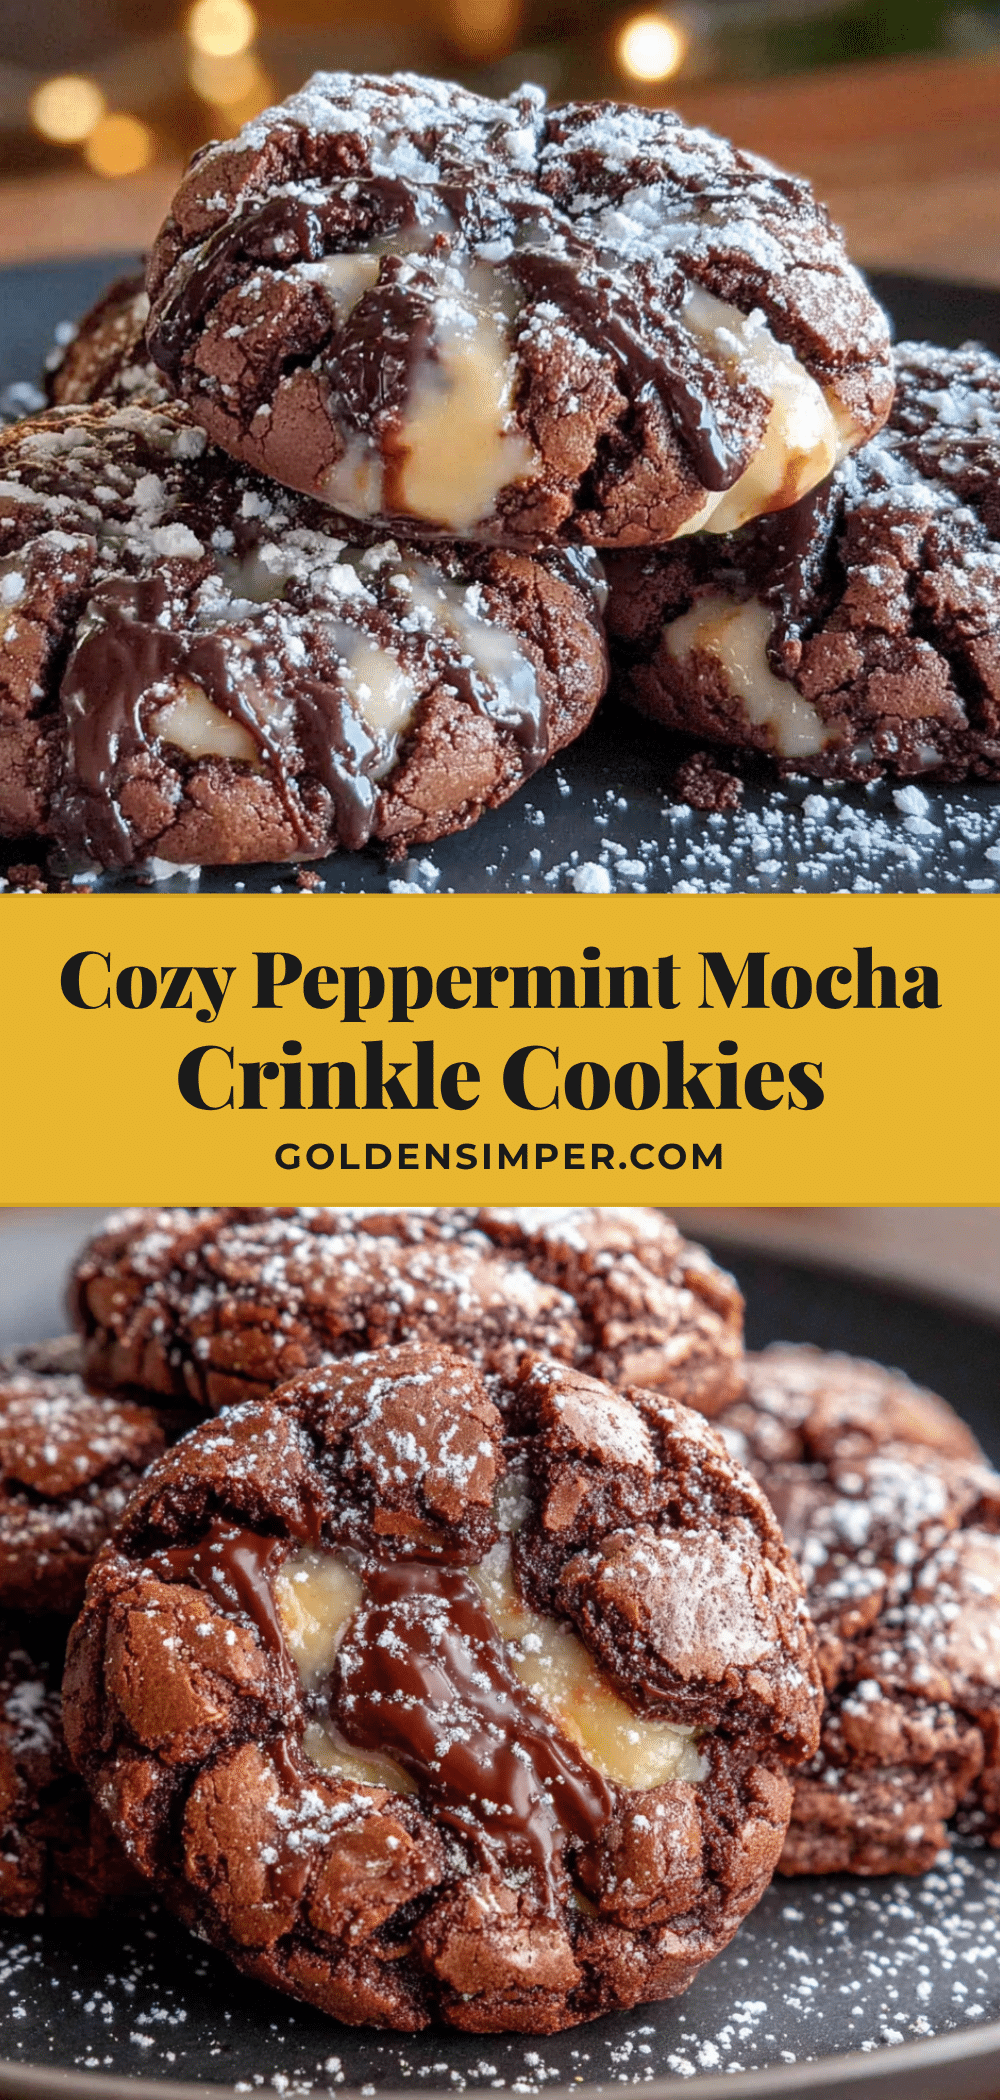
Cozy Peppermint Mocha Crinkle Cookies

These Cozy Peppermint Mocha Crinkle Cookies are the perfect blend of rich, dark chocolate, a whisper of espresso, and the cool, crisp bite of peppermint. They are soft, fudgy, and crackled with a snowy powdered sugar coating, making them the ultimate holiday cookie.
- Prep Time: 15 minutes
- Cook Time: 12 minutes
- Total Time: 2 hours 27 minutes (includes 2 hours chilling)
- Yield: 24 cookies 1x
- Category: Dessert
- Cuisine: American
Ingredients
- 1/2 cup (1 stick, 113g) unsalted butter, softened
- 1 cup (200g) granulated sugar
- 1 large egg, room temperature
- 1 teaspoon pure vanilla extract
- 1/2 teaspoon peppermint extract
- 1 1/2 cups (180g) all-purpose flour
- 1/2 cup (50g) unsweetened Dutch-process cocoa powder
- 1 tablespoon instant espresso powder
- 1 teaspoon baking powder
- 1/4 teaspoon salt
- 1/2 cup (60g) powdered sugar (for rolling)
- 1/4 cup crushed candy canes or peppermint candies (about 4–5 small candy canes)
Instructions
- Cream the butter and sugar: In a large mixing bowl, beat the softened butter and granulated sugar together with an electric mixer on medium speed until light, fluffy, and pale in color, about 2-3 minutes. Scrape down the sides of the bowl as needed.
- Add the wet ingredients: Beat in the room-temperature egg, vanilla extract, and peppermint extract until fully combined and smooth, about 1 minute. The mixture may look curdled at first but will come together.
- Whisk the dry ingredients: In a separate medium bowl, whisk together the all-purpose flour, cocoa powder, instant espresso powder, baking powder, and salt until evenly distributed.
- Combine wet and dry: Gradually add the dry ingredients to the wet mixture, mixing on low speed or folding by hand with a rubber spatula until just combined. Do not overmix. The dough will be thick and sticky.
- Chill the dough: Cover the bowl with plastic wrap and refrigerate for at least 2 hours, or up to overnight. This step is crucial for preventing spreading and creating the crinkled texture.
- Preheat and prepare: When ready to bake, preheat oven to 350°F (175°C). Line two baking sheets with parchment paper or silicone baking mats. Place powdered sugar in a small shallow bowl.
- Shape and roll: Using a cookie scoop or tablespoon, portion the chilled dough into 1.5-tablespoon-sized balls (about 20-25g each). Roll each ball firmly between your palms to create a smooth sphere. Roll each ball generously in the powdered sugar until completely coated. Place on prepared baking sheets, spacing 2 inches apart.
- Bake: Bake for 10-12 minutes. The edges should look set, and the tops will be crackled and puffed. The centers will still look slightly soft. Do not overbake.
- Cool and garnish: Let cookies cool on the baking sheet for 5 minutes, then carefully transfer to a wire cooling rack to cool completely. While still warm, sprinkle crushed candy canes over the top.
Notes
Chilling the dough is non-negotiable for the perfect crinkle texture. Be generous with the powdered sugar coating. For best results, use a cookie scoop for uniform size. Let cookies cool on the baking sheet for 5 minutes before transferring. Store in an airtight container at room temperature for up to 5 days. Freeze baked cookies for up to 3 months, or freeze unbaked dough balls for fresh cookies on demand.
Nutrition
- Serving Size: 1 cookie
- Calories: 145
- Sugar: 15
- Sodium: 75
- Fat: 6
- Saturated Fat: 3.5
- Carbohydrates: 22
- Fiber: 1
- Protein: 2
Keywords: peppermint mocha crinkle cookies, chocolate crinkle cookies, holiday cookies, peppermint cookies, mocha cookies, easy cookie recipe, Christmas cookies



