Love this? Save it for later!
Share the inspiration with your friends
I was standing in the baking aisle of our local grocery store last Tuesday when a woman walked past me, and I caught the faintest trail of her perfume—something floral and a little bit powdery, like violets. And just like that, I was nine years old again, sitting cross-legged on my aunt Margot’s linoleum kitchen floor, watching her pipe purple rosettes onto a birthday cake for my cousin. She was always the one who made us feel seen, you know? She remembered that my cousin’s favorite color was purple, and she’d spend hours getting the frosting just that shade—not too lavender, not too magenta, just right. She passed away a few years ago, and I still can’t walk past a bakery display without looking for a purple cake.
Honestly, I’ve been trying to recreate that feeling for years. But here’s the thing—I’m not a patient baker, and I definitely don’t have hours to spend on a cake on a random Tuesday night. So I set out to make a version that captures that same magic but fits into a real, busy life. This quick Sagittarius birthday cake with purple frosting is the result of that mission. It’s not fussy, it doesn’t require a pastry bag, and it comes together in about thirty minutes flat. I mean, I literally made it after work last week while my kid was doing homework at the kitchen table.
The first time I tested it, I accidentally used salted butter instead of unsalted, and honestly? It was still delicious. That’s the kind of recipe this is—forgiving, fast, and full of personality. Maybe you’ve been there, staring at a box mix and thinking, “I want something special but I don’t have the energy for a project.” This cake is for those nights. It’s for the Sagittarius in your life who loves bold colors and big flavors, or for anyone who just needs a little bit of whimsy on a regular old Wednesday. It’s the cake I wish my aunt Margot had in her back pocket—quick enough for a weeknight, pretty enough for a celebration.
Why You’ll Love This Recipe
Let me tell you why this purple Sagittarius birthday cake has become my go-to for last-minute celebrations. I’ve tested it six times now (yes, six—my family is very tired of purple cake), and each time I tweaked something small to make it better. The version I’m sharing with you is the one that finally made me close my eyes after the first bite.
- Quick & Easy: This cake goes from mixing bowl to table in under 30 minutes. No kidding. The batter comes together in one bowl, and the frosting takes about five minutes. Perfect for those “oh no, I forgot it’s someone’s birthday” moments.
- Simple Ingredients: You probably have most of these in your pantry right now. No obscure extracts, no specialty flours, no trips to three different stores. Just basic baking staples plus a little purple food coloring.
- Perfect for Weeknight Celebrations: Whether it’s a birthday, a promotion, or just because it’s Tuesday, this cake feels special without requiring a big time commitment. The bold purple frosting makes it look like you spent way more effort than you actually did.
- Crowd-Pleaser: I brought this to a potluck last month, and three people asked for the recipe. The kids loved the color, and the adults loved that it wasn’t overly sweet. It’s that rare cake that makes everyone happy.
- Unbelievably Delicious: The texture is what gets me every time—super moist with a tender crumb, thanks to a little trick I learned from a pastry chef friend. And the frosting? It’s creamy but not heavy, with just a hint of vanilla that lets the cake shine.
What makes this different from every other birthday cake recipe out there is the method. Instead of the usual creaming method, I use a reverse creaming technique that gives you a more tender cake with less risk of overmixing. It sounds fancy, but it’s actually easier and faster. Plus, the purple frosting isn’t just for looks—I add a tiny pinch of salt to balance the sweetness, which makes it taste more like a bakery cake than a homemade one.
This recipe is the kind that makes you feel like a hero when you’re short on time. It’s comfort food reimagined—faster, yes, but with the same soul-soothing satisfaction. Perfect for impressing guests without stress, or turning a simple weeknight into something memorable.
What Ingredients You Will Need
This recipe uses simple, wholesome ingredients that work together to create a moist, flavorful cake with a gorgeous purple finish. Most of these are pantry staples, which is exactly what you want when you’re making a last-minute celebration cake.
For the Cake
- 1 ½ cups (190g) all-purpose flour — I use King Arthur Flour for consistent results, but any brand works. Spoon and level your flour for the best texture; don’t scoop directly from the bag or you’ll end up with a dense cake.
- 1 cup (200g) granulated sugar — Regular white sugar is perfect here. It dissolves easily and gives the cake a nice tender crumb. You can reduce it to ¾ cup if you prefer a less sweet cake, but don’t go lower than that or the texture will suffer.
- 1 ½ teaspoons baking powder — Make sure it’s fresh! If your baking powder is more than six months old, it might not give you enough lift. Test it by dropping a little in hot water—if it bubbles vigorously, you’re good.
- ½ teaspoon baking soda — This helps the cake brown nicely and adds tenderness. Don’t skip it even though the recipe doesn’t have an acidic ingredient like buttermilk—the baking soda still helps with texture.
- ½ teaspoon salt — I use fine sea salt. Salt isn’t just for savory food; it balances sweetness and enhances the vanilla flavor in the cake.
- ½ cup (113g) unsalted butter, softened — This is important: the butter needs to be at room temperature, not melted and not straight from the fridge. Leave it on the counter for about an hour before you start. If you’re in a hurry, cut it into small cubes and let it sit for 15 minutes.
- 1 cup (240ml) whole milk, room temperature — Whole milk gives the richest texture, but 2% works in a pinch. Don’t use skim milk—the cake will be less tender. Take the milk out of the fridge when you take the butter out so they come to temperature together.
- 2 large eggs, room temperature — Cold eggs can seize the batter and make the cake dense. If you forgot to take them out early, place them in a bowl of warm water for 5 minutes.
- 2 teaspoons vanilla extract — I prefer pure vanilla extract, not imitation. It makes a real difference in flavor. My go-to brand is Nielsen-Massey, but any pure vanilla works.
For the Purple Frosting
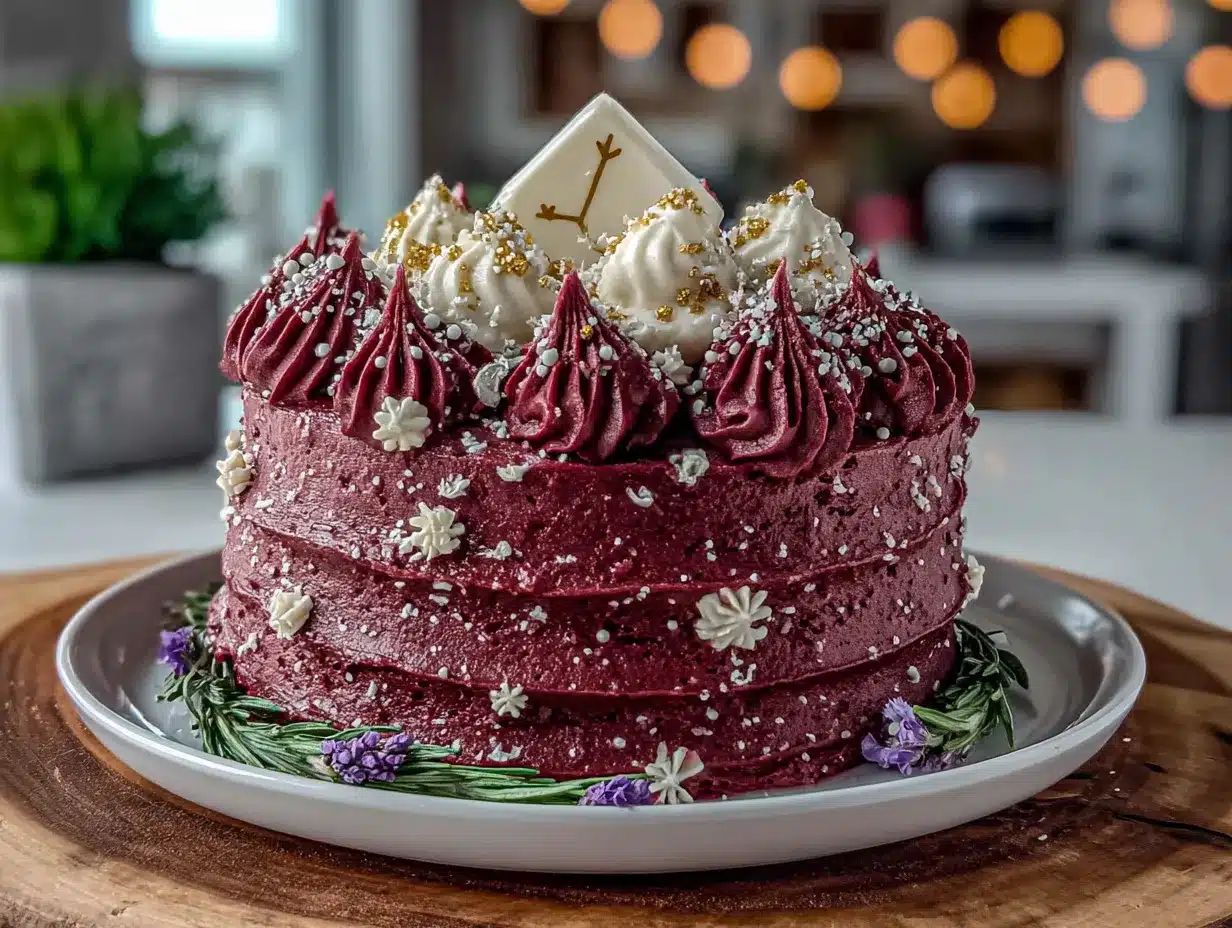
- ½ cup (113g) unsalted butter, softened — Again, room temperature is key. Cold butter won’t cream properly and will leave you with lumpy frosting.
- 2 cups (240g) powdered sugar, sifted — Sifting is non-negotiable here. Lumpy powdered sugar makes lumpy frosting. I sift mine directly into the mixing bowl to save a dish.
- 2 tablespoons heavy cream — Heavy cream makes the frosting silky and spreadable. You can use milk in a pinch, but the frosting won’t be as luxurious.
- 1 teaspoon vanilla extract — Same as the cake—use pure vanilla if you can.
- Pinch of salt — This is my secret weapon. A tiny pinch of salt cuts the sweetness and makes the frosting taste more sophisticated.
- Purple food coloring — I recommend gel food coloring rather than liquid. Gels are more concentrated, so you need less, and they won’t thin out your frosting. Start with a tiny drop and add more until you get the shade you want. For a true Sagittarius purple, I use a mix of violet and a tiny dot of magenta.
Optional Decorations
- Sprinkles or edible stars — Because every birthday cake needs sprinkles. I like gold stars for a Sagittarius-themed cake.
- Fresh berries — Raspberries or blackberries add a nice tart contrast to the sweet cake.
Equipment Needed
You don’t need a fancy kitchen to make this cake. Here’s what you’ll need:
- One 8-inch round cake pan — I use a light-colored metal pan for even baking. Dark pans can cause the edges to brown too quickly. If you only have a 9-inch pan, the cake will be thinner and bake a few minutes faster, so start checking at 18 minutes.
- Parchment paper — Cut a circle to line the bottom of your pan. This is the easiest way to guarantee your cake comes out clean. I learned this the hard way after a few stuck cakes.
- Mixing bowls — One large bowl for the dry ingredients and one medium bowl for the wet ingredients. Glass or stainless steel works fine.
- Hand mixer or stand mixer — A hand mixer is totally fine for this recipe. You can even whisk by hand if you’re patient, but a mixer saves time and gives a lighter texture.
- Rubber spatula — For scraping down the bowl and folding in any last bits of flour.
- Cooling rack — A wire rack lets air circulate around the cake so it cools evenly. If you don’t have one, you can use a cutting board, but flip the cake out of the pan after 10 minutes so it doesn’t get soggy.
- Offset spatula — This makes frosting the cake so much easier. A butter knife works in a pinch, but an offset spatula is worth the $8 investment.
Budget-friendly tip: You can find a perfectly good 8-inch cake pan at a thrift store for a couple of dollars. That’s where I got my favorite one, and it’s been going strong for years.
Preparation Method
Preheat your oven to 350°F (175°C). Grease your 8-inch round cake pan with butter or non-stick spray, then line the bottom with a circle of parchment paper. This step is crucial—trust me, I’ve skipped it before and spent twenty minutes chiseling cake out of the pan.
- Mix the dry ingredients: In a large mixing bowl, whisk together the flour, sugar, baking powder, baking soda, and salt. Make sure everything is evenly distributed—you don’t want a pocket of baking powder in your finished cake. This takes about 30 seconds.
- Add the butter: Cut your softened butter into small cubes and drop them into the flour mixture. Using your hand mixer on low speed (or a pastry cutter if you’re going old-school), mix until the butter is broken down into small, pea-sized pieces. The mixture should look like coarse sand. This is the reverse creaming method I mentioned—it coats the flour in fat, which prevents too much gluten from forming and gives you a more tender cake. Don’t overmix here; about 1-2 minutes is plenty.
- Combine the wet ingredients: In a separate bowl, whisk together the milk, eggs, and vanilla extract. Whisk until the eggs are fully incorporated and the mixture is smooth. It should look pale and slightly frothy.
- Add wet to dry: Pour the wet ingredients into the dry mixture. Mix on low speed just until everything comes together—about 30 seconds. Scrape down the sides and bottom of the bowl with your spatula, then mix for another 10 seconds. The batter should be smooth but don’t keep mixing once it comes together. Overmixing at this stage will make your cake tough.
- Pour and bake: Pour the batter into your prepared pan and spread it evenly with your spatula. Give the pan a gentle tap on the counter to release any air bubbles. Bake for 22-25 minutes, or until a toothpick inserted in the center comes out clean or with just a few moist crumbs. The cake should be golden on top and pulling away slightly from the edges of the pan.
- Cool the cake: Let the cake cool in the pan for 10 minutes on a wire rack. Then run a knife around the edge to loosen it, invert it onto the rack, and peel off the parchment paper. Let it cool completely before frosting—about 30 minutes. If you frost it while it’s still warm, the frosting will melt and slide right off. I learned this the messy way.
- Make the frosting: While the cake cools, make your frosting. In a medium bowl, beat the softened butter with your hand mixer until it’s smooth and creamy—about 1 minute. Add the sifted powdered sugar one cup at a time, mixing on low speed. The mixture will look dry and crumbly at first; don’t panic. Add the heavy cream, vanilla, and salt, then increase the speed to medium and beat for 2-3 minutes until the frosting is light, fluffy, and spreadable. Add the purple food coloring one tiny drop at a time, mixing after each addition, until you reach your desired shade.
- Frost the cake: Place the cooled cake on your serving plate. Use your offset spatula to spread a generous layer of frosting on top. If you want to be fancy, you can create swirls or peaks with the spatula. Add sprinkles or edible stars while the frosting is still soft so they stick.
And that’s it! From start to finish, this takes about 30 minutes of active time and 25 minutes of baking. You’ve got a stunning purple Sagittarius birthday cake ready to celebrate.
Cooking Tips & Techniques
I’ve made this cake enough times to know where things can go wrong. Here are the tips I wish someone had told me:
Room temperature ingredients are non-negotiable. I know, I know, it’s annoying to plan ahead. But cold butter doesn’t incorporate properly, and cold eggs can make the batter curdle. If you forgot to take everything out early, here’s a shortcut: cut the butter into small cubes and microwave it for 5-7 seconds—just until it’s soft but not melted. For the eggs, place them in a bowl of warm water for 5 minutes. For the milk, microwave it for 15 seconds.
Don’t overmix the batter. This is the most common mistake I see in home baking. Once you add the wet ingredients to the dry, mix just until the flour disappears. A few small lumps are fine. Overmixing develops gluten, which makes the cake dense and rubbery instead of light and tender.
Test for doneness early. Every oven runs differently. Start checking your cake at 20 minutes, even if the recipe says 22-25. Insert a toothpick into the center—if it comes out clean, it’s done. If there’s wet batter on it, give it another 2-3 minutes and check again. An overbaked cake is dry and crumbly, so better to underbake slightly than overbake.
Let the cake cool completely. I cannot stress this enough. The first time I made this, I was impatient and frosted the cake after only 15 minutes. The frosting melted into a purple puddle and slid off the sides. It still tasted good, but it looked like a disaster. Give it the full 30 minutes on the cooling rack.
Use gel food coloring, not liquid. Liquid food coloring will thin out your frosting and make it runny. Gel colors are more concentrated, so you need less, and they won’t affect the texture. I use Americolor brand, but any gel works. Start with a tiny dot on a toothpick and mix it in—you can always add more, but you can’t take it away.
Make the frosting ahead of time. If you’re really short on time, you can make the frosting up to 3 days in advance. Store it in an airtight container in the fridge, then let it come to room temperature and re-whip it for a minute before using. This actually saves time on the day you’re baking.
Variations & Adaptations
One of the things I love about this recipe is how flexible it is. Here are some variations I’ve tried:
Gluten-Free Version: Swap the all-purpose flour for a 1:1 gluten-free baking flour blend. I use King Arthur’s Measure for Measure blend, and it works perfectly. Don’t use almond flour or coconut flour—they’ll change the texture completely. Add an extra tablespoon of milk since gluten-free flours tend to absorb more liquid.
Dairy-Free Version: Use vegan butter (I like Miyoko’s) and substitute the milk with oat milk or unsweetened almond milk. For the frosting, use vegan butter and a dairy-free creamer. The texture will be slightly different—a little less tender—but it’s still delicious. I made this version for a friend with a dairy allergy, and she couldn’t tell the difference.
Different Frosting Colors: The purple frosting is perfect for a Sagittarius birthday cake, but you can easily change the color for other zodiac signs or occasions. Use red for Aries, green for Taurus, blue for Aquarius—you get the idea. Just swap the food coloring and keep everything else the same.
Cupcake Version: This batter makes about 12 cupcakes. Bake them at 350°F for 15-18 minutes, or until a toothpick comes out clean. The frosting recipe is enough for all 12 cupcakes with some left over for extra swirls on top. I did this for my daughter’s class party, and they were a huge hit.
Add-In Options: Fold in ½ cup of mini chocolate chips, fresh blueberries, or crushed freeze-dried raspberries for extra flavor and texture. If you add fruit, toss it in a tablespoon of flour first so it doesn’t sink to the bottom of the cake.
Layer Cake: Double the recipe and bake in two 8-inch pans. Layer the cakes with frosting in between, then frost the whole thing. This turns your quick weeknight cake into a showstopper for a birthday party. Just add 5 minutes to the baking time for the thicker layers.
Serving & Storage Suggestions
This cake is best served at room temperature. If you’ve refrigerated it, let it sit on the counter for about 30 minutes before serving—the texture is much better when it’s not cold.
How to serve: Slice the cake with a sharp knife, wiping the blade clean between cuts for neat slices. Serve it on its own, or with a scoop of vanilla ice cream or a dollop of whipped cream. The contrast of cold ice cream with the tender cake is absolutely lovely. For a Sagittarius-themed party, add some gold star sprinkles on top and serve with sparkling cider.
What to pair it with: This cake goes beautifully with a cup of coffee or a glass of cold milk. If you’re serving it for a birthday brunch, pair it with fresh fruit salad and mimosas. The sweetness of the cake balances nicely with tart berries or citrus.
Storage instructions: Store leftover cake in an airtight container at room temperature for up to 3 days. If your kitchen is warm, store it in the fridge—the frosting can get a little soft. Bring slices to room temperature before eating for the best texture. The cake actually tastes even better on day two, as the flavors have time to meld together.
Freezing instructions: You can freeze the unfrosted cake for up to 3 months. Wrap it tightly in plastic wrap, then in aluminum foil. When you’re ready to use it, thaw it overnight in the fridge, then bring it to room temperature before frosting. I’ve done this twice now, and the texture is almost as good as fresh. The frosted cake can also be frozen, but the frosting might lose some of its fluffiness.
Reheating tip: If you want that fresh-from-the-oven warmth, microwave individual slices for 10-15 seconds. Don’t do the whole cake—it’ll get soggy.
Nutritional Information & Benefits
Here’s the estimated nutritional breakdown for one slice of this purple Sagittarius birthday cake (based on 8 servings):
| Nutrient | Amount per Serving |
|---|---|
| Calories | 385 |
| Total Fat | 18g |
| Saturated Fat | 11g |
| Cholesterol | 85mg |
| Sodium | 320mg |
| Total Carbohydrates | 52g |
| Dietary Fiber | 1g |
| Sugars | 38g |
| Protein | 4g |
This cake is a celebration treat, so it’s not exactly health food—and that’s okay! It’s meant to be enjoyed on special occasions. That said, the ingredients do offer some benefits. The butter provides vitamin A and healthy fats, and the eggs add protein and B vitamins. If you want to make it a little more nutrient-dense, you can swap half the all-purpose flour for whole wheat pastry flour, which adds fiber without making the cake too dense.
Dietary considerations: This recipe contains gluten, dairy, and eggs. For gluten-free and dairy-free options, see the variations section above. It is nut-free as written, so it’s safe for most school parties.
My personal take? I believe in balance. I eat vegetables most of the time, but when it’s someone’s birthday, I want real butter and sugar. This cake is a reminder that food is about joy and connection, not just fuel. Enjoy every bite.
Conclusion
This quick Sagittarius birthday cake with purple frosting is more than just a recipe to me. It’s a way to capture that feeling of being nine years old on my aunt’s kitchen floor, watching her create something beautiful out of simple ingredients. It’s a reminder that you don’t need hours of time or professional skills to make someone feel special. Sometimes all it takes is a purple cake and a little bit of effort.
I hope you’ll try this recipe and make it your own. Maybe you’ll add different sprinkles, or change the color to match your favorite team, or double it for a big party. That’s the beauty of a simple recipe—it leaves room for your personality to shine through. Don’t be afraid to experiment. If your first attempt isn’t perfect, that’s okay. Mine wasn’t either. The important thing is that you made something with your hands and shared it with people you care about.
If you make this purple Sagittarius birthday cake, I’d love to hear about it. Drop a comment below and tell me what color you chose, or tag me in your photos on social media. Your adaptations might inspire someone else to try something new. Happy baking, and may your celebrations be as bright and bold as a Sagittarius spirit!
Frequently Asked Questions
Can I use a box cake mix instead of making the cake from scratch?
Absolutely! If you’re really short on time, use a white or vanilla box cake mix and follow the package directions. The purple frosting is what makes this cake special, and it works just as well on a box mix. Just make sure the cake is completely cool before frosting.
How do I get the perfect shade of purple for the frosting?
Start with one tiny drop of purple gel food coloring and mix it in thoroughly. Add more drop by drop until you reach your desired shade. For a deep, royal purple, use a mix of violet and a tiny dot of magenta. For a lighter lavender, use less color. Remember that the color will deepen slightly as the frosting sits.
Can I make this cake ahead of time for a party?
Yes! Bake the cake up to 2 days in advance and store it wrapped tightly at room temperature. Make the frosting up to 3 days ahead and keep it in the fridge. Frost the cake the day you plan to serve it for the freshest look. If you need to frost it a day ahead, that works too—just store it in an airtight container in the fridge.
My cake came out dry. What went wrong?
Dry cake usually means one of three things: you overbaked it, you overmixed the batter, or you used too much flour. Next time, check the cake at 20 minutes and pull it out as soon as a toothpick comes out clean. Measure your flour by spooning it into the measuring cup and leveling it off, not by scooping. And mix the batter just until the flour disappears.
Can I use liquid food coloring instead of gel?
You can, but I don’t recommend it. Liquid food coloring is less concentrated, so you need a lot more to get a vibrant purple. That much liquid can thin out your frosting and make it runny. If liquid coloring is all you have, use it sparingly and add a little extra powdered sugar to compensate for the extra liquid.
Pin This Recipe!
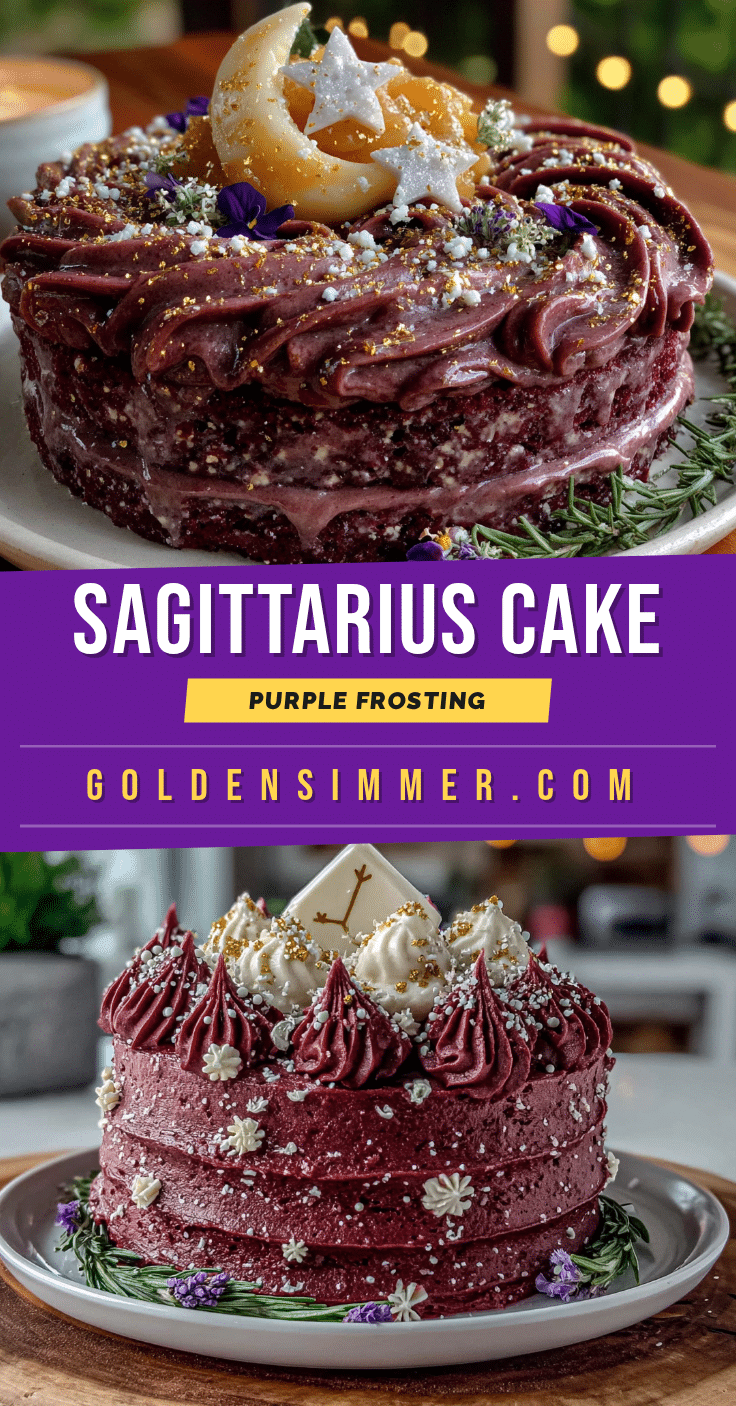
Purple Sagittarius Birthday Cake Easy 30-Minute Recipe
A quick and easy purple birthday cake that comes together in about 30 minutes, perfect for last-minute celebrations. This moist, tender cake features a creamy purple frosting and is inspired by childhood memories of watching my aunt pipe rosettes.
- Prep Time: 10 minutes
- Cook Time: 25 minutes
- Total Time: 35 minutes
- Yield: 8 servings 1x
- Category: Dessert
- Cuisine: American
Ingredients
- 1 ½ cups (190g) all-purpose flour
- 1 cup (200g) granulated sugar
- 1 ½ teaspoons baking powder
- ½ teaspoon baking soda
- ½ teaspoon fine sea salt
- ½ cup (113g) unsalted butter, softened
- 1 cup (240ml) whole milk, room temperature
- 2 large eggs, room temperature
- 2 teaspoons pure vanilla extract
- ½ cup (113g) unsalted butter, softened (for frosting)
- 2 cups (240g) powdered sugar, sifted
- 2 tablespoons heavy cream
- 1 teaspoon pure vanilla extract
- Pinch of salt
- Purple gel food coloring (violet and magenta)
- Sprinkles or edible stars (optional)
- Fresh berries (optional)
Instructions
- Preheat oven to 350°F (175°C). Grease an 8-inch round cake pan and line the bottom with parchment paper.
- In a large bowl, whisk together flour, sugar, baking powder, baking soda, and salt.
- Cut softened butter into small cubes and add to flour mixture. Mix on low speed with a hand mixer until mixture resembles coarse sand (about 1-2 minutes).
- In a separate bowl, whisk together milk, eggs, and vanilla until smooth and slightly frothy.
- Pour wet ingredients into dry mixture. Mix on low speed just until combined (about 30 seconds). Scrape down bowl and mix for another 10 seconds. Do not overmix.
- Pour batter into prepared pan and spread evenly. Tap pan gently on counter to release air bubbles.
- Bake for 22-25 minutes, or until a toothpick inserted in center comes out clean or with a few moist crumbs.
- Let cake cool in pan on a wire rack for 10 minutes. Run a knife around edge, invert onto rack, peel off parchment, and let cool completely (about 30 minutes).
- For frosting: In a medium bowl, beat softened butter until smooth and creamy (about 1 minute). Add sifted powdered sugar one cup at a time, mixing on low. Add heavy cream, vanilla, and salt. Increase speed to medium and beat for 2-3 minutes until light and fluffy. Add purple gel food coloring drop by drop until desired shade is reached.
- Place cooled cake on serving plate. Spread frosting evenly on top using an offset spatula. Add sprinkles or edible stars while frosting is still soft.
Notes
Room temperature ingredients are crucial for best texture. Use gel food coloring instead of liquid to avoid thinning the frosting. Cake can be made gluten-free or dairy-free with appropriate substitutions. Frosting can be made up to 3 days ahead and stored in the fridge.
Nutrition
- Serving Size: 1 slice
- Calories: 385
- Sugar: 38
- Sodium: 320
- Fat: 18
- Saturated Fat: 11
- Carbohydrates: 52
- Fiber: 1
- Protein: 4
Keywords: purple cake, birthday cake, Sagittarius cake, quick cake, easy cake, 30-minute cake, purple frosting, weeknight dessert



