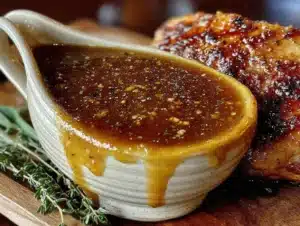
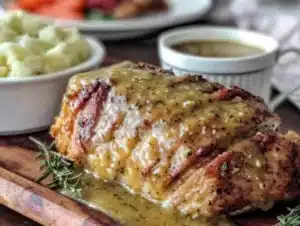
Love this? Save it for later!
Share the inspiration with your friends
I was standing in the frozen foods aisle last November, staring at a row of those little brown gravy packets, when the smell hit me. Not a real smell—a memory-smell. That deep, peppery, roast-drippings aroma that used to fill my aunt Rita’s kitchen every Thanksgiving morning. I was maybe nine years old, standing on a step stool at her counter, and she was letting me stir the gravy with a wooden spoon that was almost as tall as me. She’d been gone seven years by then, and I hadn’t tasted that gravy since I was a kid. But standing there in my coat, holding a packet of something that promised “homestyle flavor” in five minutes, I just couldn’t do it. I put the packet back, grabbed a bag of onions instead, and decided right there that I was going to figure out how to make her gravy myself.
Here’s the thing about Aunt Rita’s gravy—it wasn’t complicated. She wasn’t some trained chef. But she had this way of making it feel like the centerpiece of the meal, even though the turkey got all the attention. And she always made it the day before. I remember asking her why once, and she said, “Honey, Thanksgiving morning is chaos enough. The gravy should be the easy part.” Smart woman. Honestly, that idea stuck with me more than any recipe she could have written down.
So I spent a few Thanksgivings trying to recreate it. The first batch was way too salty. The second was lumpy and tasted like flour. The third—well, the third was close, but not quite there. But eventually, I cracked it. And now, this homemade make-ahead turkey gravy is my go-to for every holiday, Sunday roast, or random Tuesday when I want something that tastes like comfort. Maybe you’ve been there too—standing in a grocery store aisle, trying to decide if the shortcut is worth losing the memory. I’m here to tell you it’s not. This recipe is how you get that memory back without the stress.
Why You’ll Love This Recipe
Let me tell you why this homemade make-ahead turkey gravy is going to become your new holiday hero. I’ve tested this recipe more times than I can count—through burnt roux, through gravy that was so thin it looked like broth, through one particularly memorable disaster where I forgot the salt entirely. But I kept at it because I knew gravy could be better than what comes from a packet. And now, I can honestly say this version is the one I reach for every single time.
- Make-Ahead Friendly: This gravy is designed to be made up to three days before your big meal. That means one less thing to panic about on Thanksgiving morning. You can literally pull it out of the fridge, reheat it, and pour it into a serving boat like you’re a professional caterer.
- Simple Ingredients: No fancy demi-glace, no obscure spices, no trips to a specialty store. Chicken wings, onions, carrots, celery, butter, flour, and a few pantry staples. That’s it. You probably have most of this stuff already.
- Feeds a Crowd: This recipe makes about six cups of gravy, which is plenty for a big Thanksgiving dinner with leftovers. I’ve served it to twelve people and still had some left over for turkey sandwiches the next day.
- Crowd-Pleaser: I’ve served this to picky kids, to in-laws who “don’t like gravy,” and to my neighbor who swears by the canned stuff. Every single person has asked for the recipe. It’s that good.
- Unbelievably Rich: The secret is using roasted chicken wings to build a deeply flavored stock. It gives the gravy that same richness you’d get from a turkey carcass, but without needing to roast the turkey first. Genius, right?
This isn’t just another gravy recipe you’ll find online. It’s the one that makes people close their eyes after the first bite. The one that gets scraped clean from the serving dish. It’s comfort food, made better and faster, but with all the soul-soothing satisfaction you remember from your grandmother’s table.
What Ingredients You Will Need
This recipe uses simple, honest ingredients to build deep flavor without any fuss. Most of these are pantry staples or easy to find at any grocery store. I’ve included notes on what to look for and a few substitution ideas if you need them.
For the Stock (This is the secret weapon)
- 2 pounds chicken wings (or chicken backs/necks if you can find them—they’re cheaper and just as flavorful)
- 1 large onion, quartered (no need to peel it—the skin adds color)
- 2 carrots, roughly chopped (peel them if you want, but honestly, it doesn’t matter much)
- 2 celery stalks, roughly chopped
- 4 cloves garlic, smashed (just crush them with the side of your knife)
- 2 tablespoons olive oil (or any neutral oil you have)
- 6 cups water (enough to cover the bones by about an inch)
- 2 sprigs fresh thyme (or 1 teaspoon dried—I use dried when fresh isn’t available)
- 1 bay leaf
- 1 teaspoon whole black peppercorns (or 1/2 teaspoon ground pepper if that’s all you have)
For the Gravy
- 1/2 cup unsalted butter (salted butter works too—just reduce the added salt later)
- 1/2 cup all-purpose flour (for a gluten-free version, use a good quality gluten-free flour blend)
- 4 cups of your homemade stock (strained and ready to go)
- 1/2 teaspoon salt (start here and add more to taste)
- 1/4 teaspoon black pepper (freshly ground is best)
- Optional: 1/4 cup turkey drippings (if you’re making this on the day you roast your turkey, add the drippings for extra flavor)
Ingredient Notes and Substitutions
I recommend using chicken wings for the stock because they’re cheap and packed with gelatin, which gives the gravy that silky mouthfeel. If you can find chicken backs or necks, they work even better and cost less. For the butter, I prefer unsalted because it lets me control the salt level, but salted is fine if that’s what you have—just be careful when you add salt later. The flour is standard all-purpose, but a gluten-free blend works well if you need it. I’ve tested this with King Arthur’s Measure for Measure blend and it turned out great.
One more thing—don’t skip the carrots and celery in the stock. They add a subtle sweetness that balances the savory flavors. And the garlic? It’s not traditional in every gravy, but I love what it does here. It’s not garlicky, just… deeper. Trust me on this one.
Equipment Needed
You don’t need a lot of fancy equipment for this recipe, which is exactly how I like it. Here’s what you’ll need:
- Large roasting pan or rimmed baking sheet – For roasting the chicken wings and vegetables. A 9×13-inch pan works perfectly.
- Large stockpot or Dutch oven – At least 5 quarts. This is where you’ll simmer the stock.
- Fine-mesh strainer or cheesecloth – For straining the stock. A regular colander works in a pinch, but you’ll get a clearer gravy with a fine mesh.
- Medium saucepan – For making the roux and finishing the gravy.
- Whisk – A good whisk is your best friend here. It prevents lumps and helps you build a smooth roux.
- Wooden spoon or spatula – For stirring the stock and scraping up the browned bits from the roasting pan.
- Measuring cups and spoons – Standard kitchen basics.
- Large bowl or container – For storing the finished stock and gravy. I use quart-sized mason jars.
- Sharp knife and cutting board – For prepping the vegetables.
If you don’t have a fine-mesh strainer, you can line a regular colander with a few layers of cheesecloth or even a clean kitchen towel. It’s not fancy, but it works. And if you don’t have a Dutch oven, any large, heavy-bottomed pot will do. I’ve made this stock in a cheap stockpot I bought for fifteen bucks, and it turned out just fine.
Preparation Method
This recipe is broken into two parts: making the stock, and then turning that stock into gravy. The stock can be made days or even weeks ahead and frozen. The gravy itself takes about 20 minutes once the stock is ready.
Part 1: Making the Stock (About 2 hours)
- Preheat your oven to 425°F (220°C). While it’s heating up, spread the chicken wings, quartered onion, chopped carrots, and celery on your roasting pan. Drizzle with the olive oil and toss everything together with your hands until it’s all coated.
- Roast for 45 minutes, flipping halfway through. You want the chicken wings to be deeply browned—almost dark golden. The vegetables should be soft and starting to caramelize. This browning is where all the flavor comes from, so don’t rush it. If you see any dark spots on the pan, that’s good. Those browned bits are gold.
- Transfer everything to your stockpot. Use tongs to move the chicken and vegetables. Don’t leave any behind. Now, here’s the important part—pour off any excess fat from the roasting pan, but leave the browned bits stuck to the bottom. Set the pan on the stove over medium heat and add about a cup of water. Scrape up all those browned bits with a wooden spoon. This is called deglazing, and it’s where the real flavor lives.
- Pour the deglazing liquid into the stockpot. Add the remaining 5 cups of water, the smashed garlic, thyme, bay leaf, and peppercorns. The liquid should just cover the bones. If it doesn’t, add a little more water.
- Bring to a boil over high heat, then reduce to a gentle simmer. You want small bubbles, not a rolling boil. Let it simmer uncovered for 1 hour. Skim off any foam that rises to the surface during the first 15 minutes—it’s just impurities, and removing it gives you a cleaner stock.
- Strain the stock through your fine-mesh strainer into a large bowl or container. Discard the solids. You should have about 4 cups of rich, golden stock. If you have more, that’s fine—you can simmer it a bit longer to concentrate the flavor. If you have less, just add enough water to make 4 cups.
- Let the stock cool completely. You can speed this up by placing the container in an ice bath. Once cool, cover and refrigerate. The fat will rise to the top and solidify, making it easy to remove later. You can keep the stock in the fridge for up to 5 days, or freeze it for up to 3 months.
Part 2: Making the Gravy (About 20 minutes)
- Remove the solidified fat from the top of your stock. Don’t throw it away—you can use it instead of butter for the roux if you want. I usually save it for roasting potatoes.
- In your medium saucepan, melt the butter over medium heat. Once it’s fully melted and just starting to bubble, add the flour all at once. Whisk constantly for 2-3 minutes. The mixture should turn a light tan color and smell a bit like toasted nuts. This is your roux, and it’s the foundation of a smooth, lump-free gravy.
- Slowly pour in your stock, whisking constantly. Add it in a steady stream, not all at once. Keep whisking until the mixture is smooth and starts to thicken. This usually takes about 3-4 minutes. If you see any lumps forming, don’t panic—just whisk harder. They’ll break up.
- Bring the gravy to a gentle simmer and let it cook for 5 minutes. This cooks out the raw flour taste and allows the gravy to reach its full thickness. It should coat the back of a spoon nicely. If it’s too thick, add a splash of water or chicken broth. If it’s too thin, let it simmer a few minutes longer.
- Season with salt and pepper. Start with 1/2 teaspoon of salt and 1/4 teaspoon of pepper. Taste it, then adjust. Remember, you can always add more salt, but you can’t take it out. If you’re using turkey drippings, stir them in now.
- Remove from heat and let it cool slightly. The gravy will continue to thicken as it sits. If you’re serving it right away, pour it into a warmed gravy boat. If you’re making it ahead, let it cool completely, then transfer to an airtight container and refrigerate.
Cooking Tips & Techniques
I’ve made this gravy more times than I can count, and I’ve learned a few things the hard way. Here are my best tips to help you nail it every time.
Don’t skip the roasting step. I know it’s tempting to just boil the chicken wings and call it a day, but roasting them first is what gives the stock that deep, complex flavor. The caramelization adds layers you just can’t get from boiling alone. I learned this after making a batch of stock that tasted like plain chicken soup. Never again.
Watch your roux carefully. The roux is the most delicate part of this recipe. You want it to cook until it’s a light tan color—about the shade of peanut butter. If it gets too dark, the gravy will have a bitter taste. I burned my first roux because I walked away to answer the phone. Now I stand right there and whisk the whole time. It’s only two minutes, and it’s worth every second.
Whisk like you mean it. When you add the stock to the roux, whisk constantly and vigorously. This is the best way to prevent lumps. If you do end up with a few lumps, don’t stress—just pour the gravy through a fine-mesh strainer before serving. No one will ever know.
Season in stages. I always add salt and pepper at the end, not the beginning. The stock already has some salt from the roasting process, and the butter adds more. Tasting as you go is the only way to get the seasoning right. I once added salt too early and ended up with gravy that was borderline inedible. Learn from my mistake.
Make it ahead with confidence. This gravy actually gets better after a day in the fridge. The flavors meld together and mellow out. When you’re ready to serve, just reheat it gently on the stove over low heat, whisking occasionally. If it’s too thick, add a splash of water or broth. If it’s too thin, let it simmer a few minutes longer.
Variations & Adaptations
One of the best things about this recipe is how flexible it is. Here are a few ways to make it your own.
Herb-Infused Gravy: Add a sprig of fresh rosemary or sage to the stock while it simmers. You can also stir in a teaspoon of dried sage or thyme at the end of cooking. I love this version for Thanksgiving—it just feels right.
Mushroom Gravy: For a vegetarian version, skip the chicken wings and roast the vegetables with a pound of cremini mushrooms instead. Use vegetable broth in place of the water. The mushrooms add an earthy, umami flavor that’s incredibly satisfying. I’ve served this to meat-eaters and they didn’t miss the chicken at all.
Gluten-Free Gravy: Substitute the all-purpose flour with a good gluten-free flour blend. I’ve had the best results with King Arthur’s Measure for Measure blend. The roux will look a little different—it might be slightly grainier—but the finished gravy is smooth and delicious. Just be sure to cook the roux for an extra minute to get rid of the raw flour taste.
Spicy Gravy: Add a pinch of cayenne pepper or a dash of hot sauce at the end. This is my husband’s favorite variation. It doesn’t make the gravy spicy, just adds a little warmth in the background. Start with 1/4 teaspoon of cayenne and go from there.
Make it Dairy-Free: Use olive oil or a good vegan butter instead of regular butter for the roux. I’ve tested this with Miyoko’s vegan butter and it worked perfectly. The gravy won’t be quite as rich, but it’s still really good.
Serving & Storage Suggestions
This gravy is incredibly versatile, but here are my favorite ways to serve and store it.
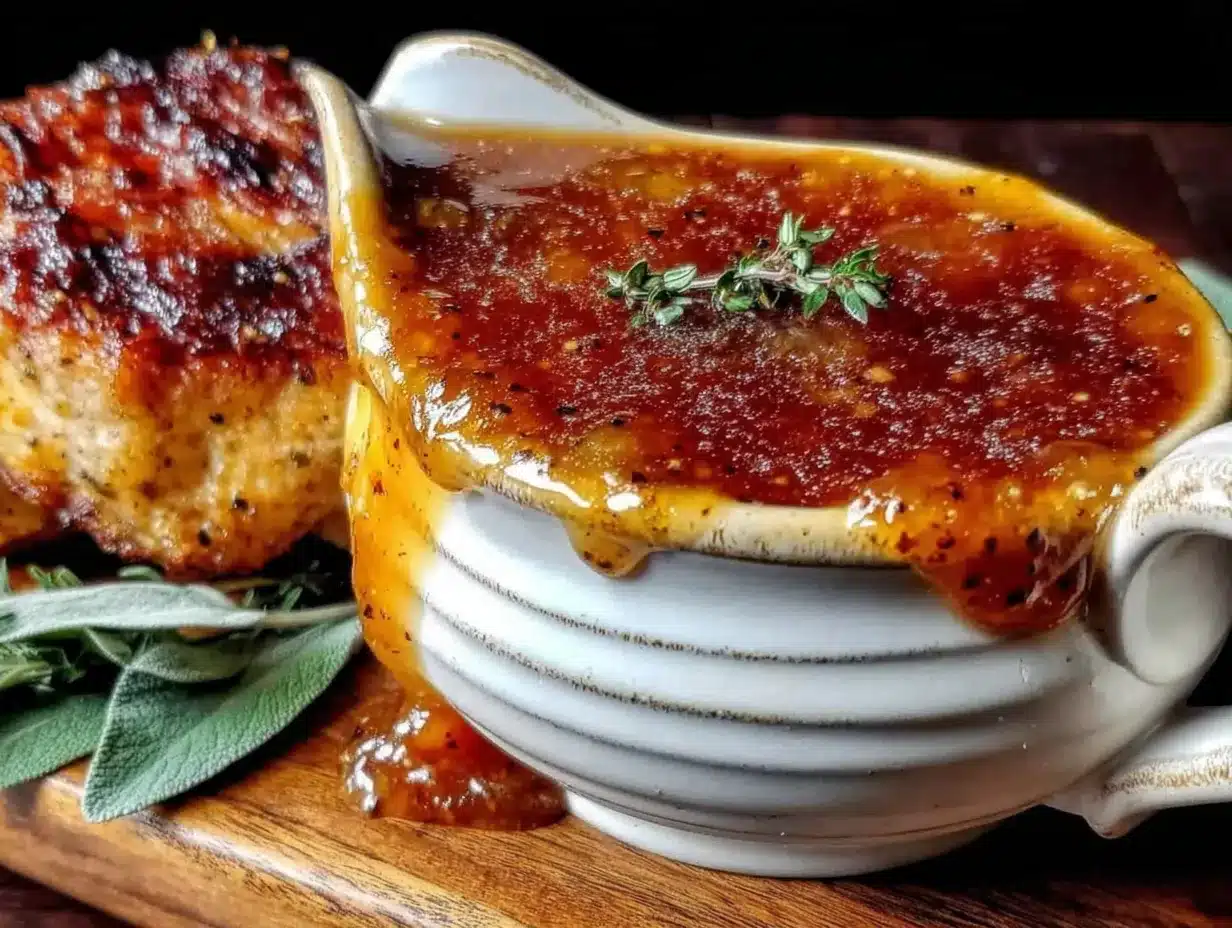
Serving Temperature: Serve the gravy hot, but not boiling. I like to reheat it gently on the stove and then pour it into a warmed gravy boat. If you’re serving it alongside a roast turkey, pour it into a bowl and let people help themselves.
What to Serve It With: Obviously, this is the perfect gravy for Thanksgiving turkey. But don’t stop there. It’s amazing on mashed potatoes, roasted chicken, pork chops, or even over a pile of fluffy rice. I’ve also used it as a base for turkey pot pie and shepherd’s pie. The possibilities are endless.
Storage Instructions: Store the gravy in an airtight container in the refrigerator for up to 5 days. The fat might solidify on top, but that’s normal—just stir it back in when you reheat. You can also freeze the gravy for up to 3 months. I like to freeze it in quart-sized freezer bags, laid flat so they stack easily.
Reheating Tips: The best way to reheat this gravy is on the stovetop over low heat, whisking occasionally. If it’s too thick, add a splash of water or broth. If it’s too thin, let it simmer for a few minutes to reduce. You can also reheat it in the microwave, but stir it every 30 seconds to prevent hot spots.
How Flavors Develop: This gravy honestly tastes better the next day. The flavors have time to meld and deepen, and the texture becomes even smoother. So if you’re making it ahead, you’re actually doing yourself a favor. It’s one of those rare recipes that improves with time.
Nutritional Information & Benefits
While this is definitely a comfort food, it’s not as bad for you as you might think. Here’s a rough breakdown per 1/4 cup serving:
| Nutrient | Amount |
|---|---|
| Calories | 85 |
| Total Fat | 6g |
| Saturated Fat | 3.5g |
| Cholesterol | 20mg |
| Sodium | 200mg |
| Total Carbohydrates | 5g |
| Dietary Fiber | 0g |
| Sugars | 1g |
| Protein | 2g |
The chicken wings in the stock provide a good amount of collagen and gelatin, which is great for joint health and digestion. The vegetables add vitamins A and C, plus a little fiber. And because you’re making the stock from scratch, you control the sodium—which is way less than what you’d get from a packet or can.
This recipe is naturally gluten-free if you use a gluten-free flour blend. It’s also dairy-free if you use oil instead of butter. Just keep an eye on the labels if you’re cooking for someone with allergies.
Conclusion
Look, I know making gravy from scratch sounds like a lot of work. But I promise you, this recipe is worth every minute. It’s the kind of gravy that makes people stop talking at the dinner table. The kind that gets spooned over everything on the plate. The kind that makes you feel like you’ve really accomplished something in the kitchen.
And the best part? You can make it ahead. So when Thanksgiving morning rolls around and you’re juggling a turkey, a dozen side dishes, and a house full of guests, the gravy is already done. You just reheat it and pour it into a pretty bowl. That’s it. No stress, no last-minute panic, no standing over the stove while everyone else is eating.
I’ve been making this gravy for years now, and it never gets old. Every time I taste it, I think of Aunt Rita and that step stool in her kitchen. And I hope that when you make it, it becomes part of your family’s story too. So go ahead—give it a try. And when you do, come back and tell me how it went. I’d love to hear about it.
Frequently Asked Questions
Can I make this gravy without chicken wings?
Yes, you can use turkey wings or even a small turkey drumstick instead. The important thing is to use bone-in, skin-on pieces for the best flavor. If you’re in a real pinch, you can use store-bought chicken broth, but the homemade stock really makes a difference.
How far ahead can I make this gravy?
You can make the stock up to 5 days ahead and keep it in the fridge, or freeze it for up to 3 months. The finished gravy can be made up to 3 days ahead. I usually make the stock on Sunday, then finish the gravy on Wednesday for a Thursday Thanksgiving.
My gravy turned out lumpy. What did I do wrong?
Lumpy gravy usually happens when you add the stock too quickly or don’t whisk enough. Don’t worry—just pour the gravy through a fine-mesh strainer before serving. It will be perfectly smooth. You can also use an immersion blender to blend out the lumps.
Can I use turkey drippings instead of chicken stock?
Absolutely. If you’re roasting a turkey, you can use the drippings as part or all of the liquid in this recipe. Just be aware that drippings can be very salty, so adjust your seasoning accordingly. I like to use a mix of homemade stock and drippings for the best of both worlds.
How do I thicken the gravy if it’s too thin?
If your gravy is too thin, let it simmer on the stove for a few more minutes. The longer it cooks, the more it will reduce and thicken. If it’s still too thin, you can mix a tablespoon of cornstarch with two tablespoons of cold water and whisk it in. Let it cook for another minute and it should thicken right up.
Pin This Recipe!

Homemade Make-Ahead Turkey Gravy

This rich, deeply flavorful turkey gravy is made ahead of time using roasted chicken wings for a silky, golden stock. It’s the perfect stress-free addition to your holiday table, with a taste that brings back cherished memories.
- Prep Time: 20 minutes
- Cook Time: 1 hour 20 minutes
- Total Time: 1 hour 40 minutes
- Yield: 6 cups (about 12 servings) 1x
- Category: Sauce
- Cuisine: American
Ingredients
- 2 pounds chicken wings (or chicken backs/necks)
- 1 large onion, quartered
- 2 carrots, roughly chopped
- 2 celery stalks, roughly chopped
- 4 cloves garlic, smashed
- 2 tablespoons olive oil
- 6 cups water
- 2 sprigs fresh thyme (or 1 teaspoon dried)
- 1 bay leaf
- 1 teaspoon whole black peppercorns (or 1/2 teaspoon ground pepper)
- 1/2 cup unsalted butter
- 1/2 cup all-purpose flour (or gluten-free flour blend)
- 4 cups homemade stock (from above)
- 1/2 teaspoon salt (plus more to taste)
- 1/4 teaspoon black pepper (freshly ground)
- Optional: 1/4 cup turkey drippings
Instructions
- Preheat oven to 425°F (220°C). Spread chicken wings, quartered onion, chopped carrots, and celery on a roasting pan. Drizzle with olive oil and toss to coat.
- Roast for 45 minutes, flipping halfway through, until chicken wings are deeply browned and vegetables are caramelized.
- Transfer chicken and vegetables to a large stockpot. Pour off excess fat from the roasting pan, leaving browned bits. Place pan on stove over medium heat, add about 1 cup of water, and scrape up browned bits with a wooden spoon (deglazing).
- Pour deglazing liquid into the stockpot. Add remaining 5 cups water, smashed garlic, thyme, bay leaf, and peppercorns. Liquid should just cover bones; add more water if needed.
- Bring to a boil over high heat, then reduce to a gentle simmer. Simmer uncovered for 1 hour, skimming off any foam during the first 15 minutes.
- Strain stock through a fine-mesh strainer into a large bowl or container. Discard solids. You should have about 4 cups of stock. Let cool completely, then refrigerate. Fat will solidify on top for easy removal.
- Remove solidified fat from the top of the stock. In a medium saucepan, melt butter over medium heat. Add flour all at once and whisk constantly for 2-3 minutes until roux is light tan and smells nutty.
- Slowly pour in the stock, whisking constantly, until smooth and thickened (about 3-4 minutes).
- Bring gravy to a gentle simmer and cook for 5 minutes to cook out raw flour taste. It should coat the back of a spoon. Adjust thickness with water or broth if needed.
- Season with salt and pepper to taste. If using turkey drippings, stir them in now.
- Remove from heat. Serve immediately or let cool completely and refrigerate for up to 3 days.
Notes
The stock can be made up to 5 days ahead or frozen for 3 months. The finished gravy can be made up to 3 days ahead. For a vegetarian version, replace chicken wings with 1 pound cremini mushrooms and use vegetable broth. For dairy-free, use olive oil or vegan butter instead of butter. The gravy thickens as it sits; thin with water or broth when reheating.
Nutrition
- Serving Size: 1/4 cup
- Calories: 85
- Sugar: 1
- Sodium: 200
- Fat: 6
- Saturated Fat: 3.5
- Carbohydrates: 5
- Protein: 2
Keywords: turkey gravy, make-ahead gravy, homemade gravy, Thanksgiving gravy, chicken wing stock, holiday gravy