Love this? Save it for later!
Share the inspiration with your friends
My friend Jen asked why I couldn’t just use the veggie tray as the centerpiece instead of hiding it on the side table. I started to explain why that wouldn’t work — then stopped. She had a point. I mean, I’d spent three Halloweens fussing with elaborate dips and separate platters, always ending up with sad, untouched celery sticks while everyone went for the candy. Honestly, it was a mess. The summer we turned thirty, Jen and I had this tradition of watching scary movies and eating our feelings in ranch dressing. She was always the one who’d point out the obvious thing I was overthinking. That Tuesday afternoon, standing in my kitchen with a bag of baby carrots and a head of broccoli, I finally listened.
I grabbed a cutting board and started arranging the veggies into long, bony fingers. The first one looked ridiculous — a crooked cucumber segment with an almond sliver nail. I laughed so hard I almost knocked over the bowl of hummus. Jen just shrugged and said, “Told you.” And you know what? It worked. Completely. The kids at the party fought over the “witch fingers” before they even touched the candy bowl. The adults kept sneaking back for more, too. There’s something about turning something ordinary — a veggie tray — into a prop that makes people smile. The whole thing came together in under twenty minutes, and I barely dirtied a dish. Maybe you’ve been there, wrestling with a party platter that just feels boring. Let me tell you, this one changes everything.
What I love most about this recipe is how it turned a “have to” into a “want to.” I used to dread the healthy option at Halloween parties. Now, this witch finger veggie tray is the first thing I plan. It’s the kind of thing that makes you feel clever without actually trying that hard. And honestly? That’s my favorite kind of recipe.
Why You’ll Love This Halloween Witch Finger Veggie Tray
This isn’t your average veggie platter. It’s a conversation starter, a crowd-pleaser, and a sneaky way to get everyone eating their vegetables. Here’s why this one stands out:
- Quick & Easy : Comes together in under 20 minutes. Seriously. You can throw this together while the kids are putting on their costumes.
- Simple Ingredients : No fancy grocery trips. You probably have most of this stuff in your fridge right now. Bell peppers, cucumbers, carrots — the usual suspects.
- Perfect for Halloween Parties : This is the ultimate potluck contribution. It’s festive, fun, and totally unexpected. Everyone will want a picture before they take a bite.
- Crowd-Pleaser : I’ve served this to kids, adults, and even picky relatives. The “finger” shape makes veggies feel like a treat, not a chore.
- Unbelievably Delicious : The crunch of fresh veggies paired with a creamy dip is next-level comfort food. The almond sliver “nails” add a subtle nutty flavor that works surprisingly well.
What makes this recipe different from the rest? It’s all about the presentation. I’ve tried those complicated monster veggie faces and the carved-out pumpkins filled with dip. They look great for about ten minutes, then everything starts to slide around. This witch finger veggie tray stays put. The fingers are easy to grab, and the dip stays right where you put it. Plus, the visual gag is so simple — long, pale veggies with a single almond sliver on the end. It’s spooky without being gross.
This recipe isn’t just good — it’s the kind that makes you close your eyes after the first bite. Not because it’s fancy, but because it’s so unexpectedly satisfying. It’s comfort food reimagined — healthier, faster, but with the same soul-soothing satisfaction. Perfect for impressing guests without stress, or turning a simple snack into something memorable.
What Ingredients You Will Need
This Halloween witch finger veggie tray uses simple, wholesome ingredients to deliver bold flavor and a spooky presentation without the fuss. Most of these are pantry staples you can grab at any grocery store.
- English cucumber, cut into 3-inch sticks (the long, skinny shape works best for fingers)
- Zucchini, cut into similar 3-inch sticks (adds a slightly different texture and color)
- Yellow squash, cut into 3-inch sticks (pale color looks eerily like witch fingers)
- Baby carrots, whole (already finger-shaped — total time-saver)
- Celery stalks, cut into 3-inch pieces (adds a satisfying crunch)
- Red bell pepper, cut into strips (for a pop of color — looks like bloody fingers)
- Snow peas, whole (flat and green — perfect for a witch’s thumb)
- Almond slivers (for the fingernails — I recommend Blue Diamond brand for consistent size)
- Hummus or ranch dressing (for the dip — use your favorite store-bought or homemade)
- Fresh parsley or dill (optional garnish — adds a “witchy” look)
For the dip, I like to use a thick hummus because it stays put and doesn’t run everywhere. If you’re using ranch, make sure it’s a thicker consistency. For a dairy-free option, swap the ranch with a dairy-free yogurt-based dip. In summer, fresh herbs from the garden make the garnish extra special.
Ingredient selection tip: Look for English cucumbers — they’re longer and have fewer seeds, which makes them easier to cut into uniform finger shapes. Baby carrots are a lifesaver because they’re already the right size. Just trim the ends to make them look more like real fingers.
Equipment Needed
You don’t need much for this witch finger veggie tray. Here’s what I use:
- Cutting board (I prefer a large wooden one — it gives you room to work)
- Sharp chef’s knife (a serrated knife works too, but a straight edge gives cleaner cuts)
- Vegetable peeler (optional — for creating “knuckle” lines on the fingers)
- Small bowl for the dip (a round bowl looks like a cauldron — fun touch)
- Large platter or serving board (a dark slate or black platter makes the veggies pop)
- Toothpicks (for securing the almond sliver nails, if needed)
If you don’t have a large platter, a baking sheet lined with parchment paper works just fine. I’ve used a cookie sheet in a pinch, and it looked surprisingly good. For the dip bowl, any small bowl will do — just make sure it’s stable and won’t tip over.
Pro tip: If you’re using a wooden cutting board as your serving platter, make sure it’s clean and dry. The veggies will release some moisture, so pat them dry with a paper towel before arranging.
Preparation Method
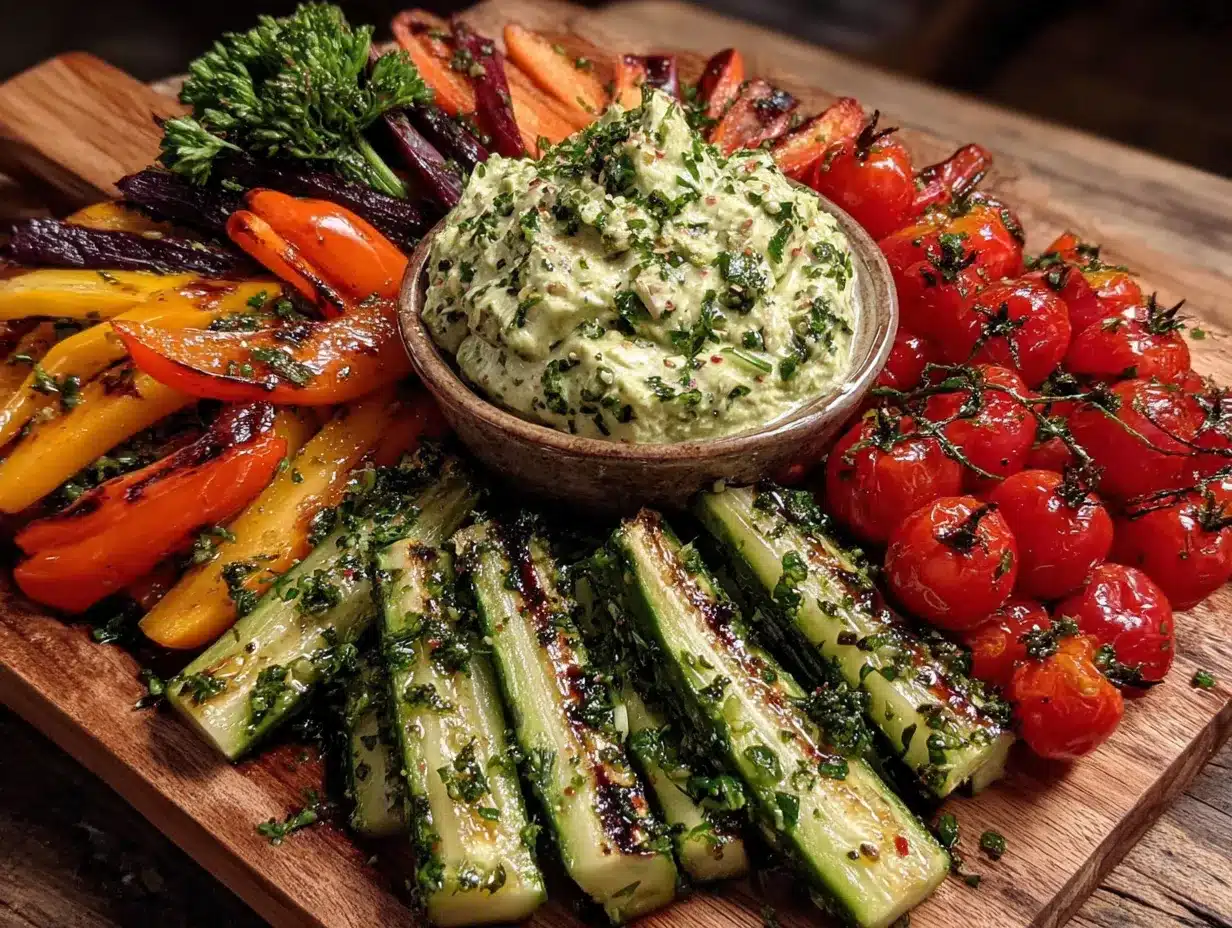
Follow these steps to create your own spooky witch finger veggie tray. Take your time with the arrangement — the visual is everything here.
- Wash and dry all vegetables thoroughly. Pat them dry with a clean kitchen towel or paper towels. Excess moisture will make the almond slivers slide off and the dip runny. This step is crucial — I learned the hard way when my first batch of “fingers” turned into a slippery mess.
- Cut the cucumber, zucchini, and yellow squash into 3-inch sticks. Aim for a finger-like thickness — about the width of your thumb. Trim the ends at a slight angle to mimic the shape of a real finger. Don’t stress about perfection; slight unevenness makes them look more realistic.
- Cut the celery stalks into 3-inch pieces. If the stalks are wide, slice them lengthwise into thinner strips. Pale celery looks especially eerie — it has that “undead” color.
- Trim the baby carrots if needed. Some baby carrots have pointed ends that look too perfect. Snip off the tip at an angle to make them look more like gnarled witch fingers. If you want, use a vegetable peeler to create a few shallow lines for “knuckles.”
- Cut the red bell pepper into strips. Aim for pieces that are about the same width as the other veggies. These will be the “bloody” fingers — the red color contrasts nicely with the pale squash and cucumber.
- Attach the almond sliver “nails.” This is the fun part. Take an almond sliver and press it gently into the end of each veggie stick. For softer veggies like cucumber and zucchini, the almond will stick on its own. For firmer veggies like carrots, you might need to use a tiny dab of hummus or cream cheese as “glue.” Position the almond so the pointed end faces outward, like a fingernail.
- Arrange the fingers on the platter. Place the dip bowl in the center or slightly off to one side. Start by laying down the longest fingers (cucumber and zucchini) in a fan pattern around the bowl. Then fill in with the shorter pieces (carrots and celery). Overlap them slightly for a more natural look — like a pile of creepy hands reaching out.
- Add the red bell pepper strips. Tuck these in among the pale fingers. They look like bloody or bruised fingers and add a nice pop of color. Don’t overdo it — a few here and there is more effective than a whole pile.
- Fill the dip bowl. Spoon your hummus or ranch into the bowl. If you want to get extra spooky, add a few drops of green food coloring to ranch dressing and stir — it looks like witch’s slime. Place the bowl in the center of the platter.
- Garnish with fresh herbs. Sprinkle a few sprigs of parsley or dill around the edges of the platter. It adds a “forest witch” vibe and makes the whole thing look more intentional. Serve immediately or refrigerate until ready to serve.
Time estimate: Prep takes about 15-20 minutes. Assembly takes another 5 minutes. Total time from start to finish is under 30 minutes — perfect for last-minute Halloween prep.
Sensory cue: The veggies should feel crisp and cold. The almond slivers should be firm and slightly crunchy. The dip should be thick and creamy. When you bite into a “finger,” you should hear a satisfying crunch.
Cooking Tips & Techniques
I’ve made this witch finger veggie tray more times than I can count, and I’ve learned a few things along the way. Here are my best tips for getting it right every time.
Keep the veggies cold. This is the number one mistake I made early on. Room-temperature veggies look limp and sad. Chill your veggies in the fridge for at least 30 minutes before cutting. Cold veggies are crisper, hold their shape better, and the almond slivers stick more easily.
Use a sharp knife. I know this sounds obvious, but a dull knife will crush the edges of the veggies and make them look ragged. A clean cut gives you a nice, flat surface for the almond sliver to sit on. I learned this the hard way when I tried to rush through it with a dull blade — my “fingers” looked more like chewed-up stubs.
Don’t overcrowd the platter. You want the fingers to be visible and easy to grab. If you pile them on top of each other, they’ll look like a mess. Leave a little space between each finger so guests can see the “nails.” Trust me, the visual impact is worth the extra room.
Make the dip ahead of time. Hummus or ranch dressing tastes better after it’s had a chance to chill. Make your dip the night before and store it in the fridge. The flavors meld together and it gets thicker. Just give it a stir before serving.
Practice your “knuckle” technique. If you want extra-realistic fingers, use a vegetable peeler to gently shave off a thin strip of skin about halfway down each veggie stick. This creates a “knuckle” line. Do this on two or three spots per finger. It’s a small detail that makes a big difference.
Prep in batches. If you’re making this for a big party, don’t try to do everything at once. Cut all the veggies first, then attach the nails, then arrange. Breaking it into steps makes it feel less overwhelming.
Variations & Adaptations
This Halloween witch finger veggie tray is incredibly versatile. Here are some ways to make it your own.
Dietary Variations: For a gluten-free option, use a gluten-free dip like hummus or guacamole. For a dairy-free version, swap ranch dressing with a vegan yogurt-based dip. For a low-carb option, skip the carrots and use more cucumber and bell pepper strips.
Flavor Twists: Add a pinch of smoked paprika to your hummus for a smoky, “witchy” flavor. Or mix some chopped fresh dill into your ranch dressing — it adds a fresh, herbal note that pairs beautifully with the crunchy veggies. For a spicy kick, mix a little sriracha into the dip.
Seasonal Swaps: In fall, use purple carrots or rainbow carrots for a more colorful display. In winter, add some roasted beet strips — they look like bloody fingers and add a sweet, earthy flavor. In summer, fresh cherry tomatoes cut in half look like little eyeballs — tuck them in among the fingers for an extra spooky touch.
Different Cooking Methods: If you have an air fryer, you can make “roasted witch fingers” by tossing the veggie sticks in olive oil and salt, then air frying at 375°F for 8-10 minutes. They’ll be slightly charred and even more realistic-looking. Just let them cool completely before adding the almond slivers.
Personal Variation: I once made a version using purple cauliflower florets as “warts” on the fingers. I just broke the cauliflower into tiny pieces and pressed them onto the veggie sticks with a dab of hummus. It looked gross in the best possible way. My nephew refused to eat any of the “warty fingers” — which meant more for me.
Serving & Storage Suggestions
This witch finger veggie tray is best served cold, right out of the fridge. The contrast between the cold, crunchy veggies and the creamy dip is what makes it so satisfying.
Serving Temperature: Serve the veggies chilled and the dip at room temperature. If you’re using a thick hummus, let it sit out for 10 minutes before serving — it spreads more easily and has a better texture.
Presentation Tips: Arrange the fingers in a fan pattern around the dip bowl, with the “nails” pointing outward. This makes it easy for guests to grab a finger and dip without knocking anything over. For extra drama, place the platter on a black tablecloth or a dark wooden board. The contrast makes the pale veggies pop.
Complementary Dishes: This veggie tray pairs beautifully with other Halloween snacks. Serve it alongside a bowl of popcorn “spider webs,” some ghost-shaped cheese slices, or a platter of mummy hot dogs. For drinks, a pitcher of “witch’s brew” (green punch or limeade) ties the whole theme together.
Storage Instructions: If you have leftovers, store the veggies and dip separately in airtight containers. The veggies will keep in the fridge for up to 3 days. The dip will keep for up to 5 days. Do not freeze — the veggies will turn mushy when thawed.
Reheating Tips: This is a cold dish, so no reheating needed. If the veggies have been sitting out for more than 2 hours, toss them and make a fresh batch. Food safety first!
Flavor Development: The veggies actually taste better the next day — they absorb a little moisture and become slightly more tender. The almond slivers will soften a bit, but the flavor is still great. Just refresh the dip and give the veggies a quick pat dry before serving.
Nutritional Information & Benefits
This Halloween witch finger veggie tray is a healthy option for your party spread. Here’s a rough estimate per serving (about 1 cup of veggies with 2 tablespoons of hummus):
- Calories: 120-150
- Protein: 4-6 grams
- Fiber: 4-5 grams
- Fat: 6-8 grams (mostly from the dip)
- Carbohydrates: 12-15 grams
- Vitamin A: 80% DV (from carrots and bell peppers)
- Vitamin C: 60% DV (from bell peppers and cucumber)
Health Benefits: This snack is packed with vitamins and antioxidants. Carrots are great for eye health, bell peppers boost your immune system, and cucumber is hydrating. The hummus adds plant-based protein and healthy fats from chickpeas and tahini. Almond slivers provide vitamin E and healthy monounsaturated fats.
Dietary Considerations: This recipe is naturally gluten-free (if you use a gluten-free dip), dairy-free (if you skip the ranch), and vegan (if you use hummus). It’s also low in sugar and high in fiber, making it a great option for anyone watching their blood sugar.
Potential Allergens: Almonds are tree nuts, so this recipe is not suitable for those with nut allergies. The dip may contain sesame (tahini) or dairy. Always check labels if serving to guests with allergies.
Personal Wellness Perspective: I love that this recipe lets me indulge in the fun of Halloween without the sugar crash. It’s a way to enjoy the holiday with my family while still feeling good about what we’re eating. Plus, the kids are so distracted by the “fingers” that they don’t even realize they’re eating vegetables.
Conclusion
This Halloween witch finger veggie tray is proof that healthy food can be fun. It’s simple, quick, and guaranteed to be the talk of your party. I’ve made this for three Halloweens now, and it never gets old. There’s something magical about watching people’s faces light up when they realize the “fingers” are just veggies.
I encourage you to make this your own. Play around with different veggies, try different dips, and don’t be afraid to get creative with the presentation. The more ridiculous it looks, the more people will love it. And honestly? That’s the whole point of Halloween — having fun and sharing a laugh with the people you care about.
I’d love to hear how your witch finger veggie tray turns out. Did you add any creepy touches? Did the kids freak out? Share your photos and stories in the comments below. And if you try a variation I haven’t thought of, let me know — I’m always looking for new ideas. Until next time, happy haunting and happy snacking!
Frequently Asked Questions
Can I make this witch finger veggie tray ahead of time?
Yes! You can cut the veggies and attach the almond slivers up to 24 hours in advance. Store them in an airtight container in the fridge. Add the dip and arrange on the platter just before serving for the best presentation.
What if I don’t have almond slivers?
No problem! You can use sliced almonds, pumpkin seeds, or even a small piece of white cheese like mozzarella for the “nails.” Just cut them into a fingernail shape and press them onto the veggie sticks.
Can I use different vegetables?
Absolutely! Try jicama sticks, radish slices, or even blanched green beans. The key is to use veggies that are firm enough to hold their shape and have a pale or neutral color that looks like a finger.
How do I get the almond slivers to stick better?
For firmer veggies like carrots, use a tiny dab of hummus, cream cheese, or peanut butter as “glue.” Press the almond sliver onto the dab and hold for a few seconds. It’ll stay put for hours.
Is this recipe suitable for a school Halloween party?
Yes, but check for nut allergies first. If nuts are a concern, use sunflower seeds or cheese for the nails instead of almonds. Also, make sure the dip is nut-free. Most store-bought hummus is safe, but always read the label.
Pin This Recipe!

Halloween Witch Finger Veggie Tray: Easy & Fun

A spooky and fun veggie tray shaped like witch fingers, perfect for Halloween parties. Quick to assemble with simple ingredients, it’s a crowd-pleaser that makes vegetables feel like a treat.
- Prep Time: 15 minutes
- Cook Time: 0 minutes
- Total Time: 20 minutes
- Yield: 8 servings 1x
- Category: Appetizer
- Cuisine: American
Ingredients
- 1 English cucumber, cut into 3-inch sticks
- 1 zucchini, cut into 3-inch sticks
- 1 yellow squash, cut into 3-inch sticks
- 1 cup baby carrots, whole
- 3 celery stalks, cut into 3-inch pieces
- 1 red bell pepper, cut into strips
- 1 cup snow peas, whole
- 1/4 cup almond slivers
- 1 cup hummus or ranch dressing
- Fresh parsley or dill for garnish (optional)
Instructions
- Wash and dry all vegetables thoroughly. Pat them dry with a clean kitchen towel or paper towels.
- Cut the cucumber, zucchini, and yellow squash into 3-inch sticks, about the width of your thumb. Trim the ends at a slight angle to mimic finger shape.
- Cut the celery stalks into 3-inch pieces. If wide, slice lengthwise into thinner strips.
- Trim the baby carrots if needed. Snip off the tip at an angle to look like gnarled witch fingers. Optionally, use a vegetable peeler to create shallow ‘knuckle’ lines.
- Cut the red bell pepper into strips about the same width as the other veggies.
- Attach almond sliver ‘nails’ by pressing one gently into the end of each veggie stick. For firmer veggies like carrots, use a tiny dab of hummus or cream cheese as ‘glue’.
- Arrange the fingers on a large platter with the dip bowl in the center. Start with longest fingers (cucumber, zucchini) in a fan pattern, then fill in with shorter pieces (carrots, celery). Overlap slightly for a natural look.
- Tuck red bell pepper strips among the pale fingers for a ‘bloody’ effect.
- Fill the dip bowl with hummus or ranch. Optionally, add green food coloring to ranch for a witch’s slime effect.
- Garnish with fresh parsley or dill around the edges. Serve immediately or refrigerate until ready to serve.
Notes
Keep veggies cold for best results. Chill for at least 30 minutes before cutting. Use a sharp knife for clean cuts. Don’t overcrowd the platter. Make dip ahead of time for better flavor. For extra realism, use a vegetable peeler to create ‘knuckle’ lines. Prep in batches for large parties.
Nutrition
- Serving Size: 1 cup veggies with 2
- Calories: 135
- Sugar: 6
- Sodium: 200
- Fat: 7
- Saturated Fat: 1
- Carbohydrates: 14
- Fiber: 5
- Protein: 5
Keywords: Halloween, veggie tray, witch fingers, party appetizer, healthy snack, spooky, vegetarian, gluten-free



