Love this? Save it for later!
Share the inspiration with your friends
I was standing in the baking aisle last Tuesday, staring at a can of pumpkin puree like it held the secrets to the universe, when the smell hit me. Not pumpkin—something else. Cinnamon and brown sugar, warm and sticky, the kind of smell that doesn’t just float past but actually stops you mid-step. And suddenly I was seven years old at my aunt Maggie’s kitchen table, my fingers dusted with flour, trying to press a perfect thumbprint into a cookie that was way too soft. She laughed and said, “Honey, you’re not building a birdhouse. Just poke it.”
I haven’t thought about those cookies in years. Aunt Maggie moved to Arizona a while back, and our holiday baking sessions became phone calls instead of flour fights. But that moment in the store—honestly, it hit me hard. I needed those cookies. Not just any cookies, but the ones with the little jam centers that looked like tiny stained glass windows. Except I wanted a fall version. Something with pumpkin, because let’s face it, October is basically pumpkin’s month to shine.
So I grabbed the pumpkin puree, a bag of powdered sugar, and maybe got a little sidetracked by the Halloween sprinkles. You know how it is—one minute you’re buying ingredients, the next you’re holding a bag of candy eyeballs and wondering if you’ve gone too far. I hadn’t. Not even close.
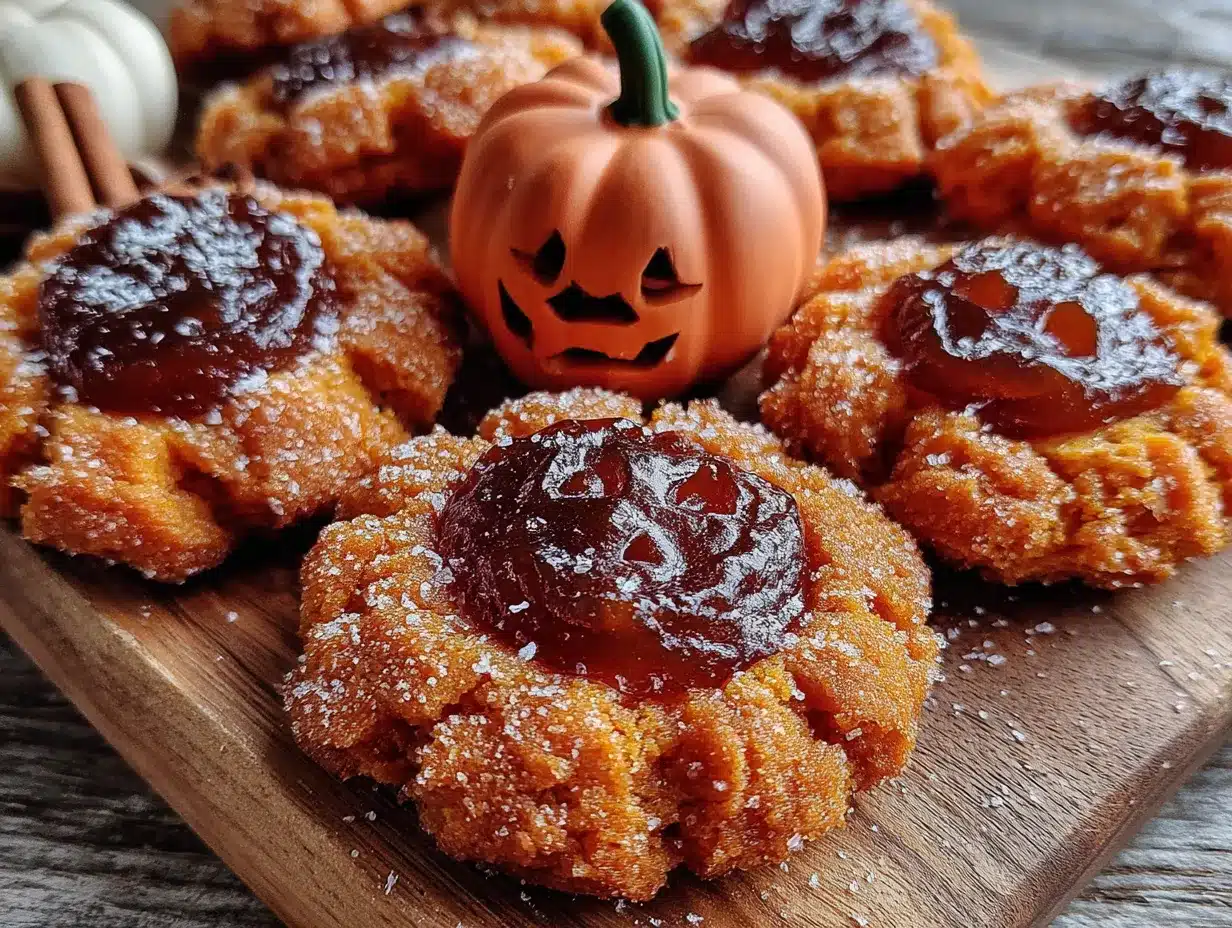
These Quick Jack-O’-Lantern Pumpkin Pie Thumbprint Cookies are my love letter to that memory. They’re what happens when a classic thumbprint cookie meets a pumpkin pie filling, and then gets dressed up for Halloween. The cookie base is soft and buttery with just enough pumpkin spice to make you feel cozy, and the filling is basically a tiny pumpkin pie in every bite. Plus, I figured out how to make them look like little jack-o’-lanterns without spending an hour decorating. Because who has time for that on a Tuesday night?
Maybe you’ve had that moment too—where a familiar smell or taste pulls you right back to a kitchen from your past. This recipe is my attempt to hold onto that feeling, one cookie at a time. And honestly, they’re so good you won’t care if your thumbprints aren’t perfectly round.
Why You’ll Love This Recipe
Let me tell you why these cookies have become my go-to for fall baking. First off, they’re fast. Like, crazy fast for something that looks this impressive. From start to finish, you’re looking at about 30 minutes, which is perfect for a weeknight when you need a little baking therapy but don’t want to be in the kitchen until bedtime.
Here’s what makes these cookies stand out:
- Quick & Easy: These come together in under 30 minutes, and most of that is baking time. The dough comes together in one bowl, and the filling is just three ingredients stirred together. No chilling required—I know, right? That’s a game-changer.
- Simple Ingredients: You probably have most of these in your pantry already. Butter, sugar, flour, pumpkin puree, and pumpkin pie spice. No weird ingredients that you’ll use once and then forget about until next year.
- Perfect for Halloween: These little guys look like mini jack-o’-lanterns, which means they’re perfect for Halloween parties, classroom treats, or just making your kitchen feel festive. Kids love them, and adults pretend they’re just for the kids while sneaking a third one.
- Crowd-Pleaser: I brought these to a potluck last week, and they disappeared before the main course. Someone actually asked me if they could take the leftovers home. There were no leftovers.
- Unbelievably Delicious: The texture is what gets me every time. The cookie is soft and tender, almost like a shortbread, and the pumpkin filling is creamy and spiced perfectly. It’s like eating a pumpkin pie and a cookie at the same time, which is basically my ideal dessert situation.
What makes this recipe different from all the other pumpkin cookies out there? It’s the thumbprint technique combined with the pumpkin pie filling. Instead of a dry, crumbly cookie, you get this soft, buttery base that cradles a silky pumpkin filling. And the jack-o’-lantern face? That’s just a little powdered sugar dusting and some creative piping. It looks fancy, but I promise it’s not. I’m not exactly a piping bag pro, and mine still turn out adorable.
These cookies are the kind that make you close your eyes after the first bite. They’re comfort food reimagined—faster, easier, but with the same soul-soothing satisfaction. Perfect for impressing guests without stress, or turning a simple Tuesday into something memorable.
What Ingredients You Will Need
This recipe uses simple, wholesome ingredients to deliver that classic pumpkin pie flavor in cookie form. Most of these are pantry staples, which is exactly what you want when a baking craving hits at 8 PM on a Wednesday.
For the Cookie Base
- 1 cup unsalted butter, softened – Make sure it’s really soft, not just out of the fridge. Room temperature butter creams better and gives you a softer cookie. I use Land O’Lakes because it’s consistent, but any brand works.
- ¾ cup granulated sugar – Regular white sugar keeps these cookies light and tender. You could use coconut sugar, but the texture changes a bit.
- 1 large egg yolk, room temperature – Just the yolk, not the whole egg. The yolk adds richness and tenderness without making the dough too wet. Save the white for omelet tomorrow.
- 1 teaspoon vanilla extract – Pure vanilla extract makes a difference here. Imitation works in a pinch, but pure gives that warm, complex flavor.
- 2 cups all-purpose flour – Spoon and level your flour, don’t scoop straight from the bag. Scooping packs the flour and makes dense cookies.
- ½ teaspoon salt – Salt balances the sweetness and makes the pumpkin spice pop. I use fine sea salt for baking.
- 1 teaspoon pumpkin pie spice – You can use store-bought or make your own with cinnamon, nutmeg, ginger, and cloves. I actually prefer making my own because I like extra cinnamon.
For the Pumpkin Pie Filling
- ½ cup pumpkin puree – Not pumpkin pie filling, just pure pumpkin. I use Libby’s because it’s thick and not watery. If your puree seems wet, pat it with a paper towel before using.
- ¼ cup brown sugar, packed – Light or dark brown sugar works. Dark gives a deeper, molasses-y flavor that I love with pumpkin.
- 1 large egg yolk – This helps the filling set up creamy and smooth. Don’t skip it, or the filling will be runny.
- ½ teaspoon pumpkin pie spice – More spice because we’re making a mini pie here.
- Pinch of salt – Just a tiny pinch to bring everything together.
For the Jack-O’-Lantern Decoration
- Powdered sugar, for dusting – This creates the “face” area. You’ll dust the cookies before piping the faces.
- ½ cup powdered sugar – For the royal icing or simple glaze to pipe the faces.
- 1-2 teaspoons milk or water – To thin the icing to piping consistency. Go slow—you can always add more liquid.
- Orange food coloring (optional) – If you want your jack-o’-lanterns extra orange. I use gel food coloring because it doesn’t thin the icing.
- Black decorating gel or melted chocolate – For the jack-o’-lantern faces. I actually prefer melted dark chocolate because it tastes better and sets up firm.
Substitution Notes: If you need these dairy-free, use vegan butter sticks (not tub margarine) and a plant-based milk for the glaze. For a gluten-free version, swap the all-purpose flour with a 1:1 gluten-free baking flour blend. I’ve tried both, and they work surprisingly well. Just don’t overmix the dough.
Equipment Needed
You don’t need a fancy kitchen to make these cookies. Here’s what you’ll need:
- Mixing bowls – One large bowl for the cookie dough and one small bowl for the filling. I use glass bowls because they don’t hold onto grease.
- Electric hand mixer or stand mixer – You can cream the butter and sugar by hand, but it takes forever and your arm will hurt. A hand mixer is fine. I use my KitchenAid stand mixer because I’m lazy and it does the work for me.
- Baking sheets – Two standard baking sheets work best. Line them with parchment paper or silicone baking mats. Parchment paper is cheaper and makes cleanup a breeze.
- Cookie scoop or tablespoon – A 1.5-tablespoon cookie scoop gives you consistent cookies that bake evenly. If you don’t have one, just use a tablespoon measure.
- Thumbprint tool – I use the back of a ½ teaspoon measure to make the indentations. It’s the perfect size and doesn’t stick if you dip it in flour. Your thumb works too, but it’s harder to get consistent depth.
- Piping bag or zip-top bag – For the jack-o’-lantern faces. A small zip-top bag with the corner snipped off works perfectly. I’ve used them for years and never bought actual piping bags.
- Cooling rack – Letting cookies cool on a rack keeps them from getting soggy on the bottom. If you don’t have one, transfer them to a plate after a few minutes.
- Small fine-mesh sieve – For dusting the powdered sugar. A tea strainer works too.
Budget-Friendly Tip: Skip the fancy piping bags and just use a zip-top bag. I’ve been doing this for years, and nobody can tell the difference. Also, silicone baking mats are great, but parchment paper is cheaper and works just as well for these cookies.
Preparation Method
Alright, let’s make some cookies. I’ve tested this recipe about six times to get the timing right, so trust the process. Here’s how it goes:
- Preheat your oven to 350°F (175°C). Line two baking sheets with parchment paper. Do this first so the oven is ready when you are.
- Make the cookie dough. In a large mixing bowl, beat the softened butter and granulated sugar together until light and fluffy. This takes about 2-3 minutes with a hand mixer on medium speed. You want it to look pale and almost creamy. Scrape down the sides of the bowl once during mixing.
- Add the wet ingredients. Beat in the egg yolk and vanilla extract until just combined. Don’t overmix here, or the cookies will be tough. You just want everything incorporated.
- Add the dry ingredients. In a separate small bowl, whisk together the flour, salt, and pumpkin pie spice. Gradually add this to the butter mixture, mixing on low speed until a soft dough forms. The dough should be slightly crumbly but hold together when pressed. If it seems too dry, add a teaspoon of milk. If it’s too sticky, add a tablespoon of flour.
- Make the pumpkin filling. In a small bowl, stir together the pumpkin puree, brown sugar, egg yolk, pumpkin pie spice, and salt. Mix until smooth. It should look like a thick, creamy pumpkin pie filling. Set this aside while you shape the cookies.
- Shape the cookies. Using a cookie scoop or tablespoon, scoop out rounded tablespoons of dough. Roll each one into a smooth ball between your palms. Place them on the prepared baking sheets, spacing them about 2 inches apart. You should get about 24 cookies.
- Make the thumbprints. Here’s the trick: dip the back of a ½ teaspoon measure in flour, then press it gently into the center of each cookie ball to create a deep well. Don’t press all the way through—you want a nice indent, not a hole. If the edges crack, just smooth them with your fingers. This happens sometimes, and it’s totally fine.
- Fill the cookies. Spoon about ½ teaspoon of the pumpkin filling into each indent. Don’t overfill—the filling will spread a little as it bakes. A little goes a long way here.
- Bake the cookies. Bake for 12-14 minutes, or until the edges are lightly golden and the filling is set. The cookies will look puffy and soft. Don’t overbake them, or they’ll be dry. I take mine out at the 12-minute mark because I like them soft. Let them cool on the baking sheet for 5 minutes, then transfer to a cooling rack.
- Make the decoration icing. While the cookies cool, whisk together ½ cup powdered sugar and 1-2 teaspoons milk until smooth. Add orange food coloring if you want. The icing should be thick but pipeable. If it’s too thin, add more powdered sugar. If it’s too thick, add a drop more milk.
- Dust with powdered sugar. Once the cookies are completely cool, place a small fine-mesh sieve over each cookie and dust lightly with powdered sugar. This creates the “face” area. Don’t go overboard—you want the pumpkin filling to still be visible.
- Pipe the jack-o’-lantern faces. Transfer the orange icing to a small piping bag or zip-top bag with the corner snipped off. Pipe small triangles for eyes and a little zigzag or smile for the mouth. You can also use black decorating gel or melted dark chocolate for the faces. I like using chocolate because it tastes good and sets up firm.
- Let the icing set. Let the cookies sit for about 15 minutes so the icing hardens. Then serve or store.
Pro Tip: If you’re short on time, you can skip the jack-o’-lantern faces and just dust with powdered sugar. They’ll still look beautiful and taste amazing. I’ve done this when I was rushing, and nobody complained.
Cooking Tips & Techniques
After making these cookies about a dozen times (not exaggerating), I’ve picked up some tricks that make the process smoother. Let me share what I’ve learned the hard way.
Don’t overmix the dough. I know I said this already, but it’s worth repeating. Overmixing develops gluten, which makes cookies tough and dense. Mix just until the flour disappears into the butter. A few streaks of flour are fine—they’ll work themselves out when you roll the dough.
Chill the dough if it’s too sticky. If your kitchen is warm or your butter was too soft, the dough might be sticky and hard to roll. Pop it in the fridge for 15 minutes. This firms up the butter and makes the dough easier to handle. I’ve done this many times, and it saves the recipe.
Use a floured spoon for the indentations. This was a game-changer for me. Dipping the measuring spoon in flour before pressing into the dough prevents sticking and gives you clean, even wells. Without flour, the spoon pulls the dough up and creates a mess.
Don’t overfill the indentations. The filling spreads as it bakes, so you only need about ½ teaspoon per cookie. If you overfill, the filling will spill over the edges and make a sticky mess. Trust me, I learned this the hard way on my third batch. The cookies still tasted good, but they looked like little pumpkin volcanoes.
Watch the bake time carefully. Every oven runs differently. My oven runs hot, so I start checking at 10 minutes. The cookies are done when the edges are just barely golden and the filling is set but still slightly jiggly in the center. They’ll continue to set as they cool.
Let them cool completely before decorating. If you dust with powdered sugar while the cookies are still warm, the sugar will melt and disappear. Patience is key here. I usually make these in the evening and decorate them the next morning. They actually taste better the next day anyway.
Multitasking strategy: While the cookies bake, clean up your mixing bowls and make the icing. This way, by the time the cookies are cool, you’re ready to decorate. I hate having a messy kitchen, so I try to clean as I go. It makes the whole process feel less overwhelming.
Variations & Adaptations
One of the best things about this recipe is how adaptable it is. Here are some variations I’ve tried and loved:
Gluten-Free Version
Swap the all-purpose flour with a 1:1 gluten-free baking blend. I’ve used Bob’s Red Mill and King Arthur Measure for Measure, and both worked well. The cookies might spread a tiny bit more, so chill the dough for 20 minutes before baking. Also, add an extra tablespoon of flour to the dough because gluten-free blends tend to be more absorbent.
Vegan Version
Use vegan butter sticks (I like Earth Balance) and replace the egg yolks with flax eggs. For each egg yolk, mix 1 tablespoon ground flaxseed with 2.5 tablespoons water and let it sit for 5 minutes until thick and gel-like. The cookies won’t be quite as tender, but they’re still delicious. Use a plant-based milk for the icing.
Different Fillings
If pumpkin isn’t your thing (are we still friends?), try these fillings instead:
- Apple Butter: Use store-bought or homemade apple butter in place of the pumpkin filling. It’s like eating a mini apple pie.
- Chocolate Ganache: Fill the indentations with melted chocolate chips. Because chocolate makes everything better.
- Jam: Any flavor works. Raspberry or strawberry jam gives a nice tartness that balances the sweet cookie.
- Caramel: Fill with dulce de leche or caramel sauce. It gets all gooey and amazing.
Different Shapes
Instead of jack-o’-lantern faces, try these decorations:
- Ghosts: Dust with powdered sugar and pipe two tiny dots for eyes with black icing.
- Spiderwebs: Pipe concentric circles with white icing, then drag a toothpick from the center outward to create web lines.
- Mummies: Drizzle white icing back and forth over the cookie and add candy eyes.
Spice Variations
If you want to switch up the flavor profile, try these spice blends:
- Chai Spice: Add cardamom, ginger, and a pinch of black pepper to the dough.
- Pumpkin Chai: Use chai tea concentrate instead of vanilla extract.
- Mexican Hot Chocolate: Add a pinch of cayenne and cinnamon to the chocolate version.
Serving & Storage Suggestions
These cookies are best served at room temperature, which means they’re ready to go whenever you are. The flavors actually deepen after a day or two, so don’t be afraid to make them ahead.
Serving Ideas:
- Arrange them on a platter with other Halloween treats like Halloween candy cookies and pumpkin bread bites for a festive dessert spread.
- Serve with a glass of cold milk or a warm cup of chai latte. The spices in the cookies pair beautifully with the chai.
- Package them in little cellophane bags tied with orange ribbon for Halloween party favors. I did this last year, and they were a huge hit.
- Add them to a cookie exchange or bake sale. They stand out because they look so festive.
Storage Instructions:
- Room Temperature: Store in an airtight container at room temperature for up to 5 days. Layer them with parchment paper between layers to prevent sticking. The cookies actually get softer and more flavorful after a day or two.
- Refrigerator: You can refrigerate them, but they’ll dry out faster. If you do, bring them to room temperature before serving. Cold cookies aren’t as flavorful.
- Freezer: These freeze beautifully. Freeze the undecorated cookies in a single layer on a baking sheet, then transfer to a freezer-safe container. They’ll keep for up to 3 months. When you’re ready to serve, thaw at room temperature, then dust with powdered sugar and decorate. I always keep a batch in the freezer for unexpected guests.
Reheating: These cookies don’t really need reheating, but if you want that fresh-from-the-oven warmth, pop them in a 300°F oven for 3-4 minutes. Don’t microwave them—it makes the cookies tough and the icing melts.
Flavor Development: Here’s something interesting: the pumpkin spice flavor actually intensifies after a day or two. The spices meld with the butter and sugar, creating a deeper, more complex taste. So if you can resist eating them all on day one, you’ll be rewarded on day two. I’ve never managed to wait that long, but theoretically, it’s true.
Nutritional Information & Benefits
Let’s be real—these are cookies, not health food. But they’re made with real ingredients, and there are a few nutritional bright spots worth mentioning.
Estimated Nutritional Values (per cookie, based on 24 cookies):
| Nutrient | Amount |
|---|---|
| Calories | 145 |
| Total Fat | 8g |
| Saturated Fat | 5g |
| Cholesterol | 35mg |
| Sodium | 85mg |
| Total Carbohydrates | 18g |
| Dietary Fiber | 1g |
| Sugars | 10g |
| Protein | 2g |
| Vitamin A | 15% DV |
Health Benefits:
- Pumpkin is packed with vitamin A, which is great for eye health and immune function. It also contains fiber, which helps with digestion.
- Butter provides vitamin A and healthy fats that help your body absorb fat-soluble vitamins from the pumpkin.
- Egg yolks contain choline, which supports brain health. Plus, they add protein to an otherwise carb-heavy treat.
Dietary Considerations:
- Vegetarian: Yes, these are vegetarian-friendly.
- Gluten-Free: Use a 1:1 gluten-free flour blend.
- Dairy-Free: Use vegan butter and plant-based milk.
- Vegan: Use flax eggs and vegan butter.
- Nut-Free: These are naturally nut-free, but check your flour and butter labels for cross-contamination if you have allergies.
Potential Allergens: Wheat, dairy, eggs. If you’re serving these at a party, I recommend labeling them so guests with allergies know what’s in them.
My Personal Take: I try not to overthink the nutrition of cookies. They’re a treat, and that’s okay. But I do feel better knowing they’re made with real ingredients—no preservatives, no artificial flavors, just butter, sugar, flour, and pumpkin. That counts for something, right?
Conclusion
These Quick Jack-O’-Lantern Pumpkin Pie Thumbprint Cookies are everything I love about fall baking. They’re fast enough for a weeknight project, simple enough for beginner bakers, and cute enough to impress at any Halloween gathering. Plus, they taste like a warm hug in cookie form.
What I love most about this recipe is how flexible it is. You can make them ahead, freeze them for later, or switch up the fillings and decorations to match your mood. They’re forgiving, which is exactly what a busy baker needs. And honestly, even if your jack-o’-lantern faces look more like confused ghosts, they’ll still taste amazing.
I’d love to hear how these turn out for you. Did you try a different filling? Did your kids help with the decorating? Did you eat three before they were fully cool? (No judgment—I’ve been there.) Drop a comment below and let me know. And if you share them on social media, tag me so I can see your beautiful creations.
Happy fall baking, friends. May your cookies be soft, your pumpkin filling be creamy, and your jack-o’-lantern faces be delightfully imperfect.
Frequently Asked Questions
Can I make these cookies ahead of time?
Absolutely! You can make the dough up to 2 days ahead and keep it in the fridge. Let it sit at room temperature for 10 minutes before rolling. Or freeze the baked, undecorated cookies for up to 3 months. Thaw, dust with sugar, and decorate when you’re ready.
Why did my cookies spread too much?
This usually happens if the butter was too soft or the dough wasn’t chilled. If your kitchen is warm, pop the shaped cookies in the fridge for 15 minutes before baking. Also, make sure you’re using the right amount of flour—too little flour makes cookies spread.
Can I use pumpkin pie filling instead of pumpkin puree?
I wouldn’t recommend it. Pumpkin pie filling has added sugar and spices, which will make the filling too sweet and change the texture. Stick with pure pumpkin puree for the best results. Your taste buds will thank you.
How do I get perfectly round thumbprints?
Use the back of a ½ teaspoon measure dipped in flour. Press straight down gently, then lift straight up. Don’t twist—that creates uneven edges. If the edges crack, just smooth them with your fingers. Imperfect cookies have character!
Can I make these without a mixer?
Yes, but your arm might get tired. You can cream the butter and sugar by hand with a wooden spoon, but it takes about 5 minutes of vigorous stirring. Make sure the butter is very soft before you start. Alternatively, you can use a pastry cutter or even a fork to get the job done.
Pin This Recipe!

Quick Jack-O-Lantern Pumpkin Thumbprint Cookies: Easy Fall Treat

These Quick Jack-O’-Lantern Pumpkin Pie Thumbprint Cookies are a love letter to fall baking. They combine a soft, buttery cookie base with a creamy pumpkin pie filling, dressed up as adorable jack-o’-lanterns for Halloween.
- Prep Time: 15 minutes
- Cook Time: 12-14 minutes
- Total Time: 30 minutes
- Yield: 24 cookies 1x
- Category: Dessert
- Cuisine: American
Ingredients
- 1 cup unsalted butter, softened
- ¾ cup granulated sugar
- 1 large egg yolk, room temperature
- 1 teaspoon vanilla extract
- 2 cups all-purpose flour
- ½ teaspoon salt
- 1 teaspoon pumpkin pie spice
- ½ cup pumpkin puree
- ¼ cup brown sugar, packed
- 1 large egg yolk
- ½ teaspoon pumpkin pie spice
- Pinch of salt
- Powdered sugar, for dusting
- ½ cup powdered sugar
- 1–2 teaspoons milk or water
- Orange food coloring (optional)
- Black decorating gel or melted chocolate
Instructions
- Preheat your oven to 350°F (175°C). Line two baking sheets with parchment paper.
- Make the cookie dough: In a large mixing bowl, beat the softened butter and granulated sugar together until light and fluffy, about 2-3 minutes on medium speed.
- Add the wet ingredients: Beat in the egg yolk and vanilla extract until just combined.
- Add the dry ingredients: In a separate small bowl, whisk together the flour, salt, and pumpkin pie spice. Gradually add this to the butter mixture, mixing on low speed until a soft dough forms.
- Make the pumpkin filling: In a small bowl, stir together the pumpkin puree, brown sugar, egg yolk, pumpkin pie spice, and salt until smooth.
- Shape the cookies: Using a cookie scoop or tablespoon, scoop out rounded tablespoons of dough and roll into smooth balls. Place on prepared baking sheets, spacing about 2 inches apart.
- Make the thumbprints: Dip the back of a ½ teaspoon measure in flour, then press gently into the center of each cookie ball to create a deep well.
- Fill the cookies: Spoon about ½ teaspoon of the pumpkin filling into each indent.
- Bake the cookies: Bake for 12-14 minutes, until edges are lightly golden and filling is set. Let cool on baking sheet for 5 minutes, then transfer to a cooling rack.
- Make the decoration icing: Whisk together ½ cup powdered sugar and 1-2 teaspoons milk until smooth. Add orange food coloring if desired.
- Dust with powdered sugar: Once cookies are completely cool, dust lightly with powdered sugar using a fine-mesh sieve.
- Pipe the jack-o’-lantern faces: Transfer orange icing to a piping bag or zip-top bag with corner snipped off. Pipe triangles for eyes and a zigzag or smile for the mouth. Alternatively, use black decorating gel or melted chocolate.
- Let the icing set for about 15 minutes before serving or storing.
Notes
For best results, use room temperature butter and don’t overmix the dough. If dough is too sticky, chill for 15 minutes. Dip the measuring spoon in flour before making indentations to prevent sticking. Don’t overfill the indentations—about ½ teaspoon per cookie is enough. Let cookies cool completely before decorating to prevent powdered sugar from melting. Cookies can be stored in an airtight container at room temperature for up to 5 days, or frozen undecorated for up to 3 months.
Nutrition
- Serving Size: 1 cookie
- Calories: 145
- Sugar: 10
- Sodium: 85
- Fat: 8
- Saturated Fat: 5
- Carbohydrates: 18
- Fiber: 1
- Protein: 2
Keywords: pumpkin cookies, thumbprint cookies, Halloween cookies, fall baking, jack-o-lantern cookies, pumpkin pie cookies, easy cookies



