Love this? Save it for later!
Share the inspiration with your friends
I had refused to make green bean casserole for Thanksgiving for almost a decade. Let me tell you, I was smug about it too. Cream of mushroom soup from a can? Canned fried onions that taste more like cardboard than allium? I’d cross my arms at the potluck table and mutter something about “fresh ingredients” while everyone else piled it onto their plates. Then last November, my sister-in-law cornered me at the grocery store. “You’re bringing the green beans this year,” she said. It wasn’t a question.
So I did what any stubborn home cook would do. I made a version “just for myself” on a random Tuesday night, figuring I’d tweak it until it was edible. My plan was simple: fresh green beans, a from-scratch mushroom sauce, and shallots. Lots of shallots. I didn’t tell anyone I was testing it. I just stood there in my kitchen, slicing shallots into thin rings while the dog circled my feet, hoping for dropped scraps. The smell of those shallots hitting hot oil — that sweet, savory perfume — made me pause. Maybe I was onto something.
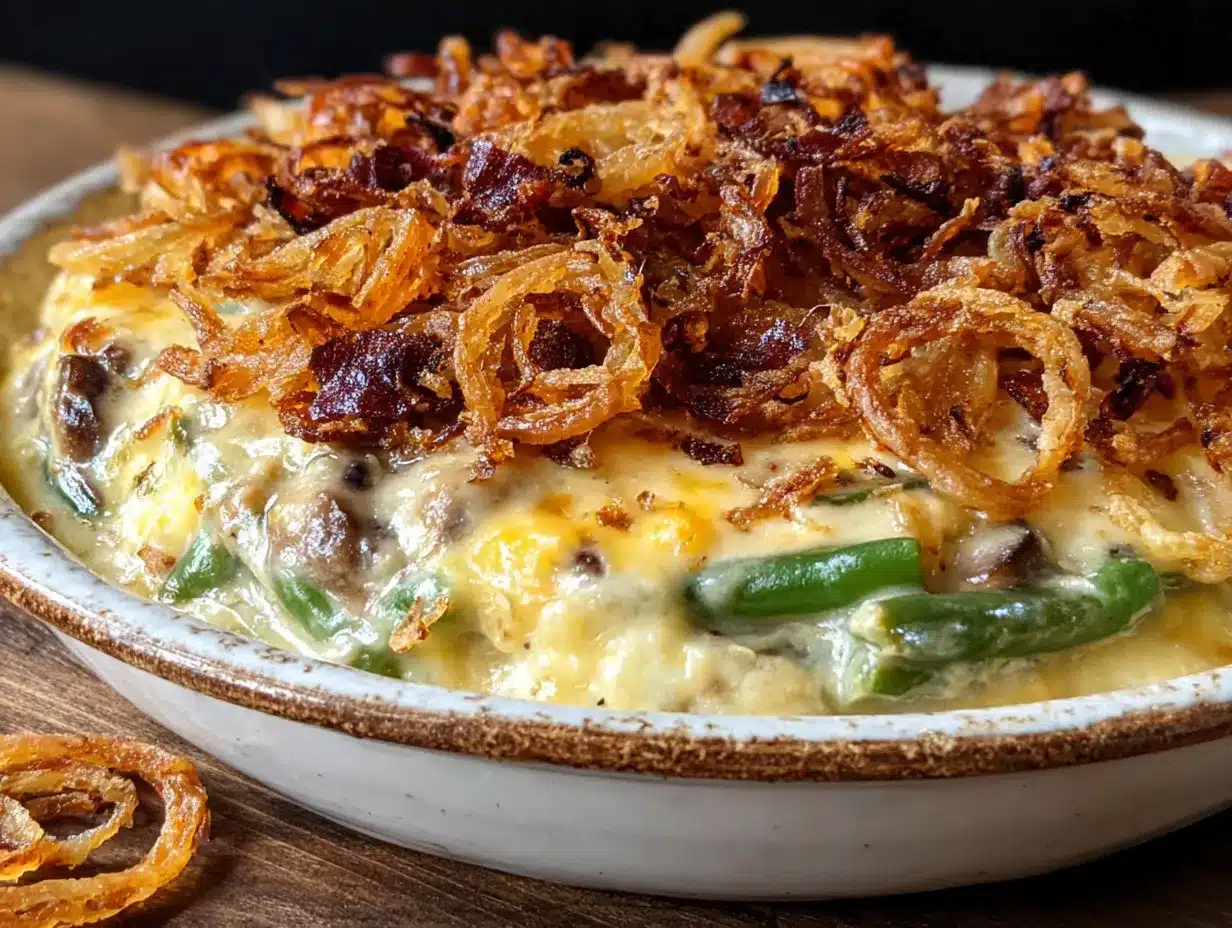
An hour later, I had a baking dish full of creamy, tender green beans topped with a mountain of golden, crispy shallots. I took one bite. Then another. Honestly, I ate half the dish standing at the counter, which is something I usually judge other people for doing. The next week, I made it again for a casual dinner with friends. One of them, a guy who proudly claims to hate vegetables, asked for the recipe before he’d finished his first serving.
That’s the thing about this Cozy Make-Ahead Green Bean Casserole with Crispy Shallots. It doesn’t try to convince you. It just sits there looking beautiful, smelling like butter and thyme, and lets you discover for yourself that green bean casserole can actually be incredible. Maybe you’ve been that person who turns up their nose at this dish. I get it. But trust me on this one.
Why You’ll Love This Recipe
This isn’t just another green bean casserole. It’s the one that made me eat my words — and my vegetables. Here’s what makes it special:
- Make-Ahead Magic: Assemble it the day before, then just bake when you’re ready. Perfect for holidays when your oven is a battlefield.
- No Canned Soup: The creamy mushroom sauce is made from scratch with real ingredients. You can taste the difference in every bite.
- Crispy Shallot Topping: These aren’t sad, soggy onions. We’re talking paper-thin shallots fried until they’re golden and shatteringly crisp. They stay crunchy even after baking.
- Simple Ingredients: Nothing weird or hard to find. Fresh green beans, mushrooms, cream, and shallots. That’s the heart of it.
- Perfect for Cozy Gatherings: Whether it’s Thanksgiving, Christmas, or a Sunday dinner that needs something warm and comforting, this dish delivers.
- Crowd-Pleaser Status: I’ve watched self-proclaimed green bean haters go back for seconds. It’s that good.
What really sets this recipe apart is the technique. Blanching the green beans keeps them bright and tender-crisp. The sauce gets its richness from real cream and sautéed mushrooms, not flour and canned soup. And those shallots? They’re fried in small batches so every single one gets perfectly golden. It’s comfort food that tastes like someone actually cared about it — because someone did.
This is the kind of dish that makes you close your eyes after the first bite. It’s warm, creamy, and full of that earthy mushroom flavor that pairs so perfectly with fresh green beans. The crispy shallots on top add this little crunch of joy in every spoonful. It’s the side dish that steals the show, and honestly, it deserves to.
What Ingredients You Will Need
This recipe uses simple, wholesome ingredients to deliver that soul-warming comfort without any of the processed shortcuts. Most of these are probably already in your kitchen, which makes this even easier.
For the Green Beans:
- 2 pounds fresh green beans, trimmed and cut into 2-inch pieces (look for bright, firm beans without any brown spots)
- 1 tablespoon salt, for the blanching water (don’t skip this — it seasons the beans from the inside out)
- Ice water bath, for shocking the beans after blanching
For the Creamy Mushroom Sauce:
- 4 tablespoons unsalted butter (I use Kerrygold for the richness, but any good butter works)
- 1 pound cremini mushrooms, thinly sliced (baby bellas are perfect here — they have more flavor than white mushrooms)
- 1 medium yellow onion, finely diced
- 4 cloves garlic, minced
- 1/4 cup all-purpose flour (use a gluten-free blend if needed)
- 2 cups whole milk, warmed (half-and-half makes it extra luxurious)
- 1 cup heavy cream
- 1 teaspoon dried thyme (or 1 tablespoon fresh, chopped)
- 1/2 teaspoon smoked paprika (adds a subtle warmth that’s lovely)
- 1 teaspoon salt, plus more to taste
- 1/2 teaspoon black pepper
- Pinch of nutmeg, freshly grated if you can (it’s a game-changer)
For the Crispy Shallots:
- 6 large shallots, peeled and sliced into thin rings (use a mandoline if you have one for even slices)
- 1 cup all-purpose flour
- 1 teaspoon salt
- 1/2 teaspoon black pepper
- 2 cups vegetable or canola oil, for frying (enough to come about 1 inch up the side of your pan)
For the Topping (Optional but Recommended):
- 1/2 cup panko breadcrumbs (adds extra crunch on top)
- 2 tablespoons melted butter
A few notes on ingredients. For the mushrooms, I really recommend cremini over white button mushrooms. They have a deeper, earthier flavor that holds up better in the sauce. If you’re dairy-free, you can substitute the butter with a good plant-based version and use unsweetened oat milk or cashew cream instead of the milk and heavy cream. The texture will be slightly different, but still delicious.
For the shallots, try to find ones that are all roughly the same size so they cook evenly. And don’t be tempted to skip the flour coating — it’s what gives them that incredible crispy texture that stays crunchy even after baking.
Equipment Needed
You don’t need a fancy kitchen to make this casserole, but a few specific tools will make your life easier.
- Large pot, for blanching the green beans (at least 6 quarts)
- Large skillet or sauté pan, for the mushroom sauce (a 12-inch pan gives you room to cook the mushrooms without overcrowding)
- Medium saucepan, for frying the shallots (I use a 3-quart saucepan — high sides prevent oil splatters)
- 9×13-inch baking dish (or any 3-quart casserole dish)
- Mandoline slicer (optional but highly recommended for evenly thin shallot slices)
- Slotted spoon or spider strainer, for removing shallots from oil
- Paper towels, for draining the shallots
- Mixing bowls, for coating shallots in flour
- Whisk, for making the sauce smooth
- Measuring cups and spoons
If you don’t have a mandoline, a sharp knife and a steady hand work just fine. Just try to get those shallots as thin as possible — about 1/8 inch thick. And if you don’t have a spider strainer, a slotted spoon works perfectly. I actually prefer my old slotted spoon because the spider strainer lets too much oil drip back into the pan too quickly. Personal preference, you know?
Preparation Method
Let’s get cooking. This recipe has a few steps, but I promise they’re all straightforward. Take your time, and you’ll be rewarded with the best green bean casserole of your life.
- Blanch the green beans. Bring a large pot of water to a rolling boil. Add 1 tablespoon of salt — this is your only chance to season the beans from the inside. Drop in the trimmed green beans and cook for exactly 3 minutes. They should be bright green and tender-crisp. While they cook, prepare a large bowl of ice water. Use a slotted spoon or tongs to transfer the beans directly into the ice bath. This stops the cooking immediately and locks in that gorgeous color. Let them sit for 2-3 minutes, then drain well and pat dry with a clean kitchen towel. Set aside.
- Start the mushroom sauce. In a large skillet over medium heat, melt 2 tablespoons of the butter. Add the sliced mushrooms in a single layer — don’t overcrowd the pan. Cook without stirring for 4-5 minutes until they’re golden brown on one side. Then stir and cook for another 3-4 minutes until all the mushrooms are nicely browned and have released their liquid. The liquid should evaporate as they cook. This is where the flavor lives, so be patient. Transfer the mushrooms to a bowl and set aside.
- Build the sauce base. In the same skillet, melt the remaining 2 tablespoons of butter over medium heat. Add the diced onion and cook for 5-6 minutes until soft and translucent. Add the minced garlic and cook for 1 minute more until fragrant. Sprinkle the flour over the onions and stir constantly for 2 minutes. This cooks out the raw flour taste and creates a roux that will thicken your sauce beautifully.
- Make it creamy. Slowly pour in the warm milk while whisking constantly. Keep whisking until the mixture is smooth and starts to thicken, about 3-4 minutes. Pour in the heavy cream and continue whisking. The sauce should be thick enough to coat the back of a spoon. If it seems too thick, add a splash more milk. Stir in the cooked mushrooms, dried thyme, smoked paprika, salt, pepper, and that pinch of nutmeg. Taste it. Adjust the seasoning if needed. This sauce should be rich, creamy, and deeply savory.
- Combine the beans and sauce. Add the blanched green beans to the skillet with the sauce. Gently fold everything together until the beans are evenly coated. Pour the mixture into your greased 9×13-inch baking dish and spread it into an even layer. At this point, you can cover the dish and refrigerate for up to 24 hours. This is the “make-ahead” magic right here.
- Fry the crispy shallots. While the casserole rests or bakes, make the shallots. In a shallow bowl, whisk together the flour, salt, and pepper. Toss the sliced shallots in the flour mixture until each ring is well coated. Shake off any excess flour. In a medium saucepan, heat the oil to 350°F (175°C). Working in batches, fry the shallots for 2-3 minutes until golden brown. Don’t overcrowd the pan — they need room to crisp up. Use a slotted spoon to transfer them to a paper towel-lined plate. Sprinkle with a little salt while they’re still warm. They’ll crisp up as they cool.
- Bake the casserole. Preheat your oven to 375°F (190°C). If you refrigerated the casserole, let it sit on the counter for 20 minutes while the oven heats. Bake the casserole uncovered for 25-30 minutes until bubbly and hot throughout. If using the panko topping, mix the panko with melted butter and sprinkle over the casserole in the last 10 minutes of baking.
- Top with shallots and serve. Remove the casserole from the oven and let it rest for 5 minutes. Just before serving, pile the crispy shallots on top. This keeps them crunchy. Serve hot and watch them disappear.
Cooking Tips & Techniques
I’ve made this casserole more times than I can count, and I’ve learned a few things the hard way. Let me save you some trouble.
Don’t skip the blanching step. I know it’s tempting to just toss raw beans into the sauce and let the oven do the work. But blanching gives you that perfect tender-crisp texture that raw beans just can’t achieve. Plus, it sets the color so your casserole looks as good as it tastes. One time I was in a hurry and skipped it. The beans came out dull and slightly chewy. Never again.
Watch your oil temperature for the shallots. If the oil isn’t hot enough, the shallots will absorb oil and turn greasy instead of crispy. If it’s too hot, they’ll burn before they’re cooked through. I use a thermometer, but if you don’t have one, drop a single shallot ring in the oil. If it sizzles immediately and floats to the top, you’re good. Also, fry them in small batches. Crowding the pan drops the oil temperature and leads to sad, soggy shallots.
Make the sauce ahead, but fry the shallots fresh. The casserole can sit in the fridge for a day, and the flavors actually get better. But those crispy shallots are at their peak within a few hours of frying. If you’re making this for a big meal, fry the shallots while the casserole bakes. Your future self will thank you.
Season as you go. Don’t wait until the end to add all the salt. Season the blanching water, season the mushrooms as they cook, season the sauce. Each layer of seasoning builds flavor. This is the difference between a good casserole and a great one.
Let it rest before serving. I know it’s hard to wait, but letting the casserole sit for 5 minutes after baking allows the sauce to set slightly. If you serve it straight from the oven, it might be a little loose. Those 5 minutes make a difference.
Variations & Adaptations
This recipe is flexible, and I love playing around with it. Here are some variations I’ve tried and loved.
Gluten-Free Version: Swap the all-purpose flour in the sauce for a 1:1 gluten-free flour blend. For the shallots, use rice flour or chickpea flour instead of all-purpose. The texture is slightly different, but still wonderfully crispy. I’ve tested this with my gluten-sensitive friends, and they couldn’t tell the difference.
Dairy-Free Version: Use olive oil or a good plant-based butter for the sauce. Substitute the milk with unsweetened oat milk and the heavy cream with full-fat coconut cream (the kind from a can, not the refrigerated kind). The coconut flavor is subtle and actually pairs beautifully with the mushrooms. Just make sure to warm the oat milk before adding it to the roux to prevent clumping.
Add Some Protein: This casserole is hearty enough as a side, but I’ve turned it into a main dish by adding shredded rotisserie chicken or crispy bacon bits. Stir the chicken in with the sauce, or sprinkle the bacon over the top along with the shallots. It’s a fantastic weeknight dinner that comes together quickly.
Seasonal Twist: In the summer, I swap the green beans for fresh asparagus. Blanch it for 2 minutes instead of 3, and follow the same recipe. In the fall, add some roasted butternut squash cubes to the casserole for extra sweetness and color. Both variations have become family favorites.
Spicy Kick: Add 1/2 teaspoon of red pepper flakes to the sauce along with the thyme. The heat cuts through the creaminess and adds a nice warmth. I did this on a whim one night, and now it’s my go-to version when I’m cooking just for myself.
Serving & Storage Suggestions
This casserole is best served hot, straight from the oven, with those crispy shallots piled high on top. The contrast between the creamy, tender beans and the crunchy topping is pure magic. I like to serve it alongside a roasted turkey or chicken, but it’s equally at home next to a juicy steak or even a simple roast pork loin.
For a holiday spread, pair it with mashed potatoes, dinner rolls, and a tangy cranberry sauce. The creaminess of the casserole balances beautifully with something bright and acidic. If you’re serving it as a main dish, a simple green salad with a lemon vinaigrette is all you need to round out the meal.
Storage: Leftovers can be stored in an airtight container in the refrigerator for up to 4 days. The shallots will lose their crunch, but the casserole itself reheats beautifully. To reheat, cover the dish with foil and warm in a 350°F oven for 15-20 minutes, or microwave individual portions for 1-2 minutes.
Freezing: This casserole freezes well, but freeze it before adding the crispy shallots. Assemble the casserole, cover tightly with foil, and freeze for up to 3 months. Thaw overnight in the refrigerator, then bake as directed. Add fresh crispy shallots after baking. I do this every fall, stocking my freezer with a few casseroles for those busy weeks when I need comfort food fast.
The flavors actually deepen after a day in the fridge. So don’t worry if you’re making this ahead — it might taste even better the next day. Just don’t tell anyone you made it in advance. They’ll think you slaved over it all day.
Nutritional Information & Benefits
Here’s the honest truth: this is comfort food, not health food. But it’s made with real ingredients, and that counts for something. Here’s a rough estimate per serving (based on 8 servings):
- Calories: 320-350
- Fat: 22g
- Carbohydrates: 28g
- Protein: 7g
- Fiber: 4g
- Sugar: 8g
The green beans are a good source of vitamin C, vitamin K, and fiber. Mushrooms provide B vitamins and selenium, which supports immune health. Shallots are packed with antioxidants and have anti-inflammatory properties. And while this dish isn’t low-calorie, it’s made with whole foods and no processed shortcuts. That’s a win in my book.
If you’re watching your intake, you can lighten it up by using half-and-half instead of heavy cream, or reducing the butter in the sauce. But honestly, this is a special occasion dish. Sometimes you just need to enjoy the full experience, you know?
Conclusion
This Cozy Make-Ahead Green Bean Casserole with Crispy Shallots is the dish that changed my mind about an entire category of food. It’s creamy, crunchy, savory, and deeply satisfying. The make-ahead option means you can actually enjoy your own party instead of sweating in the kitchen. And those crispy shallots? They’re worth the extra step, I promise.
I love this recipe because it proves that comfort food doesn’t have to come from a can. With a little time and some good ingredients, you can create something that feels both familiar and extraordinary. It’s the kind of dish that makes people ask for the recipe before they’ve finished their first serving — and that’s exactly what happened to me.
I’d love to hear how yours turns out. Did you add your own twist? Did it convert a green bean casserole skeptic at your table? Drop a comment below and let me know. And if you’re looking for more cozy side dishes, my creamy mashed potatoes and soft dinner rolls are perfect companions for this casserole. Happy cooking, friends.
Frequently Asked Questions
Can I use frozen green beans instead of fresh?
You can, but I don’t recommend it. Frozen green beans have a softer texture and release more water as they cook, which can make the sauce watery. If you’re in a pinch, thaw them completely and pat them very dry before using. But fresh green beans really do make a difference here.
How far ahead can I make this casserole?
You can assemble the casserole (minus the crispy shallots) up to 24 hours in advance. Just cover it tightly and refrigerate. Let it sit at room temperature for 20 minutes before baking. The crispy shallots should be made fresh on the day you serve — they lose their crunch after a few hours.
Can I use a different type of onion for the topping?
Absolutely. Yellow onions or red onions both work, but they won’t be as sweet and delicate as shallots. If using regular onions, slice them very thinly and soak them in cold water for 10 minutes before coating in flour. This removes some of the sharpness and helps them crisp up better.
Why did my sauce turn out lumpy?
Lumpy sauce usually happens when you add cold milk to a hot roux. Make sure your milk is warmed before adding it, and whisk constantly as you pour. If you do end up with lumps, don’t panic — just whisk vigorously and the sauce should smooth out. A quick blitz with an immersion blender also works in a pinch.
Can I double this recipe for a crowd?
Definitely. Double all the ingredients and use a larger baking dish or two 9×13-inch dishes. The baking time might increase by 5-10 minutes, so check for bubbly edges and a hot center. Just make sure not to overcrowd the pan when frying the shallots — fry them in batches instead.
Pin This Recipe!

Cozy Make-Ahead Green Bean Casserole with Crispy Shallots

A from-scratch green bean casserole with fresh green beans, creamy mushroom sauce, and crispy fried shallots. Make-ahead friendly and perfect for holidays or cozy gatherings.
- Prep Time: 30 minutes
- Cook Time: 45 minutes
- Total Time: 1 hour 15 minutes
- Yield: 8 servings 1x
- Category: Side Dish
- Cuisine: American
Ingredients
- 2 pounds fresh green beans, trimmed and cut into 2-inch pieces
- 1 tablespoon salt, for blanching water
- Ice water bath, for shocking beans
- 4 tablespoons unsalted butter
- 1 pound cremini mushrooms, thinly sliced
- 1 medium yellow onion, finely diced
- 4 cloves garlic, minced
- 1/4 cup all-purpose flour
- 2 cups whole milk, warmed
- 1 cup heavy cream
- 1 teaspoon dried thyme
- 1/2 teaspoon smoked paprika
- 1 teaspoon salt, plus more to taste
- 1/2 teaspoon black pepper
- Pinch of nutmeg, freshly grated
- 6 large shallots, peeled and sliced into thin rings
- 1 cup all-purpose flour
- 1 teaspoon salt
- 1/2 teaspoon black pepper
- 2 cups vegetable or canola oil, for frying
- 1/2 cup panko breadcrumbs (optional)
- 2 tablespoons melted butter (optional)
Instructions
- Blanch the green beans: Bring a large pot of water to a rolling boil. Add 1 tablespoon salt. Drop in trimmed green beans and cook for exactly 3 minutes. Transfer to an ice water bath for 2-3 minutes, then drain and pat dry. Set aside.
- Start the mushroom sauce: In a large skillet over medium heat, melt 2 tablespoons butter. Add sliced mushrooms in a single layer. Cook without stirring for 4-5 minutes until golden brown, then stir and cook for another 3-4 minutes until browned and liquid has evaporated. Transfer mushrooms to a bowl.
- Build the sauce base: In the same skillet, melt remaining 2 tablespoons butter over medium heat. Add diced onion and cook for 5-6 minutes until soft. Add minced garlic and cook for 1 minute. Sprinkle flour over onions and stir constantly for 2 minutes.
- Make it creamy: Slowly pour in warm milk while whisking constantly. Whisk until smooth and thickened, about 3-4 minutes. Pour in heavy cream and continue whisking until sauce coats the back of a spoon. Stir in cooked mushrooms, dried thyme, smoked paprika, salt, pepper, and nutmeg. Adjust seasoning.
- Combine beans and sauce: Add blanched green beans to the skillet with sauce. Gently fold until evenly coated. Pour into a greased 9×13-inch baking dish and spread into an even layer. Cover and refrigerate for up to 24 hours if making ahead.
- Fry the crispy shallots: In a shallow bowl, whisk together 1 cup flour, 1 teaspoon salt, and 1/2 teaspoon pepper. Toss sliced shallots in flour mixture until coated. Shake off excess. In a medium saucepan, heat oil to 350°F (175°C). Working in batches, fry shallots for 2-3 minutes until golden brown. Transfer to paper towel-lined plate and sprinkle with salt.
- Bake the casserole: Preheat oven to 375°F (190°C). If refrigerated, let casserole sit at room temperature for 20 minutes. Bake uncovered for 25-30 minutes until bubbly and hot. If using panko topping, mix panko with melted butter and sprinkle over casserole in the last 10 minutes of baking.
- Top with shallots and serve: Remove casserole from oven and let rest for 5 minutes. Just before serving, pile crispy shallots on top. Serve hot.
Notes
Don’t skip blanching the green beans—it ensures tender-crisp texture and bright color. Fry shallots in small batches to keep them crispy. The casserole can be assembled up to 24 hours ahead; add crispy shallots just before serving. For gluten-free, use a 1:1 gluten-free flour blend in the sauce and rice flour for the shallots. For dairy-free, use plant-based butter, unsweetened oat milk, and full-fat coconut cream.
Nutrition
- Serving Size: 1 serving (about 1 c
- Calories: 335
- Sugar: 8
- Sodium: 780
- Fat: 22
- Saturated Fat: 12
- Carbohydrates: 28
- Fiber: 4
- Protein: 7
Keywords: green bean casserole, make-ahead, crispy shallots, Thanksgiving side dish, from scratch, comfort food



