Love this? Save it for later!
Share the inspiration with your friends
Introduction
“You gotta try this,” my neighbor, Jim, called out over the fence one sunny Saturday afternoon. I was halfway through setting up my backyard grill for a modest BBQ, and honestly, I wasn’t expecting much more than standard burgers and hot dogs. But Jim had something else in mind—his secret weapon to steal the show: crispy grilled garlic bread slathered in homemade herb butter. I was skeptical at first, because let’s face it, garlic bread is garlic bread, right? Well, I was wrong.
Jim’s version wasn’t just bread with garlic slapped on it; it was a golden-crisp masterpiece with a buttery, fragrant herb kick that made me pause mid-bite. The sizzle from the grill, that irresistible crunch, and the way the butter melted into every nook and cranny—it all came together in a way that felt both rustic and indulgent. I made a mess trying to replicate it that weekend (spilled herb butter everywhere, naturally), but after a few tweaks, I nailed the balance between crispy and soft.
Maybe you’ve been there—wanting something simple yet impressive to bring to your next cookout or craving a snack that pairs perfectly with smoky grilled meat. This crispy grilled garlic bread with herb butter isn’t just a side; it’s the kind of recipe that turns casual BBQs into memorable meals. And honestly, once you make it, you’ll wonder how you ever grilled without it.
Why You’ll Love This Recipe
This crispy grilled garlic bread with herb butter recipe has been tested and approved through many BBQs and casual hangouts. Here’s why it’s a game-changer:
- Quick & Easy: Ready in about 15 minutes, so you can whip it up between grilling rounds without breaking a sweat.
- Simple Ingredients: Uses pantry staples like fresh garlic, butter, and herbs—no fancy trips required.
- Perfect for BBQs: Complements everything from ribs to grilled veggies, making it a versatile crowd-pleaser.
- Crowd-Pleaser: Kids and adults alike can’t get enough, and it’s often the first thing to disappear from the grill.
- Unbelievably Delicious: The crispy crust paired with the soft, garlicky inside and herb-infused butter is next-level comfort food.
What sets this recipe apart is the herb butter—fresh parsley, thyme, and a hint of oregano blended into creamy butter, applied just right before grilling. The garlic isn’t overpowering; it’s mellow and toasty, thanks to the grilling technique. I’ve tried other versions that sogged up or burned too fast, but this recipe strikes the perfect balance. Honestly, it’s the kind of treat that makes you close your eyes and smile after the first bite.
What Ingredients You Will Need
This recipe uses simple, wholesome ingredients to create bold flavors and that perfect crispy texture without fuss. Most are pantry staples, and substitutions are easy if needed.
- Bread: 1 large baguette or Italian bread (day-old works best for sturdiness)
- Butter: ½ cup (113g) unsalted butter, softened (I prefer Plugrá for richness)
- Garlic: 4 cloves, finely minced or pressed (fresh is best here)
- Fresh herbs: 2 tablespoons chopped parsley, 1 teaspoon chopped thyme, 1 teaspoon chopped oregano (can swap with dried if fresh unavailable, but fresh is tastier)
- Lemon juice: 1 teaspoon, freshly squeezed (adds brightness)
- Olive oil: 1 tablespoon (helps with grilling crispness)
- Salt: ½ teaspoon fine sea salt
- Black pepper: Freshly ground, to taste
- Optional: Grated Parmesan cheese (about 2 tablespoons) for extra flavor and crispness
If you want to make this dairy-free, swap butter with a high-quality vegan spread and use olive oil liberally. For a gluten-free option, try a sturdy gluten-free baguette or ciabatta.
Equipment Needed
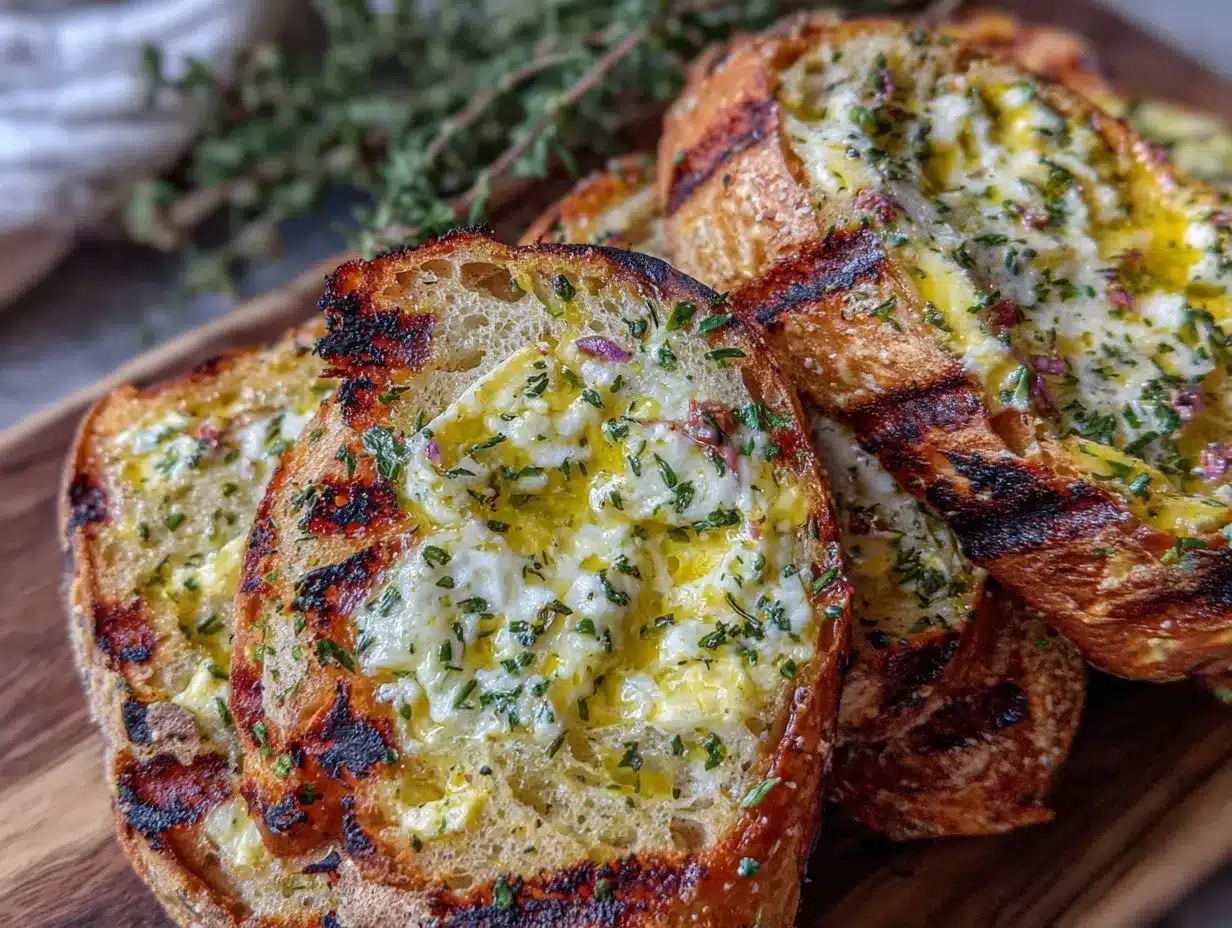
- A grill (gas, charcoal, or electric) – gas grills heat evenly, but charcoal adds smoky flavor
- Grill basket or a heavy-duty grilling tray to prevent bread from falling through grates
- Sharp serrated knife for slicing the bread evenly
- Mixing bowl for herb butter
- Spreader or small spatula to apply the herb butter
- Optional: Tongs for flipping the bread carefully
If you don’t have a grill basket, a piece of aluminum foil with holes poked in it works as a budget-friendly alternative. I’ve found that using tongs when flipping keeps the bread intact and prevents it from slipping off the grill. Also, keep a small brush handy to mop up any drips or excess butter before flipping.
Preparation Method
- Prepare the herb butter: In a mixing bowl, combine softened butter, minced garlic, chopped parsley, thyme, oregano, lemon juice, salt, and pepper. Mix until evenly blended. If using Parmesan, fold it in now. Set aside for flavors to meld while prepping the bread. (About 5 minutes)
- Slice the bread: Cut the baguette into ¾-inch (2 cm) thick slices. You want slices sturdy enough to hold the butter but thin enough to crisp up well on the grill. (Allow 3-5 minutes)
- Brush the bread with olive oil: Lightly brush one side of each slice with olive oil. This helps achieve that beautiful golden crust and prevents sticking. (2 minutes)
- Preheat the grill: Heat your grill to medium-high (about 375°F/190°C). If using charcoal, wait until coals are covered with gray ash. The grill needs to be hot enough to crisp the bread but not burn it instantly. (5-7 minutes)
- Grill the bread: Place the bread slices olive oil side down on the grill. Grill for about 2 minutes or until grill marks appear and the bread starts to crisp. Flip carefully using tongs. (2 minutes)
- Apply herb butter: Quickly spread a generous amount of the herb butter on the grilled side of each bread slice. Close the grill lid and cook for another 2-3 minutes, allowing the butter to melt into the bread and the garlic to toast slightly. (3 minutes)
- Check doneness: The bread should be golden brown and crispy on the edges, soft but flavorful inside. If you want extra crispiness, grill a bit longer but watch closely to avoid burning. (1-2 minutes as needed)
- Serve immediately: Remove from grill and serve warm for the best texture and flavor. (Serve within 5 minutes for optimal enjoyment)
Pro tip: If your grill runs hot, keep a close eye during the final steps to prevent burning. And don’t skip letting the herb butter rest a bit—this step really lets the flavors marry well. Also, I learned the hard way that spreading butter before the first grill side can cause sogginess, so grilling plain first is key.
Cooking Tips & Techniques
There’s a bit of an art to getting crispy grilled garlic bread just right, and I’ve learned a few things along the way. First, don’t skip using day-old bread if you can; it holds up beautifully and crisps without turning to mush. Fresh bread tends to soak up butter and oil too quickly, sometimes ending up soggy.
Another tip? Keep your grill at a consistent medium-high heat. Too hot, and you’ll get burnt garlic and bread before the inside softens. Too low, and you end up with dry, chewy bread. It’s a balance, but after a few tries, you’ll get the hang of your specific grill’s quirks.
I also recommend using a serrated knife when slicing the bread—this prevents squishing and keeps the slices neat. When spreading herb butter, don’t be shy! The garlic flavor blossoms when grilled this way, and the herbs add freshness that lifts the whole taste.
Watch your timing closely once the herb butter is on. The butter melts quickly, and you want the garlic to toast without burning. If you’re multitasking with other BBQ items, set a timer—you don’t want to miss this golden window.
Variations & Adaptations
This crispy grilled garlic bread with herb butter is flexible and can be adapted to suit different tastes and dietary needs. Here are some ideas:
- Cheesy variation: Sprinkle shredded mozzarella or cheddar over the herb butter before grilling for gooey, melty goodness.
- Spicy twist: Add a pinch of red pepper flakes or a dash of smoked paprika to the butter mix for a mild kick.
- Vegan adaptation: Use a plant-based butter substitute and opt for a vegan Parmesan or nutritional yeast to keep it cheesy.
- Seasonal herbs: Swap out herbs for what’s fresh and available—cilantro, basil, or chives work beautifully in spring and summer.
- Different breads: Try sourdough or ciabatta for a different texture; just adjust grilling time if slices are thicker.
I once tried adding a touch of roasted garlic paste instead of raw minced garlic for a sweeter, milder flavor—totally worth experimenting if you like a softer garlic note.
Serving & Storage Suggestions
Serve this grilled garlic bread warm off the grill alongside your favorite BBQ mains like ribs, grilled chicken, or vegetable skewers. It pairs beautifully with fresh salads and tangy coleslaws, and a cold beverage (think lemonade or a light beer) complements the buttery, herby flavors perfectly.
If you have leftovers (rare in my case!), store them in an airtight container in the fridge for up to 2 days. To reheat, pop the bread back on a warm grill or in a toaster oven for a few minutes to bring back that crispy magic. Avoid microwaving, as it tends to make the bread soggy.
Flavors actually deepen a bit after sitting overnight, so if you prepare herb butter ahead of time, it can taste even richer the next day—just grill bread fresh to keep the crunch.
Nutritional Information & Benefits
This crispy grilled garlic bread with herb butter packs about 200-250 calories per serving (2 slices), depending on bread type and butter amount. It’s a source of healthy fats from butter and olive oil, plus antioxidants from fresh herbs and garlic, which can support heart health and immunity.
If you’re watching carbs, consider using a lower-carb bread or swapping traditional butter for a lighter spread. Just keep in mind the magic of this recipe is in that buttery, garlicky richness.
For those with dairy allergies, the vegan butter alternative keeps the dish inclusive without compromising flavor. Just be sure to check ingredient labels for hidden allergens.
Conclusion
This crispy grilled garlic bread with herb butter recipe is a must-have in your BBQ lineup. It’s simple, fast, and tastes like you spent hours perfecting it. I love how it brings people together around the grill, sparking compliments and second helpings every time. Really, it’s the kind of recipe that makes you want to invite neighbors over just to share it.
Feel free to tweak the herbs or add your own spin—that’s how recipes stay alive and special. I’d love to hear how you make it yours, so don’t hesitate to drop a comment or share your version. Let me tell you, once you taste this grilled garlic bread, your BBQ game will never be the same!
FAQs
Can I make the herb butter ahead of time?
Yes! Prepare the herb butter up to 2 days in advance and keep it refrigerated. Bring it to room temperature before spreading on the bread for easier application.
What’s the best bread to use for grilling garlic bread?
A sturdy baguette or Italian bread works best, especially if it’s a day or two old. Sourdough and ciabatta are also great options but adjust grilling times as needed.
How do I prevent the garlic bread from burning on the grill?
Grill on medium-high heat, watch closely, and apply herb butter only after flipping the bread once. Using a grill basket helps control direct contact with flames.
Can I use dried herbs instead of fresh?
Yes, but reduce the amount to about one-third since dried herbs are more concentrated. Fresh herbs provide brighter flavor and aroma.
Is there a way to make this recipe vegan?
Absolutely! Use a plant-based butter substitute and omit Parmesan or swap it for nutritional yeast to keep that cheesy flavor.
By the way, if you enjoy this recipe, you might appreciate the crispy garlic chicken I shared last month—it’s another crowd-pleaser perfect for outdoor meals.
Pin This Recipe!
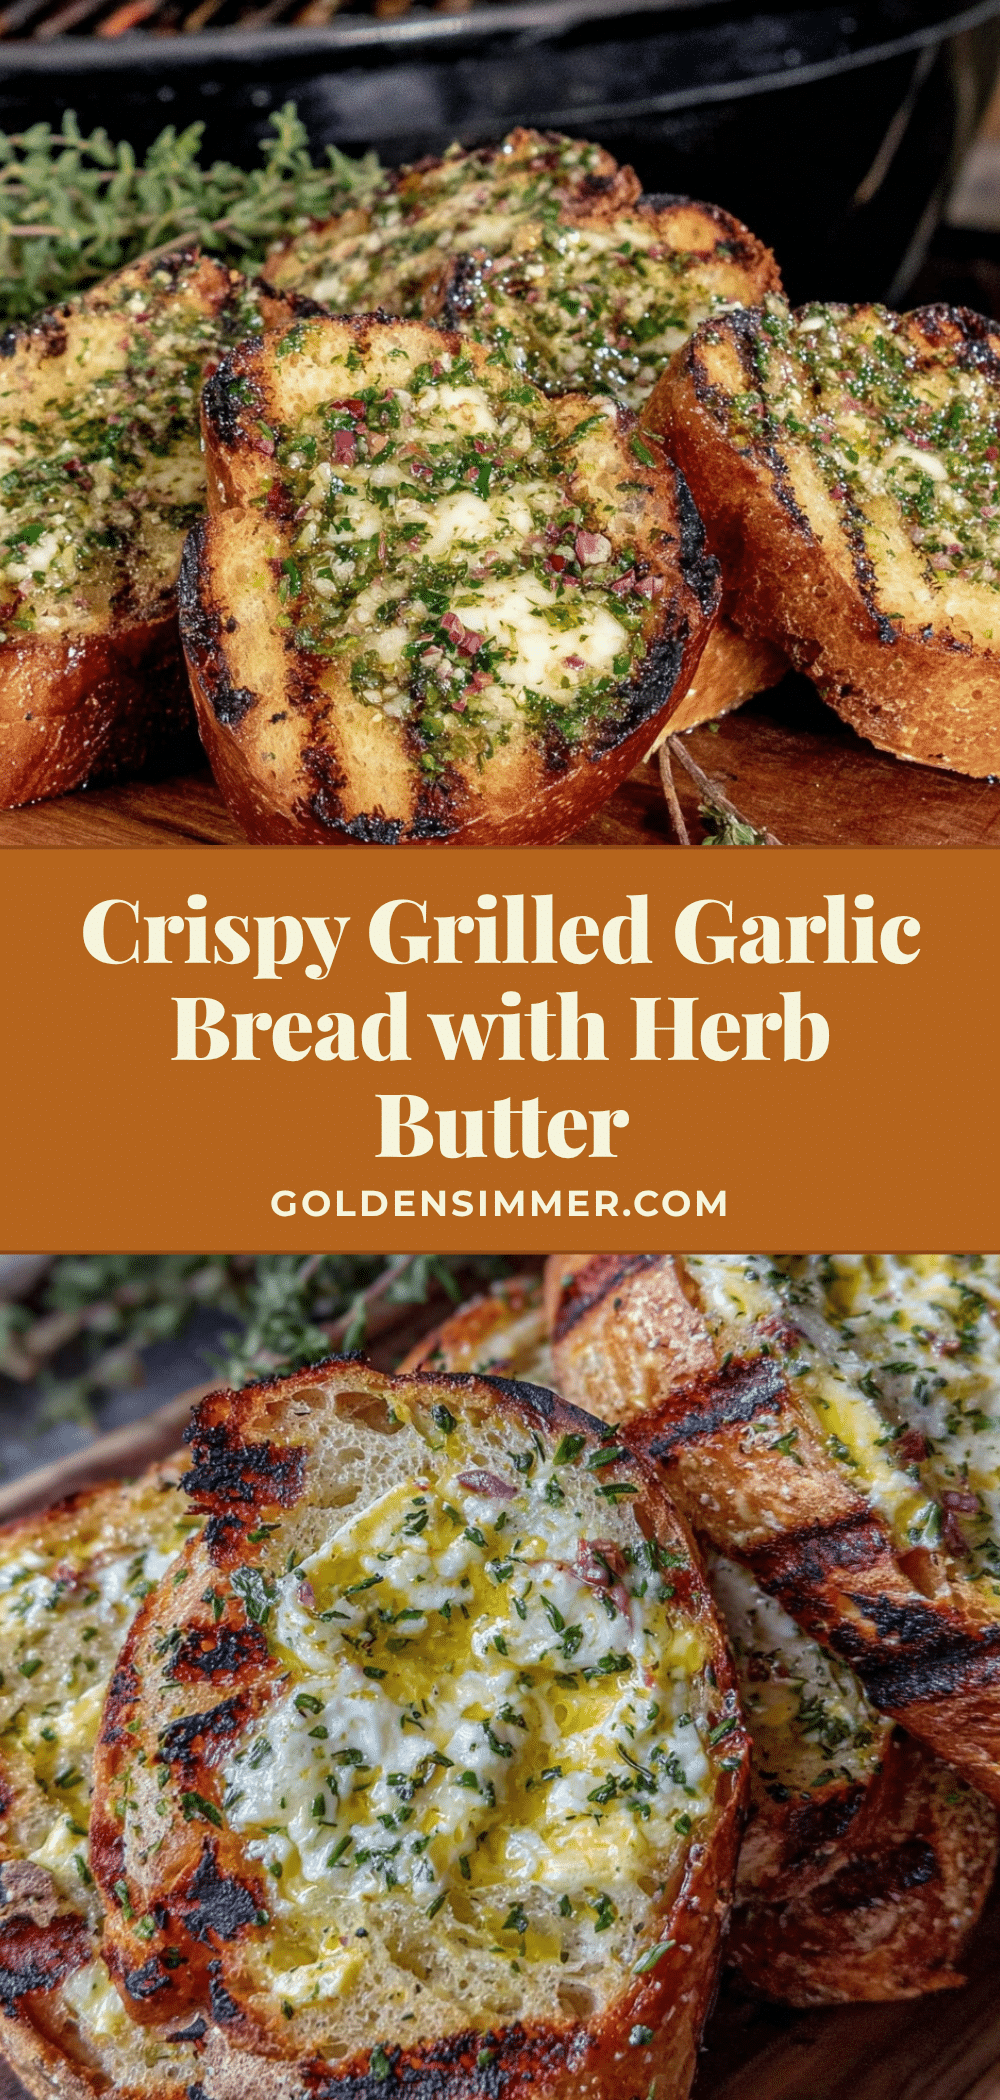
Crispy Grilled Garlic Bread with Herb Butter
A quick and easy BBQ recipe featuring crispy grilled garlic bread slathered in homemade herb butter, perfect for complementing ribs, grilled veggies, and more.
- Prep Time: 10 minutes
- Cook Time: 10 minutes
- Total Time: 20 minutes
- Yield: 6 servings 1x
- Category: Side Dish
- Cuisine: American
Ingredients
- 1 large baguette or Italian bread (day-old works best for sturdiness)
- ½ cup (113g) unsalted butter, softened
- 4 cloves garlic, finely minced or pressed
- 2 tablespoons chopped fresh parsley
- 1 teaspoon chopped fresh thyme
- 1 teaspoon chopped fresh oregano
- 1 teaspoon freshly squeezed lemon juice
- 1 tablespoon olive oil
- ½ teaspoon fine sea salt
- Freshly ground black pepper, to taste
- Optional: 2 tablespoons grated Parmesan cheese
Instructions
- Prepare the herb butter: In a mixing bowl, combine softened butter, minced garlic, chopped parsley, thyme, oregano, lemon juice, salt, and pepper. Mix until evenly blended. If using Parmesan, fold it in now. Set aside for flavors to meld while prepping the bread (about 5 minutes).
- Slice the bread: Cut the baguette into ¾-inch (2 cm) thick slices. You want slices sturdy enough to hold the butter but thin enough to crisp up well on the grill (3-5 minutes).
- Brush the bread with olive oil: Lightly brush one side of each slice with olive oil to help achieve a golden crust and prevent sticking (2 minutes).
- Preheat the grill: Heat your grill to medium-high (about 375°F/190°C). If using charcoal, wait until coals are covered with gray ash (5-7 minutes).
- Grill the bread: Place the bread slices olive oil side down on the grill. Grill for about 2 minutes or until grill marks appear and the bread starts to crisp. Flip carefully using tongs (2 minutes).
- Apply herb butter: Quickly spread a generous amount of the herb butter on the grilled side of each bread slice. Close the grill lid and cook for another 2-3 minutes, allowing the butter to melt and garlic to toast slightly (3 minutes).
- Check doneness: The bread should be golden brown and crispy on the edges, soft but flavorful inside. Grill longer if extra crispiness is desired, watching closely to avoid burning (1-2 minutes as needed).
- Serve immediately: Remove from grill and serve warm for best texture and flavor (serve within 5 minutes).
Notes
Use day-old bread for best sturdiness and crispiness. Preheat grill to medium-high heat to avoid burning. Apply herb butter only after flipping the bread once to prevent sogginess. Use a grill basket or foil with holes to prevent bread from falling through grates. Watch timing closely when herb butter is on to toast garlic without burning. For dairy-free, substitute butter with vegan spread and increase olive oil. For gluten-free, use gluten-free baguette or ciabatta.
Nutrition
- Serving Size: 2 slices
- Calories: 225
- Sugar: 1
- Sodium: 250
- Fat: 15
- Saturated Fat: 9
- Carbohydrates: 20
- Fiber: 1
- Protein: 4
Keywords: grilled garlic bread, herb butter, BBQ side dish, crispy garlic bread, easy garlic bread recipe, grilled bread, summer BBQ recipe



