Love this? Save it for later!
Share the inspiration with your friends
“You’ll never guess what I found scribbled in the margin of an old Japanese cookbook I grabbed at a thrift store last summer,” my friend Mika said, waving a slightly torn page with neat, faded handwriting. It was an authentic savory onigiri recipe, the kind that Japanese school kids tuck into their bentos every day. Honestly, I wasn’t expecting much—it looked simple enough, just rice balls with a filling. But let me tell you, making that recipe brought back a wave of nostalgia and a surprising burst of flavor that stayed with me long after lunch.
That day, I tried making the onigiri just like the recipe instructed, despite forgetting to soak the seaweed properly (typical me). The results? A perfect balance of salty, savory, and subtly sweet that I haven’t found in other rice ball recipes. It was like biting into a little piece of a Japanese school lunch—simple, satisfying, and totally comforting.
Maybe you’ve been there: craving something straightforward yet soulful, a meal that feels like a warm hug but doesn’t take hours to prep. This authentic savory onigiri bento recipe is exactly that. It’s a quick, easy way to bring a taste of Japan’s beloved lunch tradition to your table, whether you’re packing for school, work, or just need a fun kitchen project. Stick with me, and I’ll walk you through everything you need to make these delightful rice balls that have been a lunchtime staple for generations.
Why You’ll Love This Recipe
After testing this authentic savory onigiri recipe multiple times (and yes, sometimes dropping rice all over the counter in the process!), I can honestly say it’s one of those dishes that feels like you’re getting a little piece of Japanese culture with every bite. Here’s why it stands out:
- Quick & Easy: Ready in under 30 minutes, it’s perfect for busy mornings or last-minute lunch prep.
- Simple Ingredients: No exotic components—just staples like Japanese short-grain rice, nori, and savory fillings you can find at most Asian markets or substitute easily.
- Perfect for School Lunches: Compact, portable, and mess-free, onigiri is a classic lunchbox star that kids and adults both love.
- Crowd-Pleaser: Whether you’re serving picky eaters or adventurous foodies, onigiri’s comforting texture and umami-packed fillings rarely disappoint.
- Unbelievably Delicious: The secret is in the seasoning—lightly salted rice and fillings like salmon flakes or pickled plum make all the difference.
What makes this recipe different? It’s all about respecting tradition while making it doable for home cooks. For example, I blend a dash of soy sauce into the rice for a subtle savory kick, and I’ve found that using a rice paddle with a wet cloth helps shape the onigiri without sticking—a trick I picked up during a Tokyo trip. This isn’t just any rice ball recipe; it’s the best version I’ve made that brings an authentic school lunch vibe right to your kitchen.
What Ingredients You Will Need
This recipe uses simple, wholesome ingredients to deliver bold flavor and satisfying texture without the fuss. Most are pantry staples, and substitutions are easy if you’re missing something.
- For the Rice:
- 2 cups Japanese short-grain rice (sushi rice) – rinsed thoroughly
- 2 ¼ cups water
- 1 tsp salt (for seasoning the rice)
- 1 tbsp soy sauce (optional, adds subtle umami)
- For the Filling:
- 1 cup cooked salmon flakes (skinless, boneless; can use canned salmon)
- 2 tbsp Japanese mayonnaise (like Kewpie) (adds creaminess)
- 2 tbsp pickled plum (umeboshi), finely chopped (optional, for tartness)
- 1 tbsp furikake seasoning (optional, for extra flavor)
- For Assembly:
- 5 sheets of nori (seaweed), cut into strips or squares
- Salt for sprinkling on hands (to prevent sticking)
Ingredient tips: I recommend using Nishiki or Tamanishiki rice for authentic texture. If you can’t find Japanese short-grain rice, a good-quality medium-grain rice works in a pinch. For fillings, canned salmon is convenient, but fresh grilled salmon flakes give a richer flavor. And if you want a vegetarian version, mashed seasoned shiitake mushrooms work beautifully.
Equipment Needed
- Rice cooker or heavy-bottomed pot: A rice cooker simplifies cooking perfectly sticky rice, but a pot with a tight-fitting lid works well too.
- Rice paddle or wooden spoon: Essential for mixing and shaping rice without smashing the grains.
- Plastic wrap or onigiri mold: You can shape rice balls by hand, but molds make the process faster and neater.
- Sharp knife: For cutting nori and chopping fillings finely.
If you’re on a budget, a simple bowl and your hands work just fine—just keep them lightly salted to keep rice from sticking. I’ve owned a few onigiri molds over the years, and honestly, the plastic ones from Japanese stores are sturdy and easy to clean, but you don’t absolutely need one if you don’t want to buy extra gear.
Preparation Method
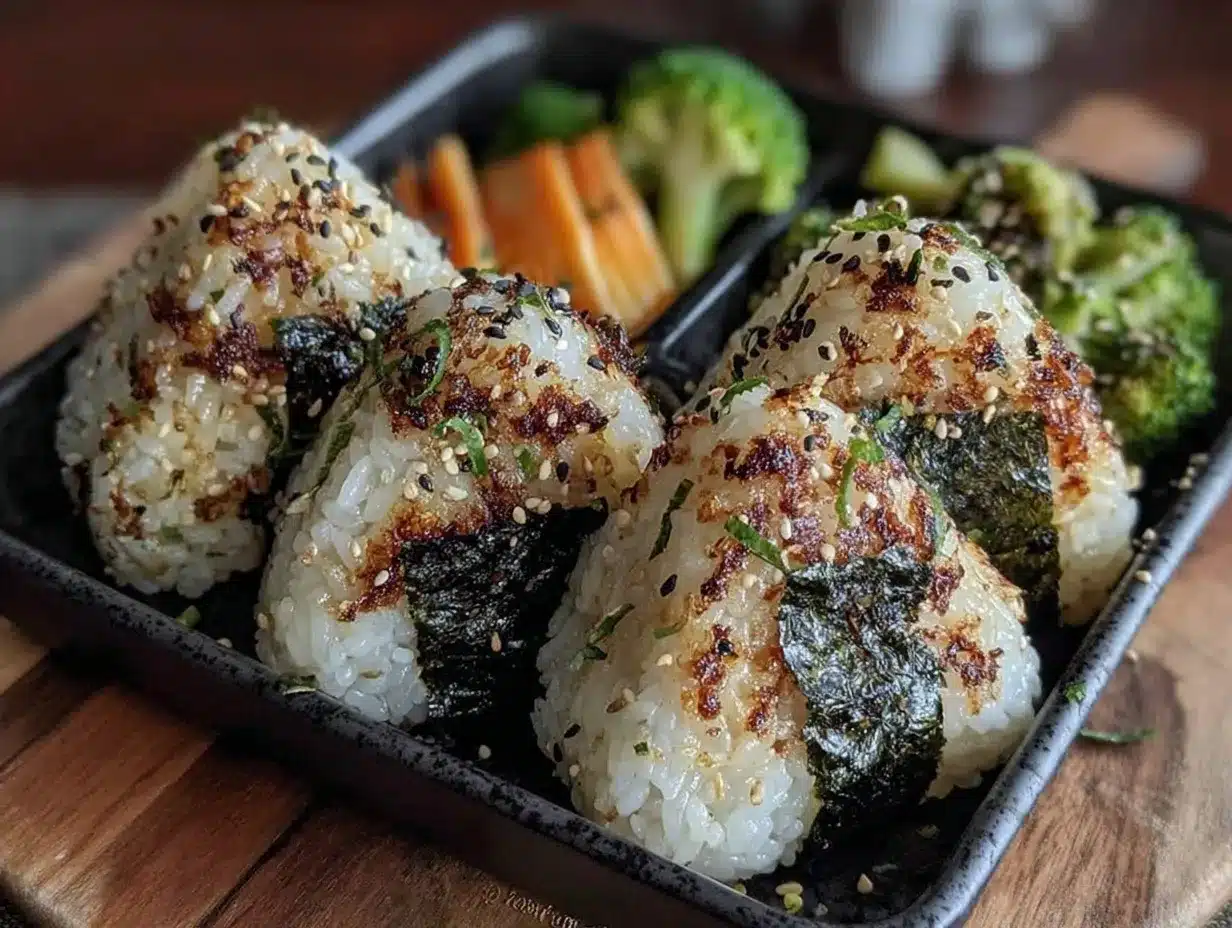
- Rinse the Rice: Place 2 cups of Japanese short-grain rice in a bowl and rinse under cold water, swirling gently with your hand. Drain and repeat 3–4 times until the water runs clear. This removes excess starch for better texture. (5 minutes)
- Cook the Rice: Transfer the rinsed rice to your rice cooker or pot, add 2 ¼ cups of water, and let it soak for 30 minutes if possible (this step helps the rice absorb water evenly). Cook according to your rice cooker’s instructions or bring the pot to a boil, then cover and simmer on low for 15 minutes. Let it rest covered for another 10 minutes off heat. (45–55 minutes total)
- Prepare the Filling: In a small bowl, mix cooked salmon flakes with Japanese mayonnaise until evenly combined. If using umeboshi, stir that in as well. (5 minutes)
- Season the Rice: Transfer cooked rice to a large bowl or hangiri (wooden tub). Sprinkle salt and soy sauce over the rice and gently fold with your paddle or spatula to mix and cool slightly. The rice should be warm but not hot to the touch. (5 minutes)
- Shape the Onigiri: Wet your hands with water and rub a pinch of salt between your palms. Take about ½ cup (90g) of rice and flatten it in your hand. Place about 1 tablespoon of the salmon filling in the center, then carefully fold rice over and press gently into a triangle or oval shape. (10 minutes)
- Wrap with Nori: Wrap each rice ball partially with a strip or square of nori. The seaweed adds flavor and helps keep the onigiri intact. (5 minutes)
- Pack into Bento: Arrange your onigiri in your bento box alongside complementary sides—maybe some tamagoyaki or steamed veggies. (5 minutes)
Note: If the rice sticks too much, wet your hands again and keep a small bowl of water nearby. The trick is warm rice and just enough pressure—not squashing it! Also, if you’re shaping by mold, fill the mold halfway with rice, add filling, then cover with more rice before pressing firmly.
Cooking Tips & Techniques
Let me share some lessons I picked up after a few messy attempts. First, always rinse your rice until the water is clear—that’s key for that perfect texture. I once skipped that step, and the rice turned sticky and gummy, which just wasn’t right for onigiri.
When shaping, don’t over-handle the rice. Keep your hands wet and lightly salted to avoid sticking, and gently press rather than squeeze. I remember the first time I tried shaping onigiri, my hands were dry, and I ended up with a rice blob stuck everywhere but in the right shape.
For fillings, less is more. Too much filling can break the rice ball apart. Stick to about a tablespoon per onigiri. And if you want to speed things up, prepare fillings in advance and keep them chilled.
Timing-wise, shape your onigiri soon after the rice cools to warm. If the rice cools too much, it becomes hard to shape and less sticky. Multitasking by prepping fillings while the rice cooks makes the process smoother.
Lastly, wrapping nori just before eating keeps it crisp. If packing for later, keep the seaweed separate and wrap onigiri right before serving to avoid sogginess.
Variations & Adaptations
Onigiri is wonderfully versatile, so here are some ideas to personalize your savory onigiri bento:
- Vegetarian: Swap salmon for a mixture of sautéed shiitake mushrooms and soy sauce or use takuan (pickled daikon) for a tangy crunch.
- Spicy Kick: Mix in a bit of spicy mayo or chili oil into the filling for heat lovers.
- Seasonal Twist: Use fresh grilled eel (unagi) or cooked shrimp in summer months for a special treat.
- Gluten-Free: Ensure soy sauce is gluten-free or replace with tamari. Rice and nori are naturally gluten-free.
- Onigiri Salad Bowl: Crumble shaped onigiri over a bed of greens with pickled veggies for a deconstructed version.
Personally, I once made onigiri filled with leftover teriyaki chicken, and it was a total hit at a picnic. The savory-sweet balance was fantastic, and it gave a nice change from the classic flavors.
Serving & Storage Suggestions
Serve your savory onigiri warm or at room temperature for the best texture. If packing for lunch, keep nori separate and add it just before eating to maintain crispness. Pair onigiri with miso soup, steamed edamame, or pickled vegetables for a balanced meal.
For storage, wrap onigiri tightly in plastic wrap and keep refrigerated up to 24 hours. When ready to eat, you can enjoy them cold or reheat gently in the microwave for 20-30 seconds. Avoid reheating too long, or the rice becomes tough.
Onigiri flavors often deepen after a few hours, which is why they’re perfect for school lunches made the night before. Just pack and go, and you’ll find the taste even more comforting by midday.
Nutritional Information & Benefits
Each onigiri contains roughly 180-220 calories, depending on filling and size. Japanese short-grain rice provides a good source of complex carbs and energy, while fillings like salmon add protein and healthy omega-3 fats. Nori is rich in vitamins and minerals, including iodine and vitamin C.
This recipe is naturally low in fat (unless you add mayo) and gluten-free, making it friendly for many diets. It’s a wholesome, balanced option that offers lasting energy—ideal for school or work days when you need steady fuel.
From a wellness perspective, I appreciate how onigiri combines simple, whole ingredients without unnecessary additives—reminding me that good food doesn’t have to be complicated to be nourishing.
Conclusion
So there you have it—an authentic savory onigiri bento recipe that’s straightforward, delicious, and steeped in tradition. Whether you’re new to Japanese cuisine or looking to bring a bit of nostalgic comfort to your lunchbox, this recipe is a keeper. I love how it’s adaptable and forgiving—perfect for home cooks who want a taste of authentic Japanese school lunches without fuss.
Give it a try, tweak the fillings to your liking, and see how easily onigiri can become a lunchbox staple in your home. I can’t wait to hear how you make it your own, so please leave a comment or share your favorite twists!
Here’s to many happy, savory lunches ahead—happy cooking!
FAQs
What type of rice is best for onigiri?
Japanese short-grain rice (sometimes called sushi rice) is best because it’s sticky enough to hold shape but still tender. Medium-grain rice can work if you can’t find short-grain.
Can I make onigiri without a mold?
Absolutely! You can shape onigiri by hand with wet, salted palms. Molds just make the process quicker and the shapes more uniform.
How long can onigiri be stored?
Refrigerated and wrapped tightly, onigiri last about 24 hours. For best texture, eat within the day and add nori just before serving.
What are some popular onigiri fillings?
Common fillings include salted salmon, pickled plum (umeboshi), tuna mayo, kombu seaweed, and grilled eel. You can get creative with leftovers too!
Is onigiri gluten-free?
Yes, rice and nori are naturally gluten-free. Just check your soy sauce or seasonings to make sure they don’t contain gluten if you need to avoid it.
Pin This Recipe!
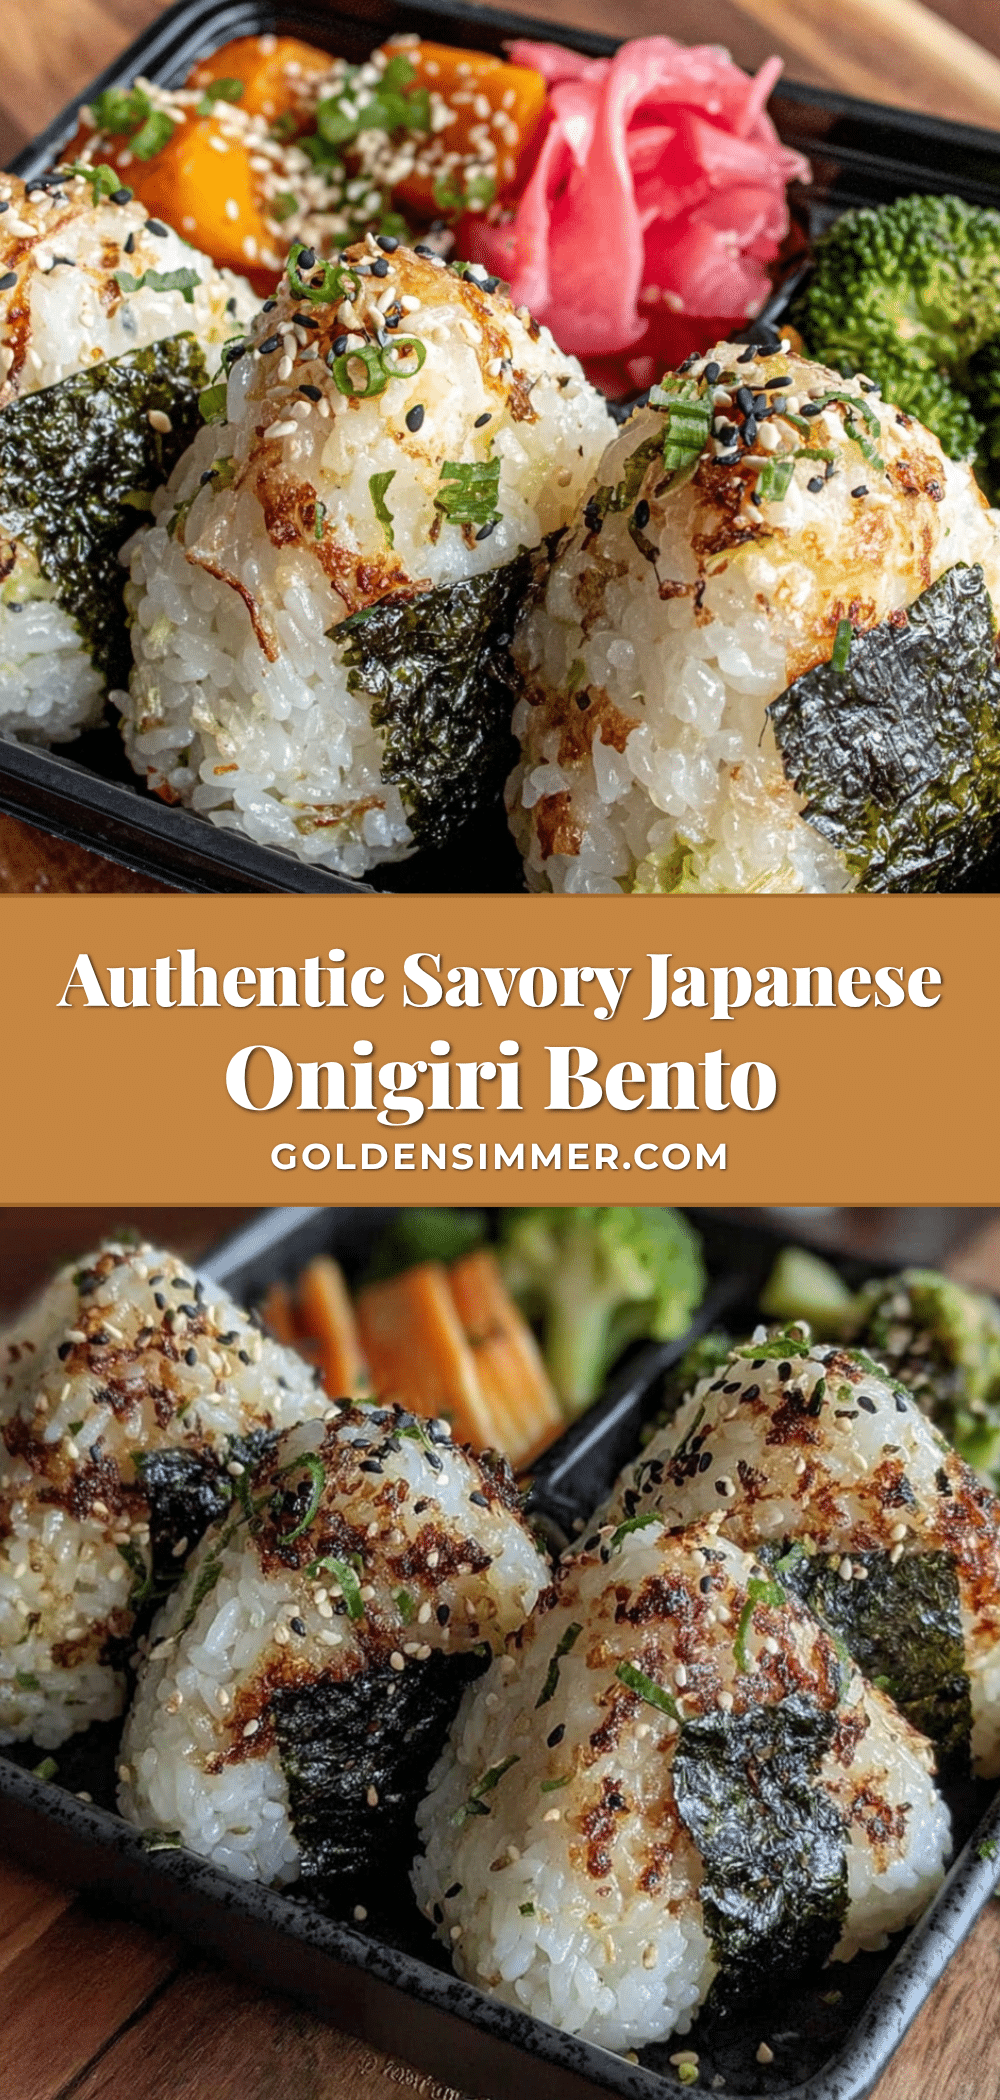
Authentic Savory Onigiri Bento Recipe
A quick and easy traditional Japanese rice ball recipe perfect for school lunches, featuring savory fillings like salmon flakes and pickled plum wrapped in nori.
- Prep Time: 15 minutes
- Cook Time: 45 minutes
- Total Time: 1 hour
- Yield: 5 servings 1x
- Category: Main Course
- Cuisine: Japanese
Ingredients
- 2 cups Japanese short-grain rice (sushi rice), rinsed thoroughly
- 2 1/4 cups water
- 1 tsp salt (for seasoning the rice)
- 1 tbsp soy sauce (optional, adds subtle umami)
- 1 cup cooked salmon flakes (skinless, boneless; can use canned salmon)
- 2 tbsp Japanese mayonnaise (like Kewpie)
- 2 tbsp pickled plum (umeboshi), finely chopped (optional)
- 1 tbsp furikake seasoning (optional)
- 5 sheets of nori (seaweed), cut into strips or squares
- Salt for sprinkling on hands (to prevent sticking)
Instructions
- Rinse the rice under cold water 3–4 times until water runs clear (about 5 minutes).
- Cook the rice with 2 1/4 cups water in a rice cooker or pot; soak rice for 30 minutes if possible. Cook for 15 minutes on low heat, then let rest covered for 10 minutes (total 45–55 minutes).
- Mix cooked salmon flakes with Japanese mayonnaise and umeboshi if using (5 minutes).
- Transfer cooked rice to a large bowl, sprinkle salt and soy sauce, and gently fold to mix and cool slightly (5 minutes).
- Wet hands with water and rub salt between palms. Take about 1/2 cup (90g) rice, flatten, add 1 tablespoon filling, fold rice over and shape into triangle or oval (10 minutes).
- Wrap each rice ball partially with a strip or square of nori (5 minutes).
- Arrange onigiri in bento box with complementary sides (5 minutes).
Notes
Keep hands wet and salted to prevent rice from sticking. Shape onigiri while rice is warm for best texture. Wrap nori just before eating to keep it crisp. Store wrapped tightly in refrigerator up to 24 hours. Reheat gently if desired.
Nutrition
- Serving Size: 1 onigiri (rice ball
- Calories: 200
- Sugar: 1
- Sodium: 400
- Fat: 6
- Saturated Fat: 1
- Carbohydrates: 30
- Fiber: 1
- Protein: 8
Keywords: onigiri, Japanese rice balls, bento, school lunch, savory onigiri, salmon onigiri, Japanese cuisine, easy Japanese recipe



