Love this? Save it for later!
Share the inspiration with your friends
My buddy Marcus watched me stress over my third batch of chili last October. I was trying to make individual portions for everyone, and honestly, it was a disaster. Ground beef was everywhere, the cheese sauce had seized up, and I was about ten minutes away from ordering pizza for ten people. He just shook his head, walked to his truck, and came back with three bags of tortilla chips and a slow cooker full of seasoned beef. “Nacho bar,” he said. “Stop making everything complicated.”
That afternoon changed how I feed crowds forever. The power went out in the third quarter, and nobody even cared because we were all huddled around this ridiculous spread of chips, toppings, and melted cheese. Someone asked me last week why I always bring the nacho bar to tailgates, and I realized it’s not just about the food. It’s about watching people build their perfect plate, hearing them argue over who gets the last of the jalapeños, and seeing that moment when someone takes their first bite and just closes their eyes for a second. Maybe you’ve been there, standing over a table full of toppings, trying to decide between the sour cream and the guacamole. Let me tell you, this is the kind of recipe that turns strangers into friends by the end of the first quarter.
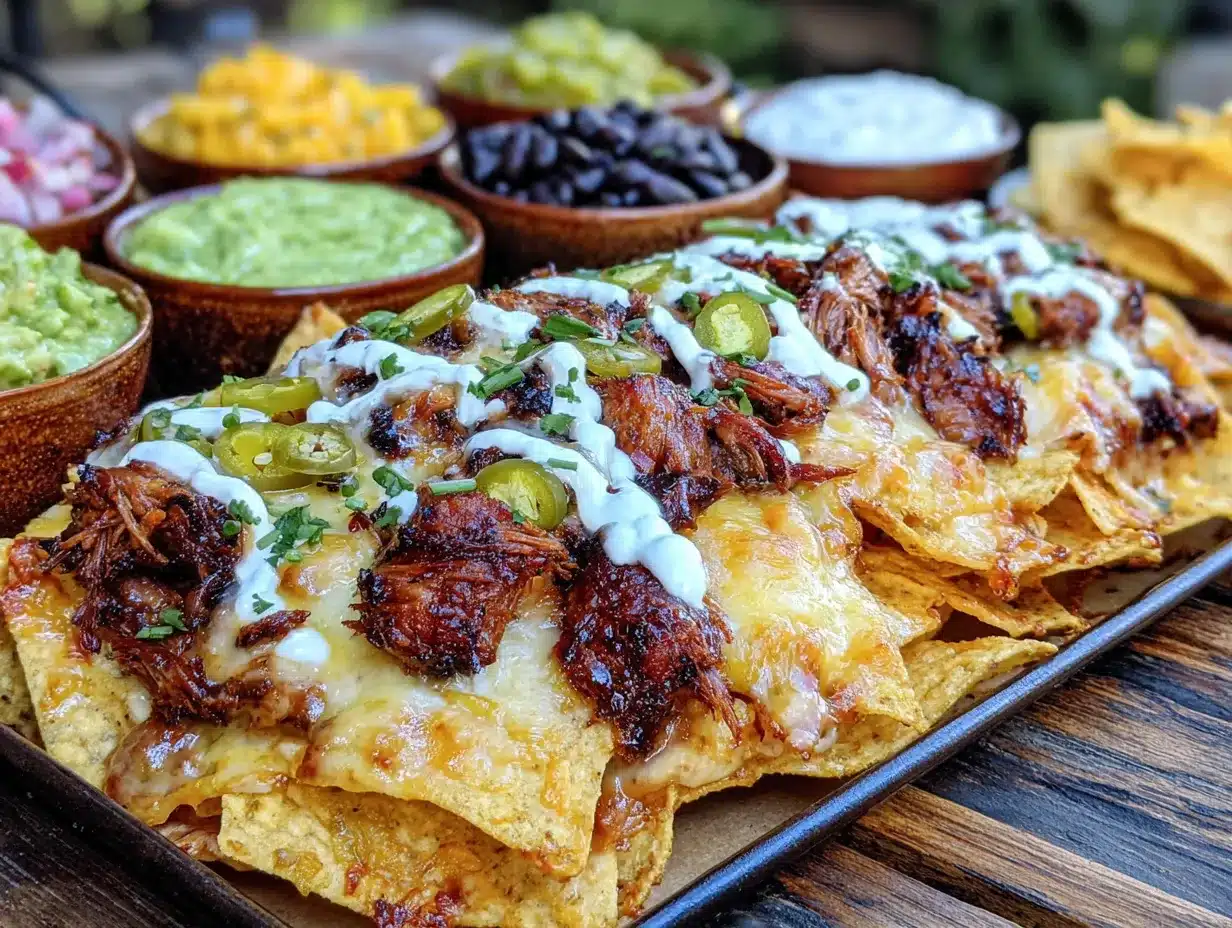
This loaded tailgate nacho bar isn’t just another snack spread. It’s a system designed for feeding a crowd without losing your mind. The components come together fast, everything holds up well on a buffet table, and the customization options mean nobody leaves hungry. I’ve refined this over three seasons of tailgating, two Super Bowl parties, and one very memorable election night gathering. It stays with you because it works, every single time.
Why You’ll Love This Recipe
Look, I’ve tested more nacho bar setups than I care to admit. Some were soggy disasters. Others ran out of key ingredients before halftime. This version is different because it’s built on real experience, not just wishful thinking. Here’s what makes it stand out:
- Feeds a Crowd Without the Stress: Everything can be prepped ahead, and the actual assembly takes about 20 minutes. You’re not stuck in the kitchen while everyone else is watching the game.
- Simple Ingredients, Maximum Flavor: No fancy grocery store runs. Ground beef, basic cheese, canned beans, and fresh toppings. You probably have most of this in your kitchen right now.
- Perfect for Game Day or Any Gathering: Whether it’s a tailgate, a birthday party, or just a Tuesday night when you want something fun, this nacho bar delivers.
- Crowd-Pleaser Guaranteed: I’ve watched picky eaters, vegetarians, and cheese snobs all go back for seconds. The setup lets everyone build exactly what they want.
- Next-Level Comfort Food: The combination of crispy chips, seasoned meat, creamy cheese sauce, and fresh toppings is honestly unfair. It’s the kind of meal that makes you forget about the score.
This isn’t just another nacho recipe. The secret is in the layering technique and the two-cheese sauce that stays smooth even when it sits out. I learned that trick from a chef friend who runs a food truck, and it’s been a game-changer. Plus, the seasoned beef has a slight smoky kick that sets it apart from standard taco meat. It’s comfort food reimagined for a crowd—faster, smarter, and with the same soul-soothing satisfaction that makes you close your eyes after the first bite.
What Ingredients You Will Need
This recipe relies on simple, accessible ingredients that come together to create something truly satisfying. Most of these are pantry staples, and I’ve included notes on where you can flex based on what you have available.
For the Seasoned Beef
- 2 pounds ground beef (80/20) – The fat content keeps the meat juicy. I prefer 80/20 for flavor, but 85/15 works too. (Drain excess fat if using higher fat content)
- 1 large yellow onion, diced – Adds sweetness and depth. White onion works in a pinch.
- 4 cloves garlic, minced – Fresh is best, but jarred minced garlic saves time.
- 2 tablespoons chili powder – I use McCormick for consistent heat. Adjust based on your tolerance.
- 1 tablespoon ground cumin – Essential for that warm, earthy flavor.
- 1 teaspoon smoked paprika – This is the secret to the smoky kick. Regular paprika works, but smoked is better.
- 1 teaspoon salt – Adjust to taste.
- ½ teaspoon black pepper
- 1 can (15 ounces) black beans, drained and rinsed – Adds fiber and texture. Pinto beans are a great substitute.
- ½ cup beef broth – Keeps the meat from drying out. Chicken broth or water works too.
For the Two-Cheese Sauce
- 4 tablespoons unsalted butter – Butter gives the sauce a richer flavor than oil.
- ¼ cup all-purpose flour – Thickens the sauce. Use gluten-free flour blend if needed.
- 2 cups whole milk – Whole milk creates the creamiest sauce. 2% works, but avoid skim.
- 2 cups sharp cheddar cheese, shredded – Buy a block and shred it yourself. Pre-shredded cheese has anti-caking agents that ruin the texture.
- 1 cup Monterey Jack cheese, shredded – Adds creaminess without overpowering. Pepper Jack adds heat if you want it.
- ½ teaspoon salt
- ¼ teaspoon cayenne pepper (optional) – For a little heat.
For the Nacho Bar Toppings
- 2 large bags (13-16 ounces each) restaurant-style tortilla chips – Go with sturdy chips. Thin ones break under the weight. I recommend Tostitos Scoops for maximum topping capture.
- 2 cups shredded lettuce – Iceberg or romaine, finely chopped.
- 2 medium tomatoes, diced – Roma tomatoes hold up best. Remove seeds if you want less liquid.
- 1 cup sour cream – Full-fat or Greek yogurt works.
- 1 cup guacamole – Store-bought is fine, but homemade is better. (I’ll include my quick version in the tips)
- 1 cup pickled jalapeños – Drain them well to avoid soggy chips.
- ½ cup sliced black olives – Optional, but some people love them.
- ¼ cup fresh cilantro, chopped – For garnish and freshness.
- 2 limes, cut into wedges – A squeeze of lime brightens everything.
Equipment Needed
You don’t need fancy equipment for this, but having the right tools makes the process smoother. Here’s what I use:
- Large skillet or Dutch oven (12-inch) – For browning the beef. A Dutch oven holds heat better and prevents splattering.
- Medium saucepan (2-quart) – For the cheese sauce. Non-stick is helpful here.
- Whisk – Essential for a smooth cheese sauce without lumps.
- Wooden spoon or spatula – For breaking up the ground beef.
- Cutting board and sharp knife – For prepping all the toppings.
- Serving platter or sheet pan – A large rimmed baking sheet works perfectly for the nacho bar setup.
- Small bowls or ramekins – For holding individual toppings. I use a mix of sizes for visual appeal.
- Slow cooker or chafing dish (optional) – Keeps the beef and cheese sauce warm during the game. Honestly, I just reheat as needed, but a slow cooker is nice for longer events.
If you don’t have a whisk, a fork works in a pinch, but you’ll need to stir constantly. I’ve burned more cheese sauces than I want to admit because I got distracted. A good whisk saves you from that heartbreak.
Preparation Method
Let’s break this down into manageable steps. The key is to prep everything before you start cooking. Trust me, having all your ingredients ready makes the process feel effortless.
Step 1: Prep Your Toppings (15 minutes)
Start by getting all your cold toppings ready. Dice the tomatoes and remove the seeds if they’re really juicy. Shred the lettuce into thin strips. Slice the jalapeños if you bought whole ones. Cut the limes into wedges. Put each topping into its own small bowl. This step takes about 15 minutes, and it saves you from scrambling later. I usually do this while the beef is browning.
Step 2: Brown the Beef (10 minutes)
Heat your large skillet over medium-high heat. Add the ground beef and break it apart with your wooden spoon. Let it cook without moving it too much for the first 3 minutes—you want a good sear. Once it’s browned, about 6-8 minutes total, drain off the excess fat. Leave about 2 tablespoons in the pan for flavor. You’ll know it’s ready when the meat is no longer pink and you can hear a steady sizzle.
Step 3: Build the Beef Flavor (10 minutes)
Reduce the heat to medium. Add the diced onion to the beef and cook for 3 minutes until it softens. Stir in the minced garlic and cook for another 30 seconds until fragrant. Now add the chili powder, cumin, smoked paprika, salt, and pepper. Stir everything together and let it cook for 1 minute to toast the spices. This step is where the magic happens—the smell will be incredible. Pour in the beef broth and add the drained black beans. Let it simmer for 5 minutes until the liquid reduces slightly. The mixture should be moist but not soupy. Taste it and adjust the salt if needed.
Step 4: Make the Cheese Sauce (15 minutes)
While the beef simmers, start your cheese sauce. Melt the butter in a medium saucepan over medium heat. Once it’s bubbling, whisk in the flour. Keep whisking for about 1 minute until the mixture turns a light golden color. This is called a roux, and it’s the foundation of a smooth sauce. Slowly pour in the milk while whisking constantly. Don’t dump it all at once—add it in a steady stream. Keep whisking until the mixture thickens, about 3-4 minutes. It should coat the back of a spoon.
Reduce the heat to low. Add the shredded cheddar and Monterey Jack cheese one handful at a time, whisking until each addition melts completely. This gradual approach prevents the sauce from breaking. Stir in the salt and cayenne if using. The sauce should be smooth and glossy. If it seems too thick, add a splash of milk. If it’s too thin, let it simmer for another minute. Keep it warm over very low heat, stirring occasionally.
Step 5: Assemble the Nacho Bar (5 minutes)
Now comes the fun part. Spread a layer of tortilla chips on your serving platter or sheet pan. Don’t pile them too high—you want each chip to get some love. Spoon the seasoned beef over the chips, spreading it evenly. Drizzle the cheese sauce over everything. I like to do about half the sauce now and save the rest for people to add more. Sprinkle the shredded lettuce, diced tomatoes, and any other cold toppings over the top. Serve the remaining cheese sauce, sour cream, guacamole, and jalapeños on the side in small bowls. Garnish with fresh cilantro and lime wedges.
Cooking Tips & Techniques
I’ve made every mistake you can imagine with nacho bars. Here’s what I’ve learned so you don’t have to repeat my failures.
Don’t over-season the beef. I once went heavy on the chili powder and ended up with meat that was almost bitter. Start with the measurements listed, then taste and adjust. You can always add more, but you can’t take it out.
Shred your own cheese. This is non-negotiable for the sauce. Pre-shredded cheese is coated with cellulose and starches that prevent clumping, but they also prevent smooth melting. I learned this the hard way when my sauce turned into a grainy mess before a big game. Spend the extra 3 minutes shredding a block of cheese. Your sauce will thank you.
Keep the chips sturdy. Thin, delicate chips will break under the weight of the toppings. Go for restaurant-style or scoop-shaped chips. I’ve tested this extensively, and trust me, the sturdier the chip, the happier your guests.
Layer strategically. Don’t just dump everything on top of the chips. Put the beef and cheese sauce on first so they soak into the chips slightly. Then add the cold toppings. This prevents the lettuce and tomatoes from getting warm and wilted.
Use a slow cooker for longer events. If you’re tailgating or hosting a party that lasts more than an hour, transfer the seasoned beef and cheese sauce to separate slow cookers set on warm. This keeps everything hot and ready for seconds. I’ve seen people fight over the last of the cheese sauce, and a slow cooker prevents that tragedy.
Prep everything the night before. You can brown the beef, make the cheese sauce, and chop all the toppings the day before. Store the beef and cheese sauce in the fridge separately. Reheat the beef in a skillet or microwave, and gently reheat the cheese sauce on the stovetop with a splash of milk to bring it back to life. This makes game day assembly a 10-minute job.
Variations & Adaptations
One of the best things about a nacho bar is how customizable it is. Here are some variations I’ve tried and loved.
Vegetarian Version
Skip the ground beef and use two cans of black beans or pinto beans instead. Mash half the beans with a fork to create a heartier texture. Season them the same way you would the beef. Add sautéed bell peppers and onions for extra substance. I’ve served this to a mixed crowd, and the meat-eaters didn’t even miss the beef.
Spicy Kick Version
If you like heat, add 1-2 diced jalapeños to the beef while it simmers. Use Pepper Jack cheese instead of Monterey Jack in the sauce. Top with fresh sliced serrano peppers and a drizzle of hot sauce. I once added a habanero to the beef, and it was almost too spicy—start slow and taste as you go.
Loaded Baked Potato Nacho Fusion
This is my personal favorite twist. Swap the tortilla chips for crispy potato wedges or tater tots. Use the same seasoned beef and cheese sauce, but add bacon bits, chopped green onions, and a dollop of sour cream. It’s ridiculous and amazing. I tried this for a winter tailgate, and it was gone in 20 minutes.
Chicken Nacho Bar
Substitute the ground beef with shredded rotisserie chicken. Season it with the same spices but add a can of diced green chiles for extra flavor. This version is lighter but still satisfying. It’s great for summer gatherings when you want something less heavy.
Serving & Storage Suggestions
Serve the nacho bar immediately after assembly while the cheese sauce is warm and the chips are still crunchy. I recommend setting it up on a large table with all the toppings arranged in a line so people can build their plates easily. Provide small plates or disposable trays for each person.
For beverages, this pairs beautifully with cold beer, margaritas, or a simple lime soda. If you’re tailgating, bring a cooler full of drinks and let people help themselves. The salty, savory flavors of the nachos balance perfectly with something cold and refreshing.
Storage: Leftovers are tricky with nachos because the chips get soggy. If you have leftover components, store them separately. The seasoned beef keeps in the fridge for up to 4 days. The cheese sauce lasts 3-4 days in an airtight container. Reheat the beef in a skillet with a splash of water, and reheat the cheese sauce gently on the stovetop or in the microwave with a little milk to restore the creamy texture. The cold toppings like lettuce and tomatoes are best used within a day or two.
Freezer instructions: The seasoned beef freezes well for up to 3 months. Let it cool completely, then transfer to a freezer-safe bag or container. Thaw overnight in the fridge and reheat as directed. The cheese sauce doesn’t freeze well—it tends to separate when thawed. I’ve tried it, and it’s not worth the hassle.
Flavors actually improve after a day in the fridge. The beef gets even more seasoned and delicious. I often make double the beef just to have leftovers for tacos or nachos later in the week.
Nutritional Information & Benefits
This is a hearty, crowd-pleasing meal, and while it’s not exactly diet food, it does have some redeeming qualities. Here’s a rough estimate per serving (about 1 cup of chips with toppings):
- Calories: Approximately 450-550 per serving
- Protein: 25-30 grams (from beef, beans, and cheese)
- Carbohydrates: 35-40 grams
- Fat: 25-30 grams
- Fiber: 6-8 grams (thanks to the beans and veggies)
The black beans add a solid dose of fiber and plant-based protein, which helps keep everyone full longer. The tomatoes provide vitamin C and lycopene, an antioxidant. The cilantro and lime add freshness without extra calories. If you’re watching your sodium, use low-sodium beef broth and go easy on the added salt in the cheese sauce.
For those with dietary restrictions, this recipe can be adapted. Use gluten-free flour in the cheese sauce for a gluten-free version. Swap the sour cream with a dairy-free alternative. The vegetarian version listed above works for plant-based eaters. Just be mindful of cross-contamination if you’re cooking for someone with severe allergies.
Honestly, I don’t stress about the nutritional numbers when I’m serving this at a tailgate. It’s about enjoying the moment, the company, and the food. Balance it out with a salad the next day and call it even.
Conclusion
This loaded tailgate nacho bar has become my go-to for any gathering where I want to feed people well without spending the whole event in the kitchen. It’s forgiving, customizable, and genuinely delicious. The combination of seasoned beef, creamy cheese sauce, and fresh toppings hits every note you want from comfort food.
I love this recipe because it brings people together. There’s something about standing around a table full of toppings, building your perfect plate, and sharing bites with friends that feels right. Whether you’re watching the big game, hosting a party, or just want a fun dinner on a Friday night, this nacho bar delivers.
I’d love to hear how yours turns out. Did you add any unique toppings? Did someone discover a new favorite combination? Drop a comment below and share your nacho bar creations. And if you’re looking for more crowd-pleasing recipes, check out my slow cooker chili or my ultimate guacamole recipe for your next gathering. Until next time, happy cooking, and may your chips always stay crunchy.
Frequently Asked Questions
Can I make the cheese sauce ahead of time?
Yes, you can make the cheese sauce up to 2 days in advance. Store it in an airtight container in the fridge. When you’re ready to serve, reheat it gently on the stovetop over low heat, whisking in a splash of milk to restore the creamy texture. Avoid microwaving it on high, as it can cause the sauce to separate.
What if I don’t have a whisk for the cheese sauce?
A fork or a wooden spoon can work in a pinch, but you’ll need to stir constantly to prevent lumps. The whisk is really the best tool here because it breaks up any flour clumps immediately. If you’re in a bind, use a fork and stir vigorously. Just be prepared for a bit more arm work.
How do I keep the chips from getting soggy?
The key is layering strategically. Put the warm beef and cheese sauce on the chips first, then add the cold toppings right before serving. Don’t let the assembled nachos sit out for more than 15-20 minutes. If you’re serving over a longer period, keep the components separate and let people build their own plates.
Can I use ground turkey instead of beef?
Absolutely. Ground turkey works well, but it’s leaner, so you’ll need to add a little extra oil when browning. I recommend adding 1 tablespoon of olive oil to the pan before cooking the turkey. The seasoning will still be delicious, and it’s a lighter option that many people appreciate.
How many people does this recipe serve?
This recipe is designed for a crowd and serves about 10-12 people as a main dish, or 15-20 as an appetizer. If you’re serving it as part of a larger spread with other dishes, it will stretch further. I’ve found that people tend to go back for seconds, so it’s better to have extra beef and cheese sauce on hand.
Pin This Recipe!
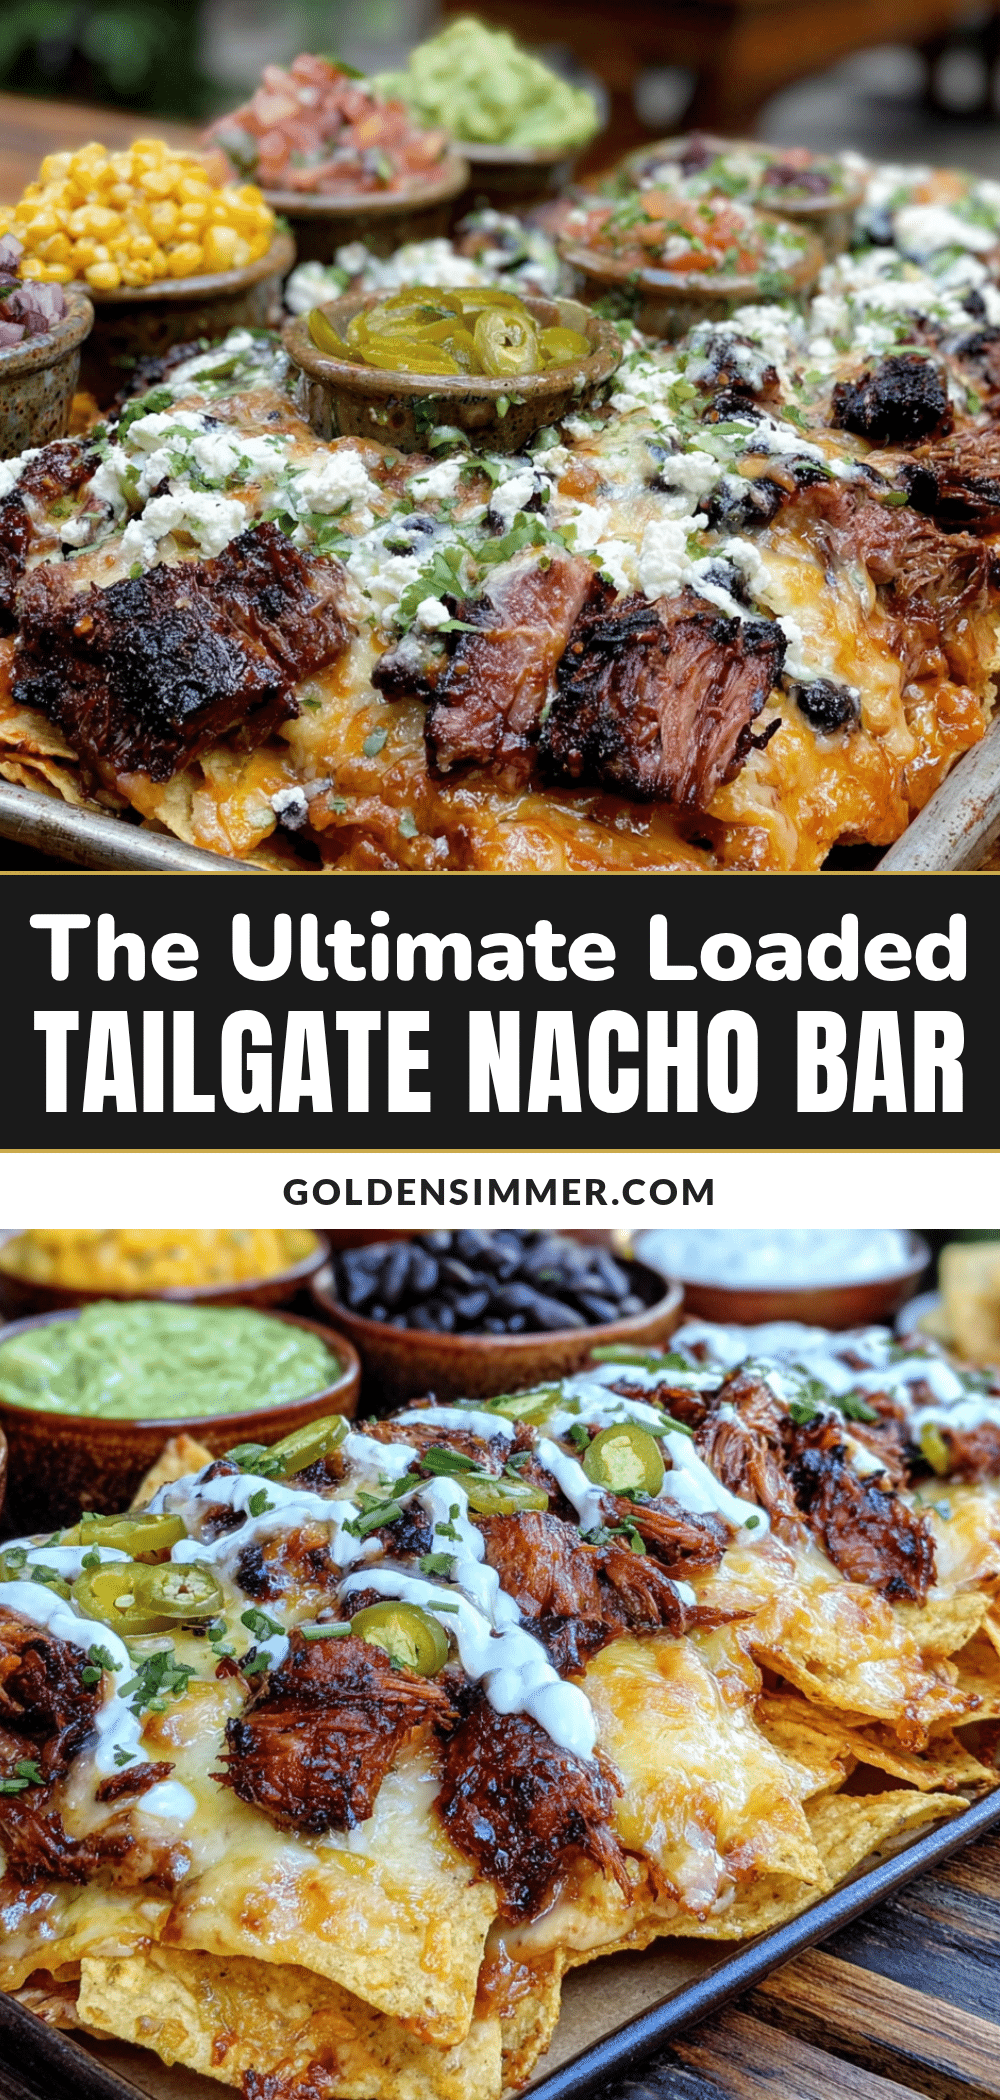
Ultimate Loaded Tailgate Nacho Bar for a Crowd
A customizable nacho bar featuring seasoned beef, creamy two-cheese sauce, and fresh toppings, perfect for feeding a crowd at tailgates, parties, or any gathering. This system is designed to minimize stress and maximize flavor, with make-ahead components and sturdy chips that hold up to hearty toppings.
- Prep Time: 15 minutes
- Cook Time: 30 minutes
- Total Time: 45 minutes
- Yield: 10-12 servings 1x
- Category: Main Course
- Cuisine: Mexican-American
Ingredients
- 2 pounds ground beef (80/20)
- 1 large yellow onion, diced
- 4 cloves garlic, minced
- 2 tablespoons chili powder
- 1 tablespoon ground cumin
- 1 teaspoon smoked paprika
- 1 teaspoon salt
- ½ teaspoon black pepper
- 1 can (15 ounces) black beans, drained and rinsed
- ½ cup beef broth
- 4 tablespoons unsalted butter
- ¼ cup all-purpose flour
- 2 cups whole milk
- 2 cups sharp cheddar cheese, shredded
- 1 cup Monterey Jack cheese, shredded
- ½ teaspoon salt
- ¼ teaspoon cayenne pepper (optional)
- 2 large bags (13–16 ounces each) restaurant-style tortilla chips
- 2 cups shredded lettuce
- 2 medium tomatoes, diced
- 1 cup sour cream
- 1 cup guacamole
- 1 cup pickled jalapeños
- ½ cup sliced black olives (optional)
- ¼ cup fresh cilantro, chopped
- 2 limes, cut into wedges
Instructions
- Prep your toppings: Dice tomatoes, shred lettuce, slice jalapeños, cut limes into wedges. Place each topping in its own small bowl.
- Brown the beef: Heat a large skillet over medium-high heat. Add ground beef and break it apart. Cook for 6-8 minutes until browned. Drain excess fat, leaving about 2 tablespoons in the pan.
- Build the beef flavor: Reduce heat to medium. Add diced onion and cook for 3 minutes until softened. Stir in minced garlic and cook for 30 seconds. Add chili powder, cumin, smoked paprika, salt, and pepper. Cook for 1 minute to toast spices. Pour in beef broth and add black beans. Simmer for 5 minutes until liquid reduces slightly.
- Make the cheese sauce: Melt butter in a medium saucepan over medium heat. Whisk in flour and cook for 1 minute until light golden. Slowly pour in milk while whisking constantly. Cook for 3-4 minutes until thickened. Reduce heat to low. Add shredded cheddar and Monterey Jack cheese one handful at a time, whisking until melted. Stir in salt and cayenne if using. Keep warm over low heat.
- Assemble the nacho bar: Spread a layer of tortilla chips on a serving platter or sheet pan. Spoon seasoned beef over chips. Drizzle half the cheese sauce over everything. Sprinkle lettuce, tomatoes, and other cold toppings on top. Serve remaining cheese sauce, sour cream, guacamole, and jalapeños on the side. Garnish with cilantro and lime wedges.
Notes
Shred your own cheese for the sauce to avoid anti-caking agents that cause graininess. Use sturdy chips like Tostitos Scoops to prevent breakage. Layer strategically: warm beef and cheese sauce first, then cold toppings. For longer events, keep beef and cheese sauce warm in separate slow cookers. Prep components the night before for quick assembly.
Nutrition
- Serving Size: 1 cup of chips with
- Calories: 450550
- Sugar: 57
- Sodium: 8001000
- Fat: 2530
- Saturated Fat: 1215
- Carbohydrates: 3540
- Fiber: 68
- Protein: 2530
Keywords: nachos, tailgate, game day, loaded nachos, nacho bar, crowd-pleaser, party food, ground beef, cheese sauce



