Love this? Save it for later!
Share the inspiration with your friends
The neighborhood pumpkin pie contest was in six hours and I’d completely forgotten. Everyone else would be bringing their grandmother’s heirloom recipes—flaky, buttery crusts that took three days to perfect. I had a can of pumpkin puree, a box of gingersnaps, and about fifteen minutes before I needed to leave.
I stood there staring at my pantry like it had personally betrayed me. No oven preheated. No flour sifted. No butter chilled. Just me and this impossible situation I’d created by being, let’s be honest, overly optimistic about my time management skills. My neighbor Karen had been bragging about her family’s secret spice blend for weeks. I was about to show up with a no-bake pumpkin pie that I was literally making up as I went along.
And you know what happened? That reckless, thrown-together no-bake pumpkin pie with gingersnap crust won first place. I’m not kidding. Karen actually asked me for the recipe, which felt like winning an Olympic medal in suburban cooking competitions. The funny thing is, I’ve been making it ever since—every Thanksgiving, every fall gathering, every time someone needs a dessert that looks impressive but takes almost zero effort.
Maybe you’ve been there, staring at a recipe that requires hours of work you just don’t have. This no-bake pumpkin pie is for those moments. It’s the dessert that makes you look like you planned ahead when you absolutely did not.
Why You’ll Love This Recipe
Let me tell you why this no-bake pumpkin pie has become my most-requested dessert. I’ve tested this recipe at least a dozen times, tweaking the spice ratios and chilling times until it was absolutely perfect. The result is something I’m genuinely proud to share.
- 15 Minutes of Work : That’s it. Fifteen minutes from opening the pantry to sliding it into the fridge. No oven required, no complicated techniques, no waiting for butter to soften.
- Simple Pantry Ingredients : You probably have most of these things already. Pumpkin puree, cream cheese, whipped topping, and gingersnaps. No special trips to fancy grocery stores.
- Perfect for Fall Gatherings : This pie screams autumn without screaming for attention. It’s great for Thanksgiving, Friendsgiving, potlucks, or Tuesday night cravings.
- Kid-Approved, Adult-Coveted : My nephew calls it “pumpkin cheesecake” and my dad asks for it by name every November. It bridges the gap between generations effortlessly.
- Incredibly Creamy Texture : The secret is letting it chill overnight. The filling sets into this silky, mousse-like perfection that melts on your tongue.
What makes this no-bake pumpkin pie different from every other version out there? It’s the crust. Using crushed gingersnaps instead of graham crackers adds this warm, spicy crunch that complements the creamy pumpkin filling perfectly. I tried graham crackers once and honestly, it wasn’t the same. The ginger and molasses in the cookies just work.
This isn’t just another pumpkin pie recipe. It’s the one that makes you close your eyes after the first bite. It’s comfort food reimagined—faster, easier, but with the same soul-soothing satisfaction that makes fall desserts so special.
What Ingredients You Will Need
This recipe uses simple, wholesome ingredients to deliver bold flavor and satisfying texture without any fuss. Most of these are pantry staples, especially if you keep basic baking supplies around.
For the Gingersnap Crust
- 2 cups crushed gingersnap cookies (about 40 cookies, crushed finely—I recommend Nabisco or Anna’s brand for consistent texture)
- 6 tablespoons unsalted butter, melted (salted butter works too, just reduce added salt elsewhere)
- 2 tablespoons granulated sugar (optional, if your gingersnaps aren’t very sweet)
- Pinch of salt (skip if using salted butter)
For the No-Bake Pumpkin Filling
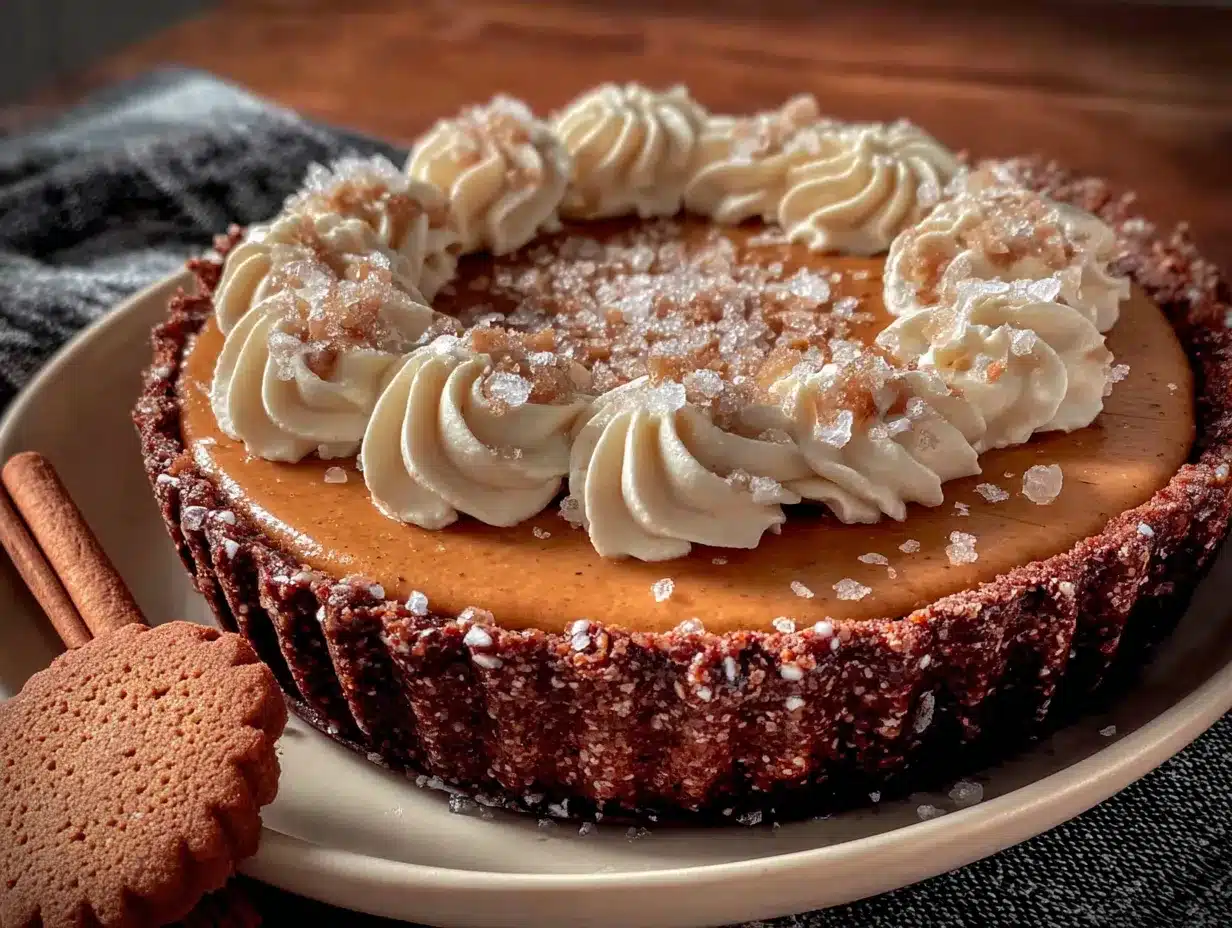
- 1 can (15 ounces) pumpkin puree (not pumpkin pie filling—make sure it’s 100% pure pumpkin, Libby’s is my go-to brand)
- 8 ounces cream cheese, softened to room temperature (full-fat gives the best texture, but reduced-fat works in a pinch)
- 1 cup powdered sugar (confectioners’ sugar, sifted if it’s lumpy)
- 1 teaspoon vanilla extract (pure vanilla extract makes a difference here)
- 1 ½ teaspoons pumpkin pie spice (or make your own: ½ tsp cinnamon, ¼ tsp nutmeg, ¼ tsp ginger, ⅛ tsp cloves)
- ½ teaspoon ground cinnamon (extra warmth and depth)
- 1 ½ cups whipped topping (Cool Whip or homemade stabilized whipped cream—thawed if frozen)
For Garnish (Optional but Recommended)
- Additional whipped topping for serving
- Crushed gingersnaps for sprinkling on top
- Ground cinnamon or nutmeg for dusting
If you want a dairy-free version, use dairy-free cream cheese and coconut whipped cream. The texture will be slightly different but still delicious. For a gluten-free option, make sure your gingersnaps are certified gluten-free—there are some good brands available now.
Equipment Needed
You don’t need a fancy kitchen to make this no-bake pumpkin pie. Here’s what you’ll need:
- 9-inch pie dish (glass or ceramic works best—metal can sometimes affect the crust texture)
- Food processor or rolling pin for crushing cookies (I use my food processor because it’s faster, but a ziplock bag and rolling pin works perfectly)
- Medium mixing bowl for the crust
- Large mixing bowl for the filling
- Hand mixer or stand mixer (a whisk works but your arm will get tired)
- Rubber spatula for scraping bowls clean
- Measuring cups and spoons
- Plastic wrap for covering the pie while it chills
I’ve made this crust with both a food processor and a rolling pin, and honestly, both work fine. The food processor gives you more consistent crumbs, but there’s something satisfying about the manual method. Plus, it’s a great arm workout!
Preparation Method
This no-bake pumpkin pie comes together in just a few simple steps. Take your time with each one and you’ll be rewarded with a perfect dessert.
Step 1: Make the Gingersnap Crust
First, crush your gingersnap cookies into fine crumbs. If using a food processor, pulse until they resemble coarse sand. If using a rolling pin, place cookies in a sealed ziplock bag and crush them firmly—don’t be shy about it. You want about 2 cups of crumbs.
Pour the crumbs into a medium bowl and add the melted butter, sugar if using, and salt. Stir with a fork until every crumb is coated and the mixture looks like wet sand. It should hold together when you squeeze a handful.
Press this mixture firmly into your 9-inch pie dish. Use the bottom of a measuring cup or glass to really pack it down—this prevents crumbling later. Start with the sides, then do the bottom. Make sure the edges are even and the thickness is consistent. Pop this in the refrigerator while you make the filling, at least 15 minutes.
Step 2: Prepare the Cream Cheese Base
In a large mixing bowl, beat the softened cream cheese with a hand mixer until it’s smooth and fluffy—about 2 minutes. Scrape down the sides of the bowl with your rubber spatula. Add the powdered sugar and vanilla extract, then beat again until everything is combined and creamy.
Here’s a tip I learned the hard way: make sure your cream cheese is truly room temperature. If it’s cold, you’ll get lumps that won’t go away no matter how long you beat it. Leave it on the counter for at least 30 minutes before starting.
Step 3: Add the Pumpkin and Spices
Add the pumpkin puree, pumpkin pie spice, and cinnamon to the cream cheese mixture. Beat on low speed until incorporated, then increase to medium and beat for another minute until the mixture is completely smooth and uniform in color. It should look like a beautiful orange sunset.
Taste the filling at this point—this is your chance to adjust spices if needed. I sometimes add an extra pinch of cinnamon if I’m feeling bold.
Step 4: Fold in the Whipped Topping
This is the step that makes this pie light and airy instead of dense. Add the whipped topping to the pumpkin mixture and fold it in gently with your rubber spatula. Use a cutting motion through the center, then scrape around the edges. Repeat until no white streaks remain.
Don’t overmix here! You want to keep as much air in the mixture as possible. Overmixing will deflate the filling and make it dense. Stop as soon as it looks uniform.
Step 5: Assemble and Chill
Remove the crust from the refrigerator. Pour the filling into the chilled crust and spread it evenly with your spatula. Smooth the top as much as possible—it’ll look prettier when sliced.
Cover the pie loosely with plastic wrap and refrigerate for at least 6 hours, but overnight is best. The filling needs time to set properly. I know it’s tempting to rush this, but trust me, patience pays off here.
Step 6: Garnish and Serve
Before serving, add a border of whipped topping around the edge of the pie. Sprinkle crushed gingersnaps over the top and dust with cinnamon or nutmeg for a beautiful finish. Slice with a sharp knife, wiping it clean between cuts for neat slices.
Cooking Tips & Techniques
After making this no-bake pumpkin pie more times than I can count, I’ve picked up a few tricks that make a real difference.
Don’t skip chilling the crust. I once tried to save time by pressing the crust and adding the filling immediately. The crust soaked up moisture from the filling and turned soggy. Chilling it first creates a barrier that keeps everything crisp.
Use full-fat cream cheese. I know, I know, we all want to be healthy. But low-fat cream cheese has more water content, which can make your filling runny. Save the low-fat stuff for spreading on bagels.
Let it chill overnight. Six hours is the minimum, but twelve hours is magic. The flavors meld together, the texture becomes silky, and the crust sets perfectly. I always make this pie the day before I need it.
Room temperature ingredients matter. Cold cream cheese equals lumpy filling. Cold whipped topping doesn’t fold in evenly. Take everything out of the fridge 30 minutes before you start. Your future self will thank you.
Press the crust firmly. This is not the time to be gentle. Really pack those crumbs down. Loose crust crumbles when you try to serve it, and nobody wants a crustless pie slice.
Variations & Adaptations
This no-bake pumpkin pie is wonderfully adaptable. Here are some variations I’ve tried and loved:
Pumpkin Cheesecake Version: Add an extra 4 ounces of cream cheese and reduce the whipped topping to 1 cup. The filling becomes denser and more cheesecake-like. My sister-in-law actually prefers this version now.
Maple Pecan Twist: Add 2 tablespoons of maple syrup to the filling (reduce the powdered sugar slightly to balance sweetness) and top with toasted pecans instead of gingersnaps. The maple and pumpkin combo is absolutely divine.
Chocolate Pumpkin: Add ¼ cup of melted dark chocolate to the cream cheese mixture before adding the pumpkin. It sounds weird but trust me—chocolate and pumpkin are a match made in heaven. Use chocolate wafer cookies for the crust instead of gingersnaps.
Vegan Adaptation: Use dairy-free cream cheese and coconut whipped cream. The texture will be slightly different—a bit lighter—but still incredibly delicious. I’ve served this to non-vegans who had no idea.
Mini Pie Version: Press the crust into a muffin tin lined with paper liners and fill with the pumpkin mixture. These mini no-bake pumpkin pies are perfect for parties or portion control. Reduce chilling time to 3 hours.
Serving & Storage Suggestions
This no-bake pumpkin pie is best served cold, straight from the refrigerator. The filling should be firm but creamy, like a mousse. Let it sit at room temperature for about 5 minutes before slicing for cleaner cuts.
For presentation, I love adding a dollop of whipped cream on each slice and a light dusting of cinnamon. A few crushed gingersnaps on top add texture and visual appeal. It pairs beautifully with a hot cup of coffee or spiced apple cider.
Storage: Cover the pie tightly with plastic wrap or aluminum foil and store in the refrigerator for up to 5 days. The flavors actually deepen after the first day, so leftovers might taste even better than the original.
Freezing: This pie freezes beautifully! Wrap the entire pie (or individual slices) tightly in plastic wrap, then aluminum foil, and freeze for up to 3 months. Thaw overnight in the refrigerator before serving. Do not thaw at room temperature—the texture gets weepy.
Reheating: Don’t. This is a no-bake pie meant to be served cold. If you want a warm pumpkin dessert, make pumpkin bread or baked pumpkin pie instead.
Nutritional Information & Benefits
Here’s the approximate nutritional breakdown for one slice of this no-bake pumpkin pie (based on 8 servings):
- Calories: 320
- Fat: 18g
- Carbohydrates: 36g
- Protein: 4g
- Fiber: 2g
- Sugar: 24g
Pumpkin is packed with vitamin A, which supports eye health and immune function. It’s also rich in fiber and antioxidants. The cream cheese adds calcium and protein, while the gingersnaps provide a little iron from the molasses.
This recipe is vegetarian and can be made gluten-free or vegan with simple substitutions. It contains dairy and gluten in its standard form, so keep that in mind for guests with dietary restrictions.
Honestly, I don’t make this pie for the health benefits—I make it because it’s delicious. But it’s nice to know there’s some nutritional value hidden in all that creamy goodness!
Conclusion
This no-bake pumpkin pie with gingersnap crust has saved me more times than I can count. It’s the dessert that looks like you spent hours on it when you really just threw things together and let the fridge do the work. And honestly, isn’t that the best kind of recipe?
I love this pie because it reminds me that cooking doesn’t have to be complicated to be good. Sometimes the simplest things—a few pantry ingredients, a little patience, and a willingness to try something new—create the most memorable dishes. This pie has become a fall tradition in my house, and I hope it becomes one in yours too.
I’d love to hear how yours turns out! Did you try any variations? Did your family love it as much as mine does? Drop a comment below and let me know. And if you’re looking for another easy fall dessert, try my easy pumpkin cheesecake bars or these homemade gingersnap cookies for a double dose of autumn flavor.
Happy no-baking, friends! Your oven-free future awaits.
Frequently Asked Questions
Can I use pumpkin pie filling instead of pumpkin puree?
No, please don’t! Pumpkin pie filling already has sugar and spices added, which will throw off the sweetness and spice balance in this recipe. Stick with 100% pure pumpkin puree for the best results.
How long does this no-bake pumpkin pie need to chill?
At least 6 hours, but overnight is best. The filling needs time to set properly so it slices cleanly. I always make this the day before I plan to serve it.
Can I make this pie gluten-free?
Absolutely! Just use certified gluten-free gingersnap cookies for the crust. Everything else in the recipe is naturally gluten-free. Check your spice blends too, as some brands add flour as an anti-caking agent.
Why is my filling runny?
Several possible reasons: your cream cheese wasn’t fully softened, you used low-fat cream cheese (which has more water), or you didn’t chill the pie long enough. Make sure everything is room temperature and give it enough time in the fridge.
Can I freeze this no-bake pumpkin pie?
Yes! Wrap it tightly in plastic wrap and aluminum foil, then freeze for up to 3 months. Thaw overnight in the refrigerator before serving. Individual slices freeze beautifully too—perfect for single-serving desserts later.
Pin This Recipe!
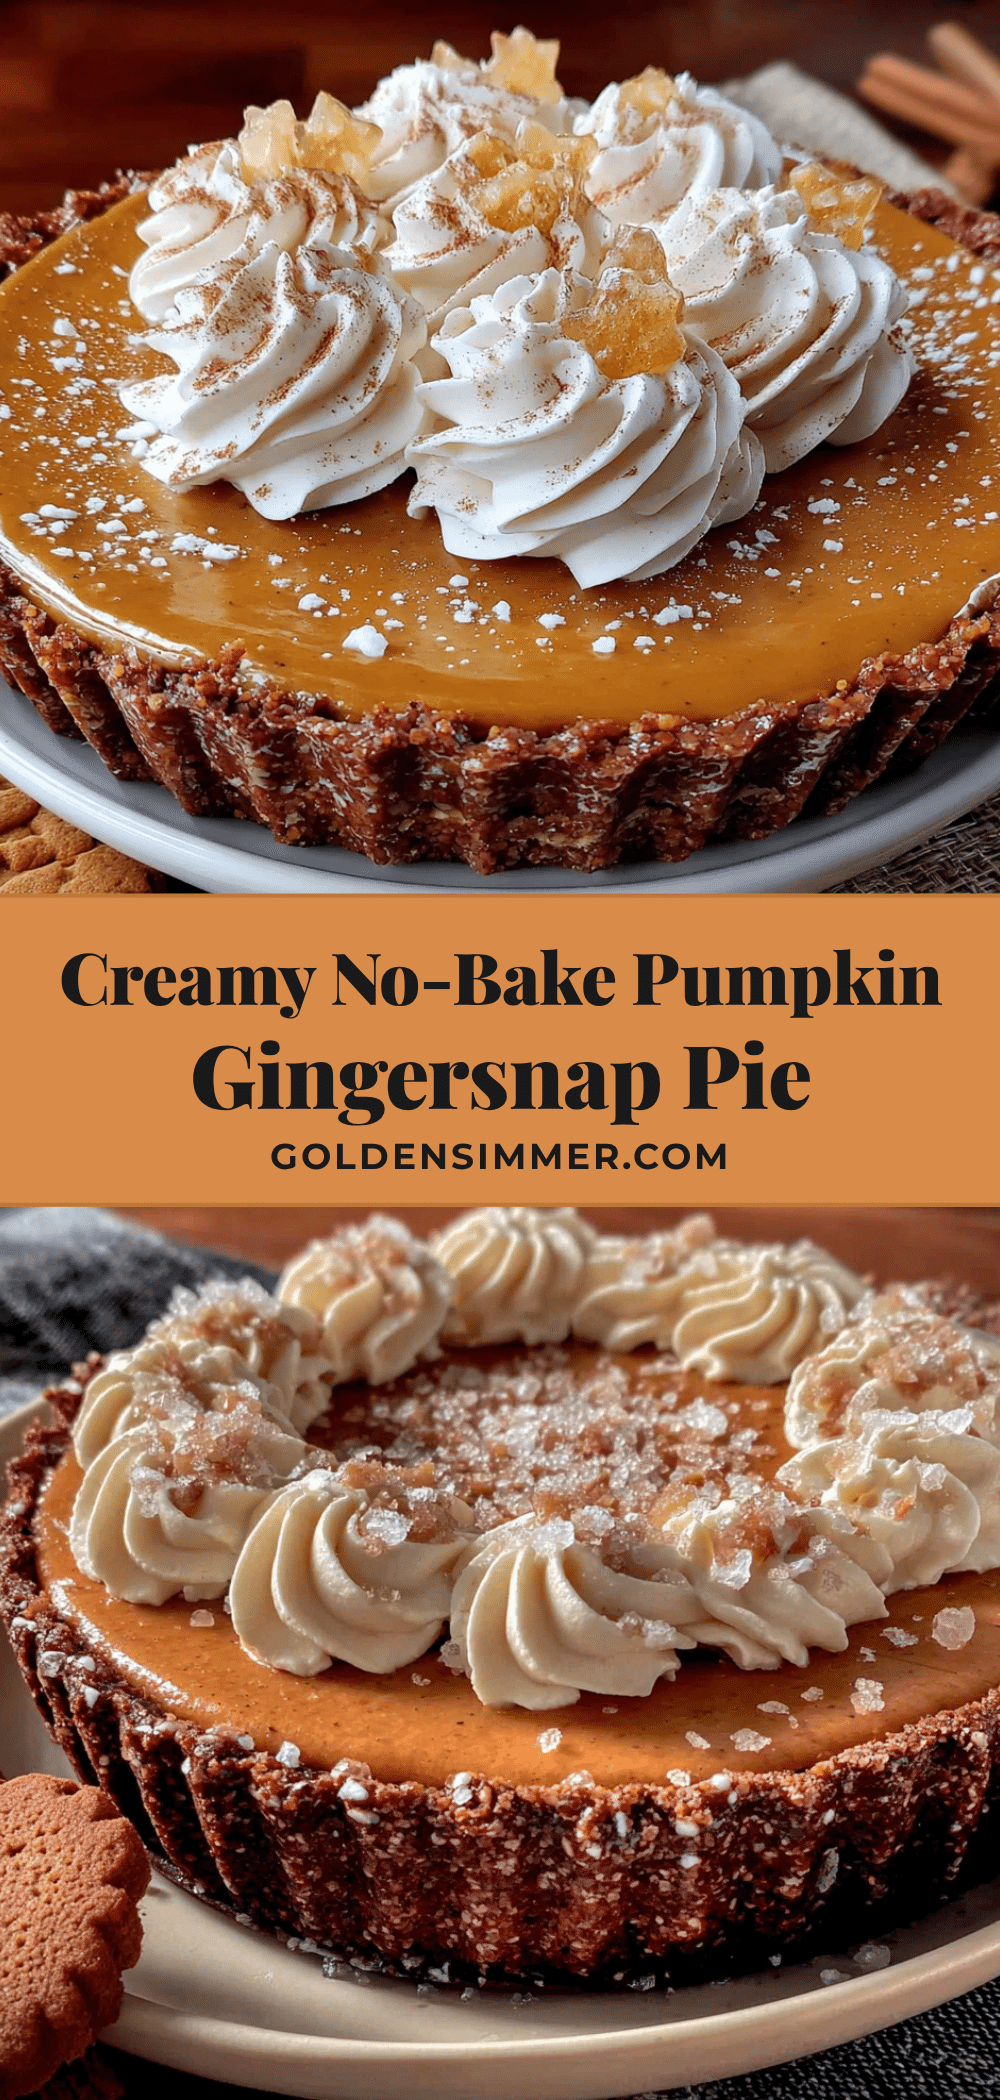
Easy No-Bake Pumpkin Pie with Gingersnap Crust: Best 15-Minute Dessert
A quick and easy no-bake pumpkin pie with a crunchy gingersnap crust that comes together in just 15 minutes. Perfect for fall gatherings, Thanksgiving, or any time you need an impressive dessert with minimal effort.
- Prep Time: 15 minutes
- Cook Time: 0 minutes
- Total Time: 6 hours 15 minutes (includes chilling)
- Yield: 8 servings 1x
- Category: Dessert
- Cuisine: American
Ingredients
- 2 cups crushed gingersnap cookies (about 40 cookies)
- 6 tablespoons unsalted butter, melted
- 2 tablespoons granulated sugar (optional)
- Pinch of salt (skip if using salted butter)
- 1 can (15 ounces) pumpkin puree (not pumpkin pie filling)
- 8 ounces cream cheese, softened to room temperature
- 1 cup powdered sugar
- 1 teaspoon vanilla extract
- 1 ½ teaspoons pumpkin pie spice
- ½ teaspoon ground cinnamon
- 1 ½ cups whipped topping (Cool Whip or homemade stabilized whipped cream, thawed if frozen)
- Additional whipped topping for garnish (optional)
- Crushed gingersnaps for garnish (optional)
- Ground cinnamon or nutmeg for dusting (optional)
Instructions
- Make the crust: Crush gingersnap cookies into fine crumbs (using a food processor or rolling pin). In a medium bowl, combine crumbs with melted butter, sugar (if using), and salt. Stir until mixture resembles wet sand. Press firmly into a 9-inch pie dish, starting with sides then bottom. Refrigerate for at least 15 minutes.
- Prepare the cream cheese base: In a large bowl, beat softened cream cheese with a hand mixer until smooth and fluffy (about 2 minutes). Add powdered sugar and vanilla extract, beat until combined and creamy.
- Add pumpkin and spices: Add pumpkin puree, pumpkin pie spice, and cinnamon to the cream cheese mixture. Beat on low until incorporated, then increase to medium and beat for 1 minute until smooth and uniform in color. Taste and adjust spices if needed.
- Fold in whipped topping: Add whipped topping to the pumpkin mixture. Gently fold with a rubber spatula using a cutting motion until no white streaks remain. Do not overmix.
- Assemble and chill: Remove crust from refrigerator. Pour filling into crust and spread evenly. Cover loosely with plastic wrap and refrigerate for at least 6 hours, preferably overnight.
- Garnish and serve: Before serving, add a border of whipped topping around the edge. Sprinkle crushed gingersnaps and dust with cinnamon or nutmeg. Slice with a sharp knife, wiping clean between cuts.
Notes
For best results, use full-fat cream cheese and let it come to room temperature. Chill the crust before adding filling to prevent sogginess. Overnight chilling is recommended for the best texture and flavor. The pie can be stored in the refrigerator for up to 5 days or frozen for up to 3 months.
Nutrition
- Serving Size: 1 slice (1/8 of pie)
- Calories: 320
- Sugar: 24
- Sodium: 280
- Fat: 18
- Saturated Fat: 10
- Carbohydrates: 36
- Fiber: 2
- Protein: 4
Keywords: no-bake pumpkin pie, gingersnap crust, easy pumpkin dessert, Thanksgiving dessert, fall dessert, 15-minute dessert



