Love this? Save it for later!
Share the inspiration with your friends
My gym buddy, Mark, had sworn off protein balls for two years. Two years! He claimed they all tasted like sweetened sawdust mixed with regret. Every time I’d pull a batch out of my bag, he’d make that face—you know the one—like I was offering him a spoonful of chalk. Honestly, I couldn’t blame him. Most store-bought versions are dry, crumbly, and taste suspiciously like cardboard. Then, last Tuesday, I made this particular batch of Easy High-Protein Chocolate Protein Balls on a whim. I was just testing a new ratio of ingredients because my usual recipe felt too sticky. I left the bowl on the counter to grab my water bottle, and when I turned back, Mark was standing there, mid-chew, with a look of pure betrayal on his face.
He had a chocolate smear on his thumb and this guilty expression that said he was caught red-handed. “These are… not terrible,” he mumbled, reaching for another one. I just laughed. That moment of catching him in the act was better than any compliment he could have given me. These no-bake protein balls have a texture that actually works—soft, fudgy, and rich without being heavy. They don’t crumble apart in your hand, and they don’t leave that weird, powdery aftertaste in your mouth. It’s the kind of snack that makes you forget you’re eating something healthy.
Maybe you’ve been there, trying to find a quick snack that actually satisfies a chocolate craving without derailing your whole day. I know I have. These little guys have become my secret weapon for busy afternoons when I need something fast. I keep making them because they solve that specific problem: wanting something sweet, needing something filling, and having absolutely zero patience for a complicated recipe. Let me tell you, this version is the one that finally stuck.
Why You’ll Love This Recipe
These Easy High-Protein Chocolate Protein Balls are not just another snack recipe; they are a lifeline for busy people who refuse to compromise on taste or nutrition. I have tested this specific ratio more times than I care to count, tweaking the wet-to-dry balance until it hit that perfect, fudgy consistency that doesn’t fall apart. Here is why this recipe stands out from the hundreds of similar ones online:
- No Baking Required: You don’t even need to turn on the oven. This comes together in about 10 minutes of active time. Perfect for those hot summer days or when you just want a snack without heating up the kitchen.
- Simple, Real Ingredients: No weird powders or hard-to-find superfoods. You probably have most of these in your pantry right now. I use basic rolled oats, peanut butter, and cocoa powder—stuff you can find at any grocery store.
- Perfect for Meal Prep: Make a batch on Sunday, and you have a high-protein snack ready for the entire week. They are great for lunchboxes, post-workout refueling, or that 3 PM slump when you need energy.
- Crowd-Pleaser: Even people who “don’t like healthy snacks” will eat these. I brought them to a family gathering last month, and my cousin, who only eats chips, asked for the recipe. That never happens.
- Unbelievably Fudgy: The texture is the real star here. It is dense, moist, and chocolaty—like a brownie batter that you can eat with your hands without feeling guilty.
What makes this recipe different is the technique of slightly toasting the oats before mixing. I know it adds an extra step, but trust me, it transforms the flavor from raw and flat to nutty and deep. It is a small detail that makes a huge difference. This isn’t just another version of a protein ball; this is the version you will actually look forward to eating. It is comfort food reimagined—healthier, faster, but with the same soul-soothing satisfaction that a chocolate fix demands.
What Ingredients You Will Need
This recipe uses simple, wholesome ingredients to deliver bold chocolate flavor and a satisfying, fudgy texture without any fuss. Most of these are pantry staples that you likely already have on hand, making this an easy last-minute snack solution.
- Rolled Oats (1 cup / 90g): I prefer old-fashioned rolled oats for texture. Quick oats work in a pinch, but they tend to make the balls a bit mushier. For a gluten-free version, use certified gluten-free oats. I usually buy Bob’s Red Mill because they have a consistent texture.
- Creamy Peanut Butter (½ cup / 128g): This acts as the binder and adds healthy fats and protein. Use a natural, no-stir peanut butter for the best texture. Avoid the super oily, separated kind that requires stirring—it makes the mixture too greasy. If you have a nut allergy, sunflower seed butter works beautifully here.
- Chocolate Protein Powder (½ cup / 40g): This is the main protein source. I recommend a whey or plant-based chocolate protein powder. My personal favorite is Orgain Simple Chocolate because it mixes well and doesn’t have that artificial aftertaste. If your protein powder is unsweetened, you might need to add a tablespoon of maple syrup or honey.
- Honey or Maple Syrup (¼ cup / 60ml): This provides the sweetness and helps bind everything together. Maple syrup gives a slightly different flavor profile—more caramel-like—while honey is more neutral. For a vegan option, stick with maple syrup.
- Cocoa Powder (2 tablespoons / 10g): This deepens the chocolate flavor. Use unsweetened cocoa powder, not hot cocoa mix. Dutch-processed cocoa will give a darker, more mellow chocolate taste, while natural cocoa is brighter and more intense.
- Chocolate Chips (¼ cup / 45g): These add little pockets of melted chocolate throughout the ball. I use mini dark chocolate chips because they distribute more evenly. If you are watching your sugar intake, sugar-free chocolate chips work great.
- Pinch of Sea Salt: This is non-negotiable. A small pinch balances the sweetness and makes the chocolate flavor pop. I use flaky Maldon salt for a subtle crunch, but any fine sea salt will do.
Equipment Needed
You don’t need a fancy kitchen setup for these Easy High-Protein Chocolate Protein Balls. The beauty of a no-bake recipe is that it keeps things simple. Here is what you will need:
- Food Processor: This is the most important tool. A food processor breaks down the oats and combines everything into a cohesive dough. If you don’t have one, a high-speed blender can work, but you may need to scrape down the sides more often.
- Large Mixing Bowl: You will need a bowl to combine the dry ingredients before adding the wet ones. I use a standard stainless steel bowl.
- Measuring Cups and Spoons: Accurate measurements are key for the right texture. I have a set of cheap metal measuring cups that I have used for years—they do the job just fine.
- Baking Sheet or Plate: You will need a flat surface to place the rolled balls on before they chill. A standard baking sheet lined with parchment paper works perfectly.
- Parchment Paper: This prevents the balls from sticking to the pan and makes cleanup a breeze. You can also use a silicone baking mat.
- Small Cookie Scoop (Optional): This is a game-changer for portioning. A 1-tablespoon scoop ensures every ball is the same size. If you don’t have one, just use your hands—it works fine, but the balls might be slightly uneven.
Preparation Method
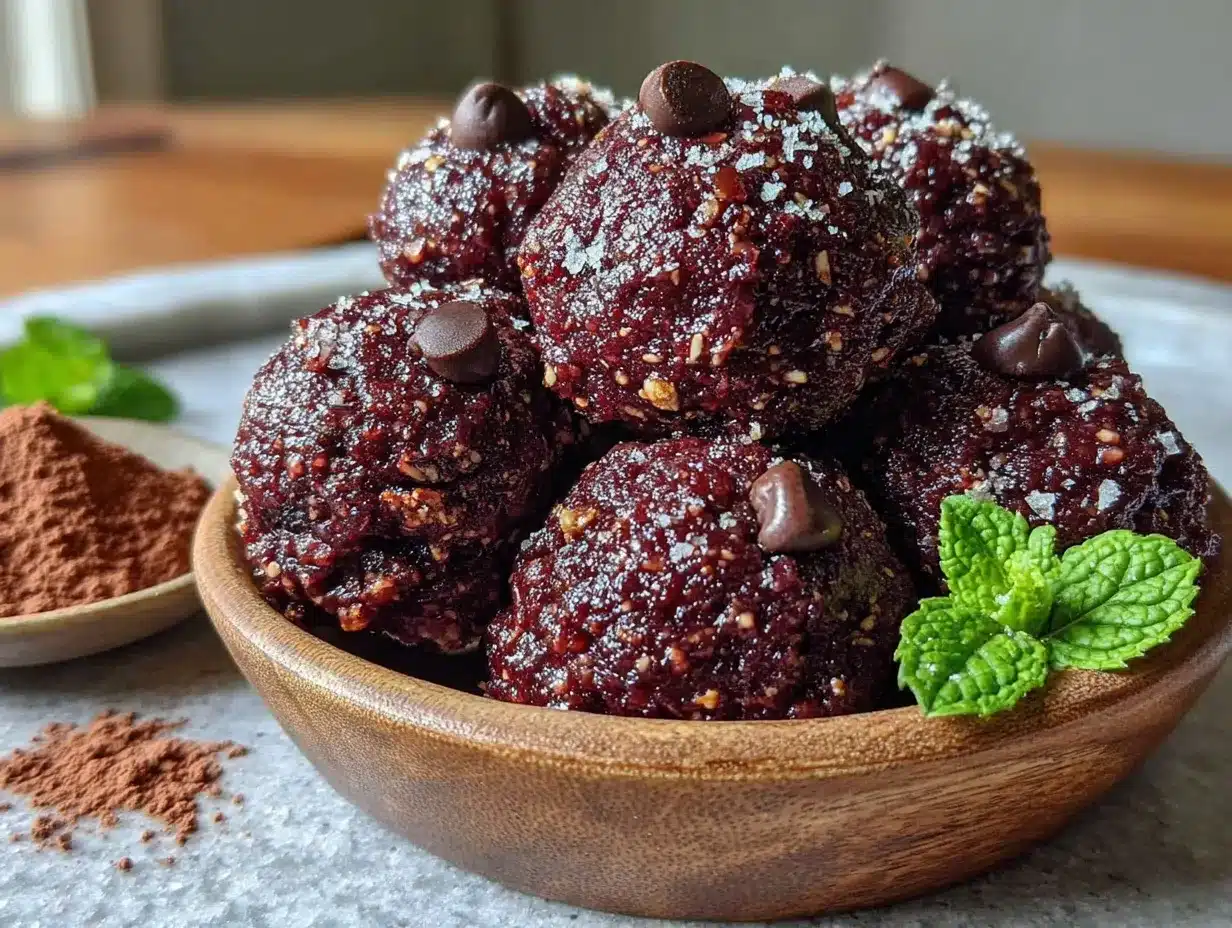
Follow these steps carefully, and you will have a batch of fudgy, high-protein snacks ready in no time. I have included some notes from my own trial-and-error experiences so you can avoid the same mistakes I made.
- Toast the Oats (Optional but Recommended): Heat a dry skillet over medium heat. Add the rolled oats and stir constantly for 3-4 minutes until they become fragrant and lightly golden. Be careful—they can burn quickly. I learned this the hard way when I walked away to answer my phone and came back to a smoky kitchen. Let the oats cool completely before proceeding. This step adds a nutty depth that makes the final balls taste almost like a baked cookie.
- Pulse the Oats: Add the cooled oats to your food processor. Pulse 10-12 times until they resemble a coarse flour. You want some texture remaining, not a fine powder. If you over-process, the balls will become gummy and dense. I usually leave a few small oat pieces visible for a better mouthfeel.
- Add Dry Ingredients: Add the chocolate protein powder, cocoa powder, and a pinch of sea salt to the food processor. Pulse 3-4 times to combine everything evenly. This ensures there are no pockets of pure cocoa powder hiding in the final mix—a mistake I made once that resulted in one very bitter ball.
- Add Wet Ingredients: Add the creamy peanut butter and honey (or maple syrup) to the food processor. Process for about 30 seconds until the mixture starts to clump together. It should look like a slightly sticky, dark brown dough. If it looks too dry and crumbly, add 1 teaspoon of water at a time until it holds together. If it looks too wet and greasy, add 1 tablespoon of oat flour or additional protein powder.
- Mix in Chocolate Chips: Transfer the dough to a large mixing bowl. Add the chocolate chips and use a spatula to fold them in by hand. If you use the food processor, the chocolate chips will get crushed into tiny pieces. I prefer having larger chunks of chocolate in my balls, so I always do this step manually.
- Chill the Dough (Crucial Step): Cover the bowl with plastic wrap and place it in the refrigerator for 20-30 minutes. This firms up the dough, making it much easier to roll into balls without it sticking to your hands. I skipped this step once when I was in a hurry, and I ended up with a sticky mess that looked more like blobs than balls. Patience pays off here.
- Roll into Balls: Line a baking sheet with parchment paper. Using a small cookie scoop or your hands, portion out about 1 tablespoon of dough. Roll it firmly between your palms to form a smooth ball. Apply gentle pressure—if you squeeze too hard, the balls will become dense and hard. Place each ball on the prepared baking sheet.
- Final Chill: Place the baking sheet in the refrigerator for at least 30 minutes to allow the balls to set completely. This step is essential for them to hold their shape. If you eat them right away, they will be soft and might fall apart. After they are firm, transfer them to an airtight container for storage.
Cooking Tips & Techniques
Over the many batches I have made, I have picked up a few tricks that make the process smoother and the results more consistent. These Easy High-Protein Chocolate Protein Balls are forgiving, but a little know-how goes a long way.
- The Sticky Hands Fix: If the dough is sticking to your hands while rolling, lightly dampen your palms with a bit of cold water. This creates a barrier that prevents the dough from clinging. Alternatively, you can rub a tiny drop of coconut oil on your hands. I keep a small bowl of water nearby specifically for this purpose.
- Texture Troubleshooting: If your mixture is too dry and won’t hold together, you likely need more liquid. Add 1 teaspoon of water, milk, or extra maple syrup. If it is too wet and greasy, your peanut butter might have been too oily. Add 1 tablespoon of oat flour or almond flour to absorb the excess moisture.
- Flavor Adjustments: Taste the dough before chilling. This is your last chance to adjust. If it is not sweet enough, add a drizzle of honey. If the chocolate flavor is weak, add another tablespoon of cocoa powder. I always do a quick taste test, even if it means eating a tiny spoonful of raw dough.
- Consistency for Meal Prep: For the best texture, let the balls sit at room temperature for 5 minutes after taking them out of the fridge. They soften slightly and become perfectly fudgy. Eating them straight from the fridge is fine, but they will be much firmer.
Variations & Adaptations
One of the best things about this recipe is how easily you can adapt it to your taste preferences or dietary needs. Here are some variations I have tried and loved:
- Peanut-Free Version: Swap the peanut butter for sunflower seed butter or tahini. Sunflower seed butter gives a slightly earthy flavor that pairs well with chocolate. Note that sunflower seed butter can sometimes react with baking soda (if used) and turn green, but since this is a no-bake recipe, that is not an issue here.
- Extra Crunch: Add 2 tablespoons of chopped nuts like almonds, walnuts, or pecans. This adds a satisfying crunch that contrasts with the fudgy interior. I sometimes add crushed freeze-dried raspberries for a tart pop of flavor.
- Vegan Option: Use maple syrup instead of honey and a plant-based protein powder. Make sure your chocolate chips are dairy-free. Most dark chocolate chips are naturally vegan, but always check the label.
- Lower Sugar: Use unsweetened protein powder and omit the honey or maple syrup. You can add 2-3 drops of liquid stevia or monk fruit sweetener to maintain sweetness without the sugar. The texture will be slightly drier, so you might need to add an extra tablespoon of peanut butter.
- Spiced Chocolate: Add ½ teaspoon of cinnamon, a pinch of cayenne pepper, or ¼ teaspoon of espresso powder to the dry ingredients. The espresso powder enhances the chocolate flavor without making the balls taste like coffee. I tried this on a whim one afternoon, and it has become my favorite variation.
Serving & Storage Suggestions
These Easy High-Protein Chocolate Protein Balls are incredibly versatile when it comes to serving and storing. They are designed to be a grab-and-go snack, but a little attention to storage will keep them fresh for longer.
Serving: Serve these balls chilled or at room temperature. I prefer them straight from the fridge on a warm day because they stay firm and fudgy. For a softer texture, let them sit out for 5-10 minutes. They pair beautifully with a glass of cold almond milk or a hot cup of coffee. You can also crumble one over a bowl of Greek yogurt for a quick dessert or breakfast topping.
Storage: Store the balls in an airtight container in the refrigerator. They will stay fresh for up to 1 week. Make sure to separate layers with parchment paper to prevent them from sticking together. If you are stacking them, a single layer of paper between each layer works wonders.
Freezing: These balls freeze exceptionally well. Place them on a baking sheet and freeze for 1 hour until solid. Then transfer them to a freezer-safe bag or container. They will keep for up to 3 months. To thaw, simply leave them in the refrigerator overnight or let them sit at room temperature for 15 minutes. I always keep a stash in my freezer for those days when I need a quick snack and don’t want to make a fresh batch.
Flavor Development: The flavors actually deepen and meld together after a day or two in the fridge. The cocoa and peanut butter become more pronounced, and the texture evens out. I often find that day-old balls taste better than freshly made ones.
Nutritional Information & Benefits
Here is an estimated nutritional breakdown for one ball (based on 12 balls per batch). These values are approximate and will vary based on the specific brands and ingredients you use.
| Nutrient | Amount Per Ball |
|---|---|
| Calories | 145 kcal |
| Protein | 8g |
| Carbohydrates | 16g |
| Fiber | 3g |
| Sugar | 8g |
| Fat | 7g |
| Saturated Fat | 2g |
| Sodium | 85mg |
Health Benefits: These protein balls are packed with fiber from the oats, which helps keep you full and supports digestive health. The peanut butter provides healthy monounsaturated fats and additional protein, making this a balanced snack. Cocoa powder is rich in antioxidants called flavonoids, which can support heart health. The protein powder helps with muscle recovery and satiety, making this an excellent post-workout option. This recipe is naturally gluten-free if you use certified gluten-free oats and is free from artificial additives. It is also a great option for those following a vegetarian or flexitarian diet.
Conclusion
These Easy High-Protein Chocolate Protein Balls have earned a permanent spot in my weekly rotation. They are proof that a healthy snack doesn’t have to taste like a compromise. The fudgy texture, the deep chocolate flavor, and the satisfying protein boost make them a winner every single time. I love that I can make a batch in under 15 minutes and have snacks ready for the whole week without any oven time or complicated steps.
I encourage you to make this recipe your own. Adjust the sweetness, swap the nut butter, or add your favorite mix-ins. That is the beauty of a simple base recipe—it is a canvas for your creativity. I would love to hear how your batch turns out. Did you add something unexpected? Did you find a new favorite variation? Drop a comment below and let me know. Share this recipe with a friend who needs a quick, healthy snack idea. And if you are looking for more easy, no-bake treats, you might enjoy my no-bake peanut butter oat bars or my chocolate almond energy bites. Happy snacking!
Frequently Asked Questions
Can I use quick oats instead of rolled oats?
Yes, you can use quick oats, but the texture will be slightly different. Quick oats are more finely processed, so they will absorb moisture faster and create a softer, almost creamy texture. The balls will still hold together, but they will be less chewy. If you use quick oats, you might need slightly less liquid.
How long do these protein balls last at room temperature?
These balls are best stored in the refrigerator. They can sit at room temperature for up to 2 hours, but they will soften and become sticky. If you are taking them on the go, pack them in a cooler bag or eat them within a couple of hours. For longer storage, always keep them chilled.
Can I make these without a food processor?
Absolutely. If you don’t have a food processor, you can use a high-speed blender, or you can finely chop the oats by hand using a knife and a cutting board. It will take more effort, and the texture will be chunkier, but the recipe will still work. Just make sure to mix everything thoroughly by hand in a large bowl.
Why are my protein balls too dry and crumbly?
This usually happens when the dry ingredients outweigh the wet ingredients. Your protein powder might be more absorbent than mine, or your peanut butter might be thicker. Fix it by adding 1 teaspoon of water, milk, or extra maple syrup at a time until the dough holds together when pressed. Also, make sure you are measuring your ingredients accurately—packed oats can throw off the ratio.
Can I use a different nut butter?
Yes, you can use almond butter, cashew butter, or even tahini. Keep in mind that different nut butters have different fat contents. Almond butter is usually thicker and less oily than peanut butter, so you might need to add an extra tablespoon of liquid. Cashew butter is creamier and will result in a softer dough. Adjust accordingly to achieve the right consistency.
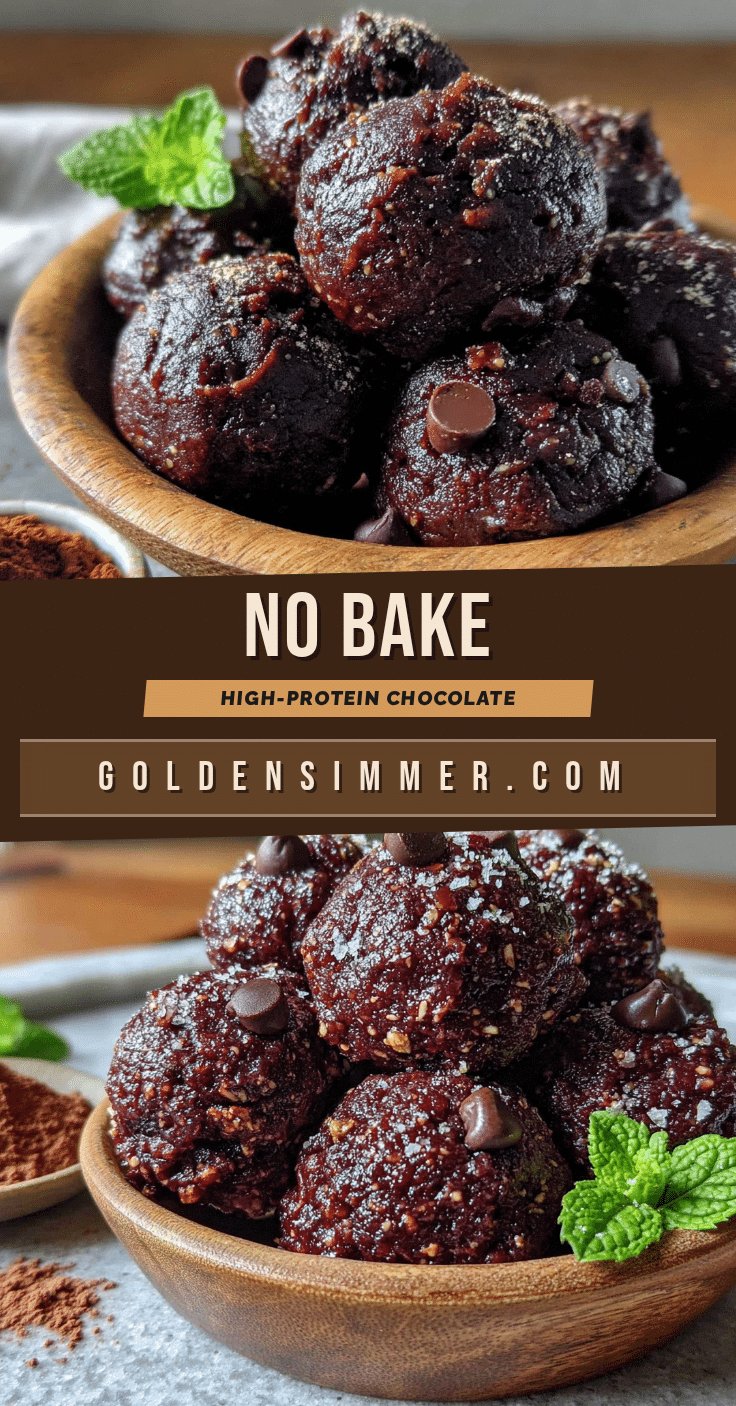
Pin This Recipe!
Easy High-Protein Chocolate Protein Balls: No Bake Best Snack

These no-bake protein balls are soft, fudgy, and rich without being heavy. They don’t crumble apart in your hand, and they don’t leave that weird, powdery aftertaste in your mouth.
- Prep Time: 10 minutes
- Cook Time: 0 minutes
- Total Time: 1 hour 10 minutes (includes chilling time)
- Yield: 12 servings 1x
- Category: Snack
- Cuisine: American
Ingredients
- 1 cup (90g) rolled oats
- ½ cup (128g) creamy peanut butter
- ½ cup (40g) chocolate protein powder
- ¼ cup (60ml) honey or maple syrup
- 2 tablespoons (10g) unsweetened cocoa powder
- ¼ cup (45g) chocolate chips (mini dark chocolate chips recommended)
- Pinch of sea salt
Instructions
- Toast the Oats (Optional but Recommended): Heat a dry skillet over medium heat. Add the rolled oats and stir constantly for 3-4 minutes until they become fragrant and lightly golden. Let the oats cool completely before proceeding.
- Pulse the Oats: Add the cooled oats to your food processor. Pulse 10-12 times until they resemble a coarse flour. You want some texture remaining, not a fine powder.
- Add Dry Ingredients: Add the chocolate protein powder, cocoa powder, and a pinch of sea salt to the food processor. Pulse 3-4 times to combine everything evenly.
- Add Wet Ingredients: Add the creamy peanut butter and honey (or maple syrup) to the food processor. Process for about 30 seconds until the mixture starts to clump together. It should look like a slightly sticky, dark brown dough. If it looks too dry and crumbly, add 1 teaspoon of water at a time until it holds together. If it looks too wet and greasy, add 1 tablespoon of oat flour or additional protein powder.
- Mix in Chocolate Chips: Transfer the dough to a large mixing bowl. Add the chocolate chips and use a spatula to fold them in by hand.
- Chill the Dough (Crucial Step): Cover the bowl with plastic wrap and place it in the refrigerator for 20-30 minutes. This firms up the dough, making it much easier to roll into balls without it sticking to your hands.
- Roll into Balls: Line a baking sheet with parchment paper. Using a small cookie scoop or your hands, portion out about 1 tablespoon of dough. Roll it firmly between your palms to form a smooth ball. Apply gentle pressure—if you squeeze too hard, the balls will become dense and hard. Place each ball on the prepared baking sheet.
- Final Chill: Place the baking sheet in the refrigerator for at least 30 minutes to allow the balls to set completely. This step is essential for them to hold their shape. After they are firm, transfer them to an airtight container for storage.
Notes
Toast the oats for a nuttier flavor. If the dough is too sticky, dampen your hands with cold water. For best texture, let balls sit at room temperature for 5 minutes after refrigeration. Flavors deepen after a day in the fridge.
Nutrition
- Serving Size: 1 ball
- Calories: 145
- Sugar: 8
- Sodium: 85
- Fat: 7
- Saturated Fat: 2
- Carbohydrates: 16
- Fiber: 3
- Protein: 8
Keywords: protein balls, no bake, chocolate, high protein, healthy snack, gluten free, meal prep



