Love this? Save it for later!
Share the inspiration with your friends
I wasn’t expecting baking advice from the guy who fixed my washing machine, but there I was, standing in my kitchen with a puddle of soapy water on the floor, listening to him describe exactly how to make a Reese’s Peanut Butter Poke Cake. His name was Frank, he was about sixty-five, and he had this way of talking about chocolate and peanut butter like they were old friends of his. He told me his wife made this cake every year for his birthday, and the way he said it—with this little smile—made me grab a pen before he even finished the repair. Honestly, you never know where a good recipe is going to find you.
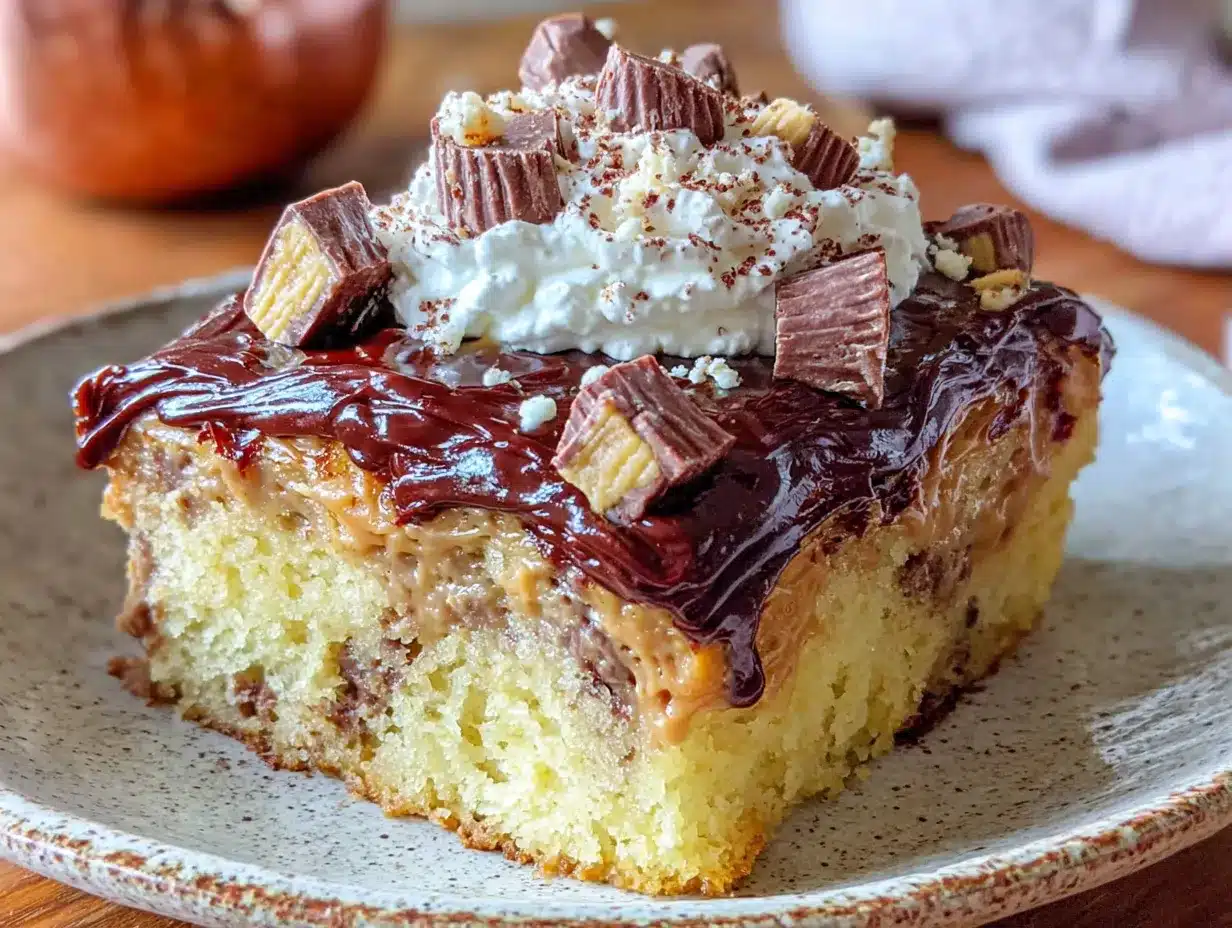
Frank scribbled the basics on a scrap of receipt paper, and I tucked it into my cookbook without much thought. A week later, I had a serious peanut butter craving and remembered that crumpled note. I made the cake that same afternoon, and let me tell you, the first bite was one of those moments where you just stop and stare at the ceiling. The cake was incredibly moist, the peanut butter filling had seeped into every single hole, and the chocolate ganache on top was pure magic. Maybe you’ve been there—when a dessert just hits different, and you know it’s going to become a regular in your kitchen.
That was three years ago, and I’ve made this Reese’s Peanut Butter Poke Cake more times than I can count. I’ve tweaked Frank’s original idea, tested it with different chocolate toppings, and even brought it to a potluck where people asked for the recipe before they finished their first slice. It’s one of those rare desserts that feels fancy enough for a celebration but simple enough for a random Tuesday. And honestly, the best recipes often come from the most unexpected places.
Why You’ll Love This Recipe
This isn’t just another chocolate cake recipe. This is the kind of dessert that makes people close their eyes after the first bite, and I’ve seen it happen more times than I can count. Here is why this Reese’s Peanut Butter Poke Cake stands out from every other chocolate cake you have tried:
- Quick & Easy: This cake comes together in about 45 minutes of active time, and the hardest part is waiting for it to chill. Perfect for last-minute dessert emergencies or busy weeknights when you need something special.
- Simple Ingredients: You probably already have most of these in your pantry. No fancy grocery store trips required—just basic baking staples and a few Reese’s peanut butter cups.
- Perfect for Any Occasion: Bring this to a birthday party, a summer barbecue, a holiday dinner, or a casual get-together. It always fits right in and steals the show.
- Crowd-Pleaser: Kids love it, adults love it, and even people who claim they don’t have a sweet tooth usually go back for seconds. It’s impossible to resist that peanut butter and chocolate combo.
- Unbelievably Delicious: The texture is what really sets this apart. The cake stays incredibly moist thanks to the poke method, and every bite has pockets of creamy peanut butter filling mixed with rich chocolate ganache.
What makes this recipe different from all the other poke cakes out there is the technique. Instead of just pouring sweetened condensed milk into the holes, I use a homemade peanut butter mixture that soaks deep into the cake. It creates this amazing layered effect where each forkful gives you cake, peanut butter, chocolate, and a little crunch from the chopped Reese’s cups on top. It’s comfort food reimagined—indulgent, satisfying, and guaranteed to make you smile.
What Ingredients You Will Need
This recipe uses simple, everyday ingredients to create something truly special. Most of these are pantry staples, and the ones that aren’t are easy to find at any grocery store. Here is everything you need to make the ultimate Reese’s Peanut Butter Poke Cake:
For the Cake Base
- 1 box (15.25 oz) chocolate cake mix (I prefer Duncan Hines or Betty Crocker for consistent results)
- 3 large eggs (room temperature works best for even mixing)
- 1 cup whole milk (adds richness, but 2% works fine too)
- ½ cup vegetable oil (or melted coconut oil for a subtle flavor twist)
- 1 teaspoon vanilla extract (pure, not imitation, for deeper flavor)
For the Peanut Butter Filling
- 1 can (14 oz) sweetened condensed milk
- ½ cup creamy peanut butter (I recommend Jif or Skippy for the smoothest texture—natural peanut butter can separate)
- ¼ cup heavy cream (helps thin the mixture so it flows into the holes easily)
- 1 teaspoon vanilla extract
For the Chocolate Ganache Topping
- 1 cup semi-sweet chocolate chips (Guittard or Ghirardelli melt beautifully)
- ½ cup heavy cream
- 2 tablespoons unsalted butter (adds shine and a silky texture)
For Garnishing
- 1 cup chopped Reese’s peanut butter cups (about 8-10 mini cups or 4 regular-sized cups)
- ¼ cup chopped salted peanuts (optional, but adds a lovely crunch)
- Flaky sea salt (just a pinch on top—trust me on this one)
A quick note on ingredient selection: For the peanut butter filling, avoid using natural peanut butter that has oil separation. It can make the filling grainy and it won’t soak into the cake as nicely. Stick with the classic creamy peanut butter for the best texture. Also, if you want to make this gluten-free, simply use a gluten-free chocolate cake mix—everything else in the recipe is naturally gluten-free.
Equipment Needed
You don’t need any fancy gadgets to make this Reese’s Peanut Butter Poke Cake, but having the right tools makes the process smoother. Here is what you will need:
- 9×13-inch baking pan: This is the perfect size for this cake. A metal pan gives you a slightly crispier edge, while glass or ceramic works great too.
- Large mixing bowl: For combining the cake batter ingredients. A glass or stainless steel bowl works best.
- Whisk or electric mixer: A whisk works fine for boxed cake mix, but an electric hand mixer makes it even easier and reduces lumps.
- Wooden spoon or spatula: For stirring the peanut butter filling and scraping down the sides of the bowl.
- Measuring cups and spoons: Accurate measurements matter, especially for the filling and ganache.
- Small saucepan: For heating the cream for the ganache. A heavy-bottomed pan prevents scorching.
- Heatproof bowl: For pouring the hot cream over the chocolate chips. Glass or ceramic works well.
- Sharp knife and cutting board: For chopping the Reese’s cups and peanuts.
- Refrigerator space: The cake needs at least 2 hours to chill and set properly.
If you don’t have an electric mixer, don’t worry. A whisk and some elbow grease will get the job done. I actually prefer whisking the cake batter by hand because it reminds me of baking with my grandmother, and it’s good arm exercise too.
Preparation Method
Follow these steps carefully, and you will have a perfect Reese’s Peanut Butter Poke Cake every single time. I’ve tested this method more times than I can count, so trust the process.
- Preheat your oven to 350°F (175°C). Grease your 9×13-inch baking pan thoroughly with butter or non-stick spray. I like to use butter because it adds a little flavor to the edges, but spray works fine too.
- Prepare the cake batter. In a large mixing bowl, combine the chocolate cake mix, eggs, milk, vegetable oil, and vanilla extract. Whisk until smooth and well combined, about 2 minutes. Scrape down the sides of the bowl to make sure everything is incorporated. The batter should be thick and glossy.
- Bake the cake. Pour the batter into the prepared pan and spread it evenly. Bake for 28-32 minutes, or until a toothpick inserted in the center comes out clean or with just a few moist crumbs. The edges should be pulling away from the sides of the pan slightly.
- Cool the cake slightly. Let the cake cool in the pan on a wire rack for about 10-15 minutes. It should still be warm but not hot. This is important—if the cake is too hot, the filling will just run out of the holes instead of soaking in.
- Poke the holes. Using the handle of a wooden spoon or a chopstick, poke holes all over the cake. Space them about 1 inch apart. Don’t be shy—poke all the way to the bottom of the cake. You want those holes deep enough to hold the filling.
- Make the peanut butter filling. In a medium bowl, whisk together the sweetened condensed milk, creamy peanut butter, heavy cream, and vanilla extract. Whisk until completely smooth and silky. The mixture should be pourable but not too thin. If it seems too thick, add another tablespoon of cream.
- Pour the filling over the cake. Slowly pour the peanut butter mixture over the warm cake, making sure it fills all the holes. Use a spatula to spread it evenly across the surface. You will see it sink into the holes and create those amazing pockets of flavor.
- Let the cake absorb the filling. Allow the cake to sit at room temperature for about 20 minutes so the filling can soak in completely. Don’t rush this step—patience pays off here.
- Make the chocolate ganache. Place the chocolate chips in a heatproof bowl. Heat the heavy cream in a small saucepan over medium heat until it just begins to simmer (small bubbles around the edges, not boiling). Pour the hot cream over the chocolate chips and let it sit for 2-3 minutes. Then whisk gently until smooth and shiny. Stir in the butter until fully melted and incorporated.
- Pour the ganache over the cake. Pour the warm ganache over the peanut butter layer and spread it evenly with a spatula. The ganache should cover the entire surface in a smooth, glossy layer.
- Add the toppings. While the ganache is still wet, sprinkle the chopped Reese’s peanut butter cups and salted peanuts evenly over the top. Add a light sprinkle of flaky sea salt—it really balances the sweetness.
- Chill the cake. Refrigerate the cake for at least 2 hours, or up to overnight. This allows the filling and ganache to set properly. The cake is best served cold or at room temperature.
Cooking Tips & Techniques
Over the years, I have made a few mistakes with this Reese’s Peanut Butter Poke Cake, and I want to help you avoid them. Here are my best tips for perfect results every time:
Don’t skip the cooling step. I learned this the hard way. The first time I made this cake, I poked the holes and poured the filling while the cake was still piping hot. The filling just ran straight through and pooled at the bottom of the pan. Let the cake cool for at least 10-15 minutes so the filling has time to absorb into the cake instead of just leaking out.
Use room temperature eggs. Cold eggs can make the batter lumpy and affect the texture of the cake. Take your eggs out of the fridge about 30 minutes before you start baking. If you forget, place them in a bowl of warm water for 5 minutes—that works in a pinch.
Poke the holes deep enough. This is the most important step in the whole process. If your holes are too shallow, the filling won’t penetrate the cake properly. Use the handle of a wooden spoon and push it all the way to the bottom of the pan. You should feel it hit the bottom.
Don’t overmix the ganache. When you whisk the cream and chocolate together, stir gently and stop as soon as it comes together. Overmixing can cause the ganache to become grainy or seize up. If that happens, don’t panic—add a tablespoon of warm cream and whisk slowly to bring it back.
Chill the cake completely. I know it’s tempting to dig in right away, but the cake needs time to set. The 2-hour chill time is non-negotiable if you want clean slices and that perfect layered texture. Overnight chilling actually makes the flavors meld together even better.
Variations & Adaptations
One of the best things about this Reese’s Peanut Butter Poke Cake is how easy it is to customize. Here are some of my favorite variations that I have tried over the years:
Chocolate Peanut Butter Swirl Cake: Instead of using a plain chocolate cake mix, try a chocolate fudge or devil’s food mix for an even richer flavor. You can also swirl extra peanut butter into the batter before baking for pockets of peanut butter throughout the cake.
Gluten-Free Version: This is incredibly simple. Just use a gluten-free chocolate cake mix. Everything else in the recipe is naturally gluten-free, including the peanut butter filling and ganache. I have made this for friends with celiac disease, and they couldn’t tell the difference.
Extra Crunchy Version: If you love texture, add chopped peanuts to the peanut butter filling before pouring it over the cake. You can also use crunchy peanut butter instead of creamy for the filling. The little bits of peanut add a nice surprise in every bite.
White Chocolate Peanut Butter Version: Swap the semi-sweet chocolate chips for white chocolate chips in the ganache. The sweetness of white chocolate pairs beautifully with the salty peanut butter. This version is a little sweeter, so I recommend using dark chocolate Reese’s cups on top to balance it out.
Individual Mini Cakes: If you’re serving a crowd or want portion-controlled desserts, bake the cake batter in a muffin tin instead of a 9×13 pan. Adjust the baking time to about 15-18 minutes, then poke holes in each cupcake and spoon the filling and ganache over each one individually. They are adorable and perfect for parties.
Serving & Storage Suggestions
This Reese’s Peanut Butter Poke Cake is incredibly versatile when it comes to serving. Here is how to make the most of it:
Best Serving Temperature: I personally love this cake cold, straight from the fridge. The filling and ganache are firmer, and the flavors are more pronounced. But it’s also delicious at room temperature if you prefer a softer texture. Let it sit out for about 15-20 minutes before serving if you want it less chilled.
Presentation Tips: For clean slices, use a sharp knife and wipe it clean between cuts. You can also run the knife under hot water before slicing for even smoother cuts. Serve each slice with a dollop of whipped cream or a scoop of vanilla ice cream—the cold creaminess pairs beautifully with the rich chocolate and peanut butter.
Complementary Dishes: This cake is rich enough to stand on its own, but it pairs wonderfully with fresh berries (strawberries or raspberries), a drizzle of caramel sauce, or a glass of cold milk. For a dessert spread, serve it alongside a fruit tart or a light angel food cake to balance the indulgence.
Storage Instructions: Store the cake in an airtight container in the refrigerator for up to 5 days. The flavors actually get better after a day or two as the filling continues to soak into the cake. If you need to stack the cake, place a sheet of parchment paper between layers to prevent sticking.
Freezing Instructions: This cake freezes beautifully. Wrap individual slices tightly in plastic wrap, then place them in a freezer-safe bag or container. They will keep for up to 3 months. To thaw, transfer a slice to the refrigerator overnight or let it sit at room temperature for about 30 minutes.
Reheating Tips: If you prefer your cake warm, microwave individual slices for about 15-20 seconds. The ganache will become slightly melty, and the cake will be soft and gooey. Just be careful not to overheat it, or the ganache can become too runny.
Nutritional Information & Benefits
Let’s be honest—this Reese’s Peanut Butter Poke Cake is an indulgence. But that doesn’t mean you can’t enjoy it mindfully. Here is the estimated nutritional breakdown per slice (based on 12 servings):
- Calories: Approximately 480-520 per slice
- Protein: 9-11 grams (thanks to the peanut butter and eggs)
- Carbohydrates: 58-62 grams
- Fat: 26-30 grams
- Fiber: 2-3 grams
- Sugar: 42-46 grams
While this isn’t a health food, there are a few redeeming qualities. Peanut butter is a good source of protein and healthy fats, and dark chocolate contains antioxidants. The eggs provide essential vitamins and minerals like vitamin D and B12. Plus, the portion size is satisfying enough that one slice is usually plenty.
If you are watching your sugar intake, you can reduce the amount of chopped Reese’s cups on top or use a sugar-free chocolate cake mix. For a lower-fat version, substitute the whole milk with skim milk and use a lighter peanut butter. But honestly, this is a dessert meant for special occasions, and sometimes you just need to enjoy the real thing.
This recipe contains dairy, peanuts, and gluten (unless using a gluten-free cake mix). Always check labels if you are serving someone with allergies.
Conclusion
This Reese’s Peanut Butter Poke Cake is more than just a dessert—it’s the kind of recipe that creates memories. I think about Frank, the washing machine repair guy, every time I make it. He probably has no idea that his wife’s birthday cake became a staple in my kitchen, and that I have passed it on to at least a dozen friends. That is the magic of sharing recipes—they travel further than you ever expect.
I really hope you give this cake a try. It is forgiving enough for beginner bakers but impressive enough to serve at a dinner party. Feel free to make it your own—swap the toppings, try different chocolate, or add your favorite candy on top. That is the beauty of baking; there are no rules, just delicious possibilities.
When you make it, I would love to hear how it turned out. Drop a comment below and let me know if you added your own twist or if you served it at a special occasion. And if you loved it as much as I do, please share this recipe with someone who needs a little sweetness in their life. Happy baking, friend!
Frequently Asked Questions
Can I use a homemade chocolate cake instead of a box mix?
Absolutely. If you prefer baking from scratch, use your favorite chocolate cake recipe. Just make sure it yields enough batter for a 9×13-inch pan. The poke method works beautifully with homemade cakes too.
Can I make this cake ahead of time?
Yes, and I actually recommend it. This cake tastes even better the next day because the filling has more time to soak into the cake. You can make it up to 2 days in advance and store it covered in the refrigerator.
Do I need to use Reese’s peanut butter cups?
No, you can use any chocolate peanut butter candy you like. I have made this with chopped peanut butter cups, peanut butter chips, and even crushed peanut butter cookies on top. Feel free to get creative.
Why did my ganache turn out grainy?
Grainy ganache usually happens when the cream is too hot or the chocolate is overheated. Make sure your cream is just simmering, not boiling, and let it sit over the chocolate for a few minutes before whisking. If it still seizes, add a tablespoon of warm cream and whisk gently.
Can I freeze the entire cake?
Yes, but I recommend freezing it without the toppings. Wrap the cooled, assembled cake tightly in plastic wrap and then foil. It will keep for up to 3 months. When ready to serve, thaw in the refrigerator overnight, then add the chopped Reese’s cups and peanuts just before serving for the best texture.
Pin This Recipe!

Best Homemade Reese’s Peanut Butter Poke Cake Recipe

This incredibly moist chocolate poke cake is filled with a creamy peanut butter mixture and topped with a rich chocolate ganache and chopped Reese’s cups. It’s an easy, crowd-pleasing dessert perfect for any occasion.
- Prep Time: 45 minutes
- Cook Time: 30 minutes
- Total Time: 2 hours 45 minutes (includes chilling)
- Yield: 12 servings 1x
- Category: Dessert
- Cuisine: American
Ingredients
- 1 box (15.25 oz) chocolate cake mix (Duncan Hines or Betty Crocker recommended)
- 3 large eggs, room temperature
- 1 cup whole milk (or 2%)
- ½ cup vegetable oil (or melted coconut oil)
- 1 teaspoon vanilla extract (pure)
- 1 can (14 oz) sweetened condensed milk
- ½ cup creamy peanut butter (Jif or Skippy recommended)
- ¼ cup heavy cream
- 1 teaspoon vanilla extract
- 1 cup semi-sweet chocolate chips (Guittard or Ghirardelli recommended)
- ½ cup heavy cream
- 2 tablespoons unsalted butter
- 1 cup chopped Reese’s peanut butter cups (about 8–10 mini or 4 regular)
- ¼ cup chopped salted peanuts (optional)
- Flaky sea salt (for garnish)
Instructions
- Preheat oven to 350°F (175°C). Grease a 9×13-inch baking pan thoroughly with butter or non-stick spray.
- In a large mixing bowl, combine chocolate cake mix, eggs, milk, vegetable oil, and 1 teaspoon vanilla extract. Whisk until smooth and well combined, about 2 minutes. Scrape down sides of bowl.
- Pour batter into prepared pan and spread evenly. Bake for 28-32 minutes, or until a toothpick inserted in center comes out clean or with a few moist crumbs. Edges should pull away from pan slightly.
- Let cake cool in pan on a wire rack for 10-15 minutes. It should still be warm but not hot.
- Using the handle of a wooden spoon or a chopstick, poke holes all over the cake, spacing them about 1 inch apart. Poke all the way to the bottom of the pan.
- In a medium bowl, whisk together sweetened condensed milk, creamy peanut butter, ¼ cup heavy cream, and 1 teaspoon vanilla extract until completely smooth and silky. Mixture should be pourable.
- Slowly pour peanut butter mixture over warm cake, making sure it fills all the holes. Use a spatula to spread evenly across surface.
- Allow cake to sit at room temperature for about 20 minutes so filling can soak in completely.
- Place chocolate chips in a heatproof bowl. Heat ½ cup heavy cream in a small saucepan over medium heat until it just begins to simmer (small bubbles around edges). Pour hot cream over chocolate chips and let sit for 2-3 minutes. Whisk gently until smooth and shiny. Stir in butter until fully melted.
- Pour warm ganache over peanut butter layer and spread evenly with a spatula.
- While ganache is still wet, sprinkle chopped Reese’s cups and salted peanuts evenly over top. Add a light sprinkle of flaky sea salt.
- Refrigerate cake for at least 2 hours, or up to overnight, to allow filling and ganache to set. Serve cold or at room temperature.
Notes
For best results, use creamy peanut butter like Jif or Skippy; natural peanut butter can separate and make filling grainy. Let cake cool 10-15 minutes before poking holes to prevent filling from running out. Chill cake completely for clean slices. Cake can be made up to 2 days ahead and stored covered in refrigerator. Freezes well for up to 3 months (without toppings).
Nutrition
- Serving Size: 1 slice
- Calories: 500
- Sugar: 44
- Sodium: 380
- Fat: 28
- Saturated Fat: 10
- Carbohydrates: 60
- Fiber: 2.5
- Protein: 10
Keywords: Reese's peanut butter poke cake, chocolate peanut butter cake, poke cake, easy dessert, birthday cake, chocolate ganache cake



