Love this? Save it for later!
Share the inspiration with your friends
Hand me that bag of tortilla chips, my friend said with a look of pure mischief. It was a Tuesday, and we were both exhausted from the week already. I had planned a simple dinner, but she had other ideas. She wanted nachos. Not just any nachos, mind you, but the kind that require a sheet pan and a little bit of patience. I hesitated, honestly, because my past experiences with homemade nachos were soggy disasters. You know that feeling when you bite into a chip and it just crumbles into a sad, wet pile? I had been there one too many times. But she was insistent, and I was too tired to argue. So, I grabbed the chips, the cheese, and the ground beef I had thawed for tacos. Little did I know, I was about to stumble onto my new favorite weeknight hero.
The first batch was a glorious mess. I piled everything on too thick, and the chips in the middle turned to mush. But the edges, oh, the edges were perfect. They were crispy, loaded with melty cheese and spicy beef, and absolutely irresistible. That first bite had this unexpected crunch followed by a wave of warm, savory goodness. I was hooked. I spent the next few weekends perfecting the method, testing different cheeses, and figuring out the ideal chip-to-topping ratio. It became a little obsession, honestly. Now, I make these Ultimate Sheet-Pan Loaded Nachos with Ground Beef whenever I need a guaranteed crowd-pleaser or a fun, no-fuss dinner that feels like a party. It is the kind of meal that makes you forget you are eating off a metal pan.
Why You’ll Love This Recipe
Let’s be real for a second. We all love nachos, but we don’t always love the hassle or the disappointment. This recipe fixes all of that. After countless trials (and a few sad, soggy plates), I can confidently say this method is foolproof. I’ve tested it for game days, family movie nights, and even a fancy-ish taco Tuesday, and it never fails. Here is why this one is different.
- Perfectly Crispy Every Time: The secret is in the layering and the oven temperature. No more soggy bottoms. Every single chip gets a chance to be gloriously crunchy.
- Simple, Pantry-Friendly Ingredients: You likely have most of these items in your fridge and pantry right now. No fancy grocery trips required for this weeknight winner.
- Completely Customizable: This is a choose-your-own-adventure meal. Swap the protein, change the cheese, or load it up with all your favorite toppings. It plays well with others.
- A True Crowd-Pleaser: I have yet to meet someone who doesn’t love a good loaded nacho. It is the ultimate sharing food, perfect for parties or a quiet night in when you want something satisfying.
- Unbelievably Delicious: The combination of seasoned ground beef, melty cheese, and fresh, crunchy toppings is pure comfort food magic. It’s the kind of dish that makes you close your eyes after the first bite.
This isn’t just another nacho recipe. It is the result of a lot of trial and error, a deep love for cheese, and a desire for a meal that feels indulgent without the stress. It is comfort food reimagined—faster, crispier, but with the same soul-soothing satisfaction you crave on a busy weeknight.
What Ingredients You Will Need
This recipe uses simple, wholesome ingredients to deliver bold flavor and satisfying texture without the fuss. Most of these are pantry staples, which makes this dish perfect for those nights when you need dinner on the table fast.
For the Seasoned Ground Beef
- 1 lb (450g) ground beef: I prefer 80/20 for the best flavor, but leaner works too. Just add a splash of oil to the pan.
- 1 tablespoon olive oil: For browning the meat. Use avocado oil if you prefer.
- 1 small yellow onion, diced: Adds a sweet, savory base to the beef.
- 2 cloves garlic, minced: Fresh is best here. It adds a punch of flavor you can’t get from powder.
- 1 tablespoon chili powder: The backbone of the seasoning. I use a mild blend, but feel free to use a hot one.
- 1 teaspoon ground cumin: Adds a warm, earthy depth that is essential for taco-seasoned meat.
- 1/2 teaspoon smoked paprika: This is my secret weapon. It adds a subtle smokiness that makes the beef taste like it cooked all day.
- 1/2 teaspoon garlic powder: For an extra layer of savory goodness.
- 1/2 teaspoon salt: Or to taste. Start with less and adjust.
- 1/4 teaspoon black pepper: Freshly ground is always better.
- 1/2 cup (120ml) water or beef broth: This helps the seasoning meld into the meat and creates a little sauce.
For the Nacho Base
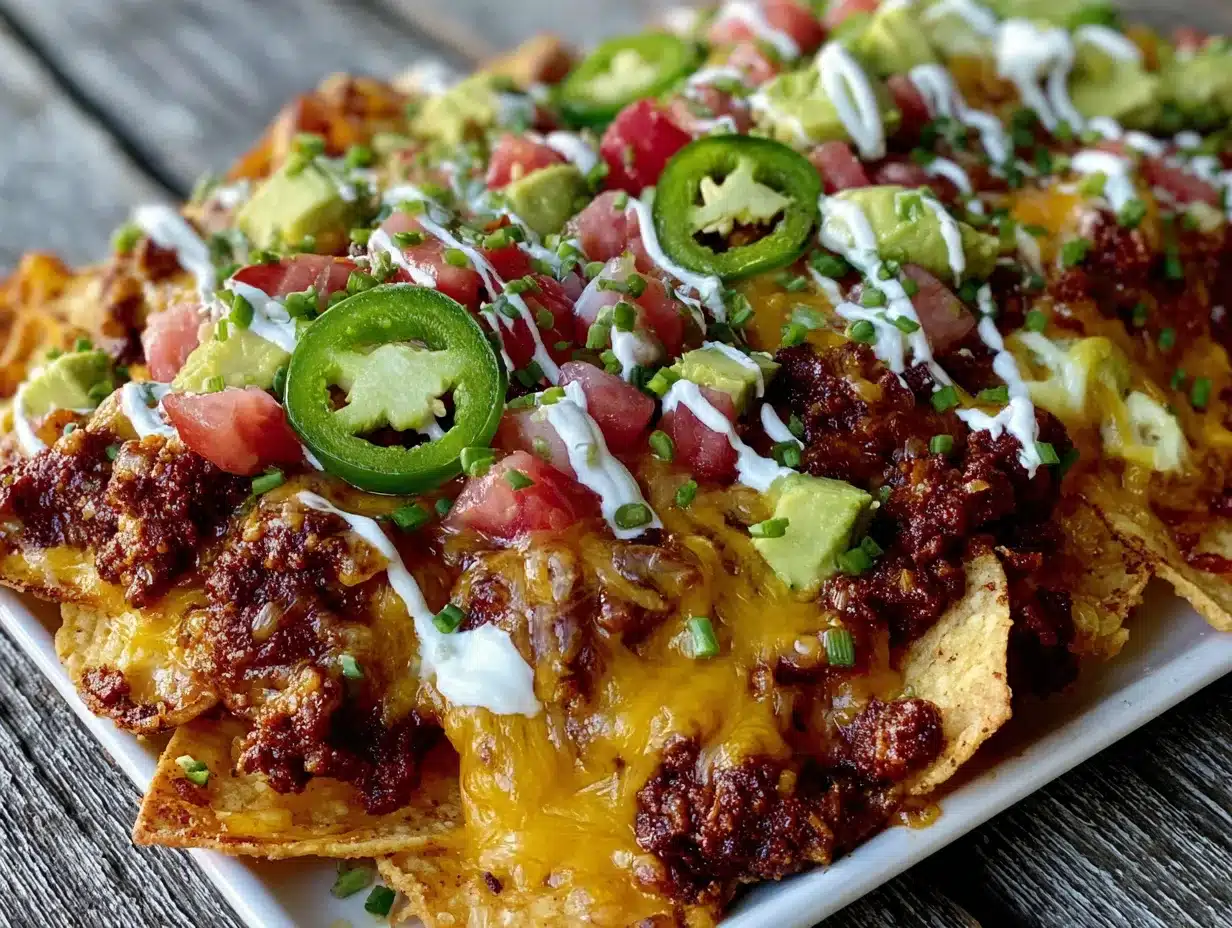
- 1 large bag (about 10-12 oz / 280-340g) restaurant-style tortilla chips: These are sturdier and hold up better to the toppings than thin, delicate chips. I recommend the brand Tostitos for their consistent thickness.
- 2 cups (225g) shredded Monterey Jack cheese: It melts beautifully and has a mild, buttery flavor. You can also use a Mexican blend.
- 1 cup (115g) shredded sharp cheddar cheese: Adds a sharper, more pronounced cheesy flavor. The combination is key.
For the Toppings (The Fun Part)
- 1 cup (150g) pico de gallo or fresh salsa: The freshness cuts through the richness of the cheese and beef. Store-bought is fine, but homemade is amazing.
- 1/2 cup (120ml) sour cream: For a cool, creamy finish. Use Greek yogurt for a healthier swap.
- 1/2 cup (75g) pickled jalapeños: Adds a necessary tangy heat. I like the La Costeña brand.
- 1 avocado, diced: For creamy, healthy fat. Squeeze a little lime juice on it to prevent browning.
- 1/4 cup fresh cilantro, chopped: Adds a bright, herbaceous note. If you are a cilantro-hater, use fresh parsley.
- 1 lime, cut into wedges: A squeeze of lime juice right before serving brightens everything up.
Equipment Needed
You don’t need a fancy kitchen to make these nachos. A few basic tools will get the job done perfectly.
- Large Rimmed Baking Sheet (Sheet Pan): This is non-negotiable. A rimmed pan keeps the toppings from sliding off. A half-sheet pan (18×13 inches) is the perfect size for a full batch.
- Large Skillet or Frying Pan: For browning the ground beef. A cast-iron skillet works great here.
- Wooden Spoon or Spatula: For breaking up the beef as it cooks.
- Chef’s Knife and Cutting Board: For dicing the onion, avocado, and chopping the cilantro.
- Small Bowls: For prepping and holding your toppings. It makes assembly so much easier.
- Parchment Paper or Aluminum Foil (Optional but Recommended): Lining your sheet pan makes cleanup an absolute breeze. Trust me on this one.
If you don’t have a large sheet pan, you can use two smaller ones. Just make sure to rotate them halfway through baking for even cooking. I have a cheap, old sheet pan that is perfectly seasoned, and it honestly works better than my fancy new one. Sometimes the imperfect tools are the best.
Preparation Method
This comes together in about 30 minutes. The key is to prep all your toppings before you start cooking. It makes the assembly a breeze.
- Preheat and Prep: Preheat your oven to 400°F (200°C). Line your large sheet pan with parchment paper or aluminum foil for easy cleanup. Set it aside.
- Cook the Beef: Place a large skillet over medium-high heat. Add the olive oil. Once it shimmers, add the diced onion and cook for 2-3 minutes until it starts to soften. Add the ground beef and break it up with your spoon. Cook for 5-7 minutes, stirring occasionally, until the beef is nicely browned and no longer pink. Drain off any excess fat if you want, but I leave a little for flavor.
- Season the Meat: Lower the heat to medium. Add the minced garlic, chili powder, cumin, smoked paprika, garlic powder, salt, and pepper. Stir everything together and cook for one minute until it smells amazing. Pour in the water or beef broth and scrape up any browned bits from the bottom of the pan. Let it simmer for 2-3 minutes until the liquid reduces and the meat is coated in a thick, flavorful sauce. Remove from heat.
- Layer the Chips: Spread the tortilla chips in a single, even layer on your prepared sheet pan. Don’t pile them too high. You want a single layer with a few overlapping edges. This ensures every chip gets crispy.
- Add the Beef and Cheese: Spoon the seasoned ground beef evenly over the chips. Try to get a little bit of meat on every chip. Sprinkle the shredded Monterey Jack and cheddar cheese over the top. Make sure the cheese covers the meat and chips well.
- Bake to Perfection: Place the sheet pan in the preheated oven. Bake for 8-10 minutes, or until the cheese is fully melted, bubbly, and starting to brown just a little on the edges. Watch it closely so the chips don’t burn.
- Add Fresh Toppings: Remove the pan from the oven. Immediately sprinkle the pico de gallo, pickled jalapeños, and diced avocado over the hot nachos. Dollop the sour cream in little pockets across the top. Finish with a generous sprinkle of fresh cilantro.
- Serve Immediately: Squeeze a few lime wedges over the whole pan. Serve the nachos straight from the sheet pan while they are hot and the cheese is stretchy. This is a sharing dish, so grab a fork or just use your hands!
Cooking Tips & Techniques
I learned these lessons the hard way, so you don’t have to. The first time I made these, I piled the chips too high and the middle was a sad, soggy mess. Here is how to avoid that and every other common mistake.
- The Single Layer Rule: This is the most important tip. Do not pile the chips. A single, even layer on the sheet pan is the secret to crispy nachos. If you want to make a double batch, use two pans. It is worth the extra pan.
- Don’t Overload the Chips: It is tempting to pile on the toppings, but too much weight will crush the chips and make them soggy. Spread the beef and cheese evenly so every chip gets a little love.
- Shred Your Own Cheese: Pre-shredded cheese has anti-caking agents that prevent it from melting smoothly. Shredding a block of Monterey Jack and cheddar yourself takes two minutes and makes a world of difference in the meltiness.
- Watch the Oven: All ovens are different. Start checking your nachos at the 8-minute mark. You want the cheese bubbly and the edges of the chips just starting to turn a deeper golden brown. Burnt chips are a tragedy.
- Cold Toppings Last: Always add the cold, fresh toppings like sour cream, pico de gallo, and avocado after the nachos come out of the oven. If you bake them, the sour cream will get weird and the avocado will turn into mush.
Variations & Adaptations
This recipe is a fantastic base for your own creations. Here are a few of my favorite ways to switch it up.
- Chicken Nachos: Swap the ground beef for shredded rotisserie chicken or cooked, shredded chicken breast. Toss it in the same seasoning blend with a little extra broth.
- Vegetarian Black Bean Nachos: Skip the meat entirely. Use one can of black beans (rinsed and drained) and one can of corn (drained). Sauté them with the onion, garlic, and the same spices for a hearty, fiber-rich filling.
- Spicy Chorizo Nachos: For a bolder, spicier flavor, replace the ground beef with Mexican chorizo. Cook it the same way, but you won’t need any extra oil. The rendered fat is pure flavor.
- Smothered Nachos: After baking, drizzle the whole pan with a warm, creamy cheese sauce or a spoonful of canned enchilada sauce. It takes the indulgence to a whole new level.
- Breakfast Nachos: This is a fun twist for brunch. Use the same base, but top the baked nachos with fried or scrambled eggs, crumbled bacon, and a drizzle of hot sauce. It is life-changing.
Serving & Storage Suggestions
These nachos are best enjoyed fresh from the oven, but here is how to handle leftovers if you have any.
- Serving: Serve the nachos directly on the sheet pan. It keeps them warm and makes for a fun, casual presentation. Place the pan on a trivet in the center of the table and let everyone dig in. It is the ultimate sharing experience.
- Storing Leftovers: Nachos do not reheat well. The chips will lose their crunch. If you have leftovers, store the chips and toppings separately in airtight containers in the refrigerator for up to 2 days. The beef and cheese mixture can be reheated and used for tacos or burritos.
- Reheating (The Best Way): If you must reheat, spread the leftover nachos on a clean sheet pan and pop them in a 350°F (175°C) oven for 5-7 minutes. It will crisp them up slightly better than a microwave. The texture won’t be perfect, but the flavor will still be there.
Nutritional Information & Benefits
This is an indulgent dish, but it also has some redeeming qualities. Here is a rough estimate for one serving (about 1/4 of the pan).
- Calories: Approximately 550-650 per serving.
- Protein: Around 30g from the ground beef and cheese, which helps keep you full.
- Fiber: 5-7g from the beans (if using), avocado, and chips.
- Healthy Fats: The avocado provides monounsaturated fats, which are good for heart health.
Dietary Considerations: This recipe is naturally gluten-free if you use certified gluten-free tortilla chips. To make it dairy-free, use a high-quality vegan cheese shred that melts well and a dairy-free sour cream. For a lower-carb option, you can use pork rinds or bell pepper strips instead of chips, though it will be a different experience. The main allergens here are dairy (cheese, sour cream) and corn (chips).
I believe in balance. This is a treat, not an everyday meal, and that is perfectly okay. Enjoying a plate of loaded nachos with friends is good for the soul, and that counts for something too.
Conclusion
This Ultimate Sheet-Pan Loaded Nachos with Ground Beef recipe is more than just a quick dinner. It is a solution for busy weeknights, a guaranteed hit for game day, and a fun way to bring people together around the table. The combination of perfectly seasoned beef, melty cheese, and fresh, crunchy toppings is simply unbeatable. I have made this for picky eaters, spice lovers, and everyone in between, and it always disappears.
I truly believe the best recipes are the ones you can make your own. So, please, use this as a starting point. Swap in your favorite protein, load up on extra jalapeños, or try a new cheese blend. I would love to hear how it turns out for you. Did you try the chorizo version? Did your kids eat it all before you could get a bite? Drop a comment below and share your nacho creations. And if you loved it, share this recipe with a friend who needs a little more crunch in their life. Happy cooking!
Frequently Asked Questions
Can I make these nachos ahead of time?
I do not recommend assembling the nachos ahead of time, as the chips will get soggy. You can, however, prep all your ingredients. Cook the ground beef and store it in the fridge. Shred the cheese and chop all your toppings. When you are ready to eat, just assemble and bake. It takes less than 15 minutes.
How do I prevent the chips from getting soggy?
The number one rule is a single layer of chips on the sheet pan. Do not pile them up. Also, make sure your ground beef is not too watery. Let the liquid simmer off after you add the broth. A hot oven (400°F) also helps the chips stay crisp.
Can I use a different type of cheese?
Absolutely. Monterey Jack and cheddar are my go-to for their meltability and flavor, but you can use a Mexican blend, pepper jack for more heat, or even a mild gouda. Just make sure to shred it yourself for the best melt.
What is the best way to reheat leftover nachos?
The oven is your best bet. Spread the leftover nachos on a sheet pan and reheat at 350°F (175°C) for 5-7 minutes. It won’t be as crispy as the first time, but it is much better than the microwave, which will turn them to mush.
Can I make this recipe in an air fryer?
Yes, you can make smaller batches in an air fryer. Assemble the nachos in a single layer in an air fryer basket that fits. Cook at 350°F (175°C) for 3-5 minutes, or until the cheese is melted. You will likely need to work in batches. It is a great way to make a single serving.
Pin This Recipe!
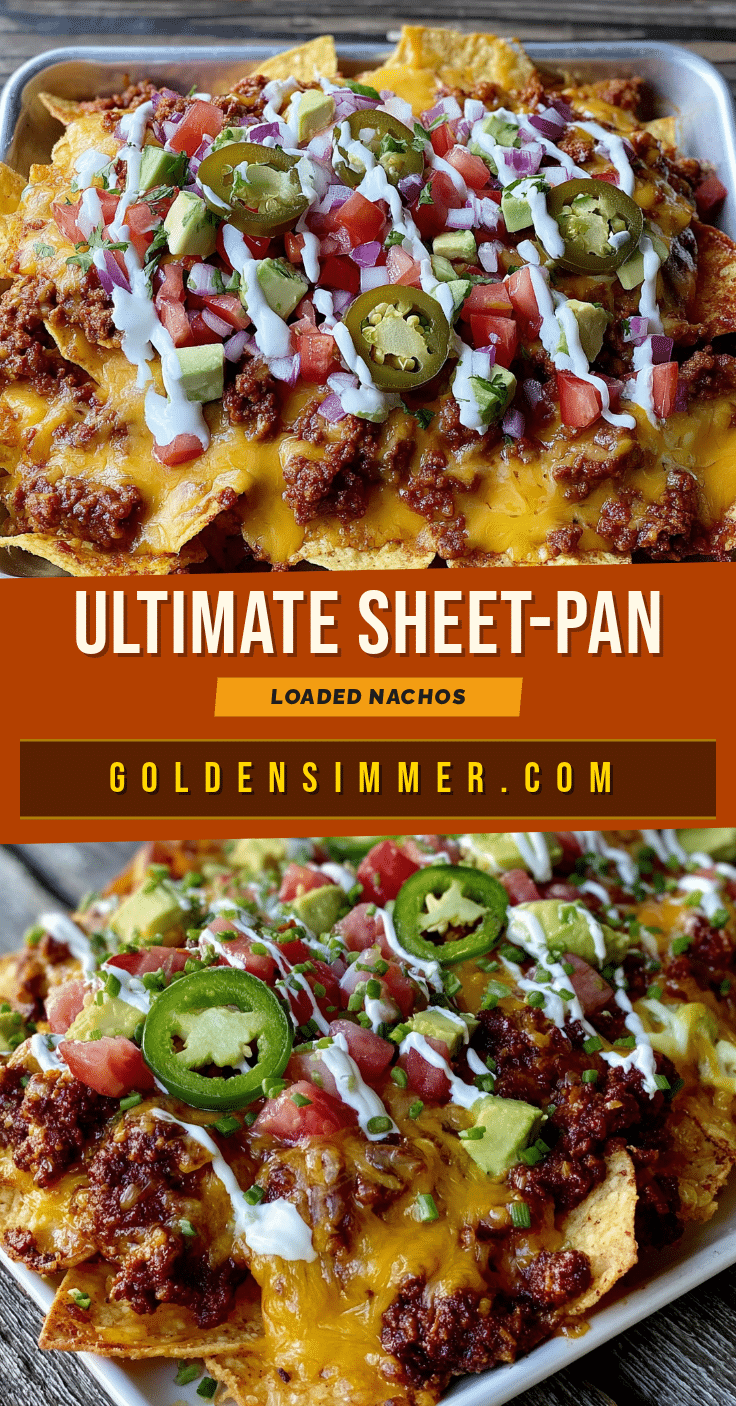
Ultimate Sheet-Pan Loaded Nachos with Ground Beef
Perfectly crispy sheet-pan nachos loaded with seasoned ground beef, melty cheese, and fresh toppings. A foolproof weeknight dinner or game-day crowd-pleaser that’s ready in 30 minutes.
- Prep Time: 15 minutes
- Cook Time: 15 minutes
- Total Time: 30 minutes
- Yield: 4 servings 1x
- Category: Main Course
- Cuisine: Mexican-American
Ingredients
- 1 lb (450g) ground beef (80/20 recommended)
- 1 tablespoon olive oil
- 1 small yellow onion, diced
- 2 cloves garlic, minced
- 1 tablespoon chili powder
- 1 teaspoon ground cumin
- 1/2 teaspoon smoked paprika
- 1/2 teaspoon garlic powder
- 1/2 teaspoon salt
- 1/4 teaspoon black pepper
- 1/2 cup (120ml) water or beef broth
- 1 large bag (10–12 oz / 280-340g) restaurant-style tortilla chips (e.g., Tostitos)
- 2 cups (225g) shredded Monterey Jack cheese
- 1 cup (115g) shredded sharp cheddar cheese
- 1 cup (150g) pico de gallo or fresh salsa
- 1/2 cup (120ml) sour cream
- 1/2 cup (75g) pickled jalapeños
- 1 avocado, diced
- 1/4 cup fresh cilantro, chopped
- 1 lime, cut into wedges
Instructions
- Preheat oven to 400°F (200°C). Line a large rimmed baking sheet with parchment paper or aluminum foil.
- Heat olive oil in a large skillet over medium-high heat. Add diced onion and cook for 2-3 minutes until softened.
- Add ground beef and cook for 5-7 minutes, breaking it up with a spoon, until browned and no longer pink. Drain excess fat if desired.
- Reduce heat to medium. Add minced garlic, chili powder, cumin, smoked paprika, garlic powder, salt, and pepper. Cook for 1 minute until fragrant.
- Pour in water or beef broth, scraping up browned bits from the pan. Simmer for 2-3 minutes until liquid reduces and meat is coated in a thick sauce. Remove from heat.
- Spread tortilla chips in a single even layer on the prepared baking sheet.
- Spoon seasoned ground beef evenly over the chips. Sprinkle Monterey Jack and cheddar cheese over the top.
- Bake for 8-10 minutes until cheese is fully melted, bubbly, and starting to brown at the edges.
- Remove from oven. Immediately top with pico de gallo, pickled jalapeños, diced avocado, and dollops of sour cream. Sprinkle with fresh cilantro.
- Squeeze lime wedges over the top. Serve immediately straight from the sheet pan.
Notes
For best results, use a single layer of chips and shred your own cheese. Add cold toppings after baking. Leftovers don’t reheat well; store components separately.
Nutrition
- Serving Size: 1/4 of the pan
- Calories: 600
- Sugar: 5
- Sodium: 800
- Fat: 35
- Saturated Fat: 15
- Carbohydrates: 40
- Fiber: 6
- Protein: 30
Keywords: sheet pan nachos, loaded nachos, ground beef nachos, easy nachos, game day nachos, weeknight dinner, crispy nachos



