Love this? Save it for later!
Share the inspiration with your friends
It was 10:47 PM on a random Wednesday, and I was staring into the fridge like it owed me money. You know that feeling? When you are too tired to cook but too hungry to sleep, and the only thing that sounds good is something you haven’t had since elementary school. I wanted a Lunchable. The kind with the little round cheese, the cracker that is always slightly too big, and the processed meat that tastes like childhood. But I didn’t have any of that plastic-wrapped magic in my house. What I did have was some leftover roasted turkey, a block of cheddar I forgot about, and a sudden, slightly unhinged idea.
I grabbed a knife and started slicing. Not perfectly, mind you. I think I cut my thumb on the cheese wrapper, honestly. But there, at my kitchen counter at nearly midnight, I built my first copycat. It was messy, the turkey was a little dry, and the crackers were from a box I bought for soup. But let me tell you—it was better than the real thing. Maybe it was the late-night hunger talking, or maybe it was the fact that I actually knew what was in it. No preservatives, no mystery meat, just real food that tasted like a memory.
That night, I made three more batches. I got carried away, okay? I started experimenting with different cheeses, adding a smear of mustard, even trying it on a mini bagel. By the time I finally went to bed, I knew I had stumbled onto something. This wasn’t just a snack—it was a solution. For busy parents, for picky eaters, for anyone who wants that nostalgic convenience without the weird ingredients. And honestly? It is way more fun to make yourself. Maybe you have been there, standing in your kitchen, craving something simple and comforting. This is that recipe.
Why You Will Love This Recipe
Let me be real with you—I have made a lot of snacks in my time. Some were great, some were forgettable, and some were just plain weird. But this Easy Homemade Turkey and Cheese Lunchables recipe? It is the one I keep coming back to. I have tested it on my picky nephew, on my stressed-out coworker, and on myself at 11 PM more times than I care to admit. It passed every test with flying colors.
- Quick & Easy: This comes together in under 10 minutes. No joke. If you can slice cheese and open a package of turkey, you can make this. Perfect for those days when you need lunch packed five minutes ago.
- Simple Ingredients: You probably have everything in your fridge right now. No fancy grocery trips, no obscure health food store runs. Just real food you recognize.
- Perfect for Lunchboxes: This is a game-changer for school lunches. Your kids will think they are getting a treat, and you will know they are getting protein and real cheese instead of processed stuff.
- Crowd-Pleaser: I have served these at playdates, as a quick appetizer for guests, and even as a light dinner option. Adults and kids both go crazy for them.
- Unbelievably Customizable: This is not just one recipe—it is a whole system. Change the meat, switch the cheese, add a spread. Every version is delicious.
What makes this different from every other snack idea out there? It is the ratio. I spent way too long figuring out the perfect turkey-to-cheese-to-cracker balance. Not too much meat, not too little cheese. Just right. Plus, you get to control the quality. No weird fillers, no artificial colors, just real ingredients that taste better than anything from a box. This is the kind of snack that makes you feel good about eating it—and about feeding it to the people you love.
What Ingredients You Will Need
This recipe uses simple, wholesome ingredients that come together to create that nostalgic lunch experience without any of the processed junk. The beauty of this copycat is that you can use whatever you have on hand, but these are my tried-and-true picks for the best results.
- Roasted Turkey Breast: 8 ounces, thinly sliced. I prefer oven-roasted from the deli counter for the best flavor. Look for nitrate-free options if you can. (Adds that classic savory taste without the processed aftertaste)
- Cheddar Cheese: 4 ounces, sliced into small squares or rounds. I like sharp cheddar for more flavor, but mild works great for kids. (Use a cheese slicer for uniform pieces)
- Crackers: 24 crackers of your choice. Classic saltines work perfectly, but I also love mini Ritz or whole wheat crackers for a healthier twist. (Keeps the crunch factor high)
- Butter or Spread: Optional, but 2 tablespoons of softened butter or cream cheese adds that authentic Lunchable richness. (Trust me on this one—it makes a difference)
- Salt and Pepper: Just a pinch to taste. Sometimes the turkey is salty enough, so taste first. (Seasoning is personal, so adjust as you go)
Let me talk about my ingredient choices for a second. I have tried this with every type of turkey out there—honey roasted, smoked, even leftover Thanksgiving turkey. The oven-roasted deli version is the winner every time. It has that clean, savory flavor that pairs perfectly with sharp cheddar. For crackers, I am a purist. I love the classic saltine because that is what I remember from my own lunchbox days. But my friend Sarah swears by butter crackers, and honestly? She is not wrong.
If you are feeling adventurous, add a smear of Dijon mustard or a tiny dollop of honey. It sounds weird, but it takes this from a simple snack to something you would actually serve to guests. Just saying.
Equipment Needed
You do not need much for this recipe, which is honestly my favorite part. No fancy gadgets, no specialty tools. Just basic kitchen stuff you already own.
- Cutting Board: A sturdy one, preferably with a groove to catch any cheese crumbs. I use a bamboo board and it works perfectly.
- Sharp Knife: A good chef’s knife or a serrated knife for clean cuts through cheese and turkey. I learned the hard way that a dull knife just smashes the cheese.
- Cheese Slicer or Vegetable Peeler: Not required, but it makes getting thin, even slices of cheese so much easier. I found mine at a thrift store for two dollars.
- Small Cookie Cutters: Optional, but if you want to make the cheese into fun shapes for kids, these are a game-changer. Star shapes are my go-to.
- Lunchbox or Airtight Container: For storing your creations. I like the compartmentalized bento boxes because they keep everything separate and crisp.
- Parchment Paper: For layering between the crackers and meat to prevent sogginess. This is a pro tip I wish I knew sooner.
If you do not have a cheese slicer, do not worry. Just use a sharp knife and go slowly. I have even used a clean ruler to measure even slices—desperate times, my friend. For containers, any airtight box works. Just avoid stacking the components directly on top of each other unless you want sad, soggy crackers by lunchtime.
Preparation Method
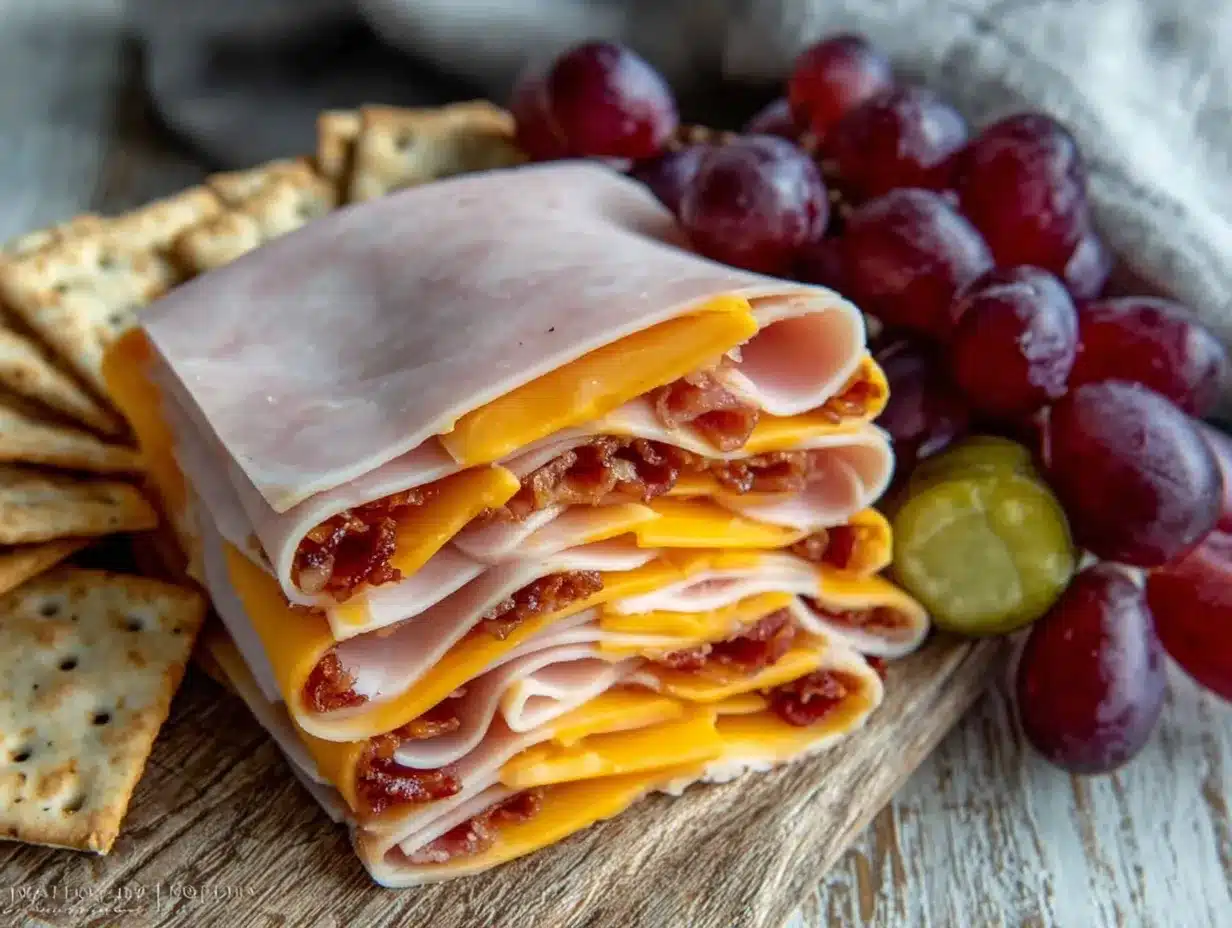
Alright, let us get to the fun part. This is where the magic happens. Follow these steps, and you will have the most perfect homemade Lunchables that will make your inner child scream with joy.
- Prep Your Workspace: Clear your counter and wash your hands. Lay out your cutting board, knife, and all ingredients. I like to set everything up assembly-line style. It makes the process faster and more satisfying.
- Slice the Turkey: If your turkey is not pre-sliced, cut it into small, bite-sized squares. Aim for pieces that are about 1.5 inches by 1.5 inches. You want them big enough to feel substantial but small enough to fit neatly on a cracker. (Time: 2 minutes)
- Cut the Cheese: Slice your cheddar into thin squares or use a small cookie cutter for fun shapes. The cheese should be slightly smaller than your crackers so it does not hang over the edges. If you are using a block of cheese, aim for 1/8 inch thickness. (Time: 3 minutes)
- Optional Butter Layer: If you are using butter or cream cheese, spread a very thin layer on each cracker. This is the secret to the authentic Lunchable experience. It adds richness and helps everything stick together. (Time: 2 minutes)
- Assemble the Layers: Place a slice of turkey on each cracker, followed by a piece of cheese. Press down gently so everything stays together. Do not stack them on top of each other yet—keep them in a single layer on a plate or tray. (Time: 3 minutes)
- Season Lightly: Sprinkle a tiny pinch of salt and pepper over the assembled snacks if desired. Remember, the turkey and cheese are already salty, so go easy. (Time: 30 seconds)
- Pack for Later: If you are making these for a lunchbox, place a piece of parchment paper between layers in your container. This prevents the crackers from getting soggy. For immediate eating, just arrange them on a plate and dig in. (Time: 2 minutes)
Let me share a little tip I learned from my third batch: do not overthink the assembly. The beauty of this recipe is its imperfection. Some pieces might be bigger, some smaller. That is fine. In fact, that is better. It feels more homemade, more real. The crackers should look inviting, not like they were assembled by a machine.
One more thing—if you are making these for a school lunch, assemble them the night before and store them in the fridge. The flavors actually meld together overnight, and somehow, they taste even better the next day. Just keep the crackers separate until right before serving if you want maximum crunch.
Cooking Tips & Techniques
Over the dozens of times I have made these, I have picked up a few tricks that separate a good Lunchable from a great one. Let me share what I have learned—including the mistakes I made so you do not have to.
- Prevent Soggy Crackers: This is the number one issue people face. The solution is simple: never assemble them more than a few hours ahead if you want crunch. Or, use the parchment paper trick between layers. I learned this the hard way when I made a big batch for a road trip and ended up with cracker mush.
- Room Temperature Ingredients: Let your cheese sit out for 10 minutes before slicing. Cold cheese crumbles and breaks. Room temperature cheese slices like a dream. I cannot stress this enough.
- Knife Technique: Use a sawing motion for slicing turkey, not a pressing motion. Pressing just squishes the meat. A gentle back-and-forth gives you clean, pretty slices.
- Batch Assembly: Do not try to make one at a time. Lay out all your crackers first, then add the butter, then the turkey, then the cheese. Assembly-line style saves you so much time.
- Flavor Boost: Toast your crackers in a dry pan for 30 seconds before assembling. This adds a nutty flavor and extra crunch that takes these to another level.
I remember one time I was in a rush and used cold cheese straight from the fridge. It crumbled into a million pieces, and I ended up with cheese dust instead of neat slices. My kitchen looked like a cheese explosion. Now I always let it sit out while I prep the turkey. Lesson learned, you know?
Another thing—if you are using a spread, do not go overboard. A thin layer is all you need. Too much butter or cream cheese will make everything slide around and turn into a mess. Think of it as glue, not a topping.
Variations & Adaptations
This recipe is incredibly flexible, which is why I never get bored of it. Here are some of my favorite ways to switch things up.
- Meat Swap: Use ham, roast beef, salami, or even grilled chicken strips. Each one gives a completely different vibe. Ham and Swiss is a classic combo that never fails.
- Cheese Changes: Try provolone, mozzarella, pepper jack for a kick, or even brie for a fancy twist. Smoked gouda is my current obsession—it pairs beautifully with turkey.
- Cracker Alternatives: Use mini bagels, rice cakes, cucumber rounds, or even apple slices for a low-carb option. Everything works, honestly.
- Add Veggies: Tuck in a thin slice of cucumber, a baby spinach leaf, or a tiny strip of roasted red pepper. It adds color and crunch.
- Sweet and Savory: Add a tiny smear of fig jam or honey under the turkey. The sweetness against the salty cheese is incredible.
I once made a version with leftover Christmas ham and brie on butter crackers. It was supposed to be a quick snack, but it turned into an appetizer for a whole party. My aunt asked for the recipe, and I had to admit it was just a Lunchable with fancy ingredients. She did not believe me until I showed her.
For a low-carb version, skip the crackers entirely and roll the turkey around a cheese stick. It is like a little pinwheel and works great for keto diets. My neighbor does this for her kids, and they love it.
Serving & Storage Suggestions
These are best served cold or at room temperature, straight from the container. The texture is perfect when the cheese is still firm but not hard, and the crackers have their full crunch.
- Presentation: Arrange them on a plate in a circular pattern with a small bowl of mustard or honey in the center for dipping. It looks intentional and fancy, even though it took two minutes.
- Pairings: Serve with apple slices, baby carrots, a handful of grapes, or some pickles. The acidity from pickles cuts through the richness perfectly.
- Beverages: A cold glass of milk is the classic pairing, but iced tea or even a light lemonade works well for adults.
- Storage: Store assembled snacks in an airtight container in the refrigerator for up to 3 days. Keep crackers separate if you want them to stay crunchy.
- Freezer: You can freeze the turkey and cheese separately, but I do not recommend freezing assembled snacks. The texture suffers.
Here is a little secret: the flavors actually get better after a few hours in the fridge. Something about the turkey and cheese mingling together creates a deeper, more cohesive taste. So do not be afraid to make these the night before.
For reheating, these are meant to be eaten cold. But if you want a warm version, pop them in a 350°F oven for 3-4 minutes. The cheese gets melty and the crackers toast slightly. It is a completely different experience, but equally delicious.
Nutritional Information & Benefits
While I am not a nutritionist, I can tell you that this homemade version is significantly better for you than the store-bought alternative. You control the ingredients, the sodium, and the quality.
- Estimated per serving (6 assembled snacks): Calories: 280, Protein: 22g, Fat: 14g, Carbohydrates: 18g, Fiber: 1g, Sugar: 2g.
- High-Quality Protein: Turkey breast is lean and packed with protein, which keeps you full and satisfied. Great for growing kids and active adults.
- Calcium Boost: Cheddar cheese provides a good amount of calcium for bone health. Use full-fat cheese for better absorption of nutrients.
- Lower Sodium: Homemade versions let you control the salt. Store-bought Lunchables can have over 600mg of sodium per serving. This version has about half that.
- No Artificial Anything: No preservatives, no artificial colors, no high-fructose corn syrup. Just real food that your body recognizes.
For dietary considerations, this recipe can be made gluten-free by using gluten-free crackers. It is naturally low in sugar and can be adjusted for low-carb diets by using cheese crisps or cucumber slices instead of crackers. If you are watching your sodium, look for low-sodium turkey and unsalted crackers.
Honestly, knowing exactly what goes into my food makes me feel so much better about snacking. And when I pack these for my family, I feel good knowing they are getting real nutrition, not just empty calories.
Conclusion
So there you have it—the Easy Homemade Turkey and Cheese Lunchables that will change your snack game forever. This recipe is proof that you do not need a box of processed food to enjoy the convenience and nostalgia of a childhood favorite. With just three main ingredients and about ten minutes, you can create something that tastes better, feels better, and is better for you.
I love this recipe because it reminds me that cooking does not have to be complicated to be good. Sometimes the simplest things are the most satisfying. Whether you are packing lunch for a picky kid, looking for a quick snack for yourself, or just want to feel like a kid again for a few minutes, these little sandwiches deliver every time.
Now I want to hear from you. Have you tried making your own Lunchables at home? What is your favorite combination? Drop a comment below and let me know. And if you try this recipe, share a photo—I love seeing your creations. Trust me, once you make these, you will never go back to the boxed version again. Happy snacking, my friend!
Frequently Asked Questions
Can I use any type of meat for this recipe?
Absolutely! While turkey is my go-to, you can use ham, roast beef, salami, chicken, or even plant-based deli slices. Each one gives a different flavor profile, so feel free to experiment.
How do I keep the crackers from getting soggy?
The key is to store the components separately until you are ready to eat. Use parchment paper between layers in your container, or pack the crackers in a separate small bag. Assembly right before eating guarantees maximum crunch.
Can I make these ahead of time for meal prep?
Yes! You can prep all the ingredients up to 3 days in advance. Slice the turkey and cheese, portion them out, and store them separately. Assemble them fresh each morning for the best texture.
Are these suitable for school lunches?
Definitely. They are a healthier alternative to store-bought Lunchables and are easy to pack. Just make sure to use an airtight container and keep them cold with an ice pack. Kids love them because they are fun to eat.
What if I do not have crackers?
No problem! You can use mini bagels, rice cakes, cucumber slices, apple rounds, or even bell pepper strips as the base. Each option adds a different texture and flavor, so it is a great way to change things up.
Pin This Recipe!
Easy Homemade Turkey and Cheese Lunchables

A quick and easy homemade version of the classic Lunchable snack, made with real ingredients like roasted turkey, cheddar cheese, and crackers. Perfect for lunchboxes, busy parents, or anyone craving a nostalgic, healthier alternative to processed snacks.
- Prep Time: 10 minutes
- Cook Time: 0 minutes
- Total Time: 10 minutes
- Yield: 4 servings 1x
- Category: Snack
- Cuisine: American
Ingredients
- 8 ounces roasted turkey breast, thinly sliced
- 4 ounces cheddar cheese, sliced into small squares or rounds
- 24 crackers (such as saltines, mini Ritz, or whole wheat crackers)
- 2 tablespoons butter or cream cheese, softened (optional)
- Salt and pepper to taste
Instructions
- Prep your workspace: Clear your counter and wash your hands. Lay out your cutting board, knife, and all ingredients assembly-line style.
- Slice the turkey: If not pre-sliced, cut turkey into small, bite-sized squares about 1.5 inches by 1.5 inches.
- Cut the cheese: Slice cheddar into thin squares or use a small cookie cutter for fun shapes. Aim for 1/8 inch thickness, slightly smaller than your crackers.
- Optional butter layer: Spread a very thin layer of butter or cream cheese on each cracker.
- Assemble the layers: Place a slice of turkey on each cracker, followed by a piece of cheese. Press down gently.
- Season lightly: Sprinkle a tiny pinch of salt and pepper over the assembled snacks if desired.
- Pack for later: For lunchboxes, place parchment paper between layers in an airtight container to prevent sogginess. For immediate eating, arrange on a plate.
Notes
For best results, let cheese sit at room temperature for 10 minutes before slicing to prevent crumbling. Use a sawing motion when slicing turkey to avoid squishing. Assemble no more than a few hours ahead for crunchy crackers, or use parchment paper between layers. The flavors meld and improve after a few hours in the fridge. For a warm version, bake at 350°F for 3-4 minutes.
Nutrition
- Serving Size: 6 assembled snacks
- Calories: 280
- Sugar: 2
- Sodium: 300
- Fat: 14
- Saturated Fat: 7
- Carbohydrates: 18
- Fiber: 1
- Protein: 22
Keywords: homemade lunchables, turkey and cheese, copycat lunchables, easy snack, lunchbox idea, healthy snack, kid-friendly snack



