Love this? Save it for later!
Share the inspiration with your friends
The PTA bake sale was in six hours and I’d completely forgotten. Like, the kind of forgetting where you wake up in a cold sweat at 3 AM realizing you signed up to bring two dozen “spooktacular treats” for the Halloween booth. Everyone else would be bringing those bakery-perfect cookies with royal icing, or those fancy cake pops that look like little ghosts. I had a half-used bottle of black food coloring, a block of cream cheese that might be expiring, and honestly, a whole lot of panic. My kitchen looked like a crime scene by the time I was done—black cocoa powder on the ceiling, buttercream on the dog—but I walked into that school gym with a cardboard box full of these black velvet cupcakes. They won the bake-off. Not because they were fancy, but because someone took one bite of that tangy cream cheese frosting and just… closed their eyes. Maybe you’ve been there, staring at your pantry wondering if you can fake a masterpiece. Let me tell you, this is that recipe.
Why You’ll Love This Recipe
I’ve tested this recipe about seven times to get the texture just right. The crumb needs to be tender, not dry, and the color has to be a true, deep black—not a sad, grayish-brown. After a few disasters (and one batch that looked like charcoal briquettes), I landed on this version. Here is why it works:
- Quick & Easy: From start to finish, you’re looking at about 45 minutes. Perfect for last-minute Halloween parties or when you forget the school bake sale.
- Simple Ingredients: No weird specialty flours or imported extracts. You probably have most of this in your pantry right now.
- Perfect for Halloween: The black color is dramatic and fun, but the cream cheese frosting keeps it classy. It’s spooky without being tacky.
- Crowd-Pleaser: I’ve served these to kids, adults, and even my neighbor who “doesn’t do sweets.” He ate three.
- Unbelievably Delicious: The combination of black cocoa powder and tangy buttermilk creates a flavor that’s almost like an Oreo, but better. The frosting is the real star—smooth, creamy, and just sweet enough.
This isn’t just another chocolate cupcake dyed black. The black cocoa powder gives it a distinct, almost smoky flavor that regular cocoa just can’t match. It’s the kind of cupcake that makes people ask for the recipe before they even finish the first one. Honestly, it’s comfort food with a dark twist—perfect for impressing guests without the stress.
What Ingredients You Will Need
This recipe uses simple, wholesome ingredients to deliver that signature black velvet flavor and tender crumb. Most of these are pantry staples, but a few are worth seeking out for the best results.
- For the Cupcakes:
- 1 ½ cups all-purpose flour (spooned and leveled)
- ½ cup black cocoa powder (I prefer the brand “The Cocoa Trader” for the darkest color)
- 1 teaspoon baking soda
- ½ teaspoon salt
- 1 cup granulated sugar
- ½ cup vegetable oil (or melted coconut oil)
- 1 large egg, room temperature
- 1 teaspoon vanilla extract
- 1 cup buttermilk, room temperature (adds tenderness and reacts with the cocoa)
- 1 tablespoon black gel food coloring (liquid won’t give you the same deep color)
- 1 teaspoon white vinegar (helps activate the baking soda)
- For the Cream Cheese Frosting:
- 8 ounces cream cheese, softened (full-fat is best for stability)
- ½ cup unsalted butter, softened
- 3 cups powdered sugar, sifted
- 1 teaspoon vanilla extract
- Pinch of salt
Ingredient Tips: For the black cocoa powder, don’t substitute regular Dutch-process cocoa—it won’t give you that dark color or unique flavor. If you can’t find black cocoa, you can use a mix of ¼ cup Dutch-process and ¼ cup regular cocoa, but the color will be more of a dark gray. For the buttermilk, you can make a quick substitute by adding 1 tablespoon of lemon juice to 1 cup of milk and letting it sit for 5 minutes. I’ve done this in a pinch and it works fine. The gel food coloring is non-negotiable here—liquid coloring will thin out the batter too much and give you a lighter, more purple-ish hue.
Equipment Needed
You don’t need a professional bakery setup for these cupcakes, but a few key tools make the process much smoother.
- Muffin tin (standard 12-cup)
- Paper cupcake liners (I like using black or orange ones for the Halloween theme)
- Large mixing bowls (at least two)
- Whisk and rubber spatula
- Electric hand mixer or stand mixer with paddle attachment
- Cooling rack
- Piping bag with a large star tip (like Ateco 846 or Wilton 1M)
- Measuring cups and spoons
If you don’t have a piping bag, you can use a zip-top bag with the corner snipped off. It won’t look as fancy, but it still tastes the same. I’ve used a butter knife to spread the frosting in a pinch, and honestly, it gives a more rustic, homemade vibe. For the mixing, a hand mixer is totally fine—you don’t need a stand mixer. Just make sure your cream cheese and butter are properly softened or you’ll end up with lumpy frosting.
Preparation Method
Let’s get baking. I’ve broken this down into clear steps, with a few notes from my own trial-and-error moments.
- Preheat and Prep: Preheat your oven to 350°F (175°C). Line your muffin tin with 12 paper liners. This seems obvious, but I’ve forgotten to line the tin before and ended up with a stuck, crumbly mess. Don’t be me.
- Mix Dry Ingredients: In a medium bowl, whisk together the flour, black cocoa powder, baking soda, and salt. Make sure there are no lumps in the cocoa powder—it tends to clump. I usually sift it if I’m feeling fancy, but whisking vigorously works too.
- Combine Wet Ingredients: In a large bowl, whisk together the sugar and vegetable oil until well combined. Add the egg, vanilla extract, and buttermilk, and whisk until smooth. The batter will look a bit thin at this point—don’t worry, that’s normal.
- Add Food Coloring: Stir in the black gel food coloring. This is where it gets messy. I usually wear disposable gloves because the gel stains everything, including my fingers. Mix until the batter is uniformly dark. It should look like black ink.
- Combine Wet and Dry: Gradually add the dry ingredients to the wet ingredients, stirring gently with a spatula until just combined. Do not overmix—overmixing will make the cupcakes tough. A few small lumps are okay.
- Add Vinegar: Stir in the white vinegar. This reacts with the baking soda to give the cupcakes a little extra lift. You’ll see a few bubbles form. Work quickly here.
- Fill the Liners: Divide the batter evenly among the 12 liners, filling each about ⅔ full. I use a cookie scoop for this—it’s less messy and ensures even-sized cupcakes.
- Bake: Bake for 18-20 minutes, or until a toothpick inserted into the center comes out clean or with a few moist crumbs. The tops should spring back when lightly touched. My oven runs hot, so I check at 16 minutes just to be safe.
- Cool Completely: Let the cupcakes cool in the pan for 5 minutes, then transfer them to a wire rack to cool completely. Do not frost them while they’re warm or the frosting will melt into a sad puddle. I learned this the hard way.
- Make the Frosting: In a large bowl, beat the softened cream cheese and butter together with an electric mixer until smooth and creamy, about 2 minutes. Add the vanilla and salt, then gradually add the powdered sugar, beating on low speed until incorporated. Increase the speed to medium-high and beat for 2-3 minutes until light and fluffy. If the frosting is too soft, refrigerate it for 15 minutes before piping.
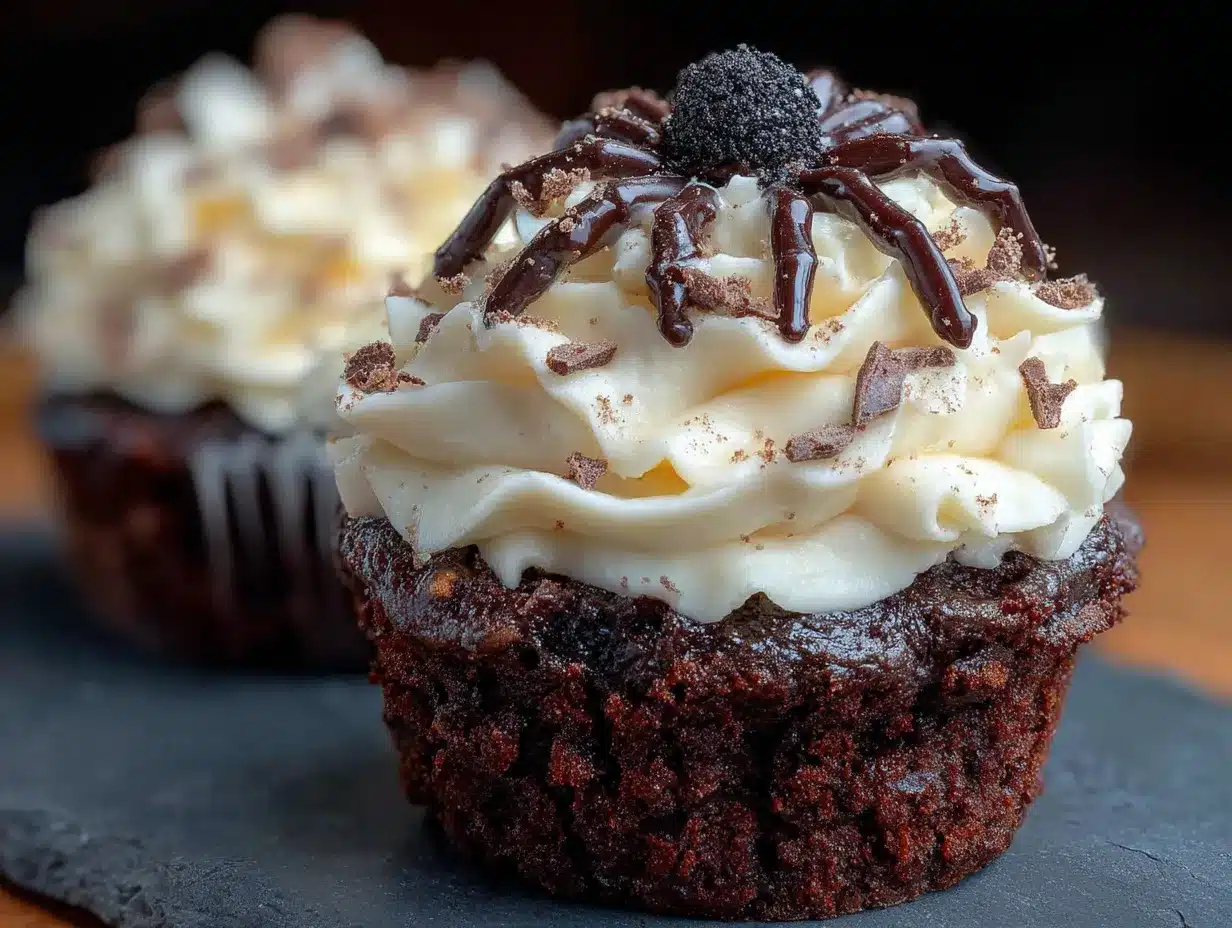
- Frost and Decorate: Transfer the frosting to a piping bag fitted with a star tip. Pipe a generous swirl onto each cooled cupcake. For a spooky touch, top with black sprinkles, edible glitter, or a small candy spider.
Cooking Tips & Techniques
I’ve made a lot of mistakes with these cupcakes so you don’t have to. Here are the things I wish I’d known from the start.
- Don’t Overmix the Batter: I know I said this already, but it’s worth repeating. Overmixing develops the gluten and makes the cupcakes dense and rubbery. Mix until the flour just disappears.
- Room Temperature Ingredients Matter: Cold buttermilk and cold eggs will make the batter seize up and create a lumpy texture. Take them out of the fridge 30 minutes before you start baking.
- Use Gel Food Coloring: Liquid food coloring will not give you the same deep black color. You’ll end up adding so much that the batter gets too thin. Gel is concentrated and keeps the batter structure intact.
- Check Your Oven Temperature: Ovens lie. I use an oven thermometer to make sure mine is actually at 350°F. If your oven runs hot, your cupcakes will dome too much and crack.
- Frosting Consistency: If your cream cheese frosting is too runny, it’s usually because the cream cheese or butter was too soft. Pop it in the fridge for 10-15 minutes to firm up. If it’s too stiff, add a tablespoon of milk.
Variations & Adaptations
One of the best things about this recipe is how adaptable it is. I’ve tried a few variations over the years, and here are my favorites.
- Gluten-Free Version: Substitute the all-purpose flour with a 1:1 gluten-free baking flour blend. I’ve used Bob’s Red Mill with good results. Add an extra tablespoon of buttermilk to compensate for the dryness of gluten-free flours.
- Vegan Adaptation: Use a flax egg (1 tablespoon ground flaxseed mixed with 3 tablespoons water) and replace the buttermilk with almond milk mixed with 1 tablespoon lemon juice. For the frosting, use vegan cream cheese and butter. It’s not exactly the same, but it’s surprisingly close.
- Spooky Spider Web Design: Instead of a simple swirl, pipe a flat layer of frosting on each cupcake, then use a toothpick to drag lines from the center outward to create a web pattern. Top with a plastic spider for a fun Halloween effect.
- Mint Chocolate Twist: Add ½ teaspoon of peppermint extract to the frosting for a cool, refreshing kick. The mint pairs beautifully with the dark cocoa flavor.
- Mini Cupcakes: Use a mini muffin tin and bake for 10-12 minutes. This is perfect for parties where people want to sample multiple treats.
Serving & Storage Suggestions
These cupcakes are best served at room temperature. The cream cheese frosting softens up nicely, and the cake is tender and moist. If you’re serving them at a Halloween party, arrange them on a black cake stand or a wooden board for a dramatic effect.
- Serving Temperature: Let them sit out for about 20 minutes after refrigerating to take the chill off. Cold frosting can taste a bit firm and less flavorful.
- Complementary Dishes: These pair wonderfully with a hot cup of coffee or a glass of cold milk. For a dessert spread, serve alongside pumpkin bars or apple cider donuts.
- Storage: Store leftover cupcakes in an airtight container in the refrigerator for up to 5 days. The cream cheese frosting needs to stay chilled.
- Freezing: You can freeze the unfrosted cupcakes for up to 3 months. Wrap them individually in plastic wrap and place them in a freezer bag. Thaw at room temperature before frosting.
- Flavor Development: Honestly, the flavor gets even better after a day in the fridge. The black cocoa deepens, and the frosting sets up perfectly. Just bring them to room temperature before serving.
Nutritional Information & Benefits
Let’s be real—these are cupcakes, not health food. But I’ve included the estimated nutritional values so you can plan your splurge. One cupcake (with frosting) contains approximately:
- Calories: 380
- Fat: 22g
- Carbohydrates: 45g
- Protein: 4g
- Sugar: 32g
That said, black cocoa powder is rich in antioxidants, and cream cheese provides a good amount of calcium and protein. It’s not a salad, but it’s not the worst thing you could eat. For those with dietary restrictions, the gluten-free and vegan versions work beautifully. The main allergens here are dairy, eggs, and wheat, so be mindful if you’re serving a mixed crowd. I personally love that this recipe lets me indulge without feeling like I’m eating a science experiment—it’s real food, made from scratch, with ingredients I can pronounce.
FAQs
Can I make these cupcakes ahead of time?
Yes! You can bake the cupcakes up to two days in advance and store them in an airtight container at room temperature. Frost them the day you plan to serve them for the best texture and appearance.
Why did my cupcakes turn out gray instead of black?
This usually happens when you use liquid food coloring instead of gel, or when you don’t use enough black cocoa powder. Make sure you’re using black cocoa powder specifically, and add the full tablespoon of black gel food coloring.
Can I use a different frosting?
Absolutely. A classic vanilla buttercream or a chocolate ganache would work well here. I’ve also tried a marshmallow frosting for a lighter, fluffier texture. The cream cheese frosting is my favorite because it balances the dark, rich cocoa flavor.
How do I get smooth frosting without lumps?
Make sure your cream cheese and butter are truly softened to room temperature. If they’re too cold, they won’t cream together smoothly. Sift your powdered sugar to remove any clumps, and beat the frosting for a full 2-3 minutes until it’s light and fluffy.
Can I double this recipe?
Yes, this recipe doubles easily. Just use two muffin tins and rotate them halfway through baking. You might need to add an extra minute or two to the baking time if you’re baking two trays at once.
Conclusion
These black velvet Halloween cupcakes are the kind of recipe that becomes a tradition. They’re dramatic enough for a spooky party, but simple enough that you can whip them up on a Tuesday night just because you feel like it. The combination of that dark, almost smoky cake with the tangy, sweet cream cheese frosting is honestly unbeatable. I’ve made these for Halloween parties, birthday dinners, and even just for myself when I needed a little pick-me-up. They never disappoint.
I’d love to hear how yours turn out. Did you try a fun variation? Did your kids help you pipe the frosting? Drop a comment below and let me know. And if you’re looking for more Halloween baking inspiration, you might want to try my spiderweb brownies—they’re just as easy and always a hit. Happy baking, and don’t forget to save one for yourself before they disappear!
Pin This Recipe!
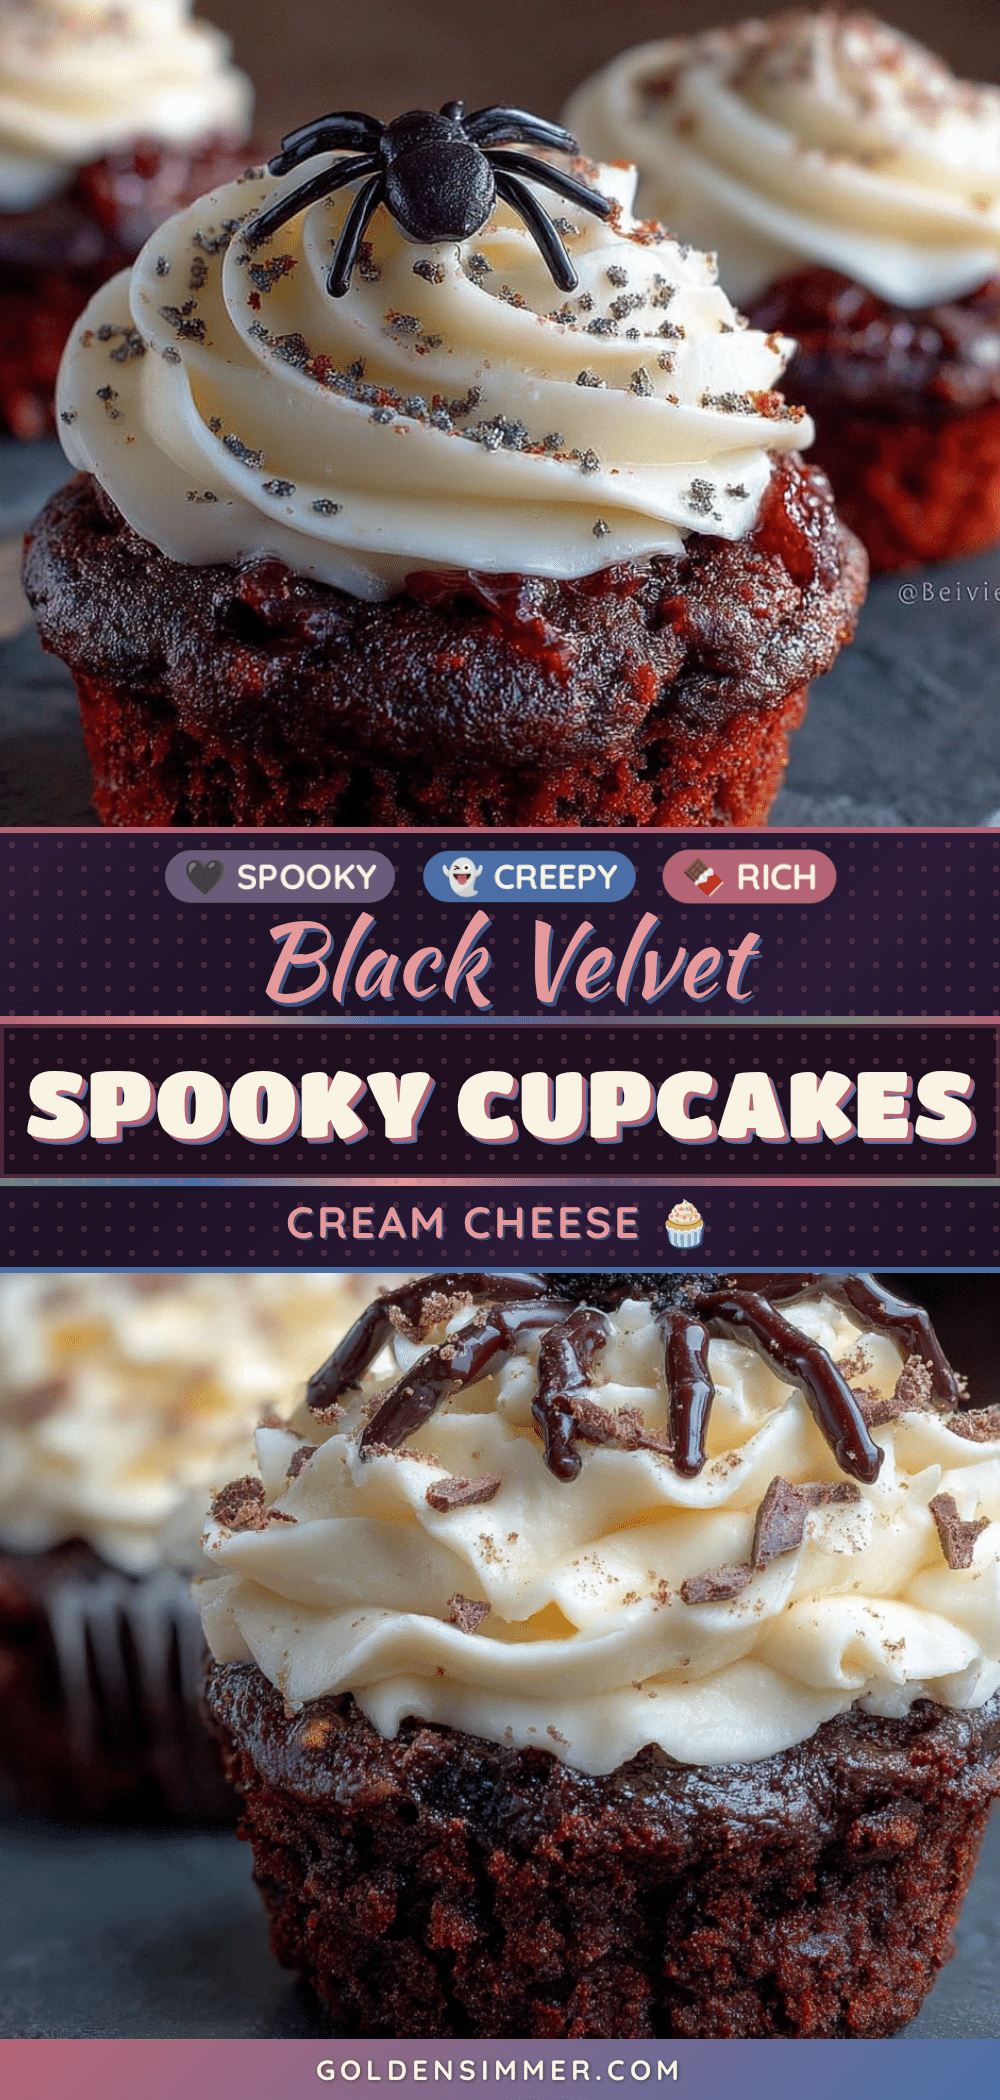
Perfect Black Velvet Cupcakes Easy Halloween Recipe
These black velvet cupcakes are the perfect Halloween treat—a tender, dark cocoa cake with a tangy cream cheese frosting. Quick and easy to make, they’re sure to be a crowd-pleaser at any spooky gathering.
- Prep Time: 15 minutes
- Cook Time: 20 minutes
- Total Time: 45 minutes
- Yield: 12 cupcakes 1x
- Category: Dessert
- Cuisine: American
Ingredients
- 1 ½ cups all-purpose flour (spooned and leveled)
- ½ cup black cocoa powder (preferably The Cocoa Trader brand)
- 1 teaspoon baking soda
- ½ teaspoon salt
- 1 cup granulated sugar
- ½ cup vegetable oil (or melted coconut oil)
- 1 large egg, room temperature
- 1 teaspoon vanilla extract
- 1 cup buttermilk, room temperature
- 1 tablespoon black gel food coloring
- 1 teaspoon white vinegar
- 8 ounces cream cheese, softened (full-fat)
- ½ cup unsalted butter, softened
- 3 cups powdered sugar, sifted
- 1 teaspoon vanilla extract
- Pinch of salt
Instructions
- Preheat your oven to 350°F (175°C). Line a 12-cup muffin tin with paper liners.
- In a medium bowl, whisk together the flour, black cocoa powder, baking soda, and salt until no lumps remain.
- In a large bowl, whisk together the sugar and vegetable oil until well combined. Add the egg, vanilla extract, and buttermilk, and whisk until smooth.
- Stir in the black gel food coloring until the batter is uniformly dark.
- Gradually add the dry ingredients to the wet ingredients, stirring gently with a spatula until just combined. Do not overmix.
- Stir in the white vinegar. You’ll see a few bubbles form; work quickly.
- Divide the batter evenly among the 12 liners, filling each about ⅔ full.
- Bake for 18-20 minutes, or until a toothpick inserted into the center comes out clean or with a few moist crumbs. The tops should spring back when lightly touched.
- Let the cupcakes cool in the pan for 5 minutes, then transfer them to a wire rack to cool completely.
- For the frosting: In a large bowl, beat the softened cream cheese and butter together with an electric mixer until smooth and creamy, about 2 minutes. Add the vanilla and salt, then gradually add the powdered sugar, beating on low speed until incorporated. Increase speed to medium-high and beat for 2-3 minutes until light and fluffy. If too soft, refrigerate for 15 minutes before piping.
- Transfer the frosting to a piping bag fitted with a star tip. Pipe a generous swirl onto each cooled cupcake. Optionally, top with black sprinkles, edible glitter, or a small candy spider.
Notes
For the black cocoa powder, don’t substitute regular Dutch-process cocoa—it won’t give you that dark color or unique flavor. If you can’t find black cocoa, use a mix of ¼ cup Dutch-process and ¼ cup regular cocoa, but the color will be more of a dark gray. For the buttermilk, you can make a quick substitute by adding 1 tablespoon of lemon juice to 1 cup of milk and letting it sit for 5 minutes. The gel food coloring is non-negotiable—liquid coloring will thin out the batter too much and give you a lighter, more purple-ish hue. Don’t overmix the batter; mix until the flour just disappears. Room temperature ingredients matter—take them out of the fridge 30 minutes before baking. Use an oven thermometer to ensure accurate temperature. If frosting is too runny, refrigerate for 10-15 minutes to firm up. If too stiff, add a tablespoon of milk.
Nutrition
- Serving Size: 1 cupcake
- Calories: 380
- Sugar: 32
- Sodium: 280
- Fat: 22
- Saturated Fat: 10
- Carbohydrates: 45
- Fiber: 2
- Protein: 4
Keywords: black velvet cupcakes, Halloween cupcakes, cream cheese frosting, black cocoa cupcakes, easy Halloween dessert