Love this? Save it for later!
Share the inspiration with your friends
It was 11:47 PM on a sweaty Wednesday in July, and I had a problem. The kind of problem that feels ridiculous in the light of day but absolutely critical at night—a desperate, undeniable need for vanilla ice cream. Not the store-bought kind, either. I wanted that thick, creamy, speckled-with-real-vanilla-bean stuff that makes you close your eyes on the first bite. The freezer was a wasteland of frozen peas and a sad bag of edamame. I didn’t have an ice cream maker—honestly, I’ve never owned one—but I had three things: a carton of heavy cream, a can of sweetened condensed milk, and a single vanilla bean that was starting to look a little sad in the spice drawer. The idea just arrived, fully formed, like a late-night vision. What if I just… whipped it? No churning, no machines, no fuss. I mean, what was the worst that could happen?
I pulled out my stand mixer, cracked the vanilla bean open with a paring knife (nearly sent the tiny black seeds flying across the counter—classic me), and just went for it. Thirty minutes later, I was spoon-deep in the most ridiculously creamy, luxurious ice cream I had ever made. It was one of those moments where you laugh out loud in an empty kitchen because something so simple shouldn’t work this well. The texture was like soft-serve meets gelato, and the vanilla flavor was so deep and floral it felt like a cheat code. Maybe you’ve been there—standing in front of an open fridge at midnight, convinced that a bowl of something cold and sweet will fix everything. Let me tell you, this recipe is the answer. It’s the one I’ve made for every summer BBQ, every lazy Sunday, and every late-night craving since. It stayed with me because it proved that you don’t need fancy equipment or a culinary degree to make something truly spectacular.
Why You’ll Love This Recipe
This isn’t just another ice cream recipe—it’s the one that makes you wonder why you ever bothered with the store-bought stuff. I’ve tested this version more times than I can count, tweaking the whipping time and the fold technique until it was absolutely foolproof. It’s the kind of recipe that builds trust, because it works every single time without fail.
- Quick & Easy: Comes together in about 15 minutes of active prep. The hardest part is waiting for it to freeze!
- Simple Ingredients: No fancy grocery trips needed. You likely have heavy cream and sweetened condensed milk in your pantry right now.
- Perfect for Summer: Great for backyard parties, holiday gatherings, or just a quiet Tuesday night treat.
- Crowd-Pleaser: Always gets rave reviews. Kids love the creamy texture, adults appreciate the real vanilla flavor.
- Unbelievably Delicious: The texture is next-level—silky, dense, and scoopable straight from the freezer.
What makes this recipe different from the rest? It’s the technique. By whipping the heavy cream to stiff peaks before folding in the sweetened condensed milk, you’re creating a stable, airy base that freezes into a creamy dream without any ice crystals. No ice cream maker, no rock salt, no constant churning. It’s comfort food reimagined—faster, simpler, but with the same soul-soothing satisfaction. Perfect for impressing guests without stress, or turning a simple summer evening into something memorable.
What Ingredients You Will Need
This recipe uses just three core ingredients to deliver bold vanilla flavor and a satisfyingly creamy texture without the fuss. Each one plays a crucial role, so let’s talk about them.
- 2 cups (480 ml) heavy cream or heavy whipping cream: This is the backbone of your ice cream. It needs to be cold—straight from the fridge—so it whips up into stiff peaks. I prefer heavy cream with at least 36% milk fat for the richest, creamiest result. (Don’t use half-and-half or milk; they won’t whip properly.)
- 1 can (14 oz / 397 g) sweetened condensed milk: This is your sugar and your secret weapon. It adds sweetness and, more importantly, it prevents large ice crystals from forming. The result is a scoopable, silky texture. I recommend Eagle Brand or Borden for consistent results.
- 1 whole vanilla bean (or 2 teaspoons vanilla bean paste or pure vanilla extract): For the best flavor, use a real vanilla bean. Look for beans that are pliable and moist, not dry and brittle. You’ll split it lengthwise and scrape out the tiny black seeds. If you don’t have a bean, Nielsen-Massey vanilla bean paste is a fantastic substitute—it gives you those beautiful specks and a deep flavor. Pure vanilla extract works in a pinch, but you’ll miss the visual appeal of the specks.
Optional Add-ins (for variations):
- Pinch of fine sea salt (enhances the vanilla flavor)
- 1 teaspoon vanilla extract (to boost flavor if using a vanilla bean)
Equipment Needed
You don’t need much for this recipe, which is part of its beauty. Here’s what you’ll need:
- Large mixing bowl: Make sure it’s clean and completely dry. Any trace of grease can prevent your cream from whipping properly.
- Electric hand mixer or stand mixer with whisk attachment: A hand mixer works perfectly. I’ve made this with a KitchenAid stand mixer and a cheap hand mixer—both work, but the stand mixer is hands-free. If you’re feeling strong, you can whisk by hand, but your arm will get a serious workout.
- Rubber spatula: For folding the condensed milk into the whipped cream. A flexible silicone spatula is best for scraping every last bit.
- Sharp paring knife and cutting board: For splitting the vanilla bean and scraping out the seeds.
- 8×4 or 9×5 loaf pan (or any freezer-safe container): A metal loaf pan helps the ice cream freeze faster. Glass or ceramic works too, but it takes a bit longer.
- Plastic wrap or parchment paper: To press directly onto the surface of the ice cream, preventing freezer burn and ice crystals.
Budget-friendly tip: Don’t have a loaf pan? Use a clean, empty 1.5-quart plastic deli container or a wide-mouth mason jar. The key is a container with a tight-fitting lid.
Preparation Method
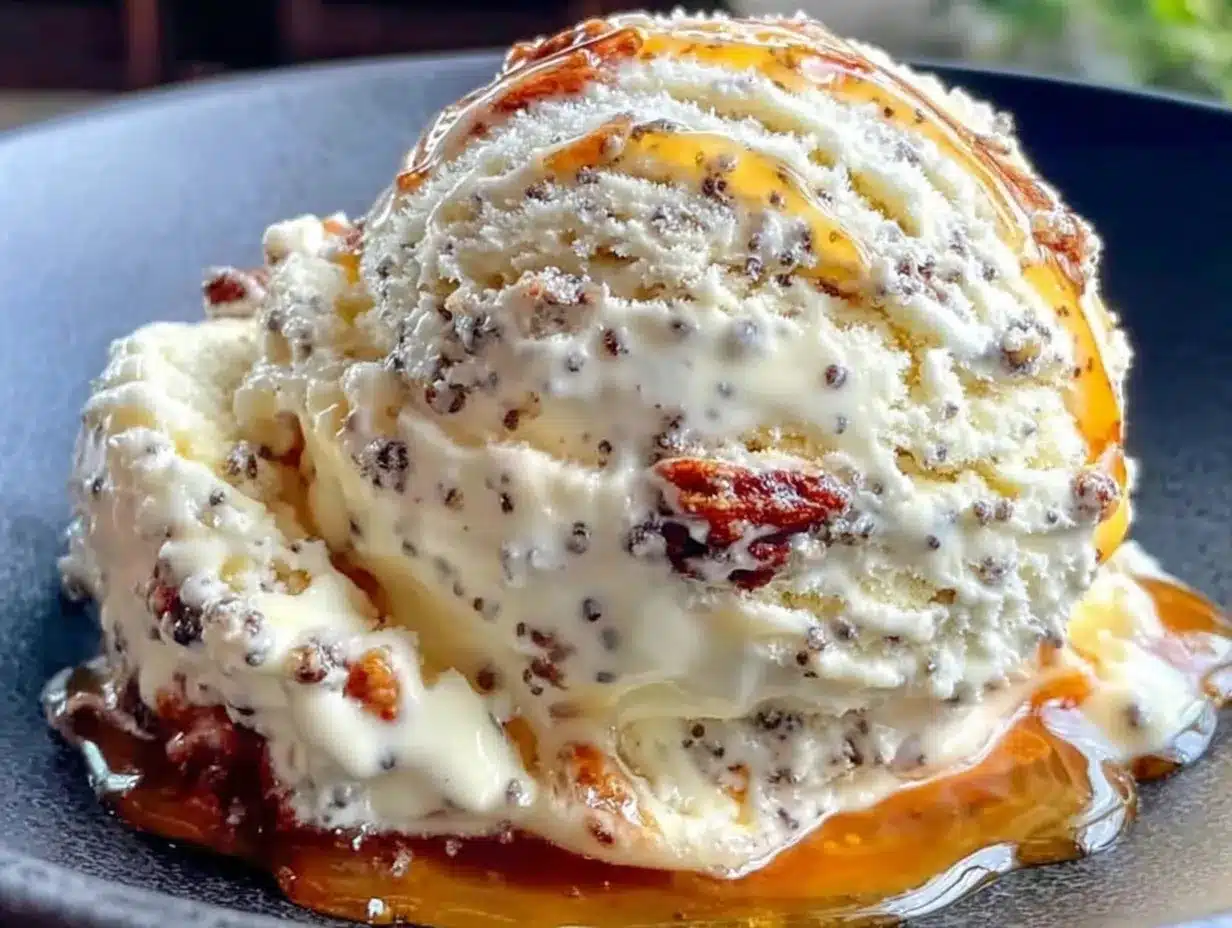
Follow these steps carefully, and you’ll have the creamiest ice cream of your life. No machine required.
- Prep the vanilla bean (5 minutes): Place the vanilla bean on a cutting board. Using a sharp paring knife, slice it in half lengthwise, from tip to tip. Open the bean like a book. You’ll see tiny black specks inside. Using the back of your knife, scrape the seeds out. Add the seeds to a small bowl with the sweetened condensed milk. Stir to combine. Don’t toss the empty pod! Bury it in a jar of sugar to make vanilla sugar later.
- Chill your tools (optional but helpful): Pop your mixing bowl and whisk attachment into the freezer for 10-15 minutes. Cold tools help the cream whip up faster and hold its shape better. I skip this step sometimes when I’m impatient, and it still works—just takes an extra minute of whipping.
- Whip the cream (3-5 minutes): Pour the cold heavy cream into your chilled mixing bowl. Start mixing on low speed to prevent splashing, then gradually increase to medium-high. Whip until stiff peaks form. You’ll know it’s ready when you lift the whisk and the cream stands up straight without drooping. Be careful not to over-whip, or you’ll end up with butter! The texture should be light and billowy, like a cloud.
- Fold in the sweetened condensed milk (2 minutes): Pour the vanilla seed-infused sweetened condensed milk over the whipped cream. Using a rubber spatula, gently fold it in. Start from the bottom of the bowl, lifting the cream up and over the condensed milk. Rotate the bowl as you go. Don’t stir—you want to keep as much air in the mixture as possible. Fold just until no white streaks remain. The mixture should be thick, pale, and look like soft-serve ice cream.
- Pour into the pan (1 minute): Scrape the mixture into your loaf pan or freezer-safe container. Spread it evenly with your spatula. Tap the pan gently on the counter a few times to release any air bubbles.
- Cover and freeze (6 hours or overnight): Press a piece of plastic wrap directly onto the surface of the ice cream mixture. This is crucial—it prevents ice crystals from forming on top. Then cover the pan with a lid or another layer of foil. Freeze for at least 6 hours, but overnight is best for a firm, scoopable texture.
- Serve (5 minutes): When you’re ready to eat, let the ice cream sit at room temperature for 5-10 minutes to soften slightly. This makes scooping much easier. Scoop into bowls or cones and enjoy immediately!
Cooking Tips & Techniques
I’ve made this recipe dozens of times, and I’ve learned a few things the hard way. Here are my best tips for perfect results every time.
- Cold cream is non-negotiable: If your heavy cream is even slightly warm, it won’t whip into stiff peaks. Keep it in the fridge until the very moment you’re ready to use it. I once left it out for 20 minutes while I answered a phone call, and it took twice as long to whip.
- Don’t over-whip: This is the most common mistake. You want stiff peaks, but if you keep going, the cream will separate and turn into butter and buttermilk. If you see it starting to look grainy, stop immediately. You can sometimes rescue it by adding a tablespoon of cold cream and gently folding, but prevention is best.
- Fold, don’t stir: Stirring deflates all the air you just whipped into the cream. Use a gentle folding motion—cut through the center, scrape along the bottom, and lift up. It’s okay if it takes a few extra folds to get it smooth.
- Use a metal pan: Metal conducts cold much better than glass or ceramic. Your ice cream will freeze faster and more evenly in a metal loaf pan. I keep a dedicated one just for this recipe.
- Patience is key: I know it’s hard, but don’t dig into the ice cream before it’s fully frozen. After 4 hours, it will be soft and delicious, but it won’t hold its shape. Give it the full 6 hours, and you’ll be rewarded with perfect, scoopable ice cream.
Variations & Adaptations
This base recipe is a blank canvas. Here are some of my favorite ways to change it up.
- Chocolate Chip Cookie Dough: After folding the condensed milk into the cream, gently stir in 1 cup of chopped chocolate chip cookie dough (the egg-free, edible kind) and ½ cup of mini chocolate chips. The chunks of dough add a fantastic chewy texture.
- Strawberry Swirl: Take 1 cup of fresh or frozen strawberries and cook them in a small saucepan with 2 tablespoons of sugar until they break down and become syrupy. Let it cool completely. Once the ice cream base is in the pan, dollop the strawberry mixture on top and swirl it in with a knife. It creates beautiful ribbons of fruity flavor.
- Mint Chocolate Chip: Add 1 teaspoon of peppermint extract to the sweetened condensed milk before folding. After folding, stir in ½ cup of mini chocolate chips. A drop of green food coloring is optional but makes it look classic.
- Dairy-Free Version: Use full-fat coconut cream (the solid part from a can of refrigerated coconut milk) in place of the heavy cream. Whip it the same way. Use a dairy-free sweetened condensed coconut milk. The texture will be slightly different—more icy—but still delicious.
- Cookies and Cream: Crush 10-12 chocolate sandwich cookies (like Oreos) into chunks. Fold them into the ice cream base just before pouring it into the pan. The cookie pieces soften slightly, creating a perfect “cookies and cream” experience.
Serving & Storage Suggestions
This ice cream is best served slightly softened, so let it sit on the counter for 5-10 minutes before scooping. For a beautiful presentation, scoop it into chilled bowls or glass cups. A drizzle of chocolate sauce, a sprinkle of flaky sea salt, or a few fresh berries on top takes it to the next level.
Storage: Keep the ice cream tightly covered with plastic wrap pressed directly onto the surface, plus a lid or foil. It will stay fresh for up to 2 weeks in the freezer. After that, it may start to develop ice crystals, but it’s still perfectly safe to eat.
Reheating/Softening: If the ice cream becomes rock-hard after a few days, microwave the container on 10% power for 15-20 seconds, or let it sit at room temperature for 15 minutes. The flavor actually deepens over the first 24 hours as the vanilla infuses the cream, so day-old ice cream is often even better.
Nutritional Information & Benefits
Please note that these values are estimates and will vary based on the specific brands and add-ins you use. Per serving (about ½ cup):
- Calories: ~350
- Fat: 22g
- Carbohydrates: 35g
- Protein: 4g
- Sugar: 32g
Health Benefits: While this is definitely a treat, it does have some redeeming qualities. Heavy cream contains fat-soluble vitamins A, D, and E. Real vanilla bean is rich in antioxidants and has been linked to reduced inflammation. This recipe is naturally gluten-free and contains no artificial preservatives or stabilizers. For a slightly lighter version, you can use half-and-half, but the texture won’t be as creamy.
Conclusion
Honestly, this creamy no-churn vanilla bean ice cream is the recipe that keeps on giving. It’s proof that you don’t need a fancy machine or a culinary degree to create something truly spectacular. With just three ingredients and a little bit of patience, you can have a bowl of pure, homemade happiness. I love this recipe because it feels like a little secret—a shortcut to something that tastes like it took hours of work. I hope you make it your own. Maybe you’ll add a swirl of caramel, or a handful of crushed cookies, or maybe you’ll keep it perfectly plain and let that beautiful vanilla flavor shine. Whatever you do, please come back and tell me about it. Drop a comment below, share your photos, and let me know how it turned out. Your next batch of the best ice cream of your life is just a few simple steps away. Happy scooping!
Frequently Asked Questions
Can I use half-and-half or milk instead of heavy cream?
No, you really need heavy cream or heavy whipping cream for this recipe. The high fat content is what allows the cream to whip into stiff peaks and creates that signature creamy texture. Half-and-half or milk won’t whip properly, and you’ll end up with a thin, icy mixture instead of thick ice cream.
How long does this ice cream need to freeze?
At least 6 hours, but overnight is best. After 4 hours, it will be soft and delicious but won’t hold its shape well. For a firm, scoopable texture that you can shape into perfect balls, give it a full 8-12 hours. The wait is worth it!
Can I use vanilla extract instead of a vanilla bean?
Absolutely. Use 2 teaspoons of pure vanilla extract. You’ll miss the beautiful black specks from the vanilla bean, but the flavor will still be fantastic. Vanilla bean paste is a great middle ground—it has the flavor and the specks without the effort of scraping a bean.
My ice cream turned out icy. What went wrong?
This usually happens for one of two reasons. First, you might have over-whipped the cream, causing it to separate. Second, the mixture might not have been fully sealed. Make sure you press plastic wrap directly onto the surface of the ice cream before freezing. This prevents air from getting in and forming ice crystals.
Can I double this recipe?
Yes, you can easily double it. Just use a larger bowl and make sure your mixer can handle the volume. You may need to whip the cream in batches if your bowl is too small. Pour the mixture into a larger container, like a 9×13 inch baking dish, for even freezing.
Pin This Recipe!
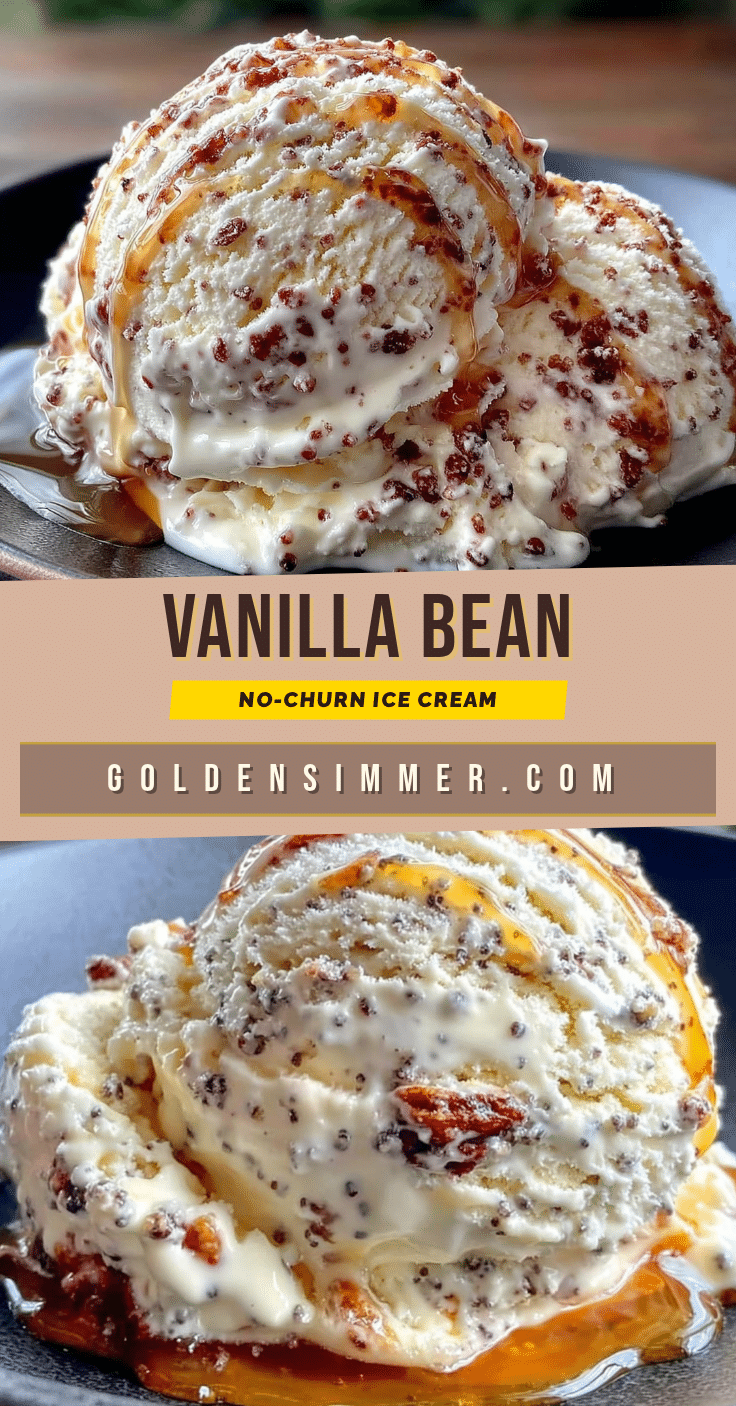
Easy 3-Ingredient No-Churn Vanilla Bean Ice Cream
This incredibly creamy, no-churn vanilla bean ice cream requires just three ingredients and no ice cream maker. It’s the perfect easy summer dessert that delivers rich, deep vanilla flavor with a silky, scoopable texture every time.
- Prep Time: 15 minutes
- Cook Time: 0 minutes
- Total Time: 6 hours 15 minutes (includes freezing time)
- Yield: 8 servings 1x
- Category: Dessert
- Cuisine: American
Ingredients
- 2 cups (480 ml) heavy cream or heavy whipping cream, cold
- 1 can (14 oz / 397 g) sweetened condensed milk (such as Eagle Brand or Borden)
- 1 whole vanilla bean (or 2 teaspoons vanilla bean paste or pure vanilla extract)
- Pinch of fine sea salt (optional)
- 1 teaspoon vanilla extract (optional, to boost flavor if using a vanilla bean)
Instructions
- Prep the vanilla bean: Place the vanilla bean on a cutting board. Using a sharp paring knife, slice it in half lengthwise. Open the bean and scrape out the tiny black seeds. Add the seeds to a small bowl with the sweetened condensed milk. Stir to combine. (Optional: Save the empty pod to make vanilla sugar.)
- Chill your tools (optional but helpful): Pop your mixing bowl and whisk attachment into the freezer for 10-15 minutes.
- Whip the cream: Pour the cold heavy cream into your chilled mixing bowl. Start mixing on low speed, then gradually increase to medium-high. Whip until stiff peaks form (3-5 minutes). Be careful not to over-whip.
- Fold in the sweetened condensed milk: Pour the vanilla seed-infused sweetened condensed milk over the whipped cream. Using a rubber spatula, gently fold it in until no white streaks remain. The mixture should be thick and pale.
- Pour into the pan: Scrape the mixture into a 8×4 or 9×5 loaf pan (or any freezer-safe container). Spread evenly and tap the pan gently to release air bubbles.
- Cover and freeze: Press a piece of plastic wrap directly onto the surface of the ice cream mixture. Cover with a lid or foil. Freeze for at least 6 hours, but overnight is best.
- Serve: Let the ice cream sit at room temperature for 5-10 minutes to soften slightly before scooping.
Notes
For best results, use cold heavy cream (at least 36% milk fat). Do not over-whip the cream or it will turn into butter. Press plastic wrap directly onto the surface of the ice cream before freezing to prevent ice crystals. Let the ice cream sit at room temperature for 5-10 minutes before scooping for best texture. The flavor deepens after 24 hours in the freezer.
Nutrition
- Serving Size: 1/2 cup
- Calories: 350
- Sugar: 32
- Sodium: 80
- Fat: 22
- Saturated Fat: 14
- Carbohydrates: 35
- Protein: 4
Keywords: no-churn ice cream, vanilla bean ice cream, 3-ingredient ice cream, easy ice cream, homemade ice cream, no machine ice cream, summer dessert