Love this? Save it for later!
Share the inspiration with your friends
There used to be a tiny dive bar on the corner of 7th and Main in my old neighborhood—the kind with sticky floors, a jukebox that only played 80s rock, and the best damn appetizers you’ve ever had. When they closed down during the pandemic, I honestly felt a little lost. Their jalapeño poppers were legendary—perfectly crispy bacon wrapped around the creamiest, spiciest filling you could imagine. After twelve tries—some burnt, some soggy, one that actually fell apart in the oven—I finally got it. These crispy bacon-wrapped jalapeño poppers are my little victory dance in appetizer form.
Let me tell you, the first batch I made was a disaster. I used thick-cut bacon that never got crispy, and the cream cheese filling just oozed out everywhere. My kitchen looked like a crime scene of melted cheese and burnt bacon. But you know that feeling when you just know a recipe has potential? That was me, standing in a smoky kitchen, eating the one popper that actually held together, and thinking, “I can fix this.” And I did.
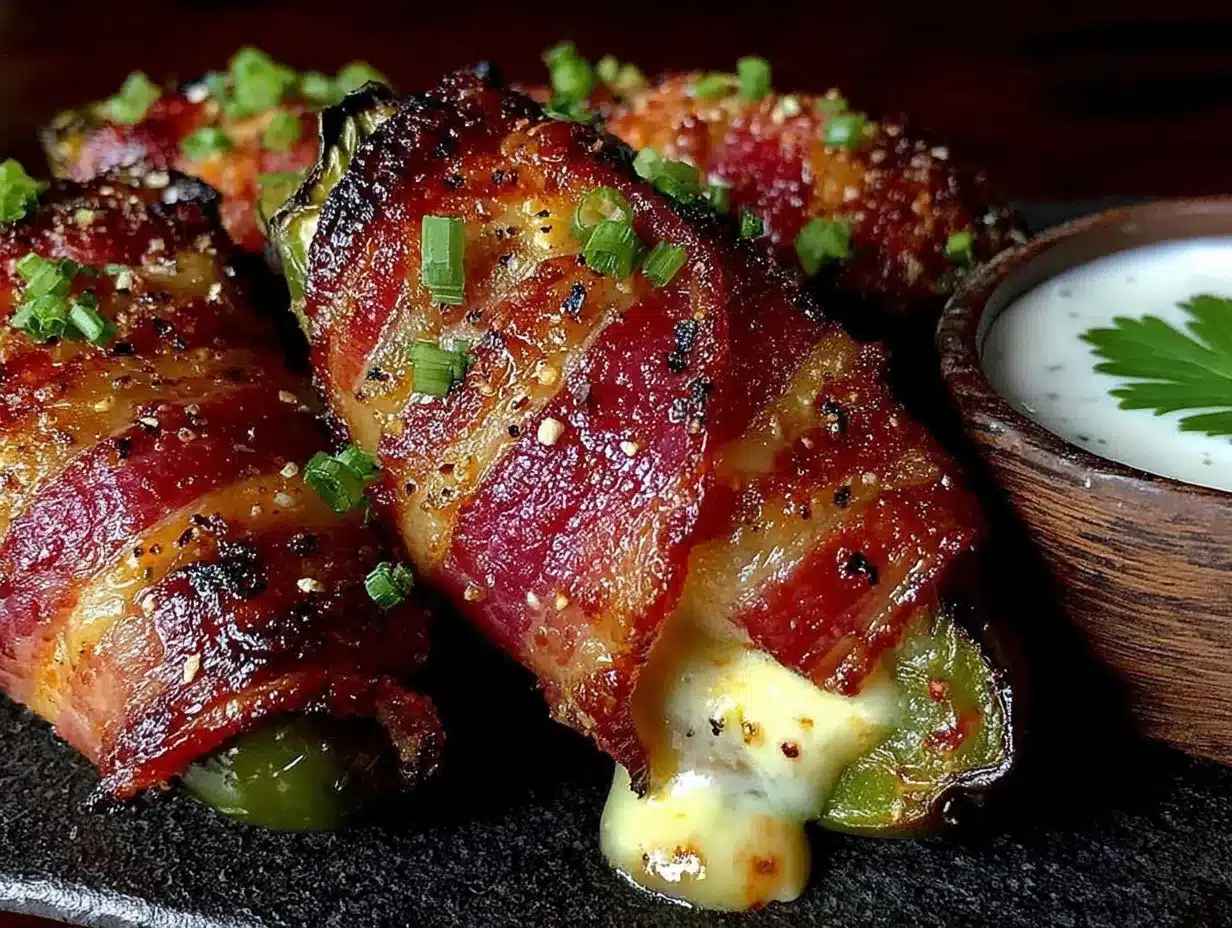
These aren’t just any jalapeño poppers. They’re the kind that disappear before you even set the bowl down. The bacon gets perfectly crispy in under 20 minutes, the cream cheese filling stays creamy and luscious, and the jalapeño gives you just enough heat to know you’re alive. I’ve brought these to game nights, potlucks, and casual dinners, and every single time, someone asks for the recipe. Maybe you’ve been there—searching for that one appetizer that steals the show without stealing your whole afternoon. Well, friend, this is it.
Why You’ll Love This Recipe
I’ve tested this recipe more times than I care to admit. My family has been my willing taste-testers through every iteration—too spicy, not spicy enough, bacon too chewy, filling too runny. But this version? This is the one that got a standing ovation from my picky-eating cousin and my spice-loving uncle alike. Here’s why these crispy bacon-wrapped jalapeño poppers are about to become your new go-to appetizer:
- Quick & Easy: Ready in under 20 minutes from start to finish. Perfect for those “oh no, guests are coming in an hour” moments.
- Simple Ingredients: You probably already have cream cheese, cheddar, and bacon in your fridge. No fancy grocery store runs needed.
- Perfect for Game Day: These little guys are the ultimate finger food. They hold up beautifully on a platter and everyone can grab one (or five) without needing a plate.
- Crowd-Pleaser: I’ve watched people who “don’t like spicy food” devour half a tray. The cream cheese tames the heat, and the bacon makes everything better.
- Unbelievably Delicious: The contrast between the crispy, salty bacon and the cool, creamy filling is honestly next-level. It’s the kind of appetizer that makes you close your eyes after the first bite.
What makes these different from every other popper recipe out there? It’s the technique. I par-cook the bacon just slightly before wrapping—trust me on this one—and I use a specific cream cheese-to-cheese ratio that keeps the filling from turning into a runny mess. I’ve tested it with low-fat cream cheese, different cheeses, and even tried an air fryer version. This is the best version, hands down.
These poppers aren’t just good—they’re the kind of appetizer that makes people linger by the snack table. It’s comfort food at its finest: spicy, creamy, salty, and crispy all in one perfect bite. Perfect for impressing guests without the stress, or turning a regular Tuesday night into something a little more special.
What Ingredients You Will Need
This recipe uses simple, honest ingredients that come together to create something truly special. Most of these are pantry staples or easy to find at any grocery store. Let me walk you through what you’ll need and why each ingredient matters.
For the Poppers
- 12 fresh jalapeño peppers – Look for firm, bright green peppers with no soft spots. I prefer medium-sized ones—too small and they’re hard to fill, too large and they take longer to cook. You want peppers that are about 3-4 inches long.
- 8 ounces cream cheese, softened – Full-fat cream cheese gives the best texture and flavor. I use Philadelphia brand because it’s consistently creamy. Let it sit out for 30 minutes before mixing—cold cream cheese is a nightmare to work with.
- 1 cup sharp cheddar cheese, shredded – Sharp cheddar adds a tangy kick that balances the jalapeño heat. Pre-shredded cheese works in a pinch, but freshly shredded melts so much better. Trust me on this one.
- 1/2 teaspoon garlic powder – Adds a subtle savory depth without overpowering the other flavors.
- 1/2 teaspoon onion powder – Just a hint of sweetness to round everything out.
- 1/4 teaspoon smoked paprika – Optional, but I love the subtle smoky flavor it adds. It plays beautifully with the bacon.
- Salt and black pepper to taste – Go easy on the salt since the bacon and cheese are already salty.
- 12 slices thin-cut bacon – This is crucial. Thin-cut bacon gets perfectly crispy in the same time it takes the peppers to soften. Thick-cut bacon will still be chewy and flabby. I recommend Oscar Mayer or Wright Brand thin-cut bacon.
- Toothpicks – For securing the bacon. Soak them in water for 10 minutes first if you’re baking, so they don’t burn.
Substitution Notes
If you’re looking to switch things up, here are some tried-and-true substitutions I’ve tested in my own kitchen:
- Dairy-free: Use dairy-free cream cheese and your favorite vegan shredded cheese. The texture will be slightly different, but still delicious.
- Milder heat: Use mini sweet peppers instead of jalapeños for a kid-friendly version. You’ll lose the heat, but the flavor is still amazing.
- Different cheese: Monterey Jack, pepper jack, or even goat cheese all work beautifully. Pepper jack adds extra heat, while goat cheese gives a tangy, creamy twist.
- Turkey bacon: Yes, you can use turkey bacon, but it won’t get quite as crispy. Look for thin-cut turkey bacon and watch it closely in the oven.
Equipment Needed
You don’t need a fancy kitchen to make these poppers, but having the right tools makes the process so much smoother. Here’s what I use every time:
- Baking sheet – A rimmed baking sheet works best to catch any bacon grease drips. I use a half-sheet pan (18×13 inches) for a full batch.
- Wire rack – This is my secret weapon. Placing a wire rack on the baking sheet lets the bacon crisp up on all sides instead of sitting in its own grease. If you don’t have one, you can still make these—just flip the poppers halfway through cooking.
- Small mixing bowl – For combining the cream cheese, cheddar, and seasonings.
- Sharp knife – A good chef’s knife makes cutting the jalapeños clean and safe. Dull knives are actually more dangerous because they slip.
- Small spoon or piping bag – I use a small spoon for filling, but a piping bag makes the job faster and less messy. A zip-top bag with the corner snipped off works perfectly too.
- Cutting board – Preferably one with a groove to catch any jalapeño juices.
- Kitchen shears – For trimming the bacon if needed. Regular scissors work too.
If you’re on a budget, skip the wire rack and just flip the poppers halfway through. They’ll still get crispy—just not quite as evenly. I’ve done it both ways, and honestly, they’re delicious either way.
Preparation Method
Alright, let’s get cooking! I’ve broken this down into simple steps with all my little tricks and warnings included. Read through everything once before you start—it’ll save you from any rookie mistakes.
- Preheat your oven to 400°F (200°C). Line a baking sheet with aluminum foil for easy cleanup, then place a wire rack on top. If you don’t have a wire rack, just use the foil-lined baking sheet.
- Prepare the jalapeños. Put on some gloves—seriously, I learned this the hard way after rubbing my eye. Cut each jalapeño in half lengthwise from stem to tip. Use a small spoon to scrape out the seeds and white membranes. The membranes hold most of the heat, so remove them completely for milder poppers, or leave a little for extra spice. You should have 24 jalapeño halves.
- Make the filling. In a small bowl, combine the softened cream cheese, shredded cheddar, garlic powder, onion powder, smoked paprika, and a pinch of salt and pepper. Mix until everything is well combined and smooth. Taste it—I always do—and adjust the seasoning if needed. The filling should be creamy and flavorful.
- Fill the jalapeños. Using a small spoon or a piping bag, fill each jalapeño half with the cream cheese mixture. Don’t overfill—you want a nice mound, but not so much that it oozes out everywhere. A heaping teaspoon per half is usually perfect. Smooth the tops with the back of the spoon.
- Wrap with bacon. Here’s the trick: cut each slice of bacon in half crosswise. You’ll have 24 short bacon strips. Wrap one half-slice of bacon around each filled jalapeño half, starting at one end and spiraling slightly to cover the filling. The bacon should overlap just a little. Secure the end with a toothpick pushed through the bacon and into the jalapeño. Don’t wrap too tightly or the filling will squeeze out.
- Arrange on the rack. Place the wrapped poppers on the wire rack, leaving a little space between each one for air circulation. This helps the bacon get crispy evenly.
- Bake for 18-20 minutes. Pop them in the oven and bake until the bacon is crispy and golden brown, and the filling is bubbly. Start checking at 18 minutes—ovens vary, and you want crispy bacon, not burnt bacon. The poppers should look golden and irresistible.
- Let them rest. Remove from the oven and let the poppers rest on the rack for 5 minutes. This lets the filling set slightly so you don’t burn your mouth. I know it’s hard to wait, but trust me.
- Serve and enjoy. Transfer to a platter, remove the toothpicks if you want (I leave them in for easy grabbing), and serve warm. Watch them disappear!
Pro tip: If your bacon isn’t crispy enough after 20 minutes, switch the oven to broil for 1-2 minutes. Watch them like a hawk—broiling goes from perfect to burnt in seconds. I may have learned this from personal experience.
Cooking Tips & Techniques
After making these poppers more times than I can count, I’ve picked up a few tricks that make a real difference. Here are my best tips for popper perfection:
Par-cook your bacon. This is the game-changer I mentioned earlier. If you’re using thick-cut bacon (which I don’t recommend, but I know some of you will try anyway), cook it for 3-4 minutes in the oven before wrapping. This renders some of the fat and gives it a head start on crisping. For thin-cut bacon, this step isn’t necessary—it’ll crisp up just fine in the full cooking time.
Don’t skip the wire rack. I know it’s one more thing to wash, but it makes such a difference. The hot air circulates all around the poppers, crisping the bacon evenly on all sides. Without the rack, the bottom of the popper sits in bacon grease and gets soggy. If you don’t have a rack, flip the poppers halfway through cooking and drain the grease from the pan.
Watch your oven like a hawk. Every oven runs differently. My old oven took exactly 18 minutes; my new one needs 20. Start checking at 16 minutes and go from there. You’re looking for deep golden brown bacon with crispy edges.
Room temperature cream cheese is non-negotiable. I tried making these with cold cream cheese once, and it was a disaster. The filling was lumpy, hard to mix, and even harder to pipe into the peppers. Let your cream cheese sit out for at least 30 minutes before you start. If you’re in a hurry, microwave it in 10-second bursts until soft.
Double up on gloves. I wear two pairs of disposable gloves when handling jalapeños. The first pair always seems to get a tiny hole somewhere, and capsaicin oil finds its way onto my skin. Double-gloving has saved me from many a burning-hand situation.
Make extra. Seriously, double this recipe. These poppers disappear faster than you’d expect. I’ve never, ever had leftovers. Not once.
Variations & Adaptations
One of the best things about this recipe is how easily you can adapt it to your taste. Here are some variations I’ve tried and loved:
Spicy Lover’s Version
Leave some of the white membranes in the jalapeños—that’s where most of the heat lives. You can also add 1/4 teaspoon of cayenne pepper to the cream cheese mixture or use pepper jack cheese instead of cheddar. For extra heat, drizzle with hot honey before serving. My spice-loving brother requests this version every single time.
Smoky BBQ Poppers
Mix 2 tablespoons of your favorite barbecue sauce into the cream cheese filling, and use smoked gouda instead of cheddar. Brush the wrapped poppers with a little extra BBQ sauce before baking. The sweet and smoky flavors are incredible together. I made these for a summer cookout and they were gone in minutes.
Air Fryer Method
Preheat your air fryer to 375°F (190°C). Arrange the poppers in a single layer in the basket—work in batches if needed. Cook for 10-12 minutes, flipping halfway through, until the bacon is crispy. The air fryer makes the bacon extra crispy in less time. Just be careful not to overcrowd the basket.
Keto-Friendly Version
These poppers are already low in carbs, but you can make them even keto-friendlier by using full-fat cream cheese and adding cooked, crumbled bacon to the filling. Skip any sweet additions and stick with savory seasonings. A friend on keto told me these are her go-to party snack.
Vegetarian Option
Replace the bacon with thin strips of zucchini or eggplant brushed with olive oil and seasoned with smoked paprika. They won’t be as crispy, but they’ll still be delicious. Alternatively, use store-bought vegetarian bacon strips—just watch the cooking time as they can burn quickly.
Serving & Storage Suggestions
These poppers are best served warm, straight from the oven. That’s when the bacon is at its crispiest and the filling is perfectly creamy and warm. Here’s how to serve and store them like a pro:
Serving temperature: Serve these bad boys warm, not piping hot. Let them rest for 5 minutes after baking so the filling sets and no one burns their tongue. They’re also surprisingly good at room temperature—I’ve brought them to potlucks and they’re still delicious an hour later.
Presentation ideas: Arrange them on a large platter with the toothpicks pointing outward for easy grabbing. Sprinkle with chopped fresh cilantro or chives for a pop of color. Serve with ranch dressing, blue cheese dip, or sour cream on the side for dipping. A drizzle of honey or hot honey on top is also amazing.
What to serve with them: These poppers are the star of the show, but they pair beautifully with other appetizers. Try them alongside buffalo chicken dip, loaded nachos, or a simple veggie platter. For drinks, a cold beer or a margarita is perfect.
Storage instructions: If you somehow have leftovers (unlikely, but possible), store them in an airtight container in the refrigerator for up to 3 days. The bacon will lose some of its crispiness, but they’ll still taste great.
Reheating tips: The oven is your best friend here. Reheat at 350°F (175°C) for 5-7 minutes, or until warmed through and the bacon crisps back up. The microwave works in a pinch, but the bacon will be soft. An air fryer at 350°F for 3-4 minutes is even better than the oven.
Freezer instructions: You can freeze unbaked poppers! Assemble them completely, place them on a baking sheet in the freezer until solid, then transfer to a freezer bag. Bake from frozen at 400°F for 22-25 minutes. I keep a batch in my freezer for emergencies—they’re a lifesaver when unexpected guests show up.
Nutritional Information & Benefits
Let’s be real—these aren’t health food. But knowing what’s in them helps you enjoy them mindfully. Here’s the estimated nutritional breakdown for one popper (based on 24 poppers per batch):
| Nutrient | Amount per Popper |
|---|---|
| Calories | 85-100 |
| Protein | 4-5g |
| Fat | 7-8g |
| Carbohydrates | 1-2g |
| Fiber | 0.5g |
| Sodium | 200-250mg |
These numbers are estimates and will vary based on your specific ingredients and portion sizes. If you’re watching your sodium, use low-sodium bacon and reduce the added salt.
On the bright side, jalapeños are packed with vitamin C and capsaicin, which has anti-inflammatory properties. The cream cheese provides calcium and protein, and the bacon adds a little protein too. Plus, these are naturally low in carbs, making them a great option for keto and low-carb diets.
I like to think of these as a treat—something to enjoy on game day, at parties, or when you just need a little indulgence. Life’s too short to count calories on appetizer night, am I right?
Frequently Asked Questions
Can I make these ahead of time?
Absolutely! You can assemble the poppers up to 24 hours in advance. Just cover them tightly with plastic wrap and keep them in the refrigerator. Bake them right before serving for the best texture. If you’re bringing them to a party, you can also bake them fully, then reheat at the party.
Why is my bacon not getting crispy?
This usually happens for one of three reasons: you’re using thick-cut bacon, your oven isn’t hot enough, or the poppers are too crowded on the baking sheet. Use thin-cut bacon, make sure your oven is at 400°F, and leave space between each popper. A wire rack also helps tremendously.
How do I handle jalapeños without burning my hands?
Wear disposable gloves! I cannot stress this enough. The capsaicin oil in jalapeños can linger on your skin for hours and will burn if you touch your eyes, nose, or any sensitive skin. If you don’t have gloves, wash your hands thoroughly with soap and warm water immediately after handling, and avoid touching your face.
Can I use pickled jalapeños instead of fresh?
I wouldn’t recommend it. Pickled jalapeños are already cooked and have a different texture—they’ll turn mushy in the oven. Fresh jalapeños hold their shape and have a better crunch. Stick with fresh for the best results.
How spicy are these poppers?
It depends on how thoroughly you remove the seeds and membranes. If you remove them completely, the poppers are very mild—just a gentle warmth. If you leave some membranes in, they’ll have more kick. For a truly mild version, use mini sweet peppers instead of jalapeños.
Conclusion
These crispy bacon-wrapped jalapeño poppers are more than just an appetizer—they’re a little piece of joy wrapped in bacon. Every time I make them, I think back to that little dive bar and the memories I made there. This recipe is my way of keeping a little bit of that magic alive in my own kitchen.
I hope you give these a try and make them your own. Add extra spice, swap the cheese, or serve them with your favorite dip—there’s no wrong way to enjoy them. The beauty of cooking is that every batch tells a story, and I’d love to hear yours.
So go ahead, preheat that oven, and get ready to make the best poppers you’ve ever had. And when you do, come back and let me know how they turned out. Did you add your own twist? Did they disappear before the game even started? I want to hear all about it. Happy cooking, friends!
Pin This Recipe!

Crispy Bacon-Wrapped Jalapeño Poppers: Easy 20-Minute Appetizer

These crispy bacon-wrapped jalapeño poppers are the ultimate crowd-pleasing appetizer, featuring perfectly crispy bacon, creamy cheese filling, and just the right amount of heat. Ready in under 20 minutes, they’re perfect for game day, parties, or any gathering.
- Prep Time: 15 minutes
- Cook Time: 20 minutes
- Total Time: 35 minutes
- Yield: 24 poppers 1x
- Category: Appetizer
- Cuisine: American
Ingredients
- 12 fresh jalapeño peppers
- 8 ounces cream cheese, softened
- 1 cup sharp cheddar cheese, shredded
- 1/2 teaspoon garlic powder
- 1/2 teaspoon onion powder
- 1/4 teaspoon smoked paprika (optional)
- Salt and black pepper to taste
- 12 slices thin-cut bacon
- Toothpicks
Instructions
- Preheat your oven to 400°F (200°C). Line a baking sheet with aluminum foil, then place a wire rack on top.
- Wearing gloves, cut each jalapeño in half lengthwise. Use a small spoon to scrape out the seeds and white membranes.
- In a small bowl, combine softened cream cheese, shredded cheddar, garlic powder, onion powder, smoked paprika, and a pinch of salt and pepper. Mix until smooth.
- Fill each jalapeño half with the cream cheese mixture using a small spoon or piping bag. Use about a heaping teaspoon per half.
- Cut each bacon slice in half crosswise. Wrap one half-slice around each filled jalapeño half, spiraling slightly to cover the filling. Secure with a toothpick.
- Arrange the wrapped poppers on the wire rack, leaving space between each.
- Bake for 18-20 minutes, until the bacon is crispy and golden brown and the filling is bubbly.
- Remove from the oven and let rest on the rack for 5 minutes.
- Transfer to a platter, remove toothpicks if desired, and serve warm.
Notes
For extra crispy bacon, use thin-cut bacon and a wire rack. If bacon isn’t crispy enough after 20 minutes, broil for 1-2 minutes, watching closely. Let cream cheese come to room temperature for easier mixing. Wear gloves when handling jalapeños to avoid burning your hands.
Nutrition
- Serving Size: 1 popper
- Calories: 90
- Sugar: 0.5
- Sodium: 225
- Fat: 7
- Saturated Fat: 3.5
- Carbohydrates: 1.5
- Fiber: 0.5
- Protein: 4.5
Keywords: jalapeño poppers, bacon-wrapped, appetizer, game day, spicy, creamy, crispy bacon, party food



