Love this? Save it for later!
Share the inspiration with your friends
Hand me that bowl, the plumber said, wiping his hands on a rag that had seen better days. I was standing in my kitchen, waiting for him to finish fixing the garbage disposal, and somehow, we’d gotten onto the topic of Thanksgiving desserts. I wasn’t expecting cooking advice from a man holding a pipe wrench, but there I was, leaning against the counter, listening to him describe exactly how to make the creamiest no-bake pumpkin cheesecake bars I’d ever taste. He wasn’t a chef or a baker. He was just a guy who loved dessert so much he’d perfected a recipe in his own tiny apartment kitchen. And honestly? I almost didn’t write it down. I mean, who takes dessert advice from someone who just pulled a soggy carrot out of your drain? But something in the way he talked about the texture—”like silk, but with a little crunch on the bottom”—made me grab a sticky note from the fridge. I scribbled his instructions between drips of water on the counter, and let me tell you, I’m so glad I did. That first bite was a revelation. The filling was impossibly smooth, not too sweet, with just the right tang from the cream cheese and a warm hug of pumpkin spice. The crust was buttery and firm, holding everything together without crumbling into a mess. Maybe you’ve been there—searching for a pumpkin dessert that doesn’t require turning on the oven or wrestling with a water bath. This one is it. It’s the kind of recipe that makes you look like a hero at a potluck, and it all started with a plumber and a broken disposal. I’ve been making these bars every fall since, and they never last long. Trust me on this one.
Why You’ll Love This Recipe
Let’s be real for a second. Pumpkin desserts can be tricky. Some are too dense, others are too watery, and a lot of them require you to babysit an oven for an hour. These no-bake pumpkin cheesecake bars solve all of that. They’re the kind of dessert you can whip up on a Tuesday night and still have time to binge-watch your favorite show.
Here’s what makes them stand out from the crowd of pumpkin recipes you’ve probably tried before:
- No Oven Required: Seriously. Zero baking. The hardest part is waiting for them to chill in the fridge.
- Simple Ingredients: You probably already have most of these in your pantry right now. No hunting down obscure spices or expensive cream.
- Perfect for Fall Gatherings: These bars are a hit at Thanksgiving, Friendsgiving, or just a cozy weekend treat. They travel well, too.
- Crowd-Pleaser: I’ve served these to kids, adults, and even my picky uncle who “doesn’t like pumpkin.” He asked for seconds.
- Unbelievably Creamy: The texture is the star here. It’s light, mousse-like, and melts in your mouth without being heavy.
What really sets this recipe apart is the technique. Instead of just mixing everything together and hoping for the best, we’re using a little trick I learned from that plumber—blending the cream cheese and pumpkin until it’s silky smooth before folding in the whipped cream. It makes all the difference. No lumps, no graininess, just pure creamy perfection. This isn’t just another pumpkin bar recipe; it’s the one you’ll come back to year after year. It’s comfort food without the stress, and honestly, isn’t that what we all need?
What Ingredients You Will Need
This recipe uses simple, wholesome ingredients to deliver that bold pumpkin flavor and velvety texture without any fuss. Most of these are pantry staples, but I’ll share a few tips on what to look for to get the best results.
For the Crust
- Graham cracker crumbs – 1 ½ cups (about 12 full sheets, crushed finely). You can use store-bought crumbs to save time.
- Granulated sugar – ¼ cup (adds just enough sweetness to balance the buttery crust).
- Unsalted butter – ½ cup (1 stick), melted. I prefer using salted butter in a pinch, just skip the added salt.
- Pinch of salt – Optional, but it really brings out the buttery flavor.
For the Pumpkin Cheesecake Filling
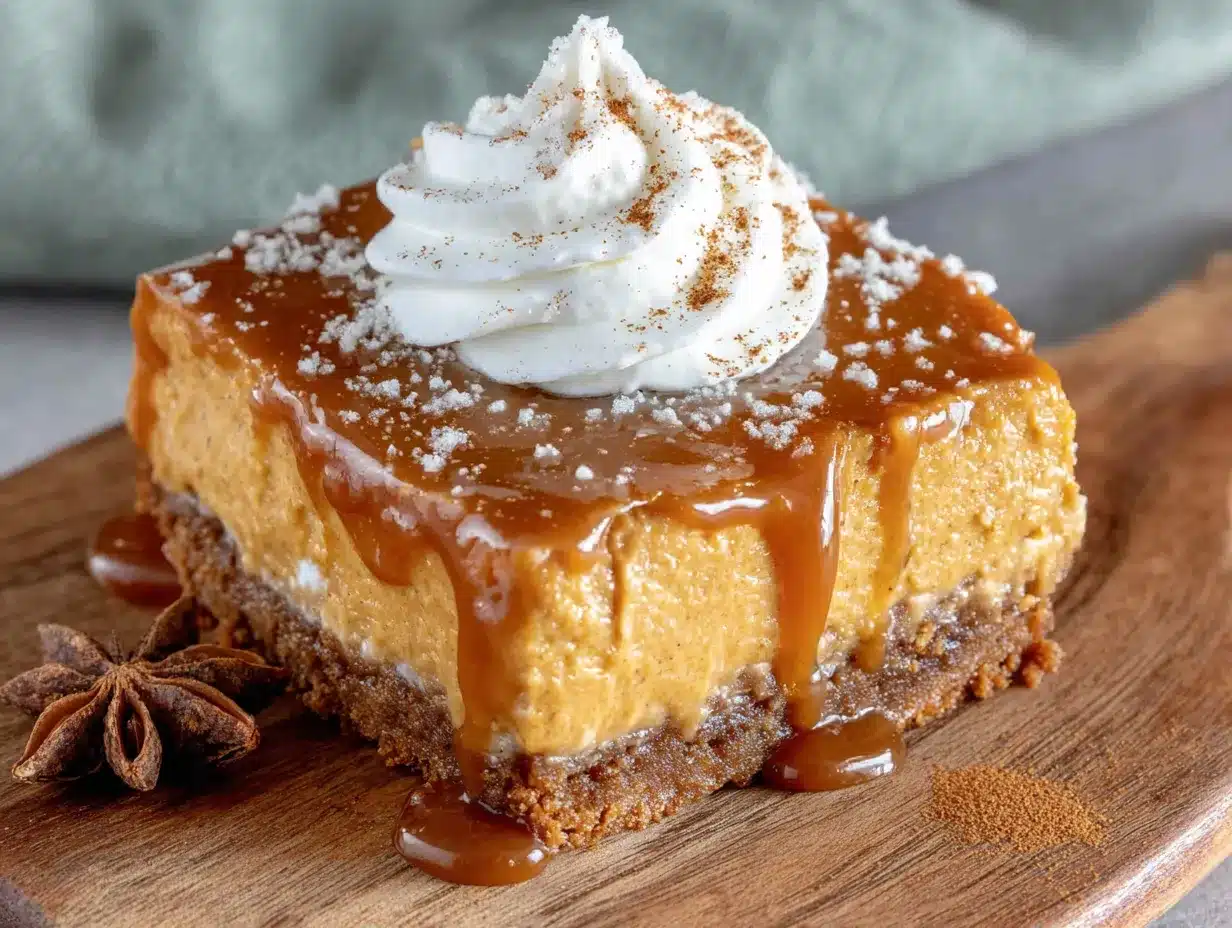
- Full-fat cream cheese – 16 oz (two 8-oz blocks), softened to room temperature. This is non-negotiable for that creamy texture. Low-fat cream cheese can make the filling grainy.
- Pumpkin puree – 1 cup (not pumpkin pie filling!). I recommend Libby’s brand for consistent texture and flavor.
- Powdered sugar – ¾ cup (it dissolves smoothly, unlike granulated sugar).
- Pumpkin pie spice – 1 ½ teaspoons. You can use a mix of 1 tsp cinnamon, ½ tsp ginger, ¼ tsp nutmeg, and a pinch of cloves if you’re out of the pre-mixed kind.
- Vanilla extract – 1 teaspoon (pure vanilla is best, but imitation works fine).
- Heavy whipping cream – 1 cup (cold). This gets whipped into soft peaks to give the bars that light, airy texture.
For the Topping (Optional but Recommended)
- Whipped cream – For dolloping on top before serving.
- Caramel sauce – A drizzle adds a lovely sweetness and looks gorgeous.
- Crushed pecans or gingersnap cookies – For a little crunch.
Substitution Note: For a gluten-free crust, use gluten-free graham crackers or crushed pecans mixed with butter. For a dairy-free version, use a plant-based cream cheese block (like Tofutti or Kite Hill) and coconut cream instead of heavy cream. The texture will be slightly different, but still delicious.
Equipment Needed
You don’t need a fancy kitchen to pull these off. Here’s what you’ll need:
- 8×8-inch baking pan – A 9×9 works too, but the bars will be a bit thinner.
- Parchment paper – For easy lifting. Let the edges hang over the sides like handles.
- Mixing bowls – One large, one medium.
- Electric hand mixer or stand mixer – You can whisk the cream by hand, but your arm will get a workout. I’ve done it once. Never again.
- Rubber spatula – For folding and scraping every last bit of filling.
- Food processor or zip-top bag – For crushing graham crackers. A rolling pin works too.
- Measuring cups and spoons – Accuracy matters here, especially for the spices.
If you don’t have a hand mixer, a sturdy whisk and some elbow grease will do the job for the whipped cream. Just make sure the cream is very cold—it whips up faster. For the crust, you can buy pre-made graham cracker crumbs to skip the crushing step entirely. It’s a small shortcut that saves time without sacrificing quality.
Preparation Method
This is where the magic happens. Follow these steps closely, and you’ll have a pan of creamy, dreamy bars that’ll make you forget all about baked cheesecake.
- Prepare the pan. Line your 8×8-inch baking pan with parchment paper, leaving a 2-inch overhang on two opposite sides. This will help you lift the bars out cleanly later. Lightly grease the parchment with a little butter or non-stick spray.
- Make the crust. In a medium bowl, combine 1 ½ cups graham cracker crumbs, ¼ cup granulated sugar, and a pinch of salt. Pour in ½ cup melted butter and stir with a fork until the mixture looks like wet sand. It should hold together when pressed between your fingers. Transfer the mixture to the prepared pan and press it down firmly and evenly. I use the bottom of a flat measuring cup to really pack it in. Pop the pan in the fridge to set while you make the filling.
- Whip the cream. In a large mixing bowl (or the bowl of your stand mixer), pour 1 cup cold heavy whipping cream. Beat on medium-high speed until soft peaks form—this takes about 2-3 minutes. You’re looking for peaks that gently flop over when you lift the beaters. Don’t over-whip, or you’ll end up with butter. Set the bowl aside.
- Make the cream cheese base. In another large bowl, beat 16 oz softened cream cheese on medium speed until smooth and fluffy, about 2 minutes. Scrape down the sides of the bowl. Add 1 cup pumpkin puree, ¾ cup powdered sugar, 1 ½ teaspoons pumpkin pie spice, and 1 teaspoon vanilla extract. Beat on low speed until combined, then increase to medium and beat for another minute until everything is silky smooth. Stop and scrape the bowl at least once. This is where you want to get rid of any lumps.
- Fold it all together. Using a rubber spatula, gently fold the whipped cream into the cream cheese mixture. Start with about a third of the whipped cream, folding until just combined, then add the rest. Be gentle—you don’t want to deflate all that air you whipped in. The final mixture should be light, fluffy, and uniform in color.
- Assemble the bars. Take the crust out of the fridge. Spoon the pumpkin cheesecake filling on top and spread it evenly with an offset spatula or the back of a spoon. Give the pan a few gentle taps on the counter to release any air bubbles.
- Chill. Cover the pan with plastic wrap and refrigerate for at least 6 hours, but overnight is best. I know it’s hard to wait, but the bars need this time to set properly. If you try to cut them too early, they’ll be a gooey mess. Trust the process.
- Slice and serve. When you’re ready to serve, lift the bars out using the parchment overhang. Place them on a cutting board and use a sharp knife to slice into 9 or 16 squares. For clean cuts, wipe the knife clean between each slice. Serve cold, topped with whipped cream, a drizzle of caramel sauce, and a sprinkle of crushed pecans if you’re feeling fancy.
Cooking Tips & Techniques
I’ve made this recipe more times than I can count, and I’ve definitely learned a few things the hard way. Here are my best tips to make sure your bars turn out perfect every single time.
- Room temperature cream cheese is a must. If it’s too cold, you’ll end up with lumps that won’t beat out. Leave it on the counter for at least 30 minutes before starting. In a pinch, you can microwave it in 10-second bursts, but be careful not to melt it.
- Don’t skip the whipped cream. I know it’s tempting to use store-bought Cool Whip, but homemade whipped cream gives the bars a lighter, more luxurious texture. Cool Whip contains stabilizers that can make the filling feel a bit gummy. Fresh cream is worth the extra two minutes.
- Press the crust firmly. A loose crust will crumble when you cut the bars. Use the bottom of a glass or a measuring cup to really compact it. I once didn’t press hard enough, and my first batch fell apart completely. It still tasted good, but it was a mess.
- Patience is a virtue. I learned this one the hard way. I once tried to cut the bars after only 4 hours of chilling, and they were more like pumpkin soup. Give them the full 6 hours, or better yet, make them the night before. The flavors meld together beautifully overnight.
- Use a hot knife for clean slices. Run your knife under hot water, dry it off, then slice. The heat helps the knife glide through the cheesecake without dragging. Wipe the blade clean between each cut for picture-perfect bars.
Variations & Adaptations
One of the best things about this recipe is how flexible it is. Here are a few ways to switch it up depending on your mood or dietary needs.
- Gluten-Free Version: Swap the graham crackers for gluten-free graham crackers or use crushed pecans mixed with a little melted butter and sugar. The nut crust adds a lovely flavor that pairs perfectly with pumpkin.
- Vegan Version: Use a high-quality vegan cream cheese block (not the spreadable kind) and replace the heavy cream with full-fat coconut cream. Chill the can of coconut cream overnight, then scoop out the solid white part and whip it. The texture will be a bit different, but it’s still creamy and delicious.
- Pumpkin Chocolate Swirl: Melt ¼ cup of dark chocolate chips and drizzle it over the filling before chilling. Use a knife to gently swirl it into the cheesecake. The chocolate and pumpkin combo is seriously underrated.
- Spiced-Up Crust: Add ½ teaspoon of cinnamon or ginger to the graham cracker mixture for an extra layer of warmth. You can also use crushed gingersnap cookies instead of graham crackers for a bolder spice profile.
- Mini Bars: Make these in a mini muffin tin for bite-sized treats. Line the tin with small parchment squares, press in the crust, fill with the cheesecake mixture, and chill. They’re perfect for parties.
I once tried a version with a pecan shortbread crust, and it was absolutely divine. The buttery, nutty base added so much depth. Don’t be afraid to experiment—that’s half the fun of cooking!
Serving & Storage Suggestions
These bars are best served cold, straight from the fridge. The texture is firm but creamy, and the flavors are more pronounced when they’re chilled. For the prettiest presentation, let the bars sit at room temperature for about 5 minutes before slicing—they’ll be slightly easier to cut cleanly.
What to serve with them: A dollop of fresh whipped cream is a classic choice, but don’t stop there. A drizzle of salted caramel sauce takes these bars over the top. For a little crunch, sprinkle on some toasted pecans, crushed gingersnaps, or even a few pumpkin seeds. If you’re serving them as part of a fall dessert spread, they pair beautifully with a warm cup of spiced apple cider or a pumpkin spice latte.
Storage: These bars will keep in an airtight container in the refrigerator for up to 5 days. The crust will stay crisp, and the filling will remain creamy. I actually think they taste even better on day two, after the flavors have had time to meld.
Freezing: You can freeze these bars for up to 3 months. Wrap the entire pan (or individual slices) tightly in plastic wrap, then a layer of aluminum foil. To thaw, transfer them to the refrigerator overnight. Don’t thaw at room temperature, or they may get too soft. I always keep a stash in my freezer for unexpected guests or late-night cravings.
Nutritional Information & Benefits
I’m not a nutritionist, but I can give you a rough idea of what’s in these bars. Per serving (based on 16 servings):
- Calories: ~290
- Fat: 20g
- Carbohydrates: 26g
- Protein: 4g
- Sugar: 18g
While these are definitely a treat, there are some redeeming qualities. Pumpkin is packed with vitamin A, which is great for your eyes and immune system. It’s also a good source of fiber. The cream cheese provides a little calcium, and if you use a nut-based crust, you’ll get some healthy fats and protein. Are they health food? No. But they’re a heck of a lot better for you than a lot of store-bought desserts loaded with preservatives and artificial flavors.
If you’re looking to lighten them up a bit, you can use reduced-fat cream cheese and a sugar substitute like monk fruit or stevia in the filling. The texture will be slightly less rich, but still satisfying. For a lower-carb option, use a crust made from almond flour and butter, and skip the caramel drizzle.
Frequently Asked Questions
Can I use pumpkin pie filling instead of pumpkin puree?
I wouldn’t recommend it. Pumpkin pie filling is already sweetened and spiced, so it will throw off the balance of the recipe. Stick with 100% pure pumpkin puree for the best results.
Why is my cheesecake filling runny?
This usually happens if the cream cheese wasn’t softened properly or if the whipped cream was under-whipped. Make sure your cream cheese is at room temperature, and whip the cream until soft peaks form. Also, be patient with the chilling time—the bars need at least 6 hours to set.
Can I make these bars dairy-free?
Yes! Use a dairy-free cream cheese block and replace the heavy cream with full-fat coconut cream. The texture will be slightly different, but still creamy and delicious. Just make sure to chill the coconut cream overnight before whipping.
How do I get clean, neat slices?
Use a sharp knife and run it under hot water before each cut. Wipe the blade clean between slices. Chilling the bars overnight also helps them hold their shape better.
Can I add a layer of chocolate or caramel?
Absolutely! You can drizzle melted chocolate or caramel sauce over the top before chilling, or even swirl it into the filling. Just keep in mind that adding too much extra liquid might affect the set of the bars.
Conclusion
There you have it—the creamiest, dreamiest no-bake pumpkin cheesecake bars you’ll ever make. They’re proof that you don’t need an oven or a culinary degree to create something spectacular. Whether you’re bringing them to a Thanksgiving dinner, a fall potluck, or just treating yourself on a cozy Sunday, these bars deliver every single time. They’re forgiving, flexible, and honestly, they taste like a hug in dessert form.
I’d love to hear how yours turn out. Did you add a swirl of caramel? Try a gluten-free crust? Maybe you made them for a party and they disappeared in five minutes (that’s usually what happens to mine). Drop a comment below and let me know—I read every single one. And if you’re looking for another easy fall dessert, don’t miss my Cinnamon Roll Apple Cobbler or these Slow Cooker Pumpkin Spice Latte bars. Happy no-baking, friends!
Pin This Recipe!
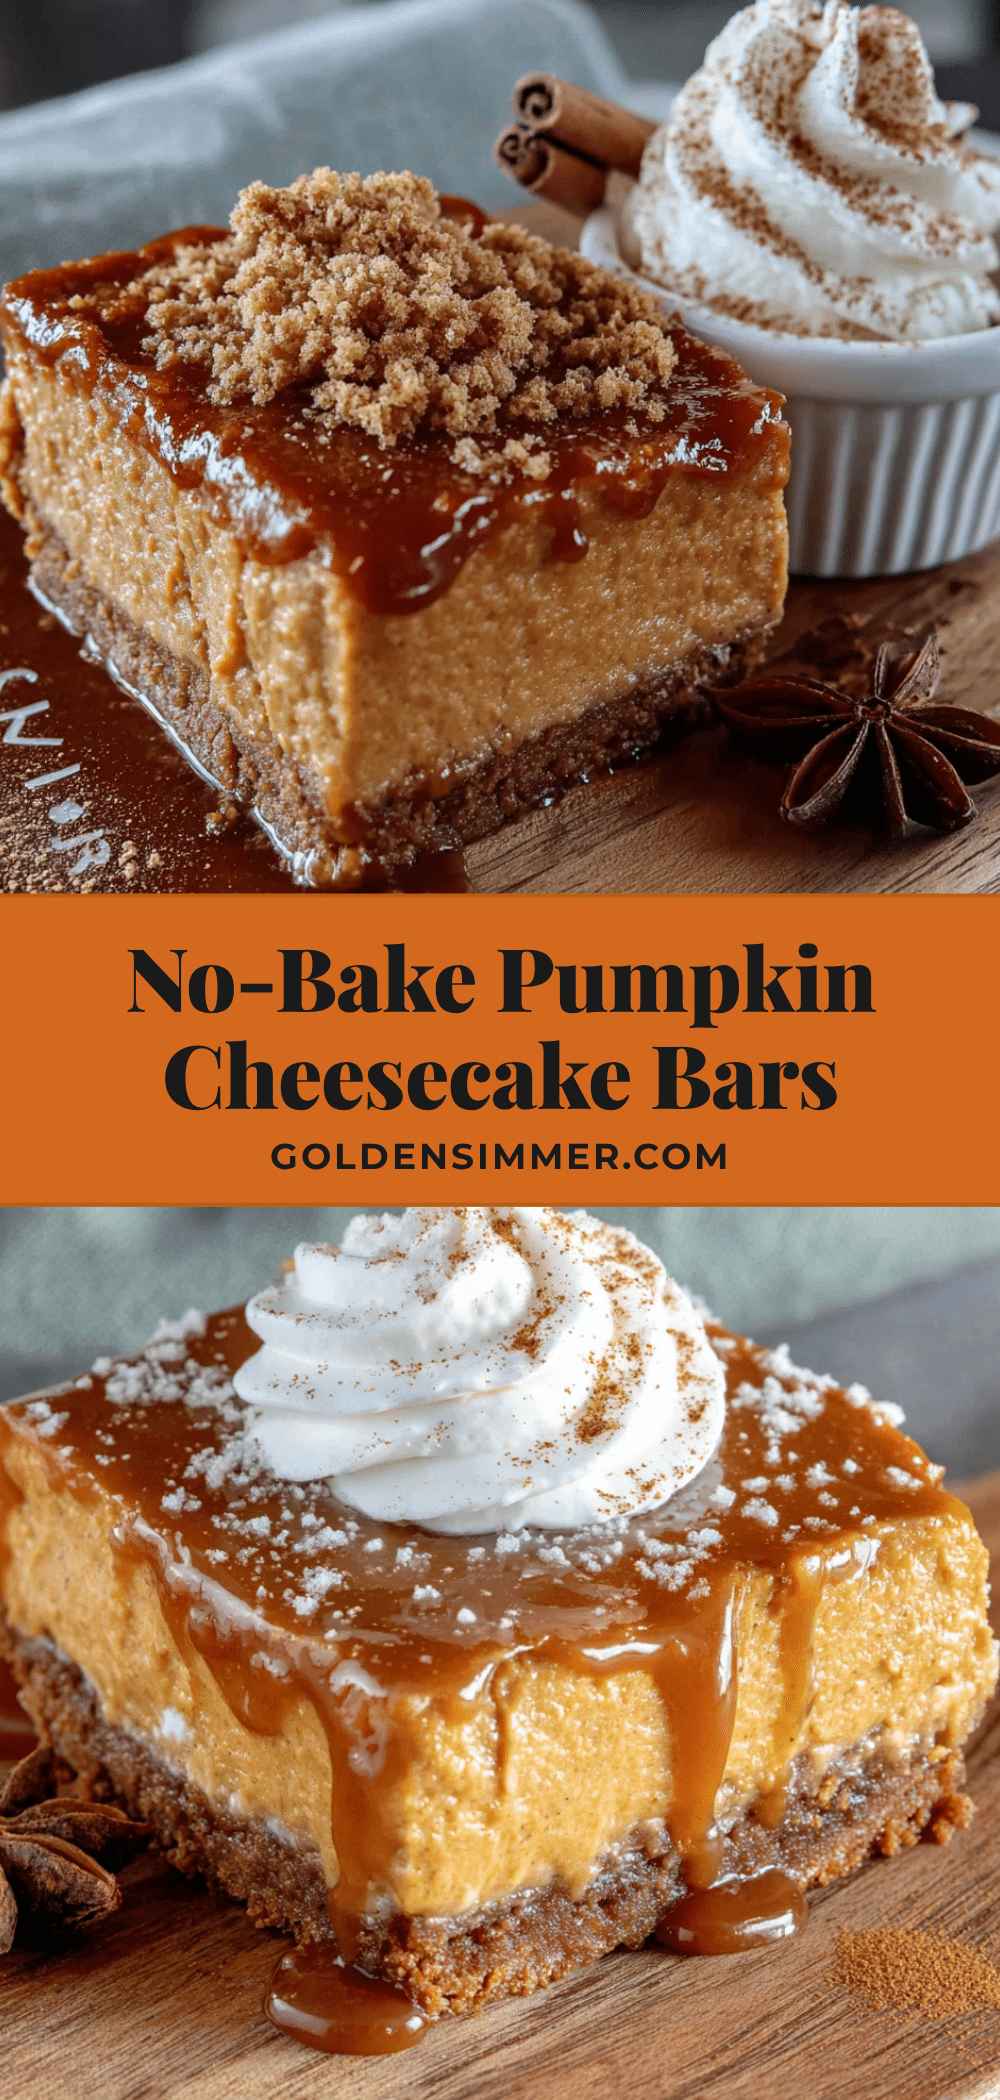
Easy No-Bake Pumpkin Cheesecake Bars Recipe
These no-bake pumpkin cheesecake bars are impossibly smooth, not too sweet, with a buttery graham cracker crust and a light, mousse-like filling. Perfect for fall gatherings, they require no oven and come together with simple ingredients.
- Prep Time: 20 minutes
- Cook Time: 0 minutes
- Total Time: 6 hours 20 minutes (includes chilling)
- Yield: 16 servings 1x
- Category: Dessert
- Cuisine: American
Ingredients
- 1 ½ cups graham cracker crumbs (about 12 full sheets, crushed finely)
- ¼ cup granulated sugar
- ½ cup unsalted butter, melted (1 stick)
- Pinch of salt (optional)
- 16 oz full-fat cream cheese, softened to room temperature (two 8-oz blocks)
- 1 cup pumpkin puree (not pumpkin pie filling)
- ¾ cup powdered sugar
- 1 ½ teaspoons pumpkin pie spice
- 1 teaspoon vanilla extract
- 1 cup heavy whipping cream, cold
- Whipped cream for topping (optional)
- Caramel sauce for drizzling (optional)
- Crushed pecans or gingersnap cookies for garnish (optional)
Instructions
- Line an 8×8-inch baking pan with parchment paper, leaving a 2-inch overhang on two opposite sides. Lightly grease the parchment with butter or non-stick spray.
- In a medium bowl, combine graham cracker crumbs, granulated sugar, and a pinch of salt. Pour in melted butter and stir with a fork until the mixture looks like wet sand. Press the mixture firmly and evenly into the prepared pan using the bottom of a flat measuring cup. Refrigerate while you make the filling.
- In a large mixing bowl, beat cold heavy whipping cream on medium-high speed until soft peaks form, about 2-3 minutes. Set aside.
- In another large bowl, beat softened cream cheese on medium speed until smooth and fluffy, about 2 minutes. Scrape down the sides. Add pumpkin puree, powdered sugar, pumpkin pie spice, and vanilla extract. Beat on low until combined, then increase to medium and beat for another minute until silky smooth. Scrape the bowl at least once.
- Using a rubber spatula, gently fold the whipped cream into the cream cheese mixture in thirds, folding until just combined. Be gentle to keep the mixture light and fluffy.
- Remove the crust from the fridge. Spoon the pumpkin cheesecake filling on top and spread evenly with an offset spatula or the back of a spoon. Tap the pan gently on the counter to release air bubbles.
- Cover the pan with plastic wrap and refrigerate for at least 6 hours, preferably overnight, until set.
- When ready to serve, lift the bars out using the parchment overhang. Place on a cutting board and slice into 9 or 16 squares using a sharp knife. Wipe the knife clean between slices. Serve cold, topped with whipped cream, caramel sauce, and crushed pecans if desired.
Notes
Room temperature cream cheese is essential for a smooth filling. Do not skip the whipped cream; homemade whipped cream gives a lighter texture than Cool Whip. Press the crust firmly to prevent crumbling. For clean slices, use a hot knife and wipe between cuts. The bars need at least 6 hours to set; overnight is best. For a gluten-free version, use gluten-free graham crackers or crushed pecans. For a dairy-free version, use plant-based cream cheese and coconut cream.
Nutrition
- Serving Size: 1 bar (based on 16 s
- Calories: 290
- Sugar: 18
- Sodium: 220
- Fat: 20
- Saturated Fat: 12
- Carbohydrates: 26
- Fiber: 1
- Protein: 4
Keywords: no-bake pumpkin cheesecake bars, pumpkin dessert, fall dessert, easy cheesecake bars, no-bake dessert



