Love this? Save it for later!
Share the inspiration with your friends
My neighbor, a retired kindergarten teacher named Margie, watched me wrestling with a bag of marshmallows that had somehow turned into a single, rock-hard clump. She didn’t say anything at first. Then she just walked over to her pantry, pulled out a fresh bag, and handed it to me with a little shrug. “You’re overthinking it,” she said. “Halloween treats should be fun, not a science project.”
That conversation—standing in my kitchen on a Tuesday afternoon in early October—changed how I approach holiday baking. Margie had been making these Rice Krispie treat pops for her classroom parties for thirty years, and she shared her method like it was nothing special. But honestly? It was the kind of kitchen wisdom you can’t get from a cookbook. She showed me how to press the mixture just firmly enough, how to let them cool on wax paper instead of greased pans, and most importantly, how to turn simple ingredients into something kids actually get excited about.
I messed up my first batch, of course. I let the butter burn while I was trying to answer a text from my sister, and the whole kitchen smelled like a campfire gone wrong. Margie just laughed and said, “Honey, that’s why we buy extra marshmallows.” So I started over, and this time I paid attention. The golden color when the marshmallows melt perfectly, the way the cereal folds in without crushing—these little details matter.
These Easy Halloween Rice Krispie Treat Pops have become my go-to for every fall gathering. They’re simple enough that my kids can help, but festive enough that guests always ask for the recipe. Maybe you’ve been there—staring at complicated Pinterest projects that take three hours and leave your kitchen looking like a disaster zone. This is the opposite of that. This is the recipe that actually works, the one you’ll come back to year after year.
Why You’ll Love This Recipe
Let me tell you why these Halloween Rice Krispie Treat Pops have earned a permanent spot in my recipe rotation. I’ve tested this method more times than I can count, and I can promise you it delivers every single time.
- Quick & Easy: From start to finish, you’re looking at about 20 minutes of active time. No complicated steps, no fancy equipment, and no stress. Perfect for those evenings when your kid announces they need a classroom treat tomorrow morning.
- Simple Ingredients: Three ingredients. That’s it. Butter, marshmallows, and crispy rice cereal. You probably already have them in your pantry right now. No special trips to the store for obscure baking supplies.
- Perfect for Halloween: These pops are the ultimate party food. They’re portable, mess-free, and you can decorate them to match any theme. Whether you’re hosting a classroom party, a neighborhood gathering, or just want something fun for your own kids, these deliver.
- Crowd-Pleaser: I’ve yet to meet a kid who doesn’t love these. Adults too, honestly. There’s something about that crispy, chewy texture that brings out the kid in everyone.
- Unbelievably Delicious: The secret is in the technique. Most recipes tell you to melt everything together and call it done. But my version—the one Margie taught me—creates a perfectly balanced texture that’s soft without being gooey and crispy without being dry.
What makes these different from every other Rice Krispie treat recipe out there? It’s the ratio. I’ve experimented with more butter, less marshmallow, different cereal brands. This version hits that sweet spot where every bite is perfectly chewy and satisfying. And when you add the Halloween decorations? They become something truly special without requiring any real baking skills.
This is the kind of recipe that makes you feel like a kitchen hero. You know that feeling when something turns out exactly right, and everyone around the table lights up? That’s what these pops deliver. They’re comfort food with a festive twist, and they’re guaranteed to make your Halloween celebration memorable.
What Ingredients You Will Need
This recipe uses just three main ingredients, plus whatever decorations you choose. The beauty of these Halloween Rice Krispie Treat Pops is that they’re incredibly forgiving, so you can swap things around based on what you have available.
- 3 tablespoons unsalted butter (I use Land O’Lakes for consistent results—salted butter works too, just skip any added salt)
- 1 package (10 ounces) marshmallows (regular size, not mini—Kraft Jet-Puffed gives the best melt, but store brands work fine)
- 6 cups crispy rice cereal (Kellogg’s Rice Krispies are the classic choice, but generic crispy rice cereal works perfectly well)
- Lollipop sticks (available at craft stores or online—the 6-inch size is perfect)
- Orange candy melts (Wilton brand melts smoothly; you can also use white chocolate with orange food coloring)
- Black decorating gel (for drawing faces and spooky designs)
- Candy eyes (those little edible eyes add so much personality)
- Sprinkles (Halloween-themed ones with pumpkins, ghosts, and bats are perfect)
- Orange sanding sugar (adds sparkle and texture)
Let me share a few ingredient tips I’ve learned the hard way. Fresh marshmallows are crucial—if your bag has been sitting in the pantry for months, they won’t melt properly and your treats will turn out grainy. I always check the expiration date before starting. For the butter, unsalted is ideal because it lets you control the salt level, but if all you have is salted, just reduce or omit any additional salt the recipe might call for.
The candy melts can be tricky if you’re not used to working with them. I’ve found that melting them in 30-second intervals in the microwave, stirring between each, prevents burning. If they get too thick, add a teaspoon of coconut oil to thin them out. White chocolate chips work as a substitute, but they don’t set as firmly and can be messier for dipping.
For the cereal, I recommend using a name brand for the best texture. Generic versions tend to be slightly larger and crunchier, which can throw off the ratio. If you’re using a store brand, measure by weight rather than volume for more consistent results.
One more thing—the lollipop sticks. Don’t use regular craft sticks or straws. Lollipop sticks are specifically designed to hold the weight of the treat without breaking. I learned this the hard way when I tried using popsicle sticks and they kept snapping in half.
Equipment Needed
You don’t need much for this recipe, which is part of why I love it. Here’s what you’ll want to have on hand:
- Large pot (at least 4-quart capacity—you need room to stir everything together)
- Wooden spoon or silicone spatula (metal utensils can scratch your pot and don’t mix as well)
- 9×13 inch baking dish (glass or metal both work; just make sure it’s at least 2 inches deep)
- Wax paper or parchment paper (for lining the dish and for cooling)
- Microwave-safe bowl (for melting candy melts)
- Small piping bags or zip-top bags (for decorating with melted candy)
- Measuring cups and spoons (accuracy matters with this recipe)
If you don’t have a 9×13 dish, you can use a 9×9 square pan for thicker treats, or even a cookie sheet for thinner, crispier ones. Just adjust the cooking time slightly. I’ve also used disposable aluminum pans in a pinch—they work fine, just be careful not to tear them when pressing the mixture down.
For the decorating, you really don’t need anything fancy. I’ve used zip-top bags with the corner snipped off for piping, and it works perfectly. If you’re planning to make these regularly, investing in a small piping tip set is worth it, but absolutely not necessary for a first attempt.
Preparation Method
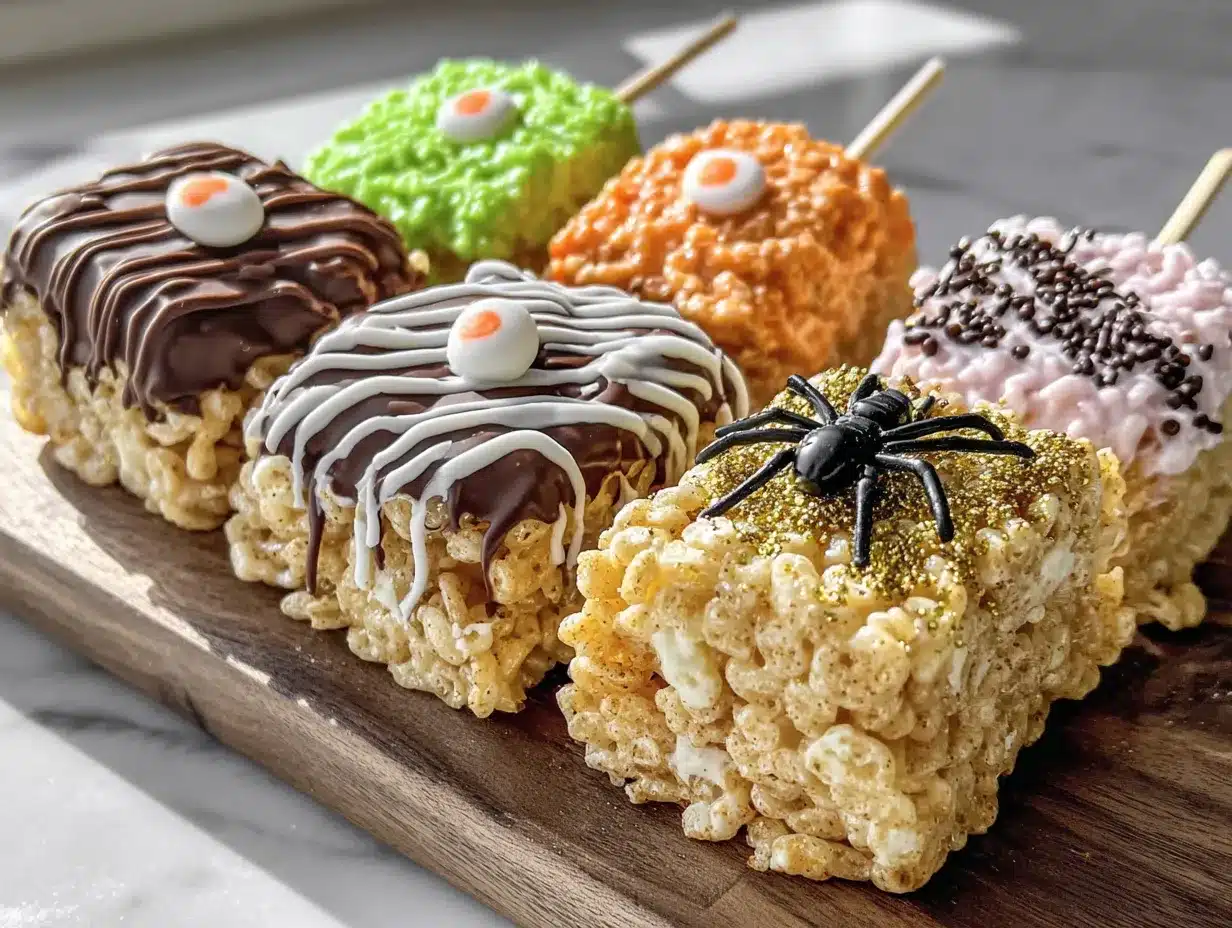
Now let me walk you through this step by step. I’m going to share every little detail, including the mistakes I’ve made so you don’t have to repeat them.
- Prep your pan. Line a 9×13 inch baking dish with wax paper or parchment paper, leaving some overhang on the sides. This makes lifting the finished treats out much easier. Lightly grease the paper with butter or non-stick spray. Don’t skip this step—I once forgot and spent twenty minutes scraping cereal off the bottom of the pan.
- Melt the butter. Place 3 tablespoons of unsalted butter in a large pot over medium-low heat. Let it melt slowly, swirling the pan occasionally. You want it fully melted but not bubbling or browning. If it starts to foam, your heat is too high. This takes about 2-3 minutes.
- Add the marshmallows. Pour in the entire 10-ounce bag of marshmallows. Stir constantly with your wooden spoon or silicone spatula. The marshmallows will start to puff up and then collapse into a smooth, gooey mixture. This takes about 5-7 minutes. Keep the heat on low—medium heat can scorch the marshmallows and give them a weird, bitter taste.
- Watch for the perfect melt. You’re looking for a smooth, creamy consistency with no visible marshmallow lumps. The mixture should be pale and glossy. If you see any brown spots, your heat is too high and you’ve started to burn the sugar. Don’t panic—just remove the pot from the heat immediately and stir vigorously.
- Add the cereal. Remove the pot from the heat. Pour in 6 cups of crispy rice cereal all at once. Stir gently but thoroughly, folding the cereal into the marshmallow mixture. You want every piece coated, but avoid crushing the cereal. Overmixing will give you dense, hard treats instead of light, airy ones. I usually fold about 15-20 times, scraping the bottom and sides of the pot.
- Transfer to the pan. Scrape the mixture into your prepared baking dish. Don’t dump it all in one spot—try to distribute it evenly. Use a second piece of wax paper (lightly greased) to press the mixture down firmly. Here’s the trick: don’t press too hard. You want the treats to hold together, but if you compact them too much, they’ll be rock hard. I press just until the top is even and the mixture feels set.
- Cool completely. Let the treats sit at room temperature for about 30 minutes. Don’t rush this—if you try to cut or shape them while they’re warm, they’ll fall apart. I usually let mine cool for a full hour to be safe. The top should feel firm and slightly springy to the touch.
- Cut into shapes. Once cooled, lift the entire block out using the wax paper overhang. Use a sharp knife or cookie cutters to create your shapes. For Halloween pops, I use pumpkin-shaped, ghost-shaped, and bat-shaped cookie cutters. If you’re making rectangles, cut them into 2×3 inch pieces. Dip your knife in warm water between cuts for cleaner edges.
- Insert the sticks. Gently push a lollipop stick into each treat, about halfway through. Don’t push all the way through or the stick will poke out the other side. If the treat cracks, just press it back together—the marshmallow will act like glue. I find it easier to insert the sticks before decorating, so the treats are stable.
- Decorate your pops. Melt your orange candy melts according to package directions. Dip each pop into the melted candy, letting any excess drip off. Place on wax paper to set. While the coating is still wet, add candy eyes, sprinkles, or sanding sugar. For faces, let the coating set completely, then use black decorating gel to draw spooky expressions.
One thing I’ve learned: work in small batches. If you decorate all the pops at once, the coating can start to set before you add your decorations. I usually do 3-4 pops at a time, adding decorations immediately after dipping.
Cooking Tips & Techniques
Over the years, I’ve collected a few tricks that make these Halloween Rice Krispie Treat Pops turn out perfectly every time. Let me share what I’ve learned through trial and error.
The marshmallow melt is everything. This is where most people go wrong. You want the marshmallows fully melted but not overheated. If they bubble or turn brown, you’ve gone too far. The ideal temperature is just hot enough to melt them smooth—about 120°F. I use a thermometer sometimes, but honestly, visual cues work just as well. When the marshmallows have collapsed into a smooth, glossy puddle with no lumps, you’re ready.
Butter quality matters. I know it sounds fussy, but using good butter makes a noticeable difference. Cheap butter has more water content, which can make your treats soggy. European-style butter with higher fat content gives a richer flavor and better texture. That said, regular supermarket butter works fine—just don’t use margarine or spreadable butter products.
Don’t overmix the cereal. This was my biggest mistake early on. I thought I needed to stir until every single piece was perfectly coated, but that just crushed the cereal and made the treats dense. Now I fold gently, stopping as soon as the cereal is evenly distributed. A few dry spots are fine—they’ll get coated as the mixture settles.
Humidity is your enemy. Rice Krispie treats don’t do well in humid weather. The marshmallow absorbs moisture from the air, making the treats sticky and soft. If you’re making these on a rainy day, work quickly and store them in an airtight container immediately. I’ve had batches turn into a sticky mess because I left them out too long on a humid afternoon.
Let them cool completely before cutting. I know it’s tempting to dig in while they’re still warm, but patience pays off. Warm treats are soft and will squish instead of cutting cleanly. I’ve ruined more than a few shapes by rushing this step. Give them a full hour at room temperature, or pop them in the fridge for 20 minutes if you’re in a hurry.
Double-check your candy melts. Not all candy melts are created equal. Some brands are thinner and require less thinning, while others are thick and need coconut oil. Test your melted candy on a small piece before dipping all your pops. If it’s too thick, add a teaspoon of coconut oil and stir. Too thin? Let it cool for a minute and stir again.
Variations & Adaptations
One of the best things about this recipe is how customizable it is. Here are some variations I’ve tried and loved.
Chocolate Lover’s Version: Swap the orange candy melts for dark chocolate or milk chocolate. Dip the pops in melted chocolate, then add orange and black sprinkles. The combination of chocolate and marshmallow is absolutely irresistible. I made these for a Halloween party last year and they disappeared faster than the traditional ones.
Peanut Butter Twist: Add 1/4 cup of creamy peanut butter to the marshmallow mixture while it’s melting. Stir until fully incorporated before adding the cereal. The peanut butter adds a salty-savory note that balances the sweetness perfectly. Just make sure to check for peanut allergies if you’re serving these at a party.
Gluten-Free Option: Most crispy rice cereals are naturally gluten-free, but always check the label to be sure. Some brands use malt flavoring that contains gluten. I recommend using certified gluten-free cereal if you’re serving guests with celiac disease. Everything else in the recipe is already gluten-free.
Vegan Version: Use vegan marshmallows (Dandies brand works well) and vegan butter. The texture will be slightly different—vegan marshmallows don’t get as gooey—but they still taste great. Use dairy-free chocolate or candy melts for the coating. I’ve made these for vegan friends and they were a hit.
Spooky Spider Pops: Instead of dipping the entire pop, use black candy melts to drizzle spider webs over the top. Add a candy spider on each web. These look incredibly creepy and are perfect for older kids who want something scarier. I use Wilton’s black candy melts and draw the webs with a piping bag.
Monster Munch Pops: Skip the candy coating entirely and press mini chocolate chips, candy corn, and pretzel pieces into the top of each treat before they set. The combination of sweet and salty is amazing, and the different textures keep every bite interesting. These are my personal favorite for movie nights.
Serving & Storage Suggestions
These Halloween Rice Krispie Treat Pops are best served at room temperature. The texture is perfect—chewy but firm, with a slight crunch from the cereal. If you’ve coated them in candy melts, the coating will be firm and snappy, contrasting beautifully with the soft interior.
For serving, I like to arrange them on a platter with the sticks pointing up, like a bouquet. It makes a stunning presentation and kids love being able to grab one by the stick. For parties, I sometimes insert the pops into a foam block covered in orange or black fabric—it looks professional and keeps them organized.
These pair wonderfully with warm apple cider, hot chocolate, or pumpkin spice lattes. For a Halloween party spread, serve them alongside caramel apples, popcorn balls, and pumpkin-shaped cookies. They’re also perfect for classroom parties because they’re individually portioned and easy to hand out.
Storage: Store your decorated pops in an airtight container at room temperature for up to 5 days. Layer them between sheets of wax paper to prevent the decorations from sticking together. Do not refrigerate them—the moisture in the fridge will make the treats soggy and the candy coating can develop condensation.
Freezing: You can freeze undecorated Rice Krispie treats for up to 3 months. Wrap them tightly in plastic wrap, then place in a freezer bag. Thaw at room temperature for about 30 minutes before decorating. I’ve done this many times when I wanted to prep ahead for a party. The texture is slightly softer after freezing, but still delicious.
Reheating: If your treats have become a bit stale, pop them in the microwave for 5-10 seconds. This softens the marshmallow and restores some of the fresh texture. Just be careful not to overheat, or the candy coating will melt and make a mess.
One thing I’ve noticed: these treats actually taste better the next day. The flavors meld together overnight, and the texture becomes perfectly balanced. So don’t stress if you need to make them a day ahead—they’ll be even better.
Nutritional Information & Benefits
Let’s be honest—these are a treat, not a health food. But here’s what you’re looking at per pop (assuming you get about 12 pops from the recipe, with candy coating and decorations):
Estimated per pop: 220 calories, 8g fat, 36g carbohydrates, 2g protein, 1g fiber, 18g sugar. These numbers will vary based on your specific ingredients and decorations.
The main ingredients do offer a few benefits. Butter provides vitamin A and healthy fats. Marshmallows are mostly sugar, but they’re what gives these treats their iconic texture. The crispy rice cereal is fortified with iron and B vitamins, so there’s at least a tiny nutritional upside.
Dietary considerations: This recipe contains dairy (butter) and may contain gluten depending on your cereal choice. The candy melts often contain soy lecithin. If you’re using the peanut butter variation, peanuts are obviously present. Always check labels if you’re serving guests with allergies.
For a slightly healthier version, you can use brown rice cereal, which adds more fiber and a nuttier flavor. You can also reduce the butter to 2 tablespoons, though the texture will be slightly less rich. I’ve tried both modifications and they work well, though the original version is definitely more indulgent.
My personal philosophy? These are Halloween treats, meant to be enjoyed in moderation. I don’t stress about the nutritional content when I’m making something festive and fun. Life is about balance, and sometimes that balance includes a perfectly decorated Rice Krispie pop.
Conclusion
These Easy Halloween Rice Krispie Treat Pops have become a staple in my kitchen for good reason. They’re simple enough for a weeknight project but impressive enough for any Halloween gathering. The three-ingredient base is forgiving and adaptable, and the decorating possibilities are endless. Whether you’re making them for a classroom party, a neighborhood event, or just to surprise your kids, they deliver every single time.
I love that this recipe brings people together. There’s something about decorating these pops that makes everyone feel like a kid again—the sticky fingers, the laughter over lopsided faces, the pride when you create something truly spooky. It’s not just about the finished product; it’s about the process, the mess, the memories.
I encourage you to make this recipe your own. Try different decorations, experiment with flavors, and don’t be afraid to get creative. If your ghost ends up looking more like a blob, that’s okay—it’s still delicious. Some of my favorite batches have been the “ugly” ones that tasted amazing.
So grab your ingredients, put on some Halloween music, and get ready to create something magical. I’d love to hear how your pops turn out—share your creations in the comments below, or tag me in your photos. Happy Halloween, and happy snacking!
Frequently Asked Questions
Can I use mini marshmallows instead of regular ones?
Yes, mini marshmallows work just fine. Use about 4 cups of mini marshmallows to replace one 10-ounce bag of regular marshmallows. They actually melt faster, so keep a closer eye on them to prevent burning.
Why are my Rice Krispie treats hard and crunchy?
This usually happens when you press the mixture too firmly into the pan or when you overcook the marshmallows. Press gently—just enough to create an even layer—and remove the pot from heat as soon as the marshmallows are fully melted.
How far in advance can I make these pops?
You can make the undecorated treats up to 3 days ahead and store them in an airtight container. Decorate them the day you plan to serve them for the freshest look. If you need to prep even further ahead, freeze the undecorated treats for up to 3 months.
Can I use white chocolate instead of candy melts?
Absolutely, but white chocolate behaves differently. It’s softer and doesn’t set as firmly. Add a tablespoon of coconut oil to help it thin out and set better. White chocolate also has a richer flavor that pairs beautifully with the marshmallow.
How do I prevent the candy coating from cracking?
Cracking happens when the coating is too thick or when the treats are too cold. Make sure your treats are at room temperature before dipping, and thin your candy melts with a little coconut oil if they seem thick. Also, avoid tapping the pop too hard to remove excess coating—gentle shaking works better.
Pin This Recipe!
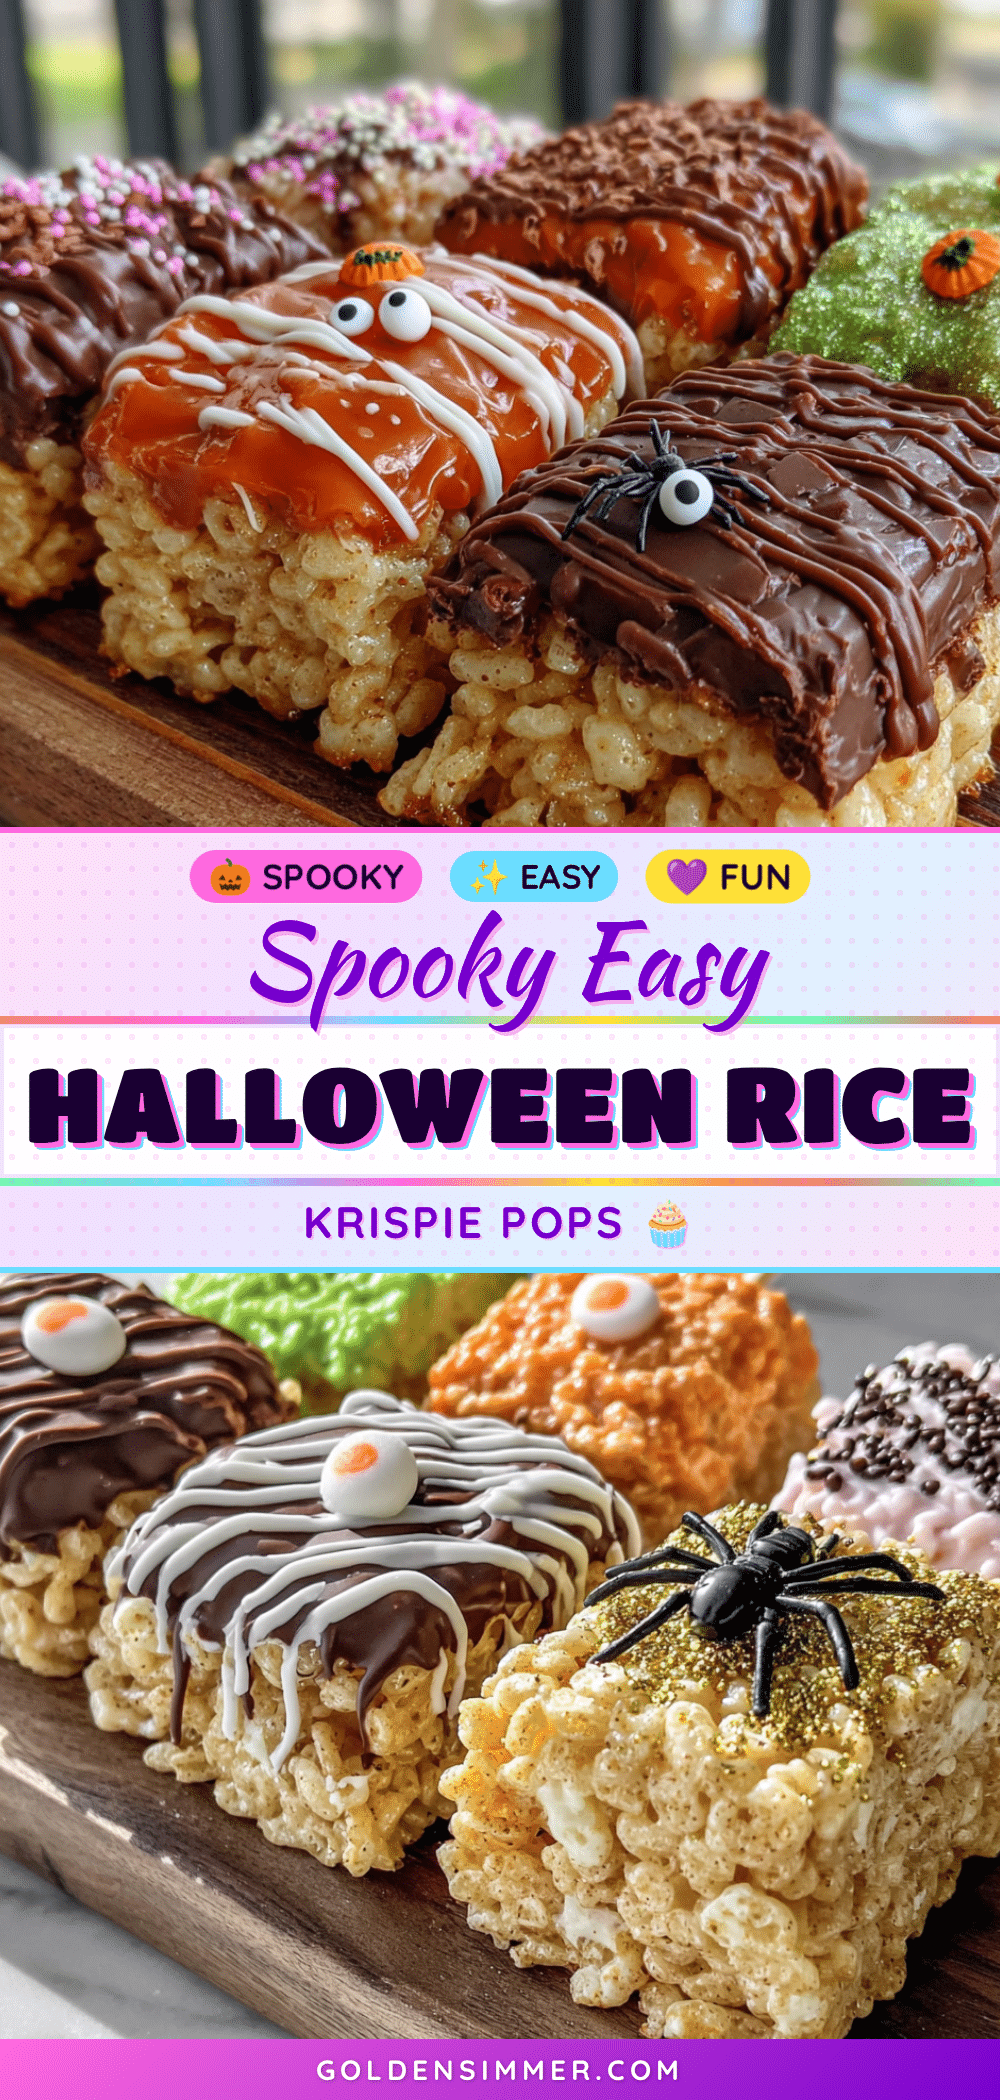
Easy Halloween Rice Krispie Treat Pops: 3-Ingredient Fun

These Easy Halloween Rice Krispie Treat Pops are simple, festive, and perfect for fall gatherings. Made with just three ingredients, they’re quick to prepare and fun to decorate, making them a crowd-pleaser for kids and adults alike.
- Prep Time: 20 minutes
- Cook Time: 10 minutes
- Total Time: 30 minutes
- Yield: 12 servings 1x
- Category: Dessert
- Cuisine: American
Ingredients
- 3 tablespoons unsalted butter
- 1 package (10 ounces) marshmallows (regular size)
- 6 cups crispy rice cereal
- Lollipop sticks (6-inch size)
- Orange candy melts
- Black decorating gel
- Candy eyes
- Halloween-themed sprinkles
- Orange sanding sugar
Instructions
- Line a 9×13 inch baking dish with wax paper or parchment paper, leaving some overhang. Lightly grease the paper with butter or non-stick spray.
- Place 3 tablespoons of unsalted butter in a large pot over medium-low heat. Melt slowly, swirling occasionally, until fully melted but not bubbling or browning (about 2-3 minutes).
- Add the entire 10-ounce bag of marshmallows. Stir constantly over low heat until marshmallows are fully melted and smooth (about 5-7 minutes). Remove from heat immediately if any browning occurs.
- Remove pot from heat. Pour in 6 cups of crispy rice cereal all at once. Stir gently but thoroughly, folding until every piece is coated (about 15-20 folds). Avoid crushing the cereal.
- Scrape mixture into prepared baking dish, distributing evenly. Use a second piece of lightly greased wax paper to press the mixture down firmly but gently, just until even and set.
- Cool at room temperature for about 30 minutes to 1 hour, until firm and slightly springy to the touch.
- Lift the entire block out using the wax paper overhang. Use a sharp knife or cookie cutters to cut into shapes (e.g., pumpkins, ghosts, bats) or 2×3 inch rectangles. Dip knife in warm water between cuts for cleaner edges.
- Gently push a lollipop stick into each treat, about halfway through. If the treat cracks, press it back together.
- Melt orange candy melts according to package directions. Dip each pop into the melted candy, letting excess drip off. Place on wax paper to set. While coating is still wet, add candy eyes, sprinkles, or sanding sugar. For faces, let coating set completely, then use black decorating gel to draw spooky expressions.
Notes
Use fresh marshmallows for best results. Avoid overmixing the cereal to keep treats light and airy. Work in small batches when decorating to prevent coating from setting before adding decorations. Store in an airtight container at room temperature for up to 5 days. Do not refrigerate. Undecorated treats can be frozen for up to 3 months.
Nutrition
- Serving Size: 1 pop
- Calories: 220
- Sugar: 18
- Sodium: 150
- Fat: 8
- Saturated Fat: 4
- Carbohydrates: 36
- Fiber: 1
- Protein: 2
Keywords: Halloween, Rice Krispie treats, pops, easy, 3-ingredient, kids, party, fall, no-bake



