Love this? Save it for later!
Share the inspiration with your friends
My niece asked why I couldn’t just use a store-bought cookie cutter for the cat shape instead of making a template from scratch. I started to explain why that wouldn’t work — then stopped. Honestly, I had no good reason. I just assumed homemade templates were better because, well, I made them. She was right. The store-bought cutter gave those cookies the most consistent, adorable cat faces I’d ever managed. Let me tell you, being wrong never tasted so good.
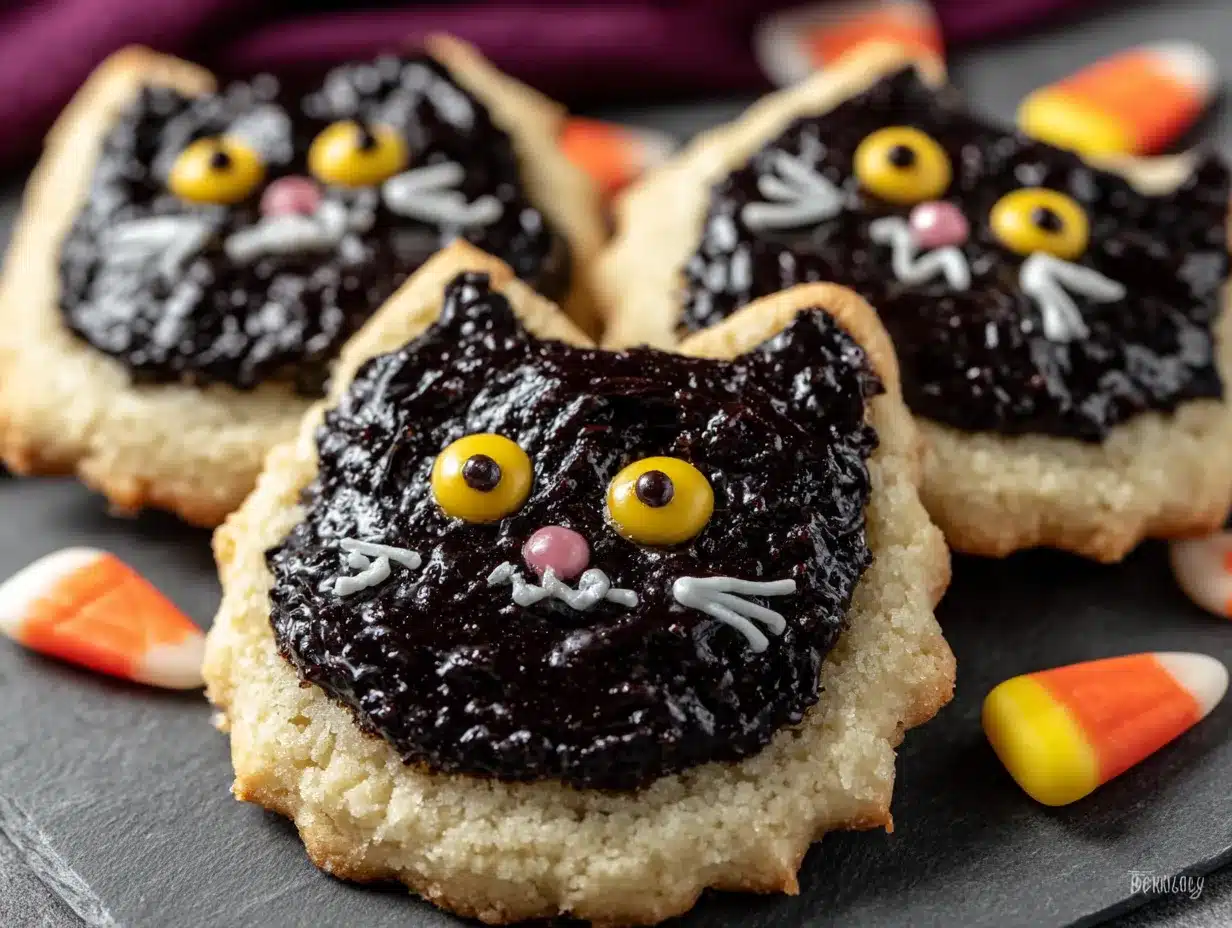
It was a Tuesday afternoon in late September, and the kitchen was already a disaster zone of flour and powdered sugar. I was determined to create the perfect Halloween cookie, something that captured that spooky-but-cute vibe without looking like a hot mess. My niece, all of nine years old, watched me struggle with my carefully cut paper template. “Why not just use the cat cutter Grandma gave you?” she asked. I almost dismissed it — that cutter always left the ears looking wonky. But I was tired, and she was insistent, so I handed her the dough and the cutter. She pressed it down, lifted it up, and there it was: a perfect little black cat shape with distinct ears and a round face. I mean, I was floored.
That moment changed my whole approach to these cookies. You know that feeling when a simple solution has been staring you in the face the whole time? That was this. From that day on, these Adorable Black Cat Sugar Cookies for Halloween became our annual tradition. They’re the kind of cookies that make you smile before you even take a bite — cute enough to charm, spooky enough to fit the season, and so simple that even a nine-year-old can nail them. I keep making them because they remind me that sometimes the best ideas come from letting go of control and listening to the people around you, even when they’re half your age.
Why You’ll Love This Recipe
These aren’t just any sugar cookies. They are the result of years of trial and error, a stubborn aunt, and a very smart niece. I’ve tested this dough more times than I can count to get that perfect balance of crisp edges and soft centers. It’s a recipe that I’ve tweaked and perfected, and I’m handing it to you with all my best tips baked right in.
- Quick & Easy: From start to finish, these cookies come together in under an hour. The dough chills for just 20 minutes, which means you can go from craving to decorating faster than you can say “trick or treat.”
- Simple Ingredients: No fancy grocery trips needed. Butter, sugar, flour, eggs, and vanilla — you likely already have everything in your pantry. The only special item is black food coloring, which is easy to find at any grocery store or online.
- Perfect for Halloween: Whether you’re hosting a spooky soiree, sending treats to school, or just want to surprise your family, these cookies are the star of any Halloween spread. They’re cute enough for kids and clever enough for adults.
- Crowd-Pleaser: I’ve brought these to potlucks, office parties, and family gatherings. They always get rave reviews. Kids love the shape, and adults appreciate the buttery, vanilla-forward flavor that isn’t overly sweet.
- Unbelievably Delicious: The texture is next-level. The edges are just slightly crisp, while the center stays tender and soft. Paired with a simple black icing, these cookies are pure comfort food in a Halloween costume.
What makes this recipe different from the rest is the technique. I use a combination of powdered and granulated sugar to create a dough that holds its shape perfectly during baking. No spreading, no blobby cats. Just sharp, distinct edges every single time. It is comfort food reimagined — familiar, but with a spooky twist that makes it memorable. Perfect for impressing guests without stress, or turning a simple Tuesday afternoon into something special.
What Ingredients You Will Need
This recipe uses simple, wholesome ingredients to deliver bold flavor and satisfying texture without the fuss. Most of these are pantry staples, making it easy to whip up a batch whenever the Halloween spirit strikes.
- Unsalted butter, softened (1 cup / 226g) — I recommend using Land O’Lakes for consistent results. The butter needs to be at room temperature, not melted, for the creaming method to work properly.
- Granulated sugar (1 cup / 200g) — This provides the structure and sweetness. Regular white sugar is perfect here.
- Powdered sugar (1/4 cup / 30g) — This is my secret ingredient. It gives the cookies a tender, melt-in-your-mouth texture that granulated sugar alone can’t achieve. Plus, it helps the dough hold its shape.
- Large egg (1, at room temperature) — The egg binds everything together. Make sure it’s not cold, or it will seize the butter.
- Vanilla extract (2 teaspoons) — Use pure vanilla extract for the best flavor. Imitation vanilla works, but the taste is noticeably different.
- All-purpose flour (2 1/2 cups / 312g) — Spoon and level your flour for accuracy. Too much flour makes the cookies dense and dry.
- Baking powder (1/2 teaspoon) — This gives the cookies a slight lift without making them puffy.
- Salt (1/4 teaspoon) — Salt balances the sweetness and enhances the vanilla flavor.
- Black gel food coloring (1-2 teaspoons) — I recommend Americolor Super Black. Liquid food coloring won’t give you a true black and can mess with the dough’s consistency.
- For the icing: Powdered sugar (2 cups / 240g), milk (2-3 tablespoons), vanilla extract (1/2 teaspoon), and additional black gel food coloring.
- For the eyes: Small white candy eyes or white royal icing details. You can also use white chocolate chips turned upside down.
If you’re looking for a dairy-free option, you can substitute the butter with a high-quality vegan butter stick, like Miyoko’s. The texture will be slightly different, but it still works beautifully. For a gluten-free version, use a 1:1 gluten-free baking flour blend that contains xanthan gum.
Equipment Needed
You don’t need a professional bakery setup for these cookies, but having the right tools makes the process smoother and more enjoyable.
- Electric mixer (handheld or stand mixer) — Creaming the butter and sugar by hand is possible, but it takes forever. A mixer saves time and ensures a light, fluffy texture.
- Cat-shaped cookie cutter (about 3 inches wide) — I use a simple metal cutter from Wilton. It’s cheap and works perfectly. If you don’t have one, you can use a round cutter and shape the ears by hand, but the cutter is easier.
- Baking sheets (2, preferably light-colored) — Dark baking sheets can cause the bottoms to brown too quickly. If that’s all you have, reduce the baking time by a minute or two.
- Parchment paper or silicone baking mat — This prevents sticking and makes cleanup a breeze. I prefer parchment paper because it’s disposable and gives the cookies a clean bottom.
- Rolling pin with thickness guides — Consistent thickness is key for even baking. If you don’t have guides, use two wooden spoons or chopsticks on either side of the dough.
- Cooling rack — Cookies need to cool completely before decorating. A wire rack allows air to circulate, preventing soggy bottoms.
- Piping bags or ziplock bags — For the icing. A small round tip (like Wilton #2) gives you control, but snipping the corner of a ziplock bag works in a pinch.
- Small offset spatula — Helpful for lifting the cut cookies onto the baking sheet without distorting their shape.
I’ve used cheap cookie cutters from the dollar store, and they work fine. The key is to wash and dry them thoroughly before use. If you’re investing in a good set, Wilton or Ann Clark are reliable brands that hold their edge.
Preparation Method
- Cream the butter and sugars. In a large bowl, beat the softened butter, granulated sugar, and powdered sugar together on medium speed until light and fluffy, about 3 minutes. Scrape down the sides of the bowl halfway through. The mixture should look pale and feel airy. This step is crucial for a tender cookie, so don’t rush it.
- Add the egg and vanilla. Beat in the egg and vanilla extract until fully combined. The mixture might look slightly curdled at this point — that’s normal. Don’t worry.
- Incorporate the dry ingredients. In a separate bowl, whisk together the flour, baking powder, and salt. Gradually add the dry mixture to the wet mixture, mixing on low speed until just combined. Overmixing at this stage develops gluten, which makes cookies tough. Stop as soon as you don’t see any more white streaks.
- Add the black food coloring. Add 1 teaspoon of black gel food coloring and mix until the dough is evenly colored. If it’s not dark enough, add more, one drop at a time, until you reach a deep, inky black. The color will darken slightly as the dough rests.
- Chill the dough. Divide the dough in half, flatten each half into a disk, and wrap tightly in plastic wrap. Refrigerate for at least 20 minutes, or up to 2 days. Chilling firms up the butter, which prevents the cookies from spreading during baking. If you skip this step, your cats will end up as blobs.
- Preheat and prepare. Preheat your oven to 350°F (175°C). Line two baking sheets with parchment paper or silicone mats.
- Roll and cut. On a lightly floured surface, roll one disk of dough to 1/4-inch thickness. Use your cat-shaped cookie cutter to cut out shapes. Reroll the scraps once — any more than that, and the cookies will be tough. Place the cutouts on the prepared baking sheets, spacing them about 2 inches apart.
- Bake. Bake for 8-10 minutes, rotating the pans halfway through. The cookies are done when the edges are set and the tops look dry. They should not be browned at all — you want them to stay black. Let them cool on the baking sheet for 5 minutes, then transfer to a wire rack to cool completely.
- Make the icing. In a small bowl, whisk together the powdered sugar, 2 tablespoons of milk, and vanilla extract. Add more milk, one teaspoon at a time, until the icing is thick but still flows slowly from a spoon. Stir in black gel food coloring until you reach your desired shade.
- Decorate. Transfer the icing to a piping bag or ziplock bag with a tiny corner snipped off. Outline each cookie, then fill in the center with more icing. Use a toothpick to spread it evenly if needed. While the icing is still wet, press on the white candy eyes. Let the icing set for at least 1 hour before serving.
Troubleshooting tip: If your dough cracks when rolling, let it sit at room temperature for 5 minutes. If it’s too sticky, dust it lightly with flour. The goal is a smooth, pliable dough that doesn’t stick to your rolling pin.
Cooking Tips & Techniques
I’ve made these cookies more times than I can count, and I’ve learned a thing or two the hard way. Here are my best tips for perfect black cat cookies every time.
Don’t overbake. This is the number one mistake I made in the beginning. Because the cookies are black, you can’t see when they’re browning. Set a timer for 8 minutes and check them. They should look set around the edges but still soft in the center. They’ll continue to firm up as they cool. Overbaked cookies are dry and crumbly.
Use gel food coloring, not liquid. Liquid food coloring will thin out your dough and give you a muddy gray instead of a true black. Gel coloring is concentrated, so you use less, and it doesn’t affect the dough’s consistency. I’ve used Americolor Super Black for years, and it never lets me down.
Chill your cutouts. After cutting the shapes, pop the baking sheet into the fridge for 10 minutes before baking. This is a game-changer for sharp edges. The cold butter takes longer to melt in the oven, which means less spreading.
Work in batches. Don’t try to roll and cut all the dough at once. Keep the second disk in the fridge while you work with the first. Warm dough is sticky dough, and sticky dough leads to frustration. Patience pays off here.
Use a toothpick for details. If you want to add whiskers or a little mouth to your cats, dip a toothpick in the icing and draw them on. It gives you more control than a piping bag for tiny details. I learned this after a particularly disastrous attempt at piping whiskers that looked more like spider legs.
Variations & Adaptations
One of the best things about this recipe is how adaptable it is. Once you have the basic dough down, the possibilities are endless.
Gluten-Free Version: Swap the all-purpose flour for a 1:1 gluten-free baking blend that contains xanthan gum. I’ve used Bob’s Red Mill with great results. The dough will be slightly more delicate, so handle it gently and chill it well. The texture is a bit more crumbly but still delicious.
Vegan Version: Use vegan butter sticks and a flax egg (1 tablespoon ground flaxseed mixed with 3 tablespoons water, let sit for 5 minutes). The cookies won’t be as tender, but they’ll still be tasty. For the icing, use plant-based milk. The color might be slightly less vibrant, but it still works.
Flavor Variations: Add 1 teaspoon of almond extract along with the vanilla for a subtle nutty flavor. Or try adding the zest of one orange for a citrusy twist that pairs beautifully with the vanilla. I once made a batch with a pinch of cinnamon and nutmeg — it gave them a warm, cozy fall vibe that was perfect for a Halloween bonfire.
Different Shapes: Don’t limit yourself to cats. This dough works with any Halloween cookie cutter — pumpkins, ghosts, bats, or even simple circles decorated to look like jack-o’-lanterns. The black color makes it versatile for any spooky design.
No Food Coloring Option: If you want to skip the black coloring, you can make these as plain sugar cookies and decorate them with orange and purple icing. They won’t be black cats, but they’ll still be adorable Halloween treats. My niece actually prefers them this way — she says they look like “friendly ghosts.”
Serving & Storage Suggestions
These cookies are best served at room temperature, ideally within 24 hours of decorating. The icing sets up nicely and creates a slight crunch that contrasts with the soft cookie underneath.
For a Halloween party: Arrange the cookies on a platter lined with orange or purple tissue paper. Add a few candy eyeballs scattered around for extra spooky flair. They’re also great for packaging as gifts — stack them in a clear cellophane bag tied with a black ribbon.
Storage: Keep the undecorated cookies in an airtight container at room temperature for up to 5 days. If you’ve already iced them, store them in a single layer in an airtight container, with parchment paper between layers. The icing can get sticky if stacked too high.
Freezing: You can freeze the baked, undecorated cookies for up to 3 months. Place them in a freezer-safe bag with parchment paper between layers. Thaw at room temperature for about 30 minutes before decorating. The dough itself can also be frozen for up to 3 months — just wrap it tightly in plastic wrap and then foil. Thaw overnight in the fridge before rolling.
Reheating: These cookies are meant to be eaten at room temperature, but if you want a warm treat, pop them in a 300°F oven for 3-4 minutes. They’ll soften slightly. Don’t microwave them, or the icing will melt into a puddle.
One thing I love about these cookies is that the flavor actually improves after a day or two. The vanilla mellows out, and the texture becomes even more tender. So don’t stress about making them the day before — they’re actually better that way.
Nutritional Information & Benefits
Let’s be real: these are sugar cookies. They’re a treat, not a health food. But that doesn’t mean they can’t fit into a balanced lifestyle. Here’s a rough estimate per cookie (based on 24 cookies):
- Calories: 145
- Total Fat: 6g
- Saturated Fat: 4g
- Carbohydrates: 22g
- Sugar: 14g
- Protein: 2g
Dietary Considerations: These cookies contain dairy, eggs, and gluten. For allergen-friendly versions, see the variations section above. The black food coloring is typically vegan and gluten-free, but always check the label if you have specific concerns.
Health Benefits: While these aren’t a health food, there’s something to be said for the joy of baking. The process of making cookies with loved ones, the smell of vanilla and butter filling the kitchen, the satisfaction of creating something beautiful — that counts for something. Plus, using real butter and vanilla means you’re avoiding the artificial additives found in many store-bought cookies. Everything in moderation, right?
I personally believe that treats like these have a place in a healthy lifestyle. They’re about celebration, connection, and making memories. One cookie won’t derail your goals, but it might just make your day a little sweeter.
Conclusion
These Adorable Black Cat Sugar Cookies for Halloween are more than just a recipe — they’re a tradition waiting to happen. They’re the cookies that make kids’ eyes light up and adults feel like kids again. They’re the ones you’ll find yourself making year after year, tweaking and perfecting, until they’re uniquely yours.
I hope you give them a try, and I hope you make them your own. Maybe you’ll add a pinch of cinnamon, or use a different shape, or let your kids go wild with the icing. That’s the beauty of baking — there’s no wrong way to do it, as long as you’re having fun. And honestly, these cookies are pure fun from start to finish.
I’d love to hear how yours turn out! Drop a comment below with your best decorating tips, or tag me in your photos on Pinterest. Let’s make this Halloween the sweetest one yet. Happy baking, and remember: even if your cats come out a little wonky, they’ll still be delicious. That’s the secret no one tells you.
Frequently Asked Questions
Can I make the dough ahead of time?
Absolutely. The dough can be refrigerated for up to 2 days or frozen for up to 3 months. Just wrap it tightly in plastic wrap and then foil. Thaw in the fridge overnight before rolling.
Why did my cookies spread?
This usually happens if the dough wasn’t chilled enough, or if the butter was too soft. Make sure your dough is thoroughly chilled before rolling, and pop the cutouts in the fridge for 10 minutes before baking. Also, check that your baking powder isn’t expired — old leavening can cause spreading.
Can I use liquid food coloring instead of gel?
You can, but I don’t recommend it. Liquid food coloring will thin out your dough and give you a grayish color instead of a true black. You’d need a lot of it to get a dark shade, which can affect the texture. Gel is more concentrated and produces a much better result.
How do I get the icing perfectly smooth?
The key is getting the right consistency. Your icing should be thick enough to hold its shape but thin enough to flow slowly from a spoon. If it’s too thick, add a drop of milk. If it’s too thin, add more powdered sugar. Use a toothpick to spread the icing into the corners of the cookie for a smooth finish.
Can I use a different cookie cutter shape?
Of course! This dough works with any Halloween-themed cutter. Pumpkins, ghosts, bats, and spiders are all great options. Just adjust the baking time slightly if the shapes are much larger or smaller than the cat cutter. Smaller cookies might need 1-2 minutes less, and larger ones might need 1-2 minutes more.
Pin This Recipe!

Adorable Black Cat Sugar Cookies for Halloween

These adorable black cat sugar cookies are a Halloween tradition, featuring a perfectly balanced dough that holds its shape for crisp edges and soft centers. Decorated with black icing and candy eyes, they’re a spooky-cute treat that’s quick and easy to make.
- Prep Time: 20 minutes
- Cook Time: 10 minutes
- Total Time: 1 hour (including chilling and decorating time)
- Yield: 24 cookies 1x
- Category: Dessert
- Cuisine: American
Ingredients
- 1 cup (226g) unsalted butter, softened
- 1 cup (200g) granulated sugar
- 1/4 cup (30g) powdered sugar
- 1 large egg, at room temperature
- 2 teaspoons vanilla extract
- 2 1/2 cups (312g) all-purpose flour
- 1/2 teaspoon baking powder
- 1/4 teaspoon salt
- 1–2 teaspoons black gel food coloring
- For the icing: 2 cups (240g) powdered sugar
- 2–3 tablespoons milk
- 1/2 teaspoon vanilla extract
- Additional black gel food coloring
- Small white candy eyes or white royal icing details
Instructions
- Cream the butter and sugars: In a large bowl, beat the softened butter, granulated sugar, and powdered sugar together on medium speed until light and fluffy, about 3 minutes. Scrape down the sides of the bowl halfway through.
- Add the egg and vanilla: Beat in the egg and vanilla extract until fully combined. The mixture might look slightly curdled—that’s normal.
- Incorporate the dry ingredients: In a separate bowl, whisk together the flour, baking powder, and salt. Gradually add the dry mixture to the wet mixture, mixing on low speed until just combined. Do not overmix.
- Add the black food coloring: Add 1 teaspoon of black gel food coloring and mix until the dough is evenly colored. Add more, one drop at a time, until you reach a deep, inky black.
- Chill the dough: Divide the dough in half, flatten each half into a disk, and wrap tightly in plastic wrap. Refrigerate for at least 20 minutes, or up to 2 days.
- Preheat and prepare: Preheat your oven to 350°F (175°C). Line two baking sheets with parchment paper or silicone mats.
- Roll and cut: On a lightly floured surface, roll one disk of dough to 1/4-inch thickness. Use a cat-shaped cookie cutter to cut out shapes. Reroll the scraps once. Place the cutouts on the prepared baking sheets, spacing them about 2 inches apart.
- Bake: Bake for 8-10 minutes, rotating the pans halfway through. The cookies are done when the edges are set and the tops look dry. Let them cool on the baking sheet for 5 minutes, then transfer to a wire rack to cool completely.
- Make the icing: In a small bowl, whisk together the powdered sugar, 2 tablespoons of milk, and vanilla extract. Add more milk, one teaspoon at a time, until the icing is thick but still flows slowly from a spoon. Stir in black gel food coloring until you reach your desired shade.
- Decorate: Transfer the icing to a piping bag or ziplock bag with a tiny corner snipped off. Outline each cookie, then fill in the center with more icing. Use a toothpick to spread it evenly if needed. While the icing is still wet, press on the white candy eyes. Let the icing set for at least 1 hour before serving.
Notes
For best results, chill the cutouts on the baking sheet for 10 minutes before baking to prevent spreading. Use gel food coloring, not liquid, for a true black color. The dough can be refrigerated for up to 2 days or frozen for up to 3 months. Undecorated cookies can be stored in an airtight container at room temperature for up to 5 days.
Nutrition
- Serving Size: 1 cookie
- Calories: 145
- Sugar: 14
- Sodium: 50
- Fat: 6
- Saturated Fat: 4
- Carbohydrates: 22
- Protein: 2
Keywords: Halloween cookies, black cat cookies, sugar cookies, Halloween dessert, easy sugar cookies, black food coloring cookies, cat-shaped cookies



