Love this? Save it for later!
Share the inspiration with your friends
Someone asked me last week why I always bring the same dish to Thanksgiving. I laughed, but honestly, I knew exactly what they meant. It’s the green bean casserole. Not just any green bean casserole though—the one with the crispy fried onions on top that everyone picks off before the main course even hits the table. I’ve been making this version for about eight years now, ever since I messed up my aunt’s recipe so badly that I had to start from scratch. That happy accident turned into something I actually look forward to making.
The first time I attempted it, I forgot to drain the green beans properly. The whole thing turned into a soupy mess, and the fried onions on top got soggy within minutes. I was so frustrated I almost gave up on the dish entirely. But then I tried again the next week—because I’m stubborn like that—and this time I paid attention to every little detail. The result was so good that my neighbor, Mrs. Patterson, knocked on my door to ask what smelled so amazing. She’s been my taste-tester ever since.
What keeps me coming back to this recipe is how it manages to feel both nostalgic and fresh at the same time. The creamy mushroom sauce, the tender green beans, that irresistible crunch from the fried onions—it all comes together in a way that just works. You know that feeling when you take a bite and everything clicks? That’s this casserole. Maybe you’ve been there, staring at a holiday table covered in dishes, wondering which one to load up on first. This is the one that always wins.
Why You’ll Love This Recipe
I’ve tested this classic green bean casserole more times than I can count, and I can tell you with confidence—it delivers every single time. Here’s what makes it stand out from the hundreds of other versions floating around out there.
- Quick & Easy : Comes together in under 30 minutes of active prep time. The oven does the rest of the work while you focus on other dishes.
- Simple Ingredients : No fancy grocery trips needed. You probably have most of these items in your pantry right now.
- Perfect for Holidays : Great for Thanksgiving, Christmas, Easter brunch, or even a cozy Sunday dinner with the family.
- Crowd-Pleaser : Always gets rave reviews from kids and adults alike. I’ve never seen leftovers of this dish.
- Unbelievably Delicious : The texture and flavor combo is next-level comfort food. Creamy, crunchy, savory—it hits all the right notes.
What makes this recipe different from the rest? It’s the little things I discovered through trial and error. Like blanching the green beans first instead of using them straight from the can. Or making sure the cream of mushroom soup is stirred until completely smooth before adding the milk. These tiny adjustments make a huge difference in the final dish. This isn’t just another version—it’s my best version, refined over years of holiday cooking.
This recipe is the kind that makes you close your eyes after the first bite. It’s comfort food reimagined—fresher, crunchier, but with the same soul-soothing satisfaction you remember from childhood. Perfect for impressing guests without stress, or turning a simple meal into something memorable.
What Ingredients You Will Need
This recipe uses simple, wholesome ingredients to deliver bold flavor and satisfying texture without the fuss. Most of these are pantry staples, which makes this dish perfect for last-minute gatherings.
- Fresh green beans – 1 ½ pounds, trimmed and cut into 2-inch pieces (look for bright green, firm beans without brown spots)
- Cream of mushroom soup – 1 can (10.5 ounces), preferably Campbell’s for that classic flavor (reduced-sodium works fine too)
- Whole milk – ¾ cup (adds richness; you can use 2% or even unsweetened almond milk if needed)
- Soy sauce – 1 tablespoon (brings umami depth without making it taste like soy sauce)
- Garlic powder – ½ teaspoon (fresh garlic can burn in the oven, so stick with powder here)
- Black pepper – ¼ teaspoon, freshly ground
- Fried onions – 1 ½ cups, divided (French’s is my go-to brand for consistent crunch)
- Shredded cheddar cheese – ½ cup (optional, but adds a lovely savory layer)
- Butter – 2 tablespoons, melted (for tossing with the breadcrumb topping if you want extra crunch)
- Panko breadcrumbs – ¼ cup (optional, for an even crispier topping)
For the green beans, I recommend using fresh ones when they’re in season during summer and fall. In winter, frozen green beans work surprisingly well—just thaw and pat them dry before using. Canned green beans are fine in a pinch, but they tend to be softer and can make the casserole mushy. If you’re using canned, drain them really well and reduce the milk by a couple of tablespoons.
The cream of mushroom soup is the backbone of this dish. I’ve tried making homemade versions, and honestly? The canned stuff works best here. It has the right consistency and that unmistakable flavor that makes this casserole what it is. Just make sure you whisk it thoroughly with the milk before adding anything else—lumps are not your friend.
Equipment Needed
You don’t need a fancy kitchen to pull off this classic green bean casserole. Here’s what you’ll need:
- Large pot – For blanching the green beans (a 6-quart pot works great)
- Colander – To drain the beans after blanching
- Large mixing bowl – For combining all the ingredients
- 9×13-inch baking dish – A 2-quart casserole dish works too, just adjust baking time slightly
- Whisk – For smoothing out the soup and milk mixture
- Measuring cups and spoons – Accuracy matters with this recipe
- Sharp knife and cutting board – For trimming the green beans
- Aluminum foil – To cover the dish if the topping browns too quickly
If you don’t have a 9×13 dish, you can use a 10-inch cast iron skillet or even a deep pie plate. Just keep an eye on the baking time—smaller dishes mean thicker layers, so you might need an extra 5-10 minutes. I’ve used my grandmother’s old CorningWare casserole dish for years, and it works perfectly. No need to buy anything special.
Preparation Method
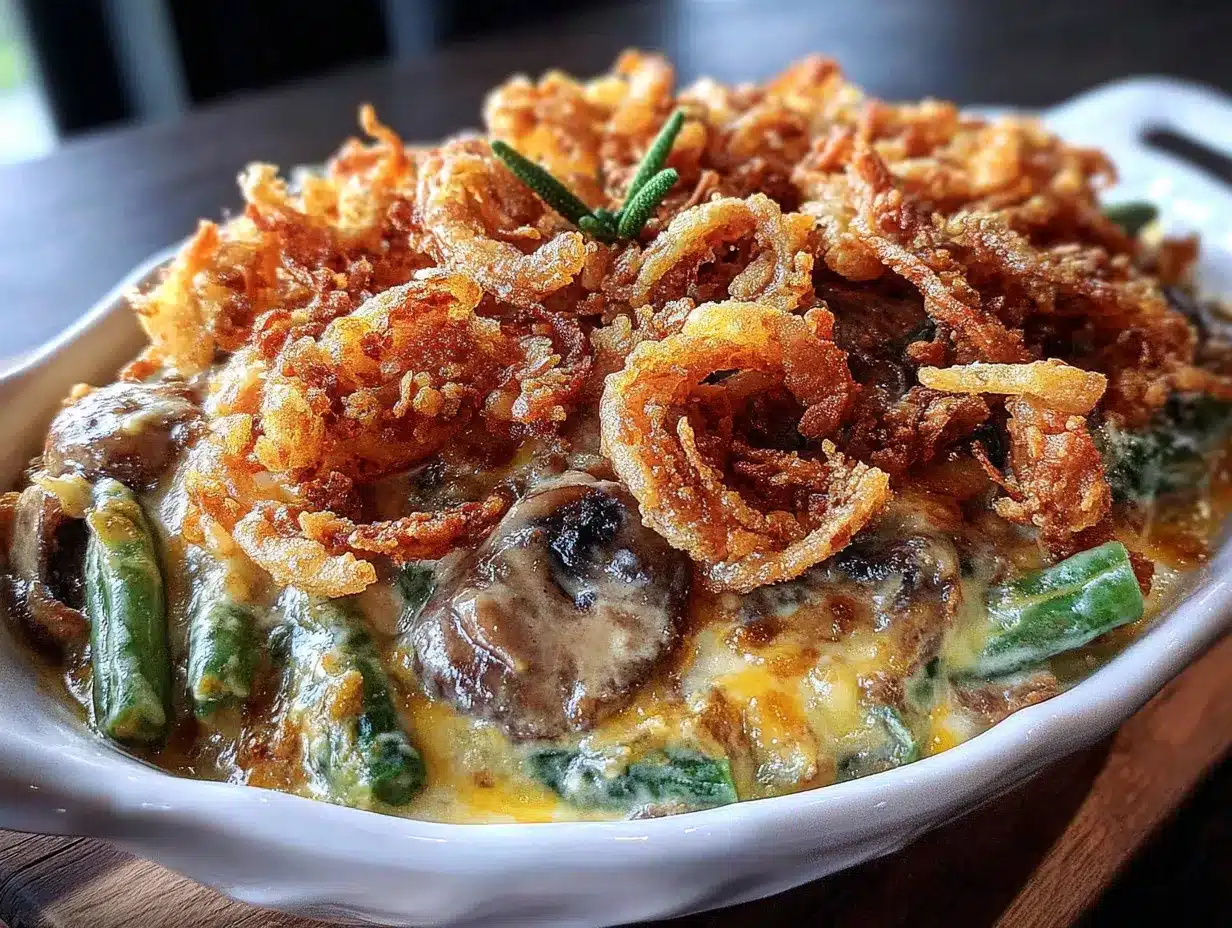
Let me walk you through this step by step. I’ve included all the little details that make the difference between a good casserole and a great one.
- Preheat your oven to 350°F (175°C). Position the rack in the center of the oven. This ensures even heat distribution while the casserole bakes.
- Bring a large pot of salted water to a boil. Use about 1 tablespoon of salt per gallon of water. While the water heats up, fill a large bowl with ice water and set it nearby.
- Blanch the green beans. Drop the trimmed beans into the boiling water and cook for exactly 3 minutes. They should turn bright green and become slightly tender but still have a nice snap. Don’t overcook them—they’ll continue cooking in the oven.
- Shock the beans in ice water. Use a slotted spoon or tongs to transfer the beans immediately to the ice water bath. This stops the cooking process and locks in that vibrant green color. Let them sit for 2 minutes, then drain well in a colander.
- Pat the beans dry. This is a step I learned the hard way. Excess water will make your casserole watery. Spread the beans on a clean kitchen towel and gently pat them dry.
- Make the sauce. In a large mixing bowl, whisk together the cream of mushroom soup, milk, soy sauce, garlic powder, and black pepper until completely smooth. No lumps allowed here—take your time.
- Add the beans and half the onions. Stir in the blanched green beans and ¾ cup of the fried onions. If you’re using the optional cheddar cheese, fold that in now too. Mix until everything is evenly coated.
- Transfer to the baking dish. Pour the mixture into your greased 9×13-inch dish and spread it into an even layer. Give the dish a gentle tap on the counter to settle everything.
- Bake for 25 minutes. Place the dish in the preheated oven, uncovered, and bake until the mixture is bubbly around the edges. The center should be hot and slightly thickened.
- Add the topping. Remove the dish from the oven and sprinkle the remaining ¾ cup of fried onions evenly over the top. If you’re using the panko breadcrumbs, toss them with the melted butter first, then sprinkle them over the onions.
- Bake for another 5-7 minutes. Return the dish to the oven and bake until the topping is golden brown and crispy. Watch it carefully during these last few minutes—onions can go from perfect to burnt very quickly.
- Let it rest for 5 minutes. Remove the casserole from the oven and let it sit on the counter for 5 minutes before serving. This allows the sauce to set up slightly, making it easier to serve.
A quick note: if you notice the topping browning too fast, tent the dish loosely with aluminum foil for the last few minutes of baking. I’ve had to do this more times than I care to admit, especially with older ovens that run hot.
Cooking Tips & Techniques
After making this classic green bean casserole dozens of times, I’ve picked up a few tricks that make a real difference. Let me share them so you don’t have to learn the hard way like I did.
Don’t skip the blanching step. I know it adds an extra step, but it’s non-negotiable. Blanching sets the color, softens the beans just enough, and removes that raw, grassy taste. I once tried to save time by skipping it, and the casserole came out with crunchy, unevenly cooked beans. Never again.
Dry your beans thoroughly. This is probably the most common mistake I see. Wet beans release steam in the oven, which turns your crispy topping into a soggy mess. After blanching, I spread the beans on a clean dish towel and roll them up gently to absorb excess moisture. It takes 30 seconds and makes a huge difference.
Watch your oven temperature. Every oven runs differently. If yours tends to run hot, check the casserole at the 20-minute mark instead of 25. The topping should be golden brown, not dark brown. I burned my first batch because I trusted the recipe timing blindly instead of using my eyes.
Make it ahead of time. This casserole actually tastes better when made a day ahead. Assemble everything except the topping, cover it, and refrigerate. When you’re ready to bake, add about 10 extra minutes to the initial baking time, then add the topping and finish as directed. The flavors meld together beautifully overnight.
Double the topping. Here’s a secret: I always make extra fried onion topping. The ratio in the recipe is good, but if you’re like me and love that crunchy layer, add an extra half cup. Just make sure you press it down lightly so it sticks to the sauce underneath.
Variations & Adaptations
One of the best things about this classic green bean casserole is how adaptable it is. Here are some variations I’ve tried and loved.
Make it from scratch. If you’re feeling ambitious, you can make the cream of mushroom soup from scratch. Sauté 8 ounces of sliced mushrooms in butter until golden, then whisk in 2 tablespoons of flour, 1 cup of chicken or vegetable broth, and 1 cup of heavy cream. Simmer until thickened, then season with salt, pepper, and a splash of Worcestershire sauce. It’s richer and more mushroom-forward than the canned version.
Add protein. Turn this side dish into a main course by adding cooked, shredded chicken or turkey. Stir in about 1 ½ cups of cooked protein when you add the green beans. It’s a great way to use up leftover Thanksgiving turkey.
Go dairy-free. Use dairy-free cream of mushroom soup (Pacific Foods makes a good one), unsweetened almond milk, and vegan butter. Most fried onions are naturally dairy-free, but double-check the label. The texture will be slightly different, but the flavor is still spot-on.
Try different vegetables. This same sauce and topping works beautifully with other vegetables. Swap the green beans for broccoli, cauliflower, or a mix of roasted Brussels sprouts and carrots. Adjust the blanching time based on the vegetable—broccoli needs about 2 minutes, while cauliflower needs 3-4.
Spice it up. For a kick of heat, add ¼ teaspoon of cayenne pepper or a pinch of red pepper flakes to the sauce. I tried this last Christmas on a whim, and my brother-in-law (who claims to hate green beans) went back for seconds.
Serving & Storage Suggestions
This classic green bean casserole is best served warm, straight from the oven. The contrast between the hot, creamy filling and the crispy topping is what makes it so irresistible. Let it rest for 5 minutes after baking so the sauce sets up, then scoop it onto plates with a wide spatula to keep the topping intact.
For presentation, I like to serve it in the same dish I baked it in. It has that rustic, homey feel that fits perfectly on a holiday table. Garnish with a few extra crispy fried onions right before serving, and maybe a sprinkle of fresh parsley if you’re feeling fancy.
This casserole pairs beautifully with roasted turkey or ham, mashed potatoes, and cranberry sauce. For a lighter meal, serve it alongside a simple green salad with vinaigrette to cut through the richness. A glass of crisp white wine like Sauvignon Blanc or a dry Riesling complements the creamy mushroom sauce perfectly.
Storage: Leftovers keep well in the refrigerator for up to 4 days. Store them in an airtight container. The topping will lose some of its crunch, but the flavor will still be fantastic. To reheat, place individual portions in a 350°F oven for 10-15 minutes, or microwave for 1-2 minutes. For best results, reheat in the oven and add a sprinkle of fresh fried onions on top.
Freezing: You can freeze this casserole for up to 3 months. Assemble it without the topping, wrap it tightly in plastic wrap and then foil, and freeze. When you’re ready to bake, thaw it overnight in the refrigerator, add the topping, and bake as directed. The texture of the green beans will be slightly softer after freezing, but it’s still delicious.
I’ve noticed that the flavors actually deepen after a day in the fridge. The second-day casserole is often even better than the first. Just add fresh crispy onions on top before reheating, and nobody will know it’s leftovers.
Nutritional Information & Benefits
Here’s the estimated nutritional breakdown for one serving of this classic green bean casserole (based on 8 servings):
| Nutrient | Amount per Serving |
|---|---|
| Calories | 185 |
| Total Fat | 10g |
| Saturated Fat | 3.5g |
| Cholesterol | 8mg |
| Sodium | 520mg |
| Total Carbohydrates | 20g |
| Dietary Fiber | 3g |
| Sugars | 4g |
| Protein | 4g |
Green beans are a good source of vitamin C, vitamin K, and fiber. They’re low in calories but high in nutrients, making them a smart addition to any meal. The fried onions add some fat and sodium, but they also provide a satisfying crunch that makes you eat slower and feel more satisfied.
If you’re watching your sodium intake, use reduced-sodium cream of mushroom soup and low-sodium soy sauce. You can also cut the fried onions by a third to reduce the fat content. For a lighter version, use 2% milk instead of whole milk and skip the optional cheese and breadcrumbs.
This recipe is not gluten-free as written, but you can easily adapt it by using gluten-free cream of mushroom soup and gluten-free fried onions. Several brands now offer both options. The taste is nearly identical.
Conclusion
This classic green bean casserole with crispy fried onions is more than just a side dish—it’s a tradition waiting to happen. Whether you’re bringing it to a holiday gathering, serving it alongside a weeknight roast chicken, or just craving something warm and comforting, this recipe delivers every single time.
What I love most about this dish is how forgiving it is. You can tweak it a hundred different ways and it still turns out delicious. Add more cheese, swap the vegetables, double the topping—make it your own. That’s what cooking is all about, isn’t it? Taking something familiar and adding your own little twist.
I’d love to hear how yours turns out. Did you add your own spin? Did the family fight over the last scoop? Drop a comment below and let me know. And if you snap a picture, tag me on Pinterest—I always love seeing your creations. Happy cooking, friends!
Frequently Asked Questions
Can I use frozen green beans instead of fresh?
Yes, you can use frozen green beans in this classic green bean casserole. Thaw them first and pat them dry with paper towels to remove excess moisture. You can skip the blanching step since frozen beans are already partially cooked. Just add them directly to the sauce mixture.
Why is my green bean casserole watery?
This usually happens when the green beans aren’t dried properly after blanching, or when canned beans are used without draining thoroughly. Make sure to pat your beans dry with a clean towel before adding them to the sauce. Also, avoid overcooking the beans, as they release more moisture as they break down.
Can I make this casserole ahead of time?
Absolutely. Assemble the casserole completely, but don’t add the topping. Cover and refrigerate for up to 24 hours. When you’re ready to bake, add an extra 10 minutes to the initial baking time, then add the topping and finish as directed. The flavors actually get better overnight.
How do I keep the fried onions crispy?
The key is to add the topping during the last 5-7 minutes of baking, not at the beginning. This prevents the onions from absorbing moisture from the sauce and becoming soggy. If you’re reheating leftovers, add fresh fried onions on top just before serving.
Can I freeze leftover green bean casserole?
Yes, this casserole freezes well for up to 3 months. Freeze it without the topping, wrapped tightly in plastic wrap and foil. Thaw overnight in the refrigerator, add fresh fried onions, and bake at 350°F until heated through. The texture will be slightly softer, but the flavor will still be excellent.
Pin This Recipe!

Easy Classic Green Bean Casserole with Crispy Onions

A classic green bean casserole with creamy mushroom sauce, tender green beans, and a crispy fried onion topping. Perfect for holidays or any comforting meal.
- Prep Time: 15 minutes
- Cook Time: 30 minutes
- Total Time: 45 minutes
- Yield: 8 servings 1x
- Category: Side Dish
- Cuisine: American
Ingredients
- 1 ½ pounds fresh green beans, trimmed and cut into 2-inch pieces
- 1 can (10.5 ounces) cream of mushroom soup (preferably Campbell’s)
- ¾ cup whole milk
- 1 tablespoon soy sauce
- ½ teaspoon garlic powder
- ¼ teaspoon freshly ground black pepper
- 1 ½ cups fried onions (French’s recommended), divided
- ½ cup shredded cheddar cheese (optional)
- 2 tablespoons melted butter (optional, for breadcrumb topping)
- ¼ cup panko breadcrumbs (optional, for extra crunch)
Instructions
- Preheat oven to 350°F (175°C). Position rack in center of oven.
- Bring a large pot of salted water to a boil. Prepare a bowl of ice water.
- Blanch green beans in boiling water for exactly 3 minutes until bright green and slightly tender.
- Transfer beans to ice water bath for 2 minutes to stop cooking. Drain well in a colander.
- Pat beans dry with a clean kitchen towel to remove excess moisture.
- In a large mixing bowl, whisk together cream of mushroom soup, milk, soy sauce, garlic powder, and black pepper until smooth.
- Stir in blanched green beans and ¾ cup fried onions. If using cheddar cheese, fold it in now.
- Pour mixture into a greased 9×13-inch baking dish and spread evenly.
- Bake uncovered for 25 minutes until bubbly around edges and center is hot.
- Remove from oven and sprinkle remaining ¾ cup fried onions over top. If using panko, toss with melted butter and sprinkle over onions.
- Return to oven and bake for 5-7 minutes until topping is golden brown and crispy.
- Let rest for 5 minutes before serving.
Notes
For best results, don’t skip blanching and drying the green beans. Add topping during last 5-7 minutes to keep onions crispy. Can be assembled a day ahead without topping; add 10 minutes to initial baking time. Double the topping if desired.
Nutrition
- Serving Size: 1 serving
- Calories: 185
- Sugar: 4
- Sodium: 520
- Fat: 10
- Saturated Fat: 3.5
- Carbohydrates: 20
- Fiber: 3
- Protein: 4
Keywords: green bean casserole, classic green bean casserole, crispy onions, Thanksgiving side dish, holiday casserole, easy green bean casserole



