Love this? Save it for later!
Share the inspiration with your friends
This was supposed to be a fancy chocolate mousse for a dinner party. I had the good chocolate out, the expensive vanilla, and a plan that involved egg whites and a double boiler. But my stand mixer decided to take the night off—just stopped mid-whip, motor humming but the paddle going nowhere. I stood there, staring at a bowl of half-whipped cream and a kitchen that was already a disaster zone. The party was in two hours, and I had nothing but a bag of Oreos, a box of instant pudding, and a package of gummy worms I’d bought as a joke for the kid’s lunch.
I almost threw in the towel. Honestly, I sat down on the kitchen floor for a solid minute. But then I thought, you know what? Maybe the kids would actually like this more. I crushed the cookies in a ziplock bag with a rolling pin—very therapeutic, by the way—whisked the pudding together in about ninety seconds, and layered it all in some clear plastic cups I found under the sink. I stuck a gummy worm in each one, feeling a little ridiculous. What came out of that mess was nothing like the plan—and way better. Those dirt cups disappeared before the fancy appetizers even made it out of the kitchen. I’ve been making them every Halloween since, and honestly, I’ve never gone back to the mousse.
Why You’ll Love This Recipe
Let me tell you, I’ve tested this recipe more times than I care to admit—mostly because my kids keep requesting it for every single school party, playdate, and random Tuesday. After years of tweaking, I’ve landed on a version that is foolproof, fast, and actually tastes good. Not just “cute for Halloween” good, but genuinely delicious.
- Quick & Easy: Comes together in under 15 minutes. No baking, no special skills, no stress. You can literally make these while answering emails or helping with homework.
- Simple Ingredients: You probably already have most of this in your pantry. No fancy grocery trips needed—just pudding, cookies, and gummy worms.
- Perfect for Halloween Parties: Great for classroom treats, office potlucks, or just making your kids’ day. They’re portable, individual-sized, and zero mess.
- Crowd-Pleaser: I’ve yet to meet a kid (or adult, honestly) who doesn’t love digging into these. They disappear faster than candy bars.
- Unbelievably Customizable: The base recipe is just the start. You can switch up the flavors, add layers, or make them dairy-free without losing the fun factor.
What makes this recipe different from all the other dirt cup recipes out there? It’s the texture. I’ve found that using a mix of crushed Oreos and a few chocolate wafer cookies gives you that perfect “dirt” consistency—not too powdery, not too chunky. Plus, I’ve got a trick for making the pudding extra creamy without using heavy cream. It’s the little things that make this version the one you’ll come back to year after year.
This is the kind of recipe that makes you feel like a hero parent without actually doing much work. It’s Halloween fun without the Halloween chaos. And honestly, isn’t that what we all need?
What Ingredients You Will Need
This recipe uses simple, store-bought ingredients that come together to create something that looks way more impressive than the effort it takes. Most of these are pantry staples, especially if you have kids who love dessert.
For the Pudding Layer
- 1 box (3.9 oz) instant chocolate pudding mix (I prefer Jell-O brand for the smoothest texture, but store brands work fine too)
- 2 cups cold whole milk (for the creamiest result—use 2% if that’s what you have, but avoid skim or it’ll be runny)
- 1/2 cup cool whip or whipped cream (optional, but it makes the pudding extra fluffy and light)
For the Dirt Layer
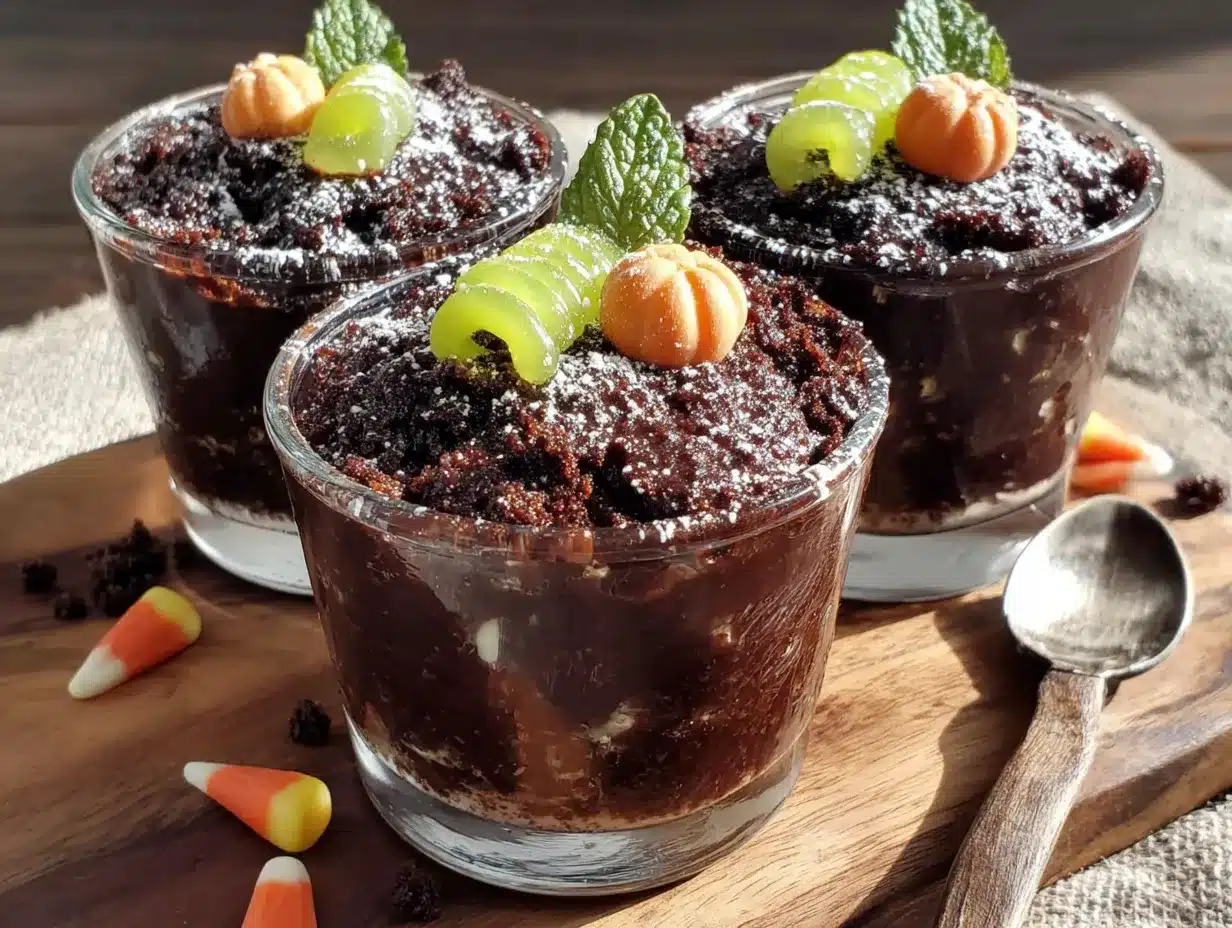
- 1 package (14.3 oz) Oreo cookies (about 20 cookies—regular, not double-stuff, though double-stuff works in a pinch)
- 4 chocolate wafer cookies (optional, but adds a deeper chocolate flavor and better texture)
For Decoration
- 1 bag gummy worms (about 20 worms—I like the sour ones for extra zing, but regular works great)
- Optional: green or orange sprinkles, candy eyeballs, or crushed graham crackers for extra Halloween flair
A quick note on ingredient selection: I’ve tried this with sugar-free pudding mix and almond milk, and honestly, it works. The texture is slightly less creamy, but the flavor is still there. If you’re making these for a crowd with dietary restrictions, go ahead and swap. Just know that the full-fat, full-sugar version is the one that makes people close their eyes and sigh.
For the gummy worms, I’ve tested about six different brands (don’t judge me—it’s research). The best ones for dirt cups are the thicker, chewier worms from Albanese or Trolli. The thin ones tend to get lost in the pudding and don’t poke out as nicely. You want worms that stand up and say “hello” when you peel back the plastic wrap.
Equipment Needed
You don’t need much for this recipe, which is part of the beauty. Here’s what you’ll want to have on hand:
- 6 to 8 clear plastic cups or small glass jars (4-ounce size is perfect—I use the clear plastic cups from the party supply store, but small mason jars work great too)
- A rolling pin or heavy-bottomed pan (for crushing the cookies—honestly, a wine bottle works in a pinch)
- A large ziplock bag (to contain the cookie crumbs and prevent a kitchen explosion)
- A medium mixing bowl and whisk (for the pudding—no electric mixer needed here)
- A small spatula or spoon (for layering)
- A measuring cup (for the milk)
I’ve made these with nothing but a fork and a coffee mug before. Not my finest moment, but it worked. The key is to have something to crush the cookies and something to mix the pudding. Everything else is just for presentation. If you’re making these for a party, the clear cups are worth the investment—they really show off the layers. But if you’re just making them for your kids on a random Tuesday, use whatever cups you have. They’ll still love them.
Preparation Method
- Crush the cookies. Place the Oreos (and wafer cookies if using) in a large ziplock bag. Seal it tight—trust me on this—and crush them with a rolling pin until you have fine crumbs with a few slightly larger pieces. You want it to look like actual dirt, not sand. A few small chunks are fine. This takes about 2 minutes and is oddly satisfying.
- Make the pudding. In a medium bowl, whisk together the instant chocolate pudding mix and 2 cups cold milk. Whisk for about 2 minutes until it starts to thicken. If you’re adding cool whip, fold it in gently now. The pudding will be thick but still pourable. Set it aside for 5 minutes to set up fully.
- Layer the cups. Spoon about 2 tablespoons of crushed cookies into the bottom of each cup. Press down gently with the back of a spoon to create a firm base. This keeps the layers distinct and prevents the dirt from mixing into the pudding.
- Add the pudding layer. Spoon or pour the pudding over the cookie layer, filling each cup about halfway. Tap the cup gently on the counter to settle the pudding and remove any air bubbles. You want a smooth, even layer.
- Top with more dirt. Sprinkle another 2 to 3 tablespoons of crushed cookies over the pudding layer. Don’t press down this time—you want it to look loose and crumbly, like freshly turned soil.
- Add the worms. Gently poke 2 to 3 gummy worms into each cup, letting some stick out of the “dirt” as if they’re crawling out. This is the fun part. I like to have one worm fully buried with just its head poking out, and another draped over the edge of the cup.
- Chill (optional but recommended). Refrigerate the cups for at least 30 minutes before serving. This helps the layers set and makes the whole thing look more polished. If you’re in a rush, you can serve them immediately—they’ll still taste great, just a bit looser.
A few sensory cues to watch for: The pudding should be thick enough that it doesn’t run when you tilt the cup. The cookie crumbs should feel dry and crumbly, not clumpy. If your crumbs are clumping, you might have over-crushed them or had too much moisture in the bag. No worries—just break them up with your fingers.
One thing I learned the hard way: Don’t overfill the cups. Leave about a half-inch of space at the top so the worms have room to poke through. My first batch looked more like worm coffins than worm habitats. Not the vibe we’re going for.
Cooking Tips & Techniques
After about twenty batches of these (I’m not exaggerating—my kids are obsessed), I’ve picked up a few tricks that make a real difference.
Crush cookies in batches. If you’re making a big batch for a party, don’t try to crush all the cookies at once. Do them in two or three batches. It’s easier to get even crumbs, and you won’t end up with a bag that bursts open and sends cookie dust everywhere. Speaking from experience here.
Let the pudding rest. I know it’s tempting to start layering right away, but letting the pudding sit for a full 5 minutes makes a huge difference. It thickens up properly and won’t soak into the cookie layer as much. Your layers will be cleaner and more distinct.
Use a piping bag for the pudding. If you want really clean layers, transfer the pudding to a piping bag or a ziplock bag with the corner snipped off. Pipe it into the cups instead of spooning it. It takes an extra minute but gives you those perfect, Instagram-worthy layers. I do this when I’m making them for parties.
Keep the worms cold. Gummy worms get soft and sticky when they’re warm. If your kitchen is warm, pop the worms in the fridge for 10 minutes before adding them to the cups. They’ll hold their shape better and look more like actual worms crawling through dirt.
Don’t skip the chill time. I know, I know—you want to serve them now. But even 20 minutes in the fridge makes a noticeable difference. The flavors meld, the texture firms up, and the whole thing just comes together. Patience pays off here.
Variations & Adaptations
One of the best things about this recipe is how easy it is to adapt. Here are some variations I’ve tried and loved:
Dairy-Free Version
Use almond milk or oat milk instead of regular milk, and a dairy-free chocolate pudding mix (most instant pudding mixes are actually dairy-free—just check the label). For the topping, use crushed dairy-free chocolate cookies. It works perfectly, and honestly, most people won’t notice the difference.
Peanut Butter Dirt Cups
Add a layer of peanut butter between the cookie crust and the pudding. Just melt 1/4 cup peanut butter in the microwave for 20 seconds and drizzle it over the cookie layer before adding the pudding. It adds a salty-sweet element that’s absolutely killer. My husband’s favorite version by far.
Pumpkin Spice Dirt Cups
For a fall twist, use vanilla pudding mixed with 1/2 teaspoon pumpkin pie spice. Top with crushed graham crackers instead of Oreos, and use candy corn or pumpkin-shaped gummies instead of worms. It’s a fun alternative for Thanksgiving or fall parties.
Gluten-Free Option
Use gluten-free chocolate sandwich cookies (like Glutino or Kinnikinnick) and a gluten-free pudding mix. Most instant pudding is gluten-free, but double-check the label. Everything else in the recipe is naturally gluten-free. I’ve made these for a gluten-sensitive friend, and she couldn’t tell the difference.
Extra Spooky Version
Add a handful of candy eyeballs scattered on top, or use green-tinted coconut flakes as “moss.” You can also layer in some red jam or sauce to look like “blood” between the dirt layers. My kids went absolutely wild for this version last Halloween.
Serving & Storage Suggestions
These dirt cups are best served cold, straight from the fridge. The contrast between the cool, creamy pudding and the crunchy cookie topping is what makes them so satisfying. I like to serve them with a small spoon and a napkin—things can get a little messy, especially with kids.
For presentation, arrange the cups on a platter with extra gummy worms scattered around the base. You can add some fake spider webs or plastic spiders for a truly spooky display. I’ve also labeled each cup with a tiny tombstone-shaped flag for Halloween parties—it’s a small touch that gets a lot of attention.
Storage: These keep well in the refrigerator for up to 3 days. Cover each cup with plastic wrap or a lid to prevent the cookie topping from getting soggy. The pudding layer stays creamy, and the worms hold up surprisingly well. I wouldn’t recommend freezing them—the texture gets weird when thawed.
Make-Ahead Tip: You can assemble these up to 24 hours in advance. Just wait to add the gummy worms until right before serving so they stay perky. If you add them too early, they’ll absorb moisture from the pudding and get a little droopy. Still tasty, just not as photogenic.
One thing I love about this recipe is that the flavors actually get better after a few hours in the fridge. The cookie crumbs soften slightly and meld with the pudding, creating this almost cake-like texture. My kids actually prefer them the next day, if they last that long.
Nutritional Information & Benefits
Let’s be real—these are a treat, not a health food. But here’s the estimated nutritional breakdown per serving (based on 8 servings, using whole milk and regular Oreos):
- Calories: 280-320 per cup
- Fat: 12-15g
- Carbohydrates: 42-48g
- Protein: 5-7g
- Sugar: 30-35g
- Fiber: 1-2g
On the bright side, the milk in the pudding provides some calcium and protein. The cookies offer a small amount of iron. And the gummy worms? Well, they’re mostly sugar, but they do make people smile, which has to count for something, right?
If you’re looking for a slightly lighter version, use low-fat milk and sugar-free pudding mix. You’ll save about 80 calories per serving without sacrificing much flavor. The texture will be a bit less creamy, but it’s still a perfectly good treat.
These are obviously not suitable for anyone with gluten or dairy sensitivities unless you use the substitutions I mentioned earlier. And they’re not vegan unless you use plant-based alternatives for everything. But for a once-a-year Halloween treat? I say go for it.
Conclusion
Look, I know there are a million dirt cup recipes out there. But this one? This one is the one I keep coming back to, year after year. It’s the one my kids request by name, the one I bring to every school party, the one that disappears fastest at every Halloween gathering. It started as a kitchen disaster, but it turned into a tradition.
The best part is how easy it is to make them your own. Swap the worms for spiders, use different cookie flavors, add a layer of caramel—whatever makes you happy. That’s the beauty of a recipe this simple. It’s a canvas, not a chore.
I’d love to hear how yours turn out. Did you try the peanut butter version? Did your kids go crazy for the extra spooky edition? Drop a comment below and let me know. And if you share them on social media, tag me—I want to see your creepy crawly creations. Happy Halloween, and happy cooking!
Frequently Asked Questions
Can I make these dirt cups ahead of time?
Yes! You can assemble them up to 24 hours in advance. Just wait to add the gummy worms until right before serving so they stay perky and don’t get soggy.
Can I use sugar-free pudding mix?
Absolutely. Sugar-free chocolate pudding works perfectly. Just follow the package directions and use cold milk. The texture might be slightly less creamy, but the flavor is still great.
How many servings does this recipe make?
This recipe makes 6 to 8 servings, depending on the size of your cups. I use 4-ounce cups and get exactly 8 cups. If you use larger cups, you’ll get fewer servings but bigger portions.
Can I freeze these dirt cups?
I don’t recommend freezing them. The pudding gets watery and grainy when thawed, and the cookie topping loses its crunch. They’re best fresh or refrigerated for up to 3 days.
What can I use instead of Oreos?
Any chocolate sandwich cookie works. You can also use chocolate graham crackers, chocolate wafer cookies, or even crushed brownies in a pinch. The key is something dark and crumbly that looks like dirt.
Pin This Recipe!
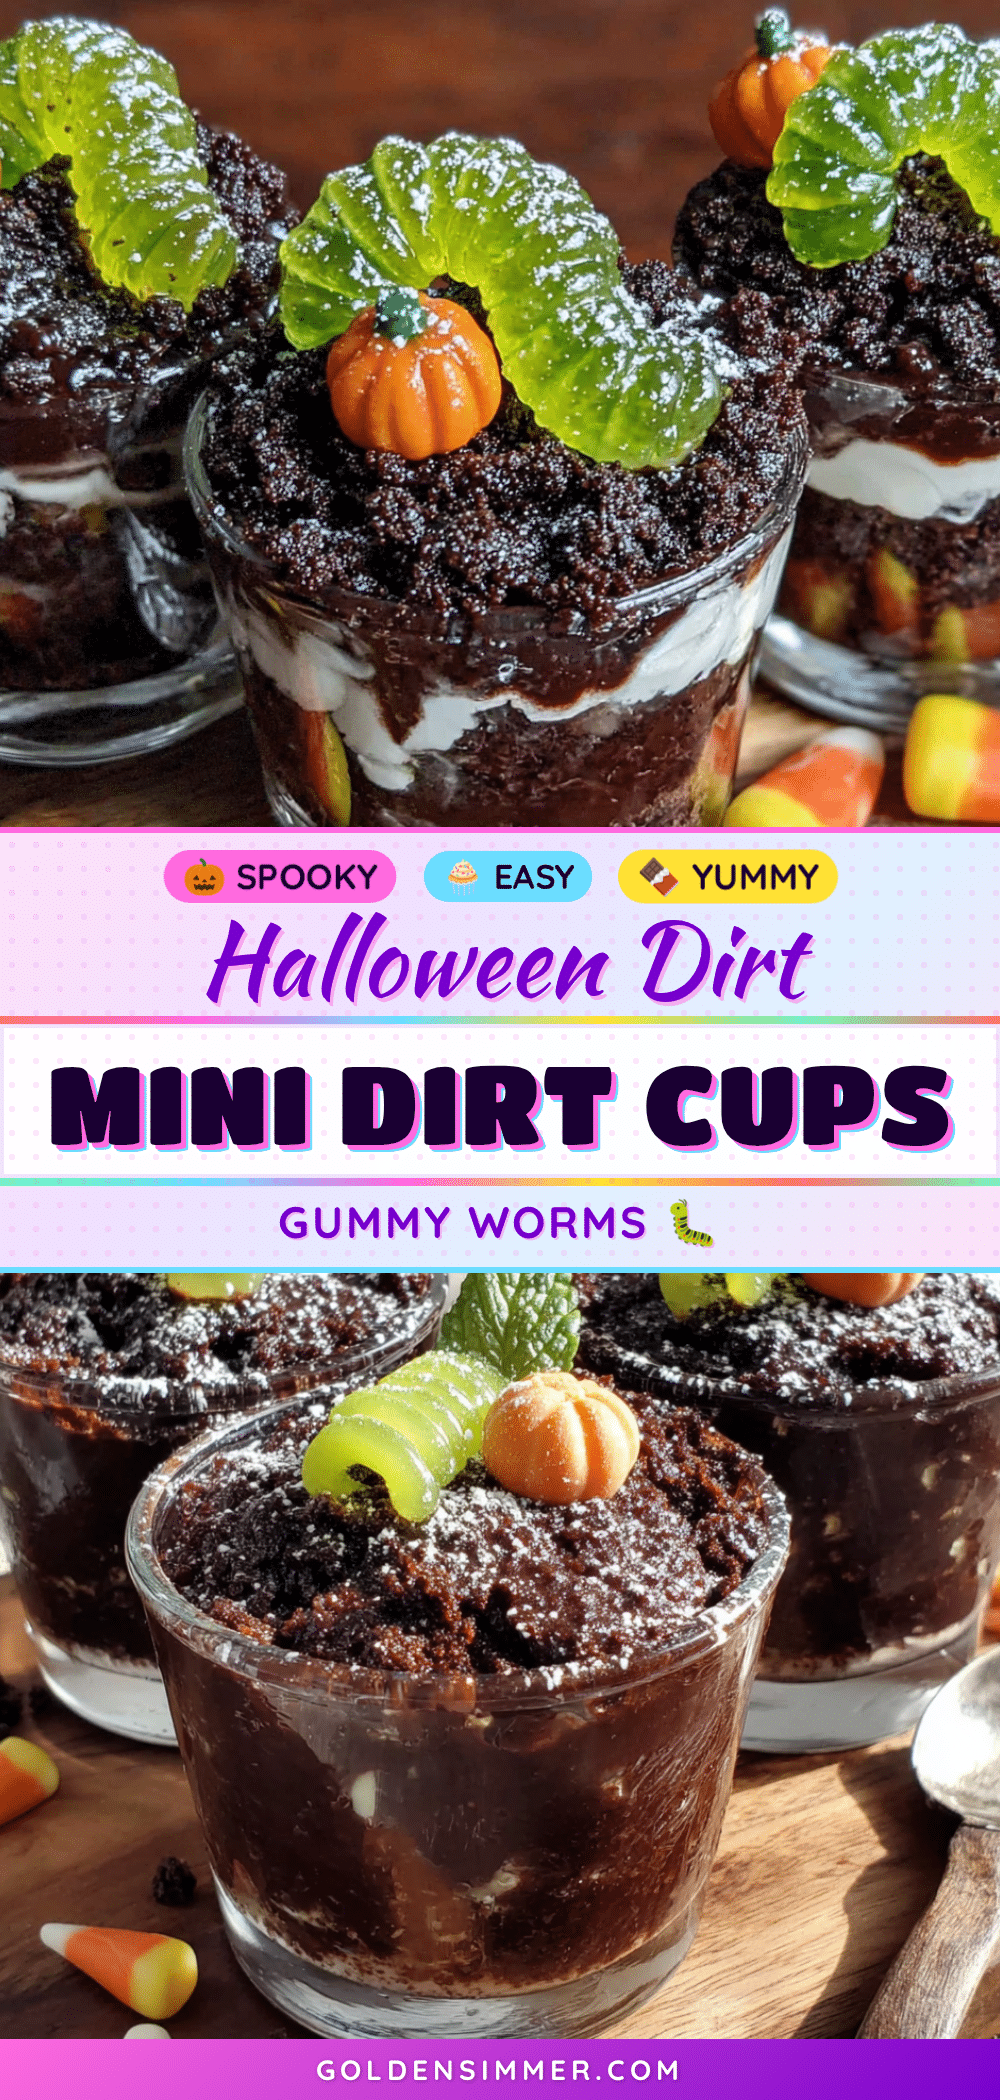
Easy Mini Halloween Dirt Cups with Gummy Worms
A quick and easy no-bake Halloween dessert made with layers of creamy chocolate pudding, crushed Oreo cookies, and gummy worms. Perfect for parties, classroom treats, or a fun family activity.
- Prep Time: 15 minutes
- Cook Time: 0 minutes
- Total Time: 15 minutes (plus 30 minutes chilling time)
- Yield: 8 servings 1x
- Category: Dessert
- Cuisine: American
Ingredients
- 1 box (3.9 oz) instant chocolate pudding mix
- 2 cups cold whole milk
- 1/2 cup cool whip or whipped cream (optional)
- 1 package (14.3 oz) Oreo cookies (about 20 cookies)
- 4 chocolate wafer cookies (optional)
- 1 bag gummy worms (about 20 worms)
- Optional: green or orange sprinkles, candy eyeballs, or crushed graham crackers for decoration
Instructions
- Crush the cookies: Place the Oreos (and wafer cookies if using) in a large ziplock bag. Seal tight and crush with a rolling pin until you have fine crumbs with a few slightly larger pieces.
- Make the pudding: In a medium bowl, whisk together the instant chocolate pudding mix and 2 cups cold milk. Whisk for about 2 minutes until it starts to thicken. If using cool whip, fold it in gently. Set aside for 5 minutes to set up fully.
- Layer the cups: Spoon about 2 tablespoons of crushed cookies into the bottom of each cup. Press down gently with the back of a spoon to create a firm base.
- Add the pudding layer: Spoon or pour the pudding over the cookie layer, filling each cup about halfway. Tap the cup gently on the counter to settle the pudding and remove air bubbles.
- Top with more dirt: Sprinkle another 2 to 3 tablespoons of crushed cookies over the pudding layer. Do not press down.
- Add the worms: Gently poke 2 to 3 gummy worms into each cup, letting some stick out of the ‘dirt’.
- Chill (optional but recommended): Refrigerate the cups for at least 30 minutes before serving.
Notes
For best results, let the pudding rest for 5 minutes before layering. Use a piping bag for cleaner layers. Keep gummy worms cold before adding to cups. Can be assembled up to 24 hours in advance, but add worms just before serving. Store covered in refrigerator for up to 3 days. Do not freeze.
Nutrition
- Serving Size: 1 cup (4 oz)
- Calories: 300
- Sugar: 32.5
- Sodium: 380
- Fat: 13.5
- Saturated Fat: 5
- Carbohydrates: 45
- Fiber: 1.5
- Protein: 6
Keywords: Halloween dessert, dirt cups, gummy worms, no-bake dessert, chocolate pudding, Oreo, easy dessert, kid-friendly, Halloween party