Love this? Save it for later!
Share the inspiration with your friends
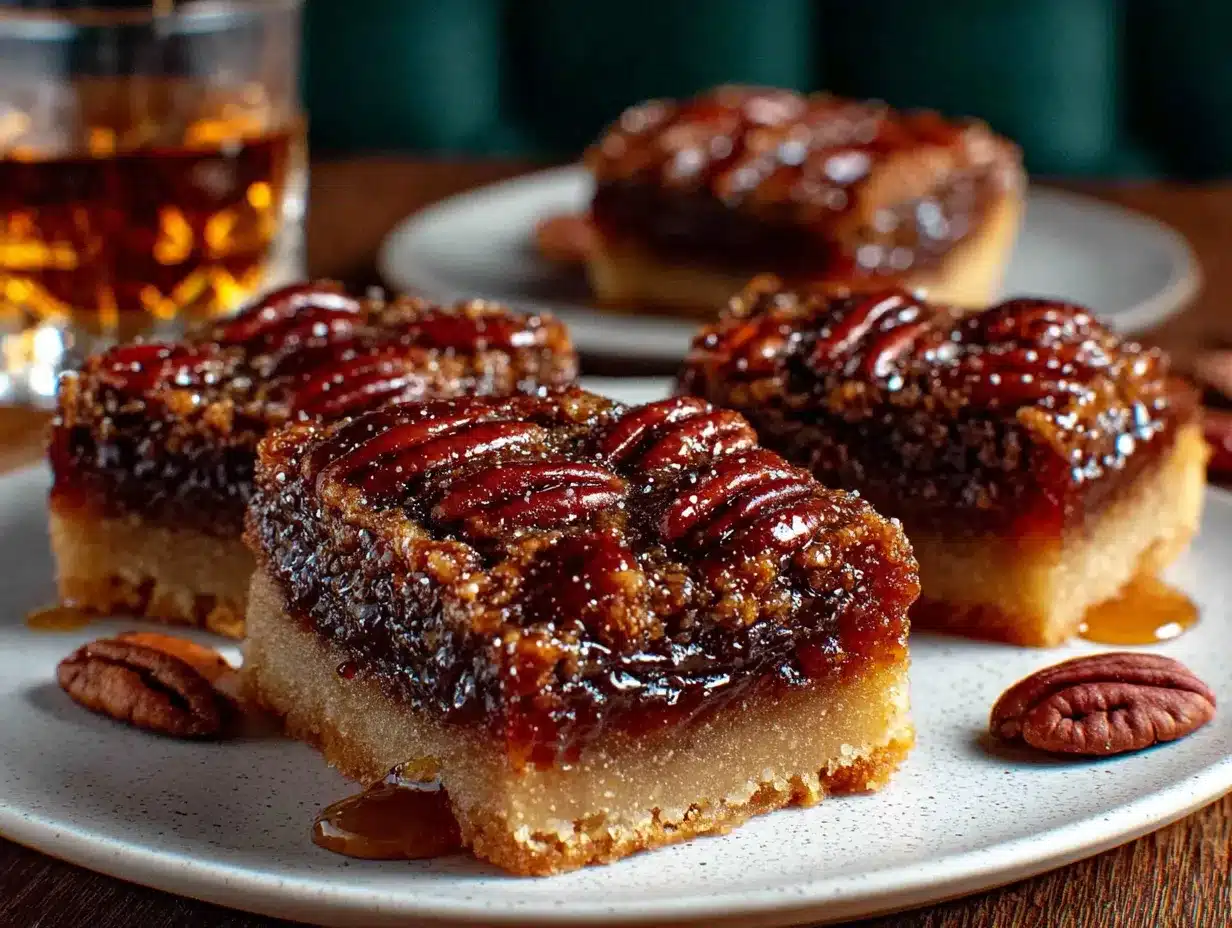
It was 11:47 PM on a random Wednesday in November, and I had a very specific craving for something buttery, nutty, and boozy. I didn’t have the patience for a full pecan pie crust—all that chilling and rolling and praying it doesn’t crack—but I had a bag of pecans, the last of my good maple syrup, and a bottle of bourbon my brother had left after Thanksgiving. And that’s how these Maple Bourbon Pecan Pie Bars were born, honestly, in a fit of late-night stubbornness and a desperate need for something that felt like a hug.
The kitchen was a disaster by the time I was done. I mean, there was flour on the dog, a sticky ring on the counter from where I set down the syrup bottle, and I definitely forgot to set a timer for the first batch of crust. (Don’t worry, I caught it before it burned—barely.) But when I pulled those bars out of the oven, the smell of toasted pecans, warm maple, and that deep, smoky bourbon hit me, and I knew I was onto something. This wasn’t just a shortcut dessert—it was the kind of thing you make when you want to impress people without losing your mind.
Let me tell you, these bars are a game-changer for hosting. They have all the rich, gooey, caramelized flavor of a classic pecan pie, but they’re way easier to slice and serve to a crowd. No more fighting with a wobbly pie plate at the buffet table. You just cut them into neat little squares, stack them on a platter, and watch them disappear. Maybe you’ve been there, standing in your kitchen at midnight, wondering if you should just order something instead of baking from scratch. I get it. But these bars? They’re worth the late night.
Why You’ll Love This Recipe
Look, I’ve tested a lot of pecan pie variations over the years—some were too sweet, some were too dry, and some just didn’t have that “wow” factor you want when you’re serving guests. These Maple Bourbon Pecan Pie Bars hit every single note perfectly. Here’s why they’ve become my go-to for every holiday gathering and dinner party:
- Quick & Easy: The shortbread crust comes together in about 10 minutes with no rolling or chilling required. The whole thing is ready in under an hour.
- Simple Ingredients: You probably have most of this stuff in your pantry right now. Butter, flour, sugar, eggs, pecans. The maple syrup and bourbon are the only “special” items, and they’re worth every penny.
- Perfect for Entertaining: These bars are designed for a crowd. You can make them a day ahead, slice them into neat squares, and serve them on a pretty platter without any fuss.
- Crowd-Pleaser: I’ve brought these to potlucks, Friendsgiving dinners, and office parties, and I’ve never brought a single crumb home. They appeal to everyone—kids, adults, even people who swear they don’t like nuts.
- Unbelievably Delicious: The combination of buttery shortbread, rich maple-bourbon caramel, and toasted pecans is next-level comfort food. It’s the kind of dessert that makes people close their eyes after the first bite.
What makes this recipe different from all the other pecan pie bars out there? It’s the bourbon, honestly. A lot of recipes use vanilla extract or just maple syrup, but that splash of bourbon adds a smoky warmth that cuts through the sweetness and makes the whole thing taste more sophisticated. Plus, the shortbread crust is perfectly salty and buttery, which balances the gooey filling. This isn’t just another version of pecan pie bars—it’s my best version, perfected after many late-night baking sessions.
This recipe is the kind that makes you feel like a rockstar host without the stress. It’s comfort food reimagined—faster, easier, but with the same soul-soothing satisfaction. And when your guests ask for the recipe? You can smile and say it’s your secret.
What Ingredients You Will Need
This recipe uses simple, wholesome ingredients to deliver that rich, decadent flavor without any complicated techniques. Most of these are pantry staples, and the few special items are easy to find at any grocery store.
For the Shortbread Crust
- Unsalted butter, softened (1 cup / 2 sticks / 226g) — Make sure it’s at room temperature for easy creaming. I prefer Kerrygold for the extra richness.
- Granulated sugar (1/2 cup / 100g) — Just regular white sugar here. No need for anything fancy.
- All-purpose flour (2 cups / 250g) — Spoon and level it for accuracy. Too much flour makes the crust dry.
- Salt (1/4 teaspoon) — A little salt in the crust balances the sweet filling perfectly.
For the Maple Bourbon Filling
- Large eggs (3, at room temperature) — Room temperature eggs blend more smoothly into the filling. If you forgot to take them out, place them in a bowl of warm water for 5 minutes.
- Pure maple syrup (1 cup / 320g) — Please use real maple syrup, not pancake syrup. The flavor is completely different. I recommend Grade A Dark Amber for a stronger maple taste.
- Brown sugar, packed (3/4 cup / 165g) — Light or dark brown sugar works. Dark brown sugar gives a deeper molasses flavor.
- Unsalted butter, melted (1/4 cup / 1/2 stick / 57g) — Melt it and let it cool slightly before mixing.
- Bourbon (2 tablespoons / 30ml) — Use a good-quality bourbon you’d actually drink. I like Bulleit or Maker’s Mark for their smooth, smoky notes. You can substitute with 1 teaspoon of vanilla extract plus 1 tablespoon of water if you’re avoiding alcohol.
- Vanilla extract (1 teaspoon) — Pure vanilla extract, not imitation. It rounds out all the flavors.
- Salt (1/2 teaspoon) — Don’t skip this! Salt is essential for balancing the sweetness.
- Pecan halves (2 cups / 200g) — Use raw, unsalted pecans. Toast them lightly before adding to the filling for extra flavor. (I’ll show you how in the preparation method.)
Ingredient Selection Tips: When buying pecans, look for ones that are uniform in color and size, with no signs of shriveling or discoloration. Store them in the freezer if you’re not using them right away—pecans have high oil content and can go rancid quickly at room temperature. For the maple syrup, skip the “maple-flavored” syrups that are basically corn syrup with artificial flavoring. Real maple syrup is worth the investment, and a good bottle will last you through many batches of these bars.
Substitution Guidance: If you’re gluten-free, you can substitute the all-purpose flour with a 1:1 gluten-free baking blend. I’ve tested this with Bob’s Red Mill 1:1 Baking Flour, and it works beautifully. For a dairy-free version, use vegan butter in both the crust and the filling. The texture will be slightly different—a bit less crumbly—but still delicious. And if you want to make these bars without alcohol, simply replace the bourbon with 1 teaspoon of vanilla extract plus 1 tablespoon of apple cider or water.
Equipment Needed
You don’t need a fancy kitchen to make these bars, but having the right tools makes the process smoother. Here’s what you’ll need:
- 9×13-inch baking pan — This is the perfect size for these bars. A metal pan works best for even baking. If you only have a glass dish, reduce the oven temperature by 25°F.
- Parchment paper — Line your pan with parchment paper, leaving an overhang on two sides. This creates “handles” that make it easy to lift the bars out for clean slicing.
- Electric mixer or stand mixer — For creaming the butter and sugar for the crust. You can do it by hand with a wooden spoon, but it takes some elbow grease.
- Large mixing bowls — One for the crust, one for the filling. I use stainless steel bowls because they’re lightweight and easy to clean.
- Whisk — For combining the filling ingredients smoothly.
- Rubber spatula — For scraping down the sides of the bowl and spreading the filling evenly.
- Measuring cups and spoons — Accurate measurements are key for baking. Use dry measuring cups for dry ingredients and liquid measuring cups for wet ingredients.
- Sharp knife — For slicing clean squares. A chef’s knife or a large serrated knife works well.
Budget-Friendly Options: If you don’t have an electric mixer, you can make the crust by hand. Just soften the butter really well and use a pastry cutter or fork to work it into the flour and sugar. It takes a few extra minutes, but it works. And if you don’t have a 9×13 pan, you can use a 9×9 square pan and adjust the baking time slightly—just check for doneness a few minutes earlier.
Personal Tip: I’ve made these bars in a disposable aluminum pan when traveling to a friend’s house for a potluck. They work surprisingly well! Just place the pan on a baking sheet for stability and to catch any potential drips.
Preparation Method
Alright, let’s get baking! I’ll walk you through every step so you can nail these bars on your first try. The whole process takes about 45 minutes, plus cooling time.
Step 1: Preheat and Prep
Preheat your oven to 350°F (175°C). Line your 9×13-inch baking pan with parchment paper, leaving about 2 inches of overhang on the two long sides. This makes it so easy to lift the bars out later. Lightly spray the parchment with non-stick cooking spray or brush with a little melted butter.
Step 2: Make the Shortbread Crust
In a large mixing bowl (or the bowl of your stand mixer), cream together 1 cup of softened unsalted butter and 1/2 cup of granulated sugar until light and fluffy. This takes about 2-3 minutes with an electric mixer. You’re looking for a pale, creamy texture. In a separate small bowl, whisk together 2 cups of all-purpose flour and 1/4 teaspoon of salt. Gradually add the dry ingredients to the butter mixture, mixing on low speed until the dough just comes together. It will look crumbly at first, then form a soft, cohesive dough. Don’t overmix, or the crust will be tough.
Sensory cue: The dough should feel soft and pliable, like play-dough. If it feels dry and crumbly, add a teaspoon of cold water and mix again.
Step 3: Press the Crust into the Pan
Transfer the dough to your prepared pan. Using your fingers or the bottom of a flat measuring cup, press the dough evenly into the bottom of the pan. Make sure it’s an even layer, especially in the corners. If the dough sticks to your fingers, lightly dust them with flour. Prick the crust all over with a fork—this prevents it from puffing up while baking.
Personal tip: I like to use the bottom of a glass to press the dough into the corners. It’s faster than using your fingers and gives a more even surface.
Step 4: Par-Bake the Crust
Bake the crust for 15-18 minutes, until it’s lightly golden around the edges and set in the center. It should look dry and slightly puffed. Remove from the oven and let it cool on a wire rack for about 10 minutes while you prepare the filling. Keep the oven on at 350°F.
Warning: Don’t overbake the crust at this stage—it will bake again with the filling. You just want it partially cooked so it doesn’t get soggy.
Step 5: Toast the Pecans
While the crust cools, spread 2 cups of pecan halves on a baking sheet. Toast them in the oven for 5-7 minutes, until they’re fragrant and slightly darker in color. Watch them closely—they can burn quickly. Let them cool slightly, then roughly chop them. You want some smaller pieces and some larger chunks for texture. Set aside.
Sensory cue: You’ll know the pecans are done when you can smell their nutty aroma. They should be warm to the touch and look lightly browned.
Step 6: Make the Filling
In a large bowl, whisk together 3 large eggs, 1 cup of pure maple syrup, 3/4 cup of packed brown sugar, 1/4 cup of melted unsalted butter, 2 tablespoons of bourbon, 1 teaspoon of vanilla extract, and 1/2 teaspoon of salt. Whisk until everything is smooth and well combined. The mixture will be thin and liquidy—that’s normal. Stir in 1 3/4 cups of the chopped toasted pecans, reserving about 1/4 cup for sprinkling on top.
Troubleshooting tip: If your mixture looks curdled or separated, it might be because your eggs were too cold. Let the mixture sit at room temperature for a few minutes, then whisk vigorously. It will come back together.
Step 7: Assemble and Bake
Pour the filling over the par-baked crust, spreading it evenly with a rubber spatula. Sprinkle the reserved 1/4 cup of chopped pecans on top for a pretty presentation. Bake for 22-28 minutes, until the filling is set around the edges but still slightly jiggly in the center. The top should be golden brown and slightly puffed. A knife inserted into the center should come out clean or with just a little bit of sticky filling.
Sensory cue: The filling will bubble gently around the edges when it’s almost done. The kitchen will smell like heaven—maple, bourbon, and toasted nuts.
Step 8: Cool Completely
Place the pan on a wire rack and let the bars cool completely at room temperature. This is crucial! The filling needs time to set properly. If you try to cut them while they’re warm, they’ll be a gooey mess. I know it’s tempting, but trust me on this. Let them cool for at least 2 hours, or even better, pop them in the fridge for 1 hour to speed things up.
Step 9: Slice and Serve
Once completely cool, use the parchment paper handles to lift the entire block of bars out of the pan. Place it on a cutting board. Using a sharp knife, slice into squares. I like to cut them into 24 bars (6 rows by 4 rows) for a crowd, or 16 larger bars for a more generous serving. Wipe the knife clean between cuts for neat edges.
Personal note: For the cleanest slices, chill the bars in the fridge for 30 minutes before cutting. It makes a huge difference!
Cooking Tips & Techniques
After making these bars more times than I can count, I’ve picked up a few tricks that make the process easier and the results more consistent. Here are my best tips:
Don’t skip the parchment paper. I learned this the hard way after spending 20 minutes trying to pry stuck bars out of a pan. The parchment paper handles are a lifesaver—they let you lift the entire batch out cleanly and slice them on a cutting board without scratching your pan.
Toast your pecans. I know it’s an extra step, but it makes a world of difference. Raw pecans are good, but toasted pecans are incredible. The heat releases their natural oils and deepens their flavor. Plus, toasting them before adding to the filling keeps them slightly crunchy rather than getting completely soft.
Measure your bourbon carefully. Two tablespoons might not seem like much, but it’s the perfect amount. Too much bourbon will make the filling taste harsh and boozy, and it can also prevent the filling from setting properly. And whatever you do, don’t use cooking sherry or imitation bourbon flavoring—it’s just not the same.
Watch the baking time closely. Every oven is different, so start checking your bars at the 22-minute mark. The filling should be set around the edges but still have a slight wobble in the center. It will continue to set as it cools. Overbaked bars will be dry and crumbly instead of gooey and delicious.
Let them cool completely. I cannot stress this enough. I once served these bars at a dinner party while they were still slightly warm, and they turned into a sticky mess on the plate. They tasted great, but they looked terrible. Patience is a virtue, especially with these bars.
One mistake I made: The first time I made these, I used a glass baking dish and didn’t adjust the temperature. The crust came out pale and slightly undercooked on the bottom. Now I always use a metal pan for the best browning. If you only have glass, reduce the oven temperature by 25°F and add a few minutes to the baking time.
Variations & Adaptations
One of the best things about this recipe is how versatile it is. You can tweak it to suit your taste, dietary needs, or what you have on hand. Here are some variations I’ve tried and loved:
Chocolate Maple Bourbon Pecan Bars
For the chocolate lovers in your life, sprinkle 1/2 cup of semi-sweet chocolate chips over the crust before pouring in the filling. The melted chocolate adds a rich, fudgy layer that pairs beautifully with the maple and bourbon. I made these for a Super Bowl party, and they were gone in minutes.
Spiced Pecan Bars
Add 1 teaspoon of pumpkin pie spice or a mix of 1/2 teaspoon cinnamon, 1/4 teaspoon nutmeg, and 1/4 teaspoon ginger to the filling. The warm spices complement the maple syrup and make these bars taste even more like fall. This is my go-to version for Thanksgiving.
Gluten-Free Version
Substitute the all-purpose flour in the crust with a 1:1 gluten-free baking blend. I’ve tested this with Bob’s Red Mill 1:1 Baking Flour, and it works perfectly. Make sure your gluten-free blend contains xanthan gum for structure. The filling is naturally gluten-free, so this is an easy adaptation.
Dairy-Free Version
Use vegan butter in both the crust and the filling. I recommend Miyoko’s or Earth Balance for the best texture. The crust will be slightly less crumbly, but the flavor is still fantastic. Make sure your maple syrup and bourbon are dairy-free (they usually are).
Bourbon-Free Version
If you’re serving kids or avoiding alcohol, replace the bourbon with 1 teaspoon of vanilla extract plus 1 tablespoon of apple cider. The apple cider adds a subtle fruity note that works surprisingly well with the maple and pecans. Or use 1 tablespoon of bourbon extract if you can find it.
Nut-Free Alternative
This one’s tricky since pecans are the star of the show, but you can substitute the pecans with toasted sunflower seeds or pumpkin seeds for a nut-free version. The texture will be different, but the flavor is still delicious. Just make sure to toast them well for maximum crunch.
Serving & Storage Suggestions
These bars are incredibly versatile when it comes to serving. Here’s how to make them look and taste their best:
Serving Temperature: These bars are delicious at room temperature, but they’re absolutely amazing when slightly warmed. Pop a bar in the microwave for 10-15 seconds before serving. The filling gets soft and gooey, and the crust warms up and becomes extra buttery. Serve them on a pretty platter or cake stand for maximum visual impact.
Presentation Tips: Dust the bars with a light sprinkle of flaky sea salt right before serving. The salt crystals add a beautiful sparkle and a perfect salty-sweet contrast. You can also drizzle a little extra maple syrup over the top or add a dollop of whipped cream for an extra-indulgent touch. For holiday parties, I like to arrange the bars on a wooden board with fresh rosemary sprigs and cranberries around them.
What to Serve Alongside: These bars pair beautifully with a scoop of vanilla ice cream or a drizzle of caramel sauce. For a boozy dessert, serve them with a glass of bourbon or a spiked coffee. They also go great with fresh fruit—sliced pears or apples cut through the richness perfectly.
Storage Instructions: Store the bars in an airtight container at room temperature for up to 3 days. If your kitchen is warm, store them in the fridge to prevent the filling from getting too soft. They actually taste even better on day two—the flavors meld together and deepen overnight.
Freezing Instructions: These bars freeze beautifully! Place them in a single layer on a baking sheet and freeze until solid (about 1 hour). Then transfer them to a freezer-safe container or zip-top bag, separating layers with parchment paper. They’ll keep for up to 3 months. To thaw, let them sit at room temperature for about 30 minutes, or warm them in a 300°F oven for 5-7 minutes.
Personal Note: I always make a double batch of these bars before the holidays and freeze one batch. It’s such a relief to have a homemade dessert ready to go when unexpected guests show up or when I’m invited to a last-minute gathering.
Nutritional Information & Benefits
Let’s be real—these Maple Bourbon Pecan Pie Bars are a treat, not a health food. But that doesn’t mean they’re without merit! Here’s a rough nutritional breakdown per bar (based on 24 servings):
| Nutrient | Amount per Bar |
|---|---|
| Calories | 245 |
| Total Fat | 16g |
| Saturated Fat | 7g |
| Cholesterol | 45mg |
| Sodium | 95mg |
| Total Carbohydrates | 24g |
| Dietary Fiber | 1g |
| Sugars | 17g |
| Protein | 3g |
Health Benefits of Key Ingredients: Pecans are packed with healthy monounsaturated fats, fiber, and antioxidants. They’re also a good source of magnesium, which supports muscle and nerve function. Maple syrup contains antioxidants and minerals like zinc and manganese, though it’s still sugar, so enjoy it in moderation. And while bourbon is alcohol, a small amount in cooking adds flavor without significant calories.
Dietary Considerations: This recipe contains gluten (from the flour), dairy (from the butter), eggs, and tree nuts (pecans). It’s not suitable for vegans, but it can be adapted for gluten-free and dairy-free diets as mentioned in the variations section. If you’re watching your sugar intake, you can reduce the brown sugar to 1/2 cup, but the filling will be slightly less gooey.
My Personal Take: I believe in balance. These bars are a special occasion dessert, and there’s nothing wrong with indulging now and then. I make them for holidays, dinner parties, and when I just need a little comfort. Life’s too short to skip dessert!
Conclusion
These Maple Bourbon Pecan Pie Bars are everything you want in a holiday dessert—rich, buttery, gooey, and packed with flavor. They’re easier than a traditional pecan pie, perfect for feeding a crowd, and guaranteed to impress your guests. Whether you’re hosting a Thanksgiving dinner, a Christmas party, or just a cozy night in with friends, these bars deliver every single time.
I love how forgiving this recipe is. You don’t need to be a pastry chef to nail it. The shortbread crust is practically foolproof, the filling comes together in minutes, and the result looks like you spent hours in the kitchen. That’s my kind of dessert—impressive without the stress.
I encourage you to make these bars your own. Play with the spices, try different nuts, or add a chocolate twist. The recipe is a starting point, and the best version is the one that makes you happy. And when you make them—because I know you will—come back and let me know how they turned out. Did you add a pinch of cinnamon? Drizzle them with caramel? I want to hear all about it!
So go ahead, preheat that oven, pour yourself a small glass of bourbon (you’ve earned it), and get baking. Your guests are going to love you for it. Happy baking, friends!
Frequently Asked Questions
Can I make these bars ahead of time?
Absolutely! In fact, they taste even better the next day. Make them up to 2 days in advance and store them in an airtight container at room temperature. You can also freeze them for up to 3 months.
Can I use a different type of alcohol?
Sure! If you don’t have bourbon, try dark rum, whiskey, or even brandy. Each one will give the bars a slightly different flavor profile. Just stick with 2 tablespoons so the filling sets properly.
Why did my filling turn out runny?
This usually happens if the bars weren’t baked long enough or if they were cut while still warm. Make sure the filling is set around the edges and only slightly jiggly in the center before removing from the oven. And be patient—let them cool completely before slicing.
Can I use a different pan size?
Yes, but you’ll need to adjust the baking time. A 9×9-inch pan will give you thicker bars that need a few extra minutes in the oven. A 9×13-inch pan is ideal for the recipe as written, but feel free to experiment.
How do I get clean, neat slices?
Chill the bars in the fridge for at least 30 minutes before cutting. Use a sharp knife and wipe it clean between each cut. For the prettiest presentation, trim the edges before slicing into squares.
Pin This Recipe!
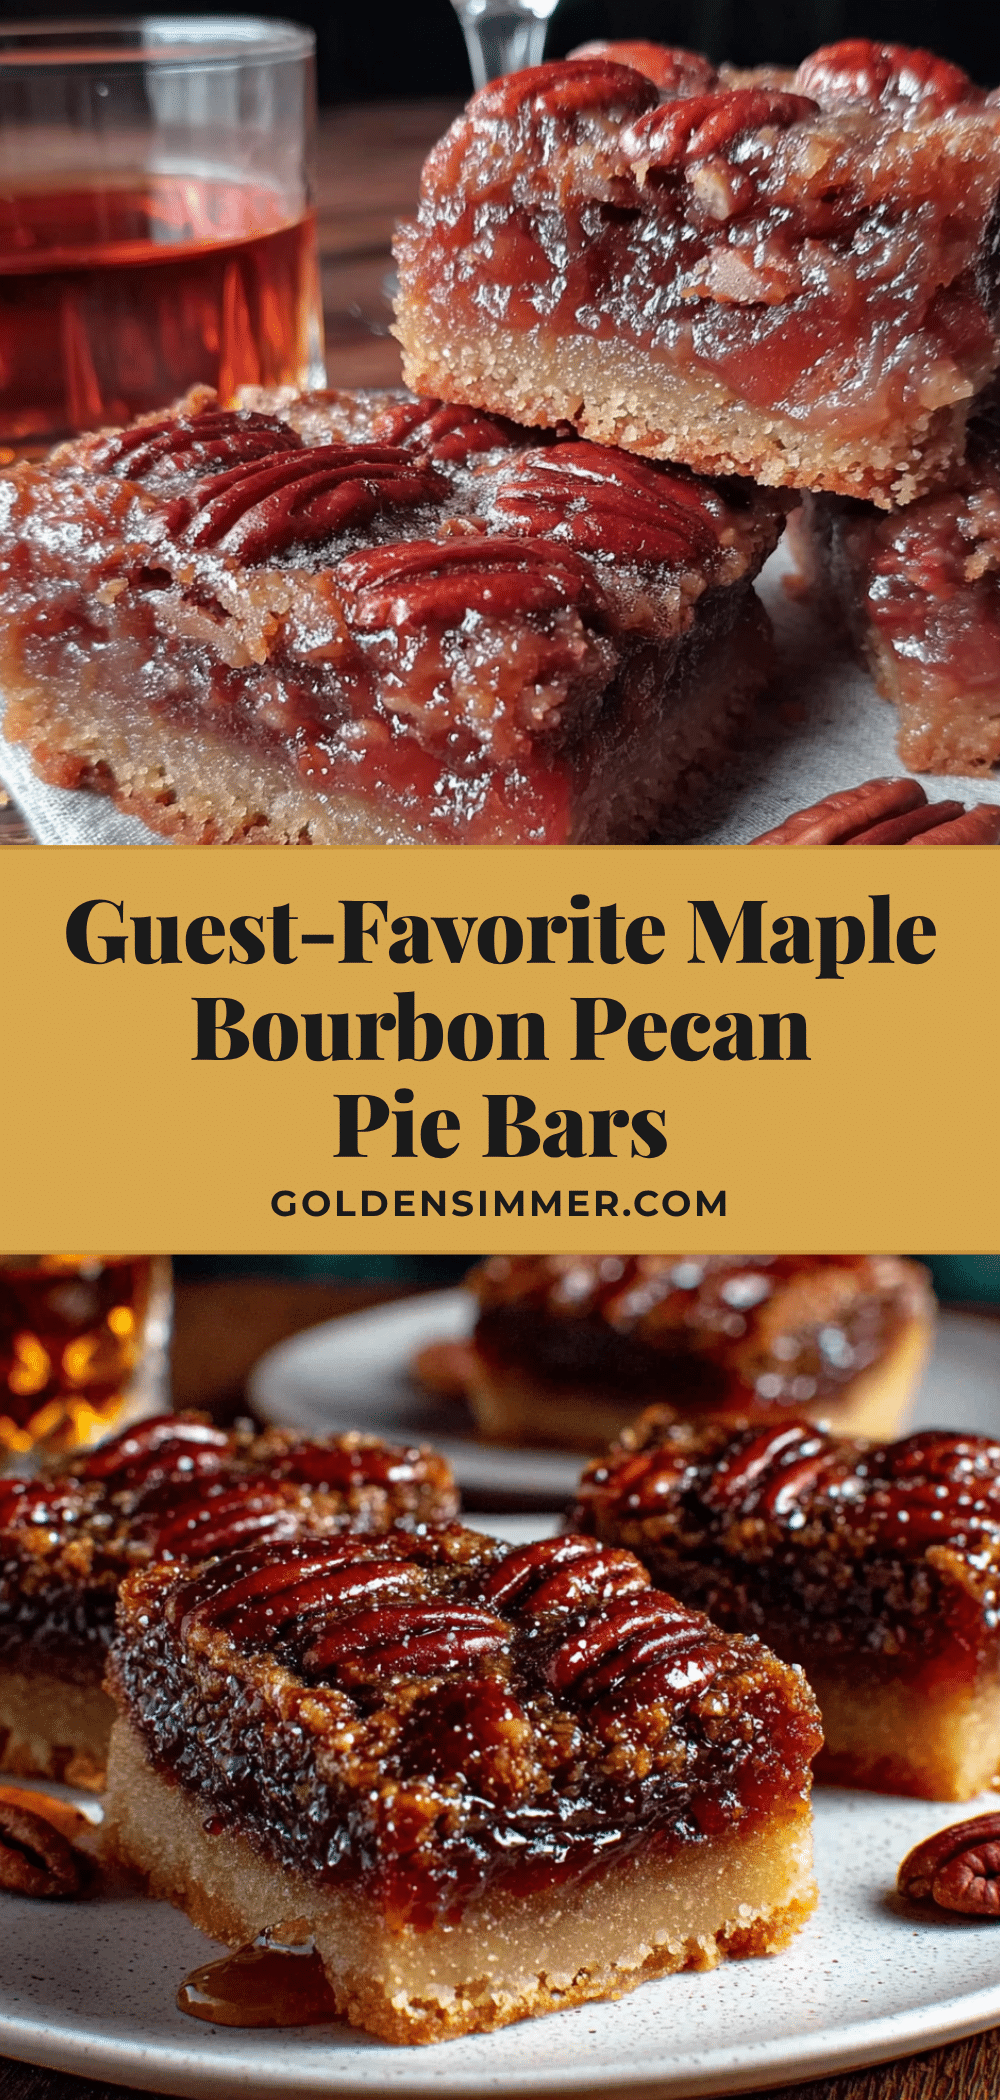
Best Maple Bourbon Pecan Pie Bars – Easy Holiday Dessert
These Maple Bourbon Pecan Pie Bars are a quick and easy holiday dessert with a buttery shortbread crust, a rich maple-bourbon pecan filling, and a perfect balance of sweet and smoky flavors. They’re ideal for entertaining and can be made ahead.
- Prep Time: 15 minutes
- Cook Time: 30 minutes
- Total Time: 45 minutes
- Yield: 24 servings 1x
- Category: Dessert
- Cuisine: American
Ingredients
- 1 cup (2 sticks / 226g) unsalted butter, softened
- 1/2 cup (100g) granulated sugar
- 2 cups (250g) all-purpose flour
- 1/4 teaspoon salt
- 3 large eggs, at room temperature
- 1 cup (320g) pure maple syrup
- 3/4 cup (165g) packed brown sugar (light or dark)
- 1/4 cup (1/2 stick / 57g) unsalted butter, melted
- 2 tablespoons (30ml) bourbon
- 1 teaspoon vanilla extract
- 1/2 teaspoon salt
- 2 cups (200g) pecan halves, toasted and roughly chopped
Instructions
- Preheat oven to 350°F (175°C). Line a 9×13-inch baking pan with parchment paper, leaving overhang on two sides. Lightly spray with non-stick spray or brush with melted butter.
- Make the shortbread crust: In a large bowl, cream together 1 cup softened butter and 1/2 cup granulated sugar until light and fluffy (2-3 minutes). In a separate bowl, whisk together 2 cups flour and 1/4 teaspoon salt. Gradually add dry ingredients to butter mixture, mixing on low until a soft dough forms. Do not overmix.
- Press dough evenly into the prepared pan. Prick all over with a fork. Bake for 15-18 minutes until lightly golden around edges and set in center. Let cool on a wire rack for 10 minutes. Keep oven on.
- While crust cools, spread pecans on a baking sheet and toast for 5-7 minutes until fragrant. Let cool slightly, then roughly chop. Reserve 1/4 cup for topping.
- Make the filling: In a large bowl, whisk together eggs, maple syrup, brown sugar, melted butter, bourbon, vanilla, and 1/2 teaspoon salt until smooth. Stir in 1 3/4 cups chopped pecans.
- Pour filling over par-baked crust. Sprinkle reserved pecans on top. Bake for 22-28 minutes until edges are set and center is slightly jiggly. A knife inserted in center should come out clean or with a little sticky filling.
- Cool completely in pan on a wire rack (at least 2 hours, or refrigerate 1 hour). Use parchment handles to lift bars out. Slice into 24 squares (6×4) or 16 larger bars. For clean slices, chill 30 minutes before cutting.
Notes
For best results, use real maple syrup (Grade A Dark Amber) and a good-quality bourbon like Bulleit or Maker’s Mark. Toast pecans for deeper flavor. Let bars cool completely before slicing to avoid a gooey mess. For gluten-free, use a 1:1 gluten-free baking blend. For dairy-free, use vegan butter. For alcohol-free, replace bourbon with 1 tsp vanilla extract plus 1 tbsp apple cider or water.
Nutrition
- Serving Size: 1 bar
- Calories: 245
- Sugar: 17
- Sodium: 95
- Fat: 16
- Saturated Fat: 7
- Carbohydrates: 24
- Fiber: 1
- Protein: 3
Keywords: pecan pie bars, maple bourbon, holiday dessert, easy pecan bars, shortbread crust, Thanksgiving dessert, Christmas dessert



