Love this? Save it for later!
Share the inspiration with your friends
There used to be a tiny bakery tucked between a dry cleaner and a vintage shop on the corner of Elm and 4th that made a slice of eggnog cheesecake that ruined me for all other desserts. When they closed two winters ago—just a handwritten sign in the window saying “Thank you for 14 years”—I may have stood there a little too long, mourning a cheesecake. After twelve tries—some cracked, one that tasted more like raw eggnog batter than actual cheesecake, and a particularly disastrous attempt where the crust turned into gingersnap soup—I finally got it.
And honestly? This version is better than the original. Not because I’m trying to be modest, but because I accidentally made it lighter in the process. The original bakery version was so rich you needed a nap after one slice. This one? You can have a slice after dinner and still feel like getting up to dance to Mariah Carey. Maybe that’s just me, but I think the lighter texture actually lets the eggnog flavor shine through more clearly. You know that feeling when something tastes indulgent but doesn’t sit heavy? That’s this cheesecake.
I remember the day I finally nailed it—a rainy Tuesday in November, the kitchen smelled like nutmeg and toasted ginger, and I pulled the cheesecake out of the water bath without a single crack on the surface. I may have actually squealed. My neighbor Karen texted me later that night saying she ate two slices and still did her morning run the next day. That’s when I knew this recipe was ready to share. Let me tell you, there’s something deeply satisfying about recreating a lost dish and making it your own.
Why You’ll Love This Recipe
This lighter eggnog cheesecake with gingersnap crust isn’t just another holiday dessert recipe. It’s the one I’ve tested across three different ovens, two different brands of cream cheese, and one very memorable incident where I forgot the sugar entirely. Here’s why it works:
- Lighter but Still Luxurious : Using a blend of reduced-fat cream cheese and Greek yogurt cuts the calories without sacrificing that velvety texture you want from a good cheesecake. You won’t miss the extra fat, I promise.
- No Water Bath Drama : This recipe uses a low-and-slow baking method that prevents cracking without the fuss of a water bath. My oven runs hot, and even I get perfect results every time.
- Simple Ingredients : Everything on the ingredient list is something you can find at a regular grocery store. No specialty items, no hunting down obscure extracts.
- Perfect for Holiday Gatherings : It feeds a crowd, slices beautifully, and tastes even better when made a day ahead. That means less stress on the day of your party.
- Crowd-Pleaser : I’ve served this to eggnog lovers and eggnog skeptics alike. The skeptics? They asked for seconds. The eggnog flavor is present but not overwhelming—think of it as a spiced vanilla cheesecake with a cozy holiday twist.
- Make-Ahead Friendly : This cheesecake actually improves after 24 hours in the fridge. The flavors meld together, the texture firms up perfectly, and you get cleaner slices.
This isn’t just another holiday cheesecake recipe. It’s the kind that makes people close their eyes after the first bite—the way I did that rainy Tuesday when I finally got it right. It’s comfort food reimagined: lighter, faster to pull together than you’d think, but with the same soul-soothing satisfaction that only a good cheesecake can deliver.
What Ingredients You Will Need
This lighter eggnog cheesecake uses simple, wholesome ingredients to deliver that rich, spiced flavor without the heavy aftermath. Most of these are pantry staples during the holiday season, and I’ve included substitution notes where I’ve tested them myself.
For the Gingersnap Crust
- 1 ½ cups crushed gingersnap cookies (about 30 cookies—I prefer Nabisco brand for their consistent texture and spice level)
- ¼ cup granulated sugar
- 5 tablespoons unsalted butter, melted (use salted butter and reduce the added salt if that’s all you have)
- Pinch of salt (skip if using salted butter)
For the Cheesecake Filling
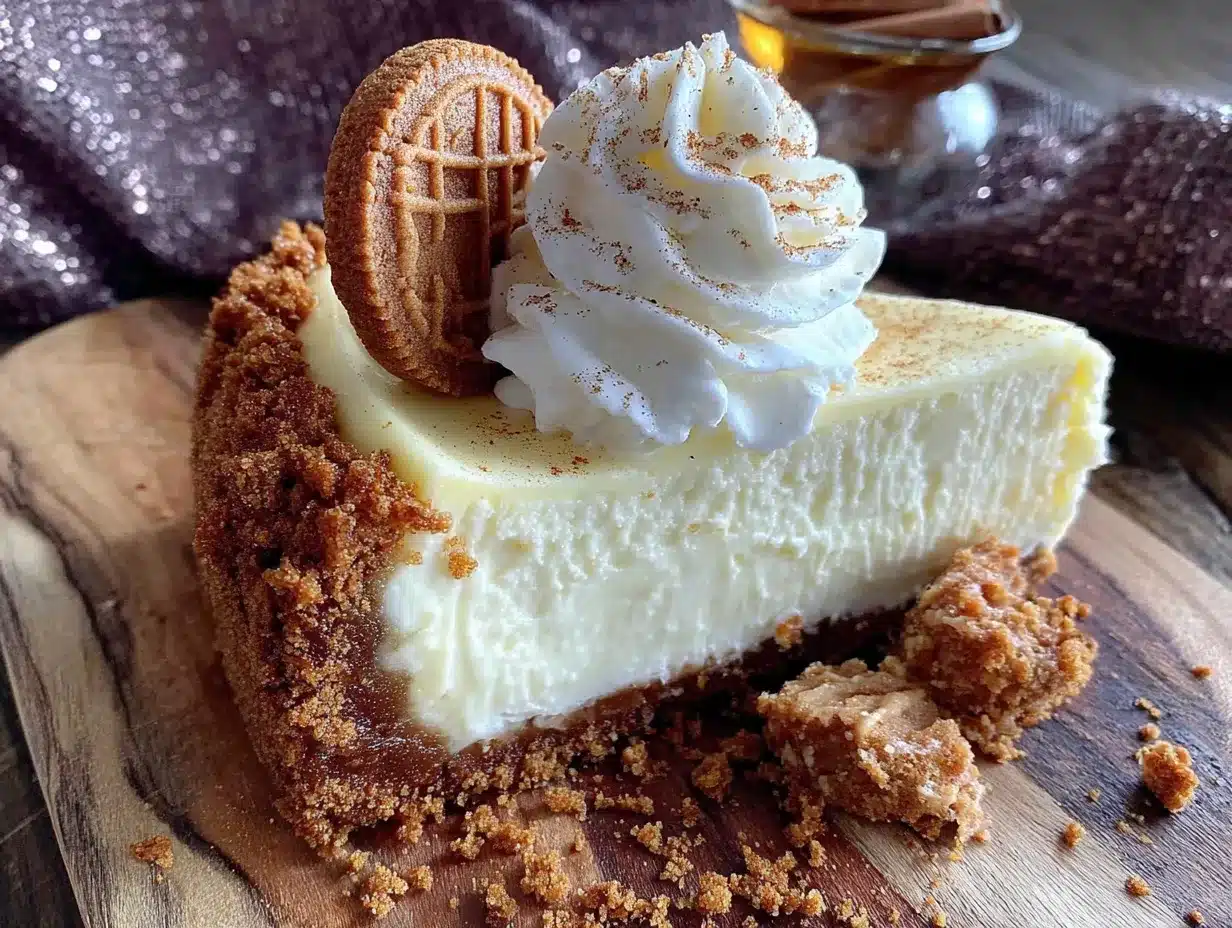
- 16 ounces reduced-fat cream cheese, softened to room temperature (Philadelphia brand works best here—the texture is consistently smooth)
- 8 ounces full-fat cream cheese, softened (don’t go all reduced-fat or the texture gets too soft—I learned this the hard way)
- ¾ cup granulated sugar
- ½ cup plain Greek yogurt (full-fat or 2%—avoid non-fat as it can make the filling watery)
- 3 large eggs, room temperature (cold eggs will seize the batter and create lumps)
- 1 cup prepared eggnog (use the good stuff—I recommend a thicker, creamier brand like Hood or Southern Comfort)
- 2 tablespoons all-purpose flour (helps stabilize the filling and prevent cracking)
- 1 teaspoon vanilla extract
- ½ teaspoon ground nutmeg (freshly grated if you’re feeling fancy—it makes a difference)
- ½ teaspoon ground cinnamon
- ¼ teaspoon ground ginger
- Pinch of ground cloves
For the Optional Topping
- ½ cup heavy cream (or coconut cream for dairy-free option)
- 1 tablespoon powdered sugar
- Freshly grated nutmeg for garnish
- Optional: crushed gingersnap cookies for sprinkling on top
Ingredient Selection Tips: Look for eggnog that’s thick and creamy—watery eggnog will make your cheesecake filling too loose. I’ve tested this with both store-bought and homemade eggnog, and both work beautifully. If you’re using homemade eggnog, make sure it’s well-chilled and hasn’t separated. For the gingersnaps, avoid the super thin, crispy ones—you want cookies with some substance that will hold up when crushed.
Equipment Needed
- 9-inch springform pan (the removable bottom makes releasing the cheesecake so much easier—I’ve had too many disasters with regular cake pans)
- Electric hand mixer or stand mixer (you can do this by hand, but your arm will thank you for using a mixer)
- Food processor or zip-top bag and rolling pin (for crushing the gingersnaps—I’ve used both methods and honestly, the bag and rolling pin give me more control over the texture)
- Large mixing bowls (at least two—one for the crust, one for the filling)
- Rubber spatula (for scraping down the bowl—don’t skip this step, it prevents lumps)
- Measuring cups and spoons
- Parchment paper (for lining the bottom of the pan—it makes cleanup a breeze)
- Cooling rack
- Plastic wrap or aluminum foil (for covering during chilling)
If you don’t have a springform pan, you can use a deep-dish pie plate, but you’ll need to adjust the baking time slightly and be careful when slicing. I found a perfectly good springform pan at a thrift store for three dollars—no need to spend a fortune.
Preparation Method
- Preheat your oven to 325°F (163°C). Place a rack in the middle position. Line the bottom of your springform pan with a circle of parchment paper—trace the pan’s bottom on parchment and cut it out. This step saves so much frustration later.
- Make the crust: Crush your gingersnap cookies until you have fine crumbs with a few slightly larger pieces for texture. In a medium bowl, combine the crumbs, sugar, and salt. Pour in the melted butter and stir until every crumb is coated. The mixture should look like wet sand and hold together when pressed in your fist.
- Press the crust into the pan: Dump the crumb mixture into your prepared springform pan. Using the bottom of a measuring cup or a flat glass, press the crumbs firmly into an even layer across the bottom and about 1 inch up the sides. Take your time with this—a well-packed crust won’t crumble when you slice the cheesecake. Bake the crust for 10 minutes, then set it aside to cool while you make the filling. Leave the oven on.
- Soften your cream cheese: This is non-negotiable. Take your cream cheese out of the fridge at least 30 minutes before starting. If you’re in a hurry, cut it into cubes and let it sit on the counter for 15 minutes. Cold cream cheese makes lumpy cheesecake—I learned this after my third attempt ended up looking like cottage cheese.
- Beat the cream cheese and sugar: In a large mixing bowl, beat the softened cream cheese and sugar together on medium speed until smooth and creamy—about 2 to 3 minutes. Scrape down the sides and bottom of the bowl with your spatula at least once. Don’t overbeat at this stage—you don’t want to incorporate too much air, which can cause cracking.
- Add the Greek yogurt and vanilla: Beat in the Greek yogurt and vanilla extract until just combined. Again, scrape the bowl. The mixture should look silky and uniform.
- Add the eggs one at a time: Crack each egg into a small bowl first (to avoid shell fragments), then add it to the cream cheese mixture. Beat on low speed after each addition just until the yolk disappears. Overbeating eggs into cheesecake batter creates air bubbles that lead to cracks—so be gentle here.
- Add the eggnog and dry ingredients: In a small bowl, whisk together the flour and all the spices. With the mixer on low, slowly pour in the eggnog, then add the flour-spice mixture. Mix until just combined—you should see no streaks of flour. The batter will be thinner than traditional cheesecake batter, and that’s exactly right. It should pour smoothly.
- Pour the filling over the crust: Give the batter one last stir with your spatula from the bottom up, making sure nothing is hiding at the bottom of the bowl. Pour it gently over the cooled crust. Tap the pan on the counter a few times to release any air bubbles.
- Bake low and slow: Place the cheesecake on the middle rack and bake for 55 to 65 minutes. The edges should be set and slightly puffed, but the center should still jiggle like Jell-O when you gently shake the pan. This is the sweet spot—if the center is completely firm, it’s overbaked and will crack as it cools.
- Cool gradually: Turn off the oven, crack the door open, and let the cheesecake sit inside for 1 hour. This gradual cooling prevents the dreaded center crack. After an hour, transfer the pan to a wire rack and let it cool completely to room temperature—about another 2 hours.
- Chill overnight: Once the cheesecake is at room temperature, cover it loosely with plastic wrap and refrigerate for at least 6 hours, but overnight is better. I know it’s hard to wait, but this step is crucial for texture and clean slices. The flavors also deepen overnight—the nutmeg and ginger become more pronounced.
- Make the whipped cream topping: Just before serving, pour the cold heavy cream into a chilled bowl. Beat on medium-high speed until soft peaks form. Add the powdered sugar and beat until stiff peaks form. Don’t overbeat, or you’ll end up with butter.
- Serve and enjoy: Run a thin knife around the edge of the pan before releasing the springform clasp. Slice with a sharp knife dipped in hot water and wiped dry between cuts for the cleanest slices. Top each slice with a dollop of whipped cream and a sprinkle of fresh nutmeg and crushed gingersnaps.
Cooking Tips & Techniques
Room temperature ingredients are not optional. I cannot stress this enough. Cold cream cheese creates lumps that no amount of beating will fix. Cold eggs can seize the batter. Set everything out on the counter at least 30 minutes before you start. I once tried to speed things up by microwaving the cream cheese—it melted unevenly and the texture was grainy. Learn from my mistakes.
The jiggle test is your best friend. After 55 minutes of baking, gently shake the pan. If the center wobbles like a wave and the edges look set, it’s done. If the whole thing wobbles, give it 5 to 10 more minutes. If it doesn’t wobble at all, you’ve gone too far. The residual heat will continue cooking the center as it cools, so a slight jiggle is exactly what you want.
Don’t open the oven door. I know it’s tempting to peek, but every time you open that door, you let out heat and humidity that can cause your cheesecake to crack. Trust the timer and the jiggle test. I speak from experience—my third attempt cracked because I checked on it three times.
Use a serrated knife for slicing. It sounds weird, but a serrated knife cuts through cheesecake cleaner than a straight blade. Dip it in hot water, wipe it dry, and slice with a gentle sawing motion. Between each cut, clean the blade and re-dip in hot water. This gives you those bakery-perfect slices.
If your crust is too crumbly, you probably didn’t use enough butter. Next time, add an extra tablespoon. If it’s too hard, you pressed it too firmly or overbaked it. The sweet spot is a crust that holds together when pressed but still has a slight crumble when you bite into it.
Multitasking tip: While the crust is baking, get your cream cheese softening and measure out your other ingredients. By the time the crust is cool, your filling ingredients will be ready to go. This shaves about 15 minutes off the total prep time.
Variations & Adaptations
Gluten-Free Version: Use gluten-free gingersnap cookies for the crust. I’ve tested this with two different brands, and both worked beautifully. The filling is naturally gluten-free as long as you use a gluten-free flour blend or cornstarch instead of all-purpose flour. Use 1 tablespoon of cornstarch mixed with 2 tablespoons of water as a substitute for the flour.
Dairy-Free Adaptation: Swap the cream cheese for a high-quality dairy-free cream cheese (I like Miyoko’s or Kite Hill). Use coconut cream instead of Greek yogurt, and a plant-based eggnog. The texture will be slightly softer, so I recommend adding an extra tablespoon of flour to help stabilize it. Bake for the same amount of time, but let it chill for a full 24 hours before slicing.
Spiced Pumpkin Variation: Replace the eggnog with 1 cup of pumpkin puree mixed with ½ cup of heavy cream. Add an extra teaspoon of pumpkin pie spice and reduce the nutmeg to ¼ teaspoon. This version is perfect for Thanksgiving and has a slightly denser texture that pairs beautifully with the gingersnap crust.
Bourbon-Infused Version: Add 2 tablespoons of bourbon to the filling along with the eggnog. The alcohol will mostly cook off, leaving behind a warm, complex flavor that complements the spices. I tried this for a New Year’s Eve party and it was the first dessert to disappear.
Mini Cheesecake Version: Line a muffin tin with paper liners and press about 1 tablespoon of crust mixture into each cup. Fill with the cheesecake batter and bake for 18 to 22 minutes. These are perfect for parties and portion control—though I’ve been known to eat three in one sitting.
Serving & Storage Suggestions
This lighter eggnog cheesecake is best served chilled, straight from the refrigerator. Let it sit at room temperature for about 10 minutes before slicing for the cleanest cuts. I like to serve it on chilled plates with a generous dollop of whipped cream and a light dusting of freshly grated nutmeg on top.
What to serve alongside: A cup of strong coffee or spiced chai tea is the perfect companion. The bitterness balances the sweetness of the cheesecake. For a full holiday dessert spread, pair it with a plate of gingerbread cookies or a warm apple crisp. The spiced flavors all work together beautifully.
Storage instructions: Cover the cheesecake loosely with plastic wrap or aluminum foil and store it in the refrigerator for up to 5 days. The flavors actually improve after the first day—the spices meld together and the texture becomes creamier. I’ve never had leftovers last longer than 3 days in my house, but they would still be good.
Freezer instructions: This cheesecake freezes beautifully. Once it’s fully chilled and set, wrap the entire cheesecake (still in the springform pan) in a layer of plastic wrap, then a layer of aluminum foil. Freeze for up to 3 months. To thaw, transfer it to the refrigerator for 24 hours. Don’t thaw at room temperature—the texture can become watery. I’ve done this twice for holiday prep, and no one could tell it was frozen.
Reheating tips: This is a cold dessert—no reheating needed. If you want to serve it slightly less cold, let it sit at room temperature for 20 minutes before serving. For the whipped cream topping, make it fresh just before serving. Frozen whipped cream defrosts watery and sad.
Nutritional Information & Benefits
Per slice (based on 12 servings, without whipped cream topping):
- Calories: 325
- Fat: 19g
- Saturated Fat: 11g
- Carbohydrates: 32g
- Fiber: 1g
- Sugar: 22g
- Protein: 8g
- Sodium: 310mg
- Calcium: 80mg
Compared to traditional eggnog cheesecake recipes that can top 500 calories per slice, this lighter version saves you nearly 200 calories without sacrificing flavor or texture. The Greek yogurt adds protein and calcium while reducing the overall fat content. Gingersnaps provide a small amount of iron and manganese from the molasses and ginger.
This recipe is suitable for vegetarians. For those watching their sugar intake, you can reduce the sugar to ½ cup without affecting the texture too much—the sweetness will be milder, but the spices will still shine through. The eggnog itself contains some natural sugars, so keep that in mind if you’re counting.
I love that I can serve this at holiday gatherings and feel good about what I’m eating. It’s indulgent enough to feel like a treat, but light enough that I don’t regret having a slice—or two—after dinner. That balance is exactly what I was chasing when I started recreating that bakery cheesecake all those months ago.
Conclusion
This lighter eggnog cheesecake with gingersnap crust is the recipe that made me stop missing that little bakery on Elm Street. It’s everything I wanted—creamy, spiced, festive, and just a little bit lighter than the original. The gingersnap crust adds that warm, peppery kick that pairs so perfectly with the smooth, eggnog-infused filling. Every time I make it, I think about that handwritten sign in the window and how something lost can lead to something even better.
I hope you give this recipe a try, whether for a holiday dinner, a cozy weekend baking project, or just because you’re craving something special. Feel free to make it your own—add more spice, try a different crust, or pile on extra whipped cream. That’s the beauty of baking. And if you do make it, I’d love to hear how it turned out. Drop a comment below, share a photo, or tell me about a bakery that you’re still missing. We all have one.
Happy baking, friends. May your cheesecakes be smooth, your crusts be crisp, and your holidays be full of good food and even better company.
Frequently Asked Questions
Can I use low-fat cream cheese for the entire recipe?
I don’t recommend using all low-fat cream cheese. The full-fat cream cheese provides structure and stability to the filling. If you use all reduced-fat, the cheesecake will be too soft and may not set properly. The combination of 16 ounces reduced-fat and 8 ounces full-fat gives you the best balance of lighter texture and structural integrity.
Why did my cheesecake crack on top?
Cracks usually happen from overbaking, overbeating, or sudden temperature changes. Make sure you’re not overmixing the batter after adding the eggs, and always cool the cheesecake gradually—leave it in the turned-off oven with the door cracked for an hour before moving it to the counter. If it still cracks, don’t worry! The whipped cream topping covers a multitude of sins.
Can I make this cheesecake without a springform pan?
Yes, you can use a deep-dish pie plate or a 9-inch round cake pan lined with parchment paper. The baking time may be slightly shorter, so start checking at 45 minutes. To remove the cheesecake from a regular cake pan, let it chill completely, then use the parchment paper to lift it out. It won’t look as clean as a springform pan release, but it will taste just as good.
How far in advance can I make this cheesecake?
You can make this cheesecake up to 3 days in advance. In fact, I prefer making it a day ahead because the flavors develop and the texture becomes creamier. Just keep it covered in the refrigerator. If you’re freezing it, you can make it up to 3 months ahead—just wrap it well and thaw in the refrigerator overnight before serving.
Can I use store-bought eggnog or does it have to be homemade?
Store-bought eggnog works perfectly! I’ve tested this recipe with several brands, and the key is to use a thick, creamy eggnog rather than a thin, watery one. Avoid the light or low-fat eggnogs as they have more water content and can make the filling too loose. Full-fat store-bought eggnog gives consistent results every time.
Pin This Recipe!
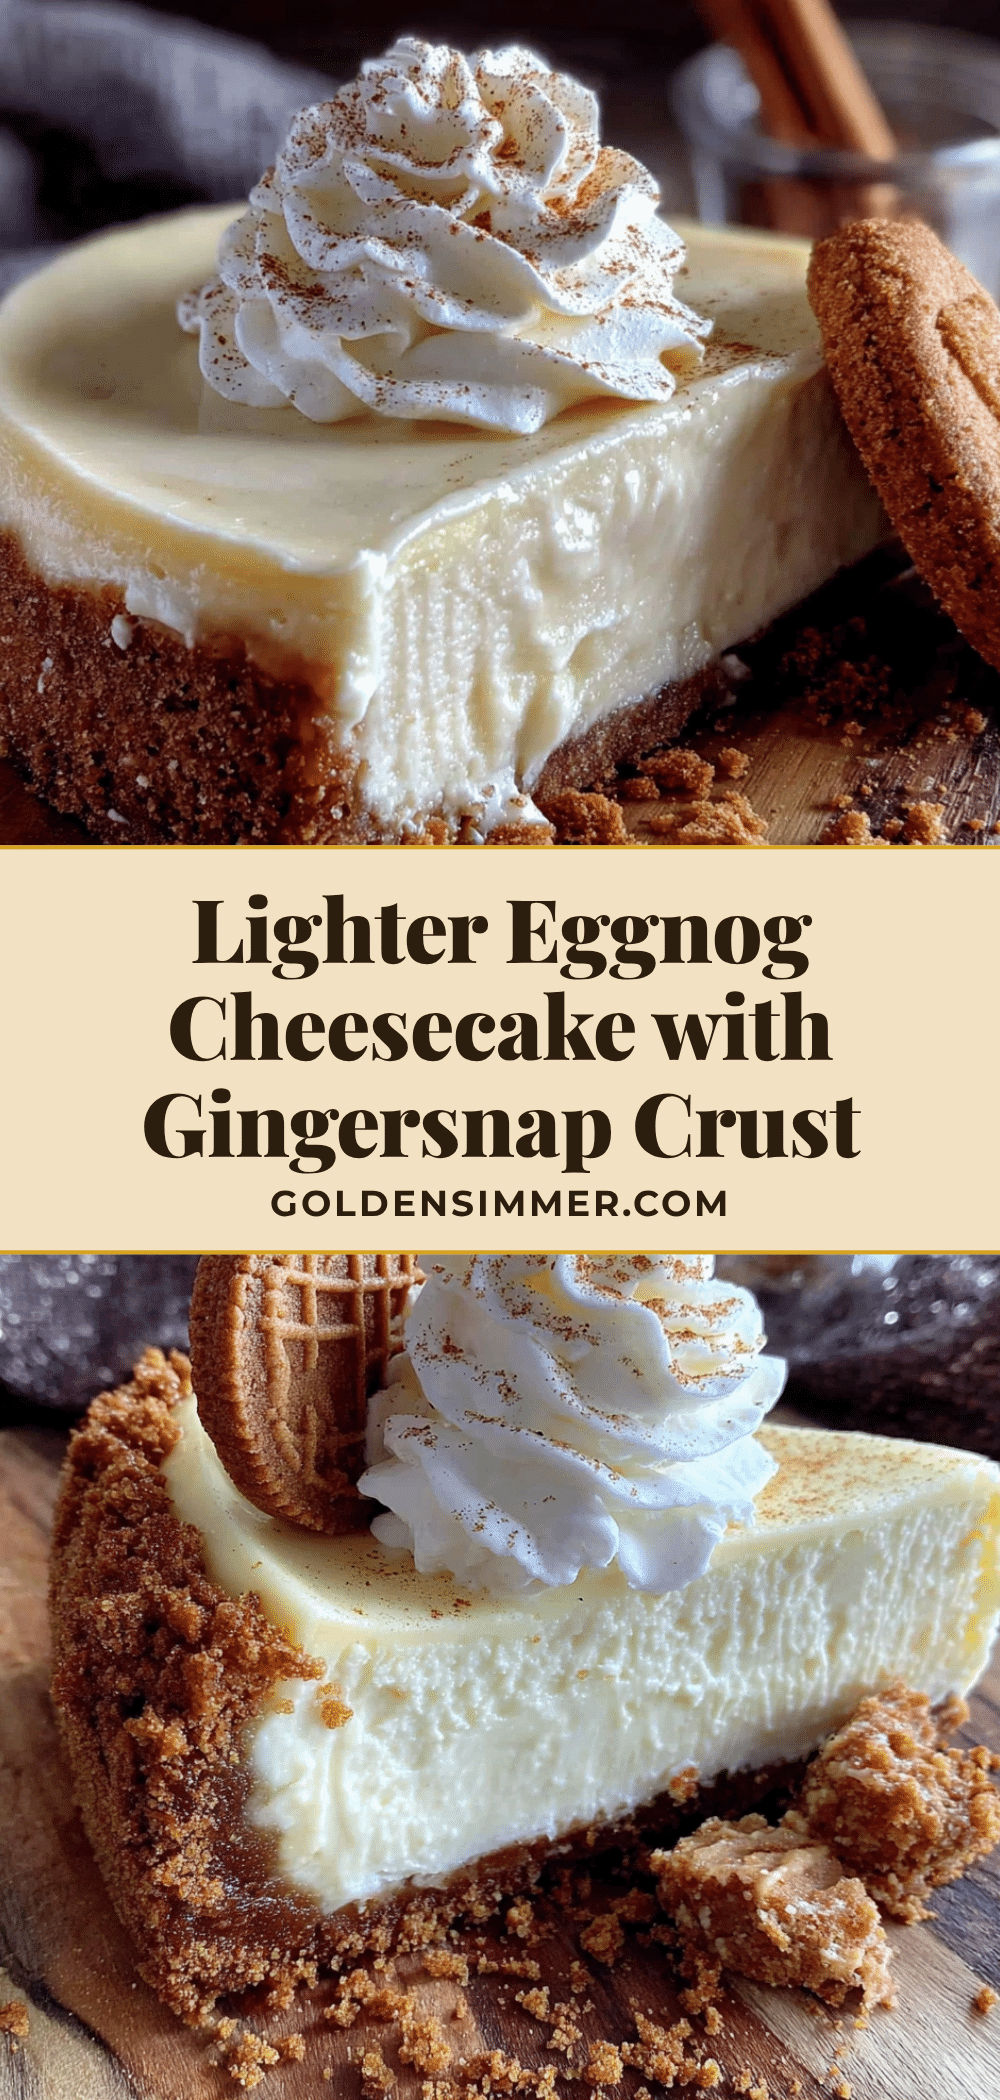
Lighter Eggnog Cheesecake with Gingersnap Crust (Easy, Best & Homemade)
A lighter version of eggnog cheesecake with a gingersnap crust that’s creamy, spiced, and festive. This recipe uses reduced-fat cream cheese and Greek yogurt to cut calories without sacrificing flavor, and it bakes without a water bath for a crack-free finish.
- Prep Time: 30 minutes
- Cook Time: 55 minutes
- Total Time: 8 hours 25 minutes (includes cooling and chilling)
- Yield: 12 servings 1x
- Category: Dessert
- Cuisine: American
Ingredients
- 1 ½ cups crushed gingersnap cookies (about 30 cookies)
- ¼ cup granulated sugar
- 5 tablespoons unsalted butter, melted
- Pinch of salt
- 16 ounces reduced-fat cream cheese, softened
- 8 ounces full-fat cream cheese, softened
- ¾ cup granulated sugar
- ½ cup plain Greek yogurt (full-fat or 2%)
- 3 large eggs, room temperature
- 1 cup prepared eggnog (thick and creamy)
- 2 tablespoons all-purpose flour
- 1 teaspoon vanilla extract
- ½ teaspoon ground nutmeg
- ½ teaspoon ground cinnamon
- ¼ teaspoon ground ginger
- Pinch of ground cloves
- ½ cup heavy cream (for optional topping)
- 1 tablespoon powdered sugar (for optional topping)
- Freshly grated nutmeg for garnish (optional)
- Crushed gingersnap cookies for sprinkling (optional)
Instructions
- Preheat your oven to 325°F (163°C). Place a rack in the middle position. Line the bottom of your springform pan with a circle of parchment paper.
- Make the crust: Crush your gingersnap cookies until you have fine crumbs with a few slightly larger pieces for texture. In a medium bowl, combine the crumbs, sugar, and salt. Pour in the melted butter and stir until every crumb is coated. The mixture should look like wet sand and hold together when pressed in your fist.
- Press the crust into the pan: Dump the crumb mixture into your prepared springform pan. Using the bottom of a measuring cup or a flat glass, press the crumbs firmly into an even layer across the bottom and about 1 inch up the sides. Bake the crust for 10 minutes, then set it aside to cool while you make the filling. Leave the oven on.
- Soften your cream cheese: Take your cream cheese out of the fridge at least 30 minutes before starting. If you’re in a hurry, cut it into cubes and let it sit on the counter for 15 minutes.
- Beat the cream cheese and sugar: In a large mixing bowl, beat the softened cream cheese and sugar together on medium speed until smooth and creamy—about 2 to 3 minutes. Scrape down the sides and bottom of the bowl with your spatula at least once.
- Add the Greek yogurt and vanilla: Beat in the Greek yogurt and vanilla extract until just combined. Again, scrape the bowl.
- Add the eggs one at a time: Crack each egg into a small bowl first, then add it to the cream cheese mixture. Beat on low speed after each addition just until the yolk disappears.
- Add the eggnog and dry ingredients: In a small bowl, whisk together the flour and all the spices. With the mixer on low, slowly pour in the eggnog, then add the flour-spice mixture. Mix until just combined.
- Pour the filling over the crust: Give the batter one last stir with your spatula from the bottom up. Pour it gently over the cooled crust. Tap the pan on the counter a few times to release any air bubbles.
- Bake low and slow: Place the cheesecake on the middle rack and bake for 55 to 65 minutes. The edges should be set and slightly puffed, but the center should still jiggle like Jell-O when you gently shake the pan.
- Cool gradually: Turn off the oven, crack the door open, and let the cheesecake sit inside for 1 hour. After an hour, transfer the pan to a wire rack and let it cool completely to room temperature—about another 2 hours.
- Chill overnight: Once the cheesecake is at room temperature, cover it loosely with plastic wrap and refrigerate for at least 6 hours, but overnight is better.
- Make the whipped cream topping: Just before serving, pour the cold heavy cream into a chilled bowl. Beat on medium-high speed until soft peaks form. Add the powdered sugar and beat until stiff peaks form.
- Serve and enjoy: Run a thin knife around the edge of the pan before releasing the springform clasp. Slice with a sharp knife dipped in hot water and wiped dry between cuts. Top each slice with a dollop of whipped cream and a sprinkle of fresh nutmeg and crushed gingersnaps.
Notes
Room temperature ingredients are not optional. Cold cream cheese creates lumps. Cold eggs can seize the batter. The jiggle test is your best friend—after 55 minutes, gently shake the pan; if the center wobbles like a wave and the edges look set, it’s done. Don’t open the oven door during baking. Use a serrated knife for slicing. If your crust is too crumbly, add an extra tablespoon of butter next time. This cheesecake improves after 24 hours in the fridge.
Nutrition
- Serving Size: 1 slice (1/12 of che
- Calories: 325
- Sugar: 22
- Sodium: 310
- Fat: 19
- Saturated Fat: 11
- Carbohydrates: 32
- Fiber: 1
- Protein: 8
Keywords: eggnog cheesecake, lighter cheesecake, gingersnap crust, holiday dessert, Christmas cheesecake, no water bath cheesecake



