Love this? Save it for later!
Share the inspiration with your friends
I was standing in the dairy aisle of a grocery store last December when the smell hit me—that specific, powdery-sweet scent of cheap hot cocoa mix mingling with the antiseptic sting of peppermint. And suddenly I was seven years old in my aunt Peggy’s cramped kitchen, her hands wrapped around a chipped ceramic mug, steam curling past her face as she told me to be careful because it was “hotter than a firecracker.” She passed away three years ago, and I haven’t had a proper cup of her hot chocolate since. Not that she used anything fancy—just the powdered stuff from a cardboard canister, a splash of milk, and those sad little stale marshmallows that turned into a single, rubbery blob. But it was the way she made it, you know? She’d stir it with this old wooden spoon that had a crack running right down the handle, and she’d hum some country song I never recognized. I’ve been chasing that feeling ever since, trying to recreate that exact warmth in my own kitchen.
Honestly, the first few attempts were a disaster. I overcomplicated things—real chocolate, homemade marshmallows, imported peppermint extract that cost more than my lunch. It all tasted… fine. But it wasn’t hers. It wasn’t the cozy chaos of her kitchen, the way the timer on her stove was always five minutes off, the stack of gossip magazines on the counter. Then it hit me one night, stirring a pot of milk for my niece’s sleepover: it wasn’t about the ingredients. It was about the gathering. The mess. The laughter. The permission to be a little silly with your hot chocolate. So I ditched the fancy stuff and built something better. A hot cocoa bar. A DIY station where guests could pile on the marshmallows, drizzle the peppermint syrup, and sprinkle crushed candy canes like they were decorating a gingerbread house. And let me tell you—it worked. My aunt Peggy would have loved the chaos of it. She would have stirred her cup with that cracked spoon, taken one sip, and said, “Now this is a party.”
Maybe you’ve been there—trying to recreate a memory that’s just out of reach, only to realize the memory was never about the recipe itself. It was about who you shared it with. This hot cocoa bar is my way of honoring that. It’s simple, it’s forgiving, and it’s built for a crowd. Whether you’re hosting a holiday party, a cozy family movie night, or a gathering of friends who just need a little warmth, this setup delivers. No fancy equipment. No stress. Just good cocoa and the people you love. And honestly, that’s what kept me coming back to this recipe—it finally felt like her.
Why You’ll Love This Recipe
Let me tell you why this hot cocoa bar has become my go-to for every winter gathering. I’ve tested it at holiday parties, birthday sleepovers, and even a mid-January “let’s pretend it’s still festive” brunch. It works every single time. Here’s what makes it special:
- Perfect for a Crowd: This setup is designed for 10-15 people with zero stress. You just set out the components and let guests build their own cups. No standing at the stove taking individual orders.
- Super Simple Ingredients: The base is made from pantry staples—milk, cocoa powder, sugar, and vanilla. No hunting down obscure ingredients at specialty stores. I’ve used whole milk, 2%, and even oat milk in a pinch, and it all works.
- Customizable for Everyone: Dietary restrictions? No problem. I’ve set up dairy-free and sugar-free variations that still taste indulgent. Kids love the marshmallow station, adults go for the peppermint kick, and everyone leaves happy.
- Prep-Ahead Friendly: You can make the cocoa base up to three days in advance. Just reheat it gently before guests arrive. That means you actually get to enjoy the party instead of being stuck in the kitchen.
- Visually Stunning: Let’s be real—a spread of colorful toppings in little bowls, a pitcher of steaming cocoa, and those tall glass mugs? It’s Instagram gold. Your guests will snap photos before they even take a sip.
What really sets this apart from every other hot cocoa recipe I’ve tried is the balance. The cocoa itself is rich but not cloying, with just enough bitterness to cut through the sweetness of the toppings. I spent three batches getting the ratio right—too much sugar and it tasted like syrup, too little and it was flat. This version hits that sweet spot where the chocolate flavor shines without being overwhelming.
This is the kind of recipe that makes you close your eyes after the first sip. It’s comfort in a mug—the kind that warms you from the inside out and makes you want to curl up by a fire. Perfect for impressing guests without the stress, or turning a simple Tuesday night into something memorable. Honestly, I’ve never had anyone refuse a second cup.
What Ingredients You Will Need
This recipe uses simple, wholesome ingredients to deliver that rich, cozy cocoa flavor without the fuss. Most of these are pantry staples you probably already have, and the toppings are entirely up to you. Here’s what you’ll need for the base and the bar:
For the Hot Cocoa Base
- 6 cups whole milk (or 2% for a lighter version; oat milk works beautifully for dairy-free)
- 1/2 cup unsweetened cocoa powder (I prefer Ghirardelli or Droste for a deep, dark chocolate flavor; avoid Dutch-process if you want a more traditional taste)
- 1/2 cup granulated sugar (adjust to taste—some like it sweeter, but this gives a balanced sweetness)
- 1/4 teaspoon salt (trust me on this—it enhances the chocolate and keeps it from tasting flat)
- 1 teaspoon vanilla extract (pure, not imitation, if you can swing it)
- 1/2 cup heavy cream (optional, for extra richness; omit for a lighter cocoa)
For the Peppermint Element
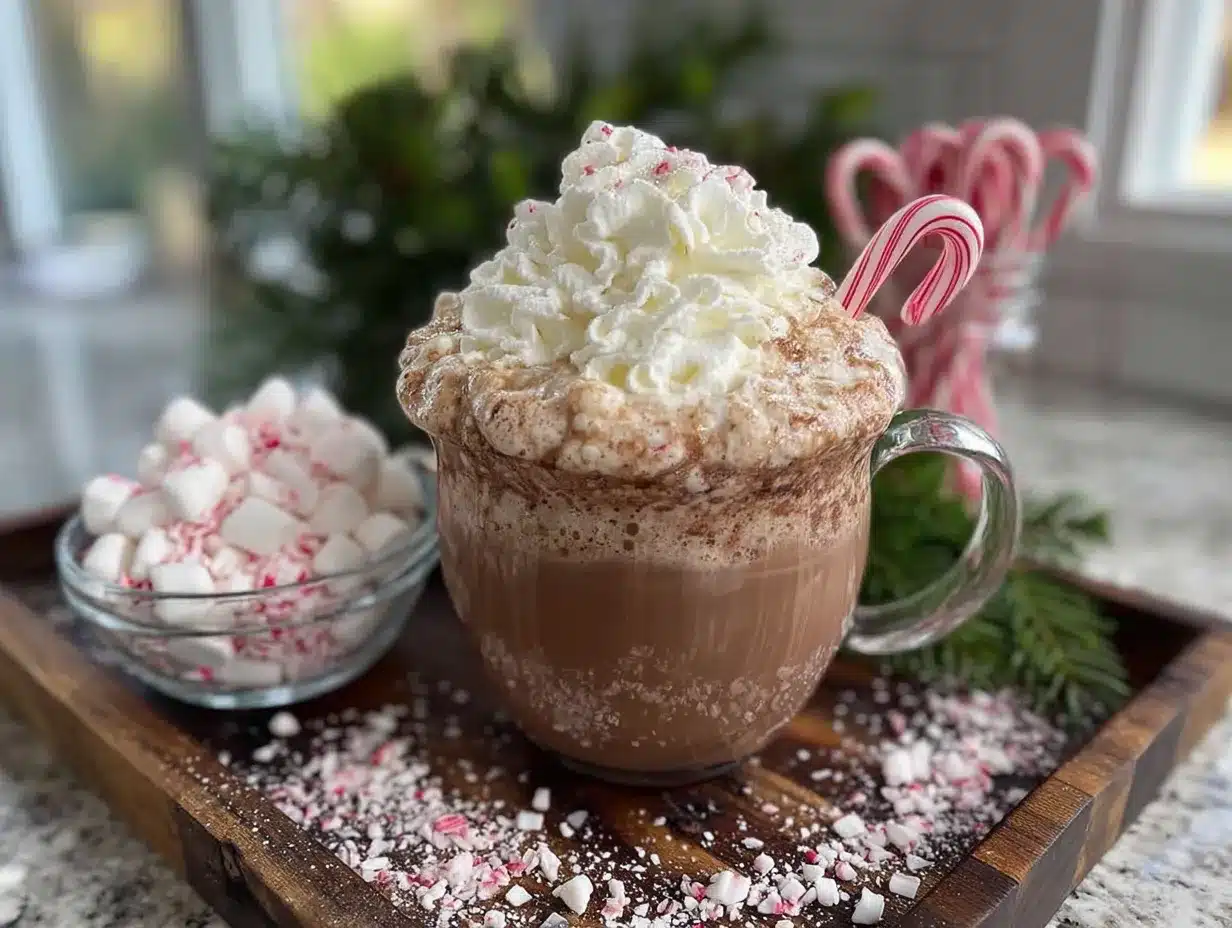
- 1/2 teaspoon peppermint extract (start with less—this stuff is potent! I learned that the hard way when I accidentally added a full teaspoon and it tasted like toothpaste)
- 1/2 cup crushed candy canes or peppermint candies (for garnish; crush them in a zip-top bag with a rolling pin—it’s oddly satisfying)
- Peppermint sticks or candy canes (for stirring; they double as a festive decoration)
For the Marshmallow Station
- 2 cups mini marshmallows (standard white, or get fancy with flavored ones—I’ve used strawberry and vanilla bean)
- 1 cup large marshmallows (for toasting if you have a kitchen torch or a gas stove)
- 1/2 cup marshmallow creme or fluff (for those who want extra gooeyness; it’s a game-changer)
Optional Toppings Bar
- Chocolate shavings or curls (use a vegetable peeler on a chocolate bar)
- Whipped cream (homemade is best—just heavy cream, a little sugar, and vanilla whipped until soft peaks form)
- Cinnamon sticks (for stirring or garnish)
- Caramel sauce or chocolate syrup (for drizzling)
- Toasted coconut flakes (adds a surprising texture)
- Crushed pretzels (for a sweet-salty combo that works weirdly well)
I recommend buying good-quality cocoa powder—it makes a noticeable difference. I’ve tried store-brand and generic, and they tend to taste flat or chalky. Ghirardelli is my go-to because it dissolves smoothly and has that deep, almost fudgy flavor. For the peppermint extract, start with 1/4 teaspoon and taste it before adding more. It’s one of those ingredients where a little goes a long way, and you can always add but you can’t take it out. Trust me on that one—I learned it the hard way during a test batch that ended up tasting like a candy cane had a fight with a chocolate bar.
Equipment Needed
You don’t need a lot of fancy gear for this, which is part of the beauty. Here’s what you’ll need:
- Large saucepan or Dutch oven (at least 4-quart capacity; I use my enameled cast iron because it distributes heat evenly and looks nice on the stovetop)
- Whisk (a balloon whisk works best for smoothing out cocoa lumps; a fork will leave you with clumps)
- Wooden spoon or silicone spatula (for stirring; the silicone is great because it won’t scratch your pot)
- Measuring cups and spoons (precise measurements matter here—eyeballing cocoa powder can lead to a bitter mess)
- Small bowls or ramekins (for the toppings; I use mismatched ones from thrift stores for a cozy, eclectic look)
- Pitcher or large measuring cup (for transferring the cocoa to the bar; a glass one looks pretty but be careful—it gets hot)
- Mugs (tall glass mugs show off the layers of toppings; ceramic ones keep the cocoa warmer longer)
- Small ladle (for serving; a soup ladle works fine, or use a small pitcher for pouring)
- Zip-top bag and rolling pin (for crushing candy canes; you can also use a mortar and pestle if you want to feel fancy)
If you don’t have a Dutch oven, any large pot will do. I’ve made this in a cheap nonstick saucepan from the grocery store, and it turned out just fine. For the mugs, I actually prefer ceramic because they hold heat better—but the glass ones are prettier for photos. Your call. Oh, and if you’re planning to toast marshmallows, grab a kitchen torch if you have one, or just use your gas stove burner. That smoky flavor takes it to another level.
Preparation Method
This comes together in about 20 minutes, and most of that is just stirring. Here’s how to do it:
- Combine the dry ingredients: In your large saucepan, whisk together the cocoa powder, sugar, and salt. Make sure there are no lumps—press them against the side of the pan with the whisk if you need to. This step takes about 30 seconds but saves you from gritty cocoa later.
- Add a splash of milk: Pour in about 1/2 cup of the milk and whisk it into the dry mixture until it forms a smooth paste. This is called a “slurry,” and it prevents lumps from forming when you add the rest of the liquid. It should look like thick chocolate pudding at this point.
- Add the remaining milk: Slowly pour in the rest of the milk while whisking constantly. Don’t just dump it all in at once—a steady stream helps everything incorporate smoothly. If you see any lumps forming, keep whisking; they’ll break up eventually.
- Heat gently: Place the saucepan over medium heat and bring the mixture to a gentle simmer, stirring occasionally with your wooden spoon. This should take about 5-7 minutes. Do not let it boil vigorously—boiling can scorch the milk and give it a burnt taste. You want small bubbles around the edges, not a rolling boil.
- Add the heavy cream (optional): Once the cocoa is hot and steaming, remove it from the heat and stir in the heavy cream if using. This adds richness and a silky mouthfeel. If you’re keeping it dairy-free, skip this step or use coconut cream.
- Stir in the vanilla and peppermint: Add the vanilla extract and peppermint extract. Start with 1/4 teaspoon of peppermint, stir, and taste. Add more if you want a stronger mint kick. I usually end up at about 1/2 teaspoon, but everyone’s tolerance is different. Remember, you can always add more—you can’t take it out.
- Prepare the toppings bar: While the cocoa is heating, set up your bar. Arrange the small bowls with marshmallows, crushed candy canes, chocolate shavings, and any other toppings you’re using. Place the mugs nearby, along with the ladle or pitcher for serving.
- Transfer and serve: Pour the hot cocoa into a pitcher or leave it in the saucepan if you have a trivet for the table. Let guests ladle their own cocoa into mugs and then go wild at the toppings bar. I recommend telling everyone to add marshmallows first, then crushed candy canes, so the candy sticks to the marshmallows instead of sinking to the bottom.
Pro tip: If you’re making this for a party, you can prepare the cocoa base up to three days in advance. Just let it cool completely, transfer it to an airtight container, and refrigerate. When you’re ready to serve, reheat it gently over medium-low heat, whisking occasionally. You might need to add a splash of milk to thin it out if it’s thickened in the fridge.
Sensory cue: When it’s done, the cocoa should look dark and velvety, almost like melted chocolate. It should smell deeply chocolatey with a hint of peppermint—not overpowering, just a whisper. The texture should be smooth and rich, coating your tongue without being heavy. If it tastes thin, you can simmer it a few more minutes to reduce and concentrate the flavor. If it’s too thick, add a splash of milk.
Cooking Tips & Techniques
I’ve made this hot cocoa bar at least a dozen times now, and I’ve learned a few things the hard way. Here’s what I wish someone had told me:
Don’t rush the heating process. I know you’re excited, but cranking up the heat to high will scorch the milk and leave you with a burnt, bitter taste that no amount of marshmallows can fix. Medium heat is your friend. Be patient. The cocoa will get there.
Whisk, don’t just stir. A whisk incorporates air and breaks up lumps way better than a spoon. I once tried to save time by using a wooden spoon the whole time, and I ended up with lumps of cocoa powder floating in my milk. Not cute. Use a whisk for the first few minutes, then switch to a spoon once everything is smooth.
Taste as you go. This is the most important tip. Everyone’s palate is different. I like my cocoa on the darker, less sweet side. My sister likes hers so sweet it could double as syrup. So taste it before you add the peppermint, then taste it again after. Adjust the sugar, the peppermint, even the salt. Your taste buds are the best measuring tool you have.
The peppermint extract is a diva. It’s strong, it’s volatile, and it can easily overwhelm everything else. I once added a full teaspoon to a batch thinking “more is better,” and it tasted like I was drinking mouthwash. Start with 1/4 teaspoon, stir, taste, and add more if needed. Seriously. I cannot stress this enough.
Prep everything before guests arrive. The whole point of a hot cocoa bar is that you get to enjoy the party too. So set out all the toppings, arrange the mugs, and have the cocoa base ready to reheat. When people show up, all you have to do is warm the cocoa and let them go to town. I learned this the hard way when I was still crushing candy canes while guests were already at my door.
Keep a backup batch of milk. If you’re serving a crowd, someone will inevitably want a second cup. I keep an extra quart of milk on hand to thin out the cocoa if it gets too thick or to make a fresh batch if the first one runs out. Better to have it and not need it than to run out mid-party.
One mistake I made early on: I tried to keep the cocoa warm in a slow cooker on the “warm” setting. It worked okay, but after about an hour, it developed a skin on top and started to taste a bit cooked. Now I just reheat it on the stovetop right before serving and keep it in a thermal carafe. It stays hot for about two hours without any quality loss.
Variations & Adaptations
This recipe is incredibly flexible, which is one of the reasons I love it. Here are some ways to switch it up:
Dairy-Free Version: Swap the whole milk for oat milk or full-fat coconut milk. Oat milk gives the creamiest texture without any coconut flavor. Use coconut cream instead of heavy cream. The result is still rich and satisfying—I’ve served it to dairy-free guests who didn’t even notice the difference.
Spicy Mexican Hot Chocolate: Add 1/2 teaspoon of cinnamon and a pinch of cayenne pepper to the dry ingredients. It gives the cocoa a warm, slightly spicy kick that pairs beautifully with the sweetness of the marshmallows. I tried this after a trip to a Mexican restaurant and it was a hit at my holiday party.
Adult Version: Set out a small bottle of peppermint schnapps, Kahlúa, or bourbon for guests to add to their cocoa. I’ve also used dark rum—it sounds weird, but it works. Just label it clearly so the kids don’t accidentally spike their cups. One of my friends added a shot of Irish cream and said it was the best hot cocoa she’d ever had.
White Chocolate Peppermint: Replace the cocoa powder with 1 cup of white chocolate chips. Melt them into the milk using the same method. The result is a creamy, vanilla-forward cocoa that pairs perfectly with peppermint. It’s sweeter than the traditional version, so you might want to cut back on the sugar. I make this for my niece who doesn’t like dark chocolate, and she goes through three cups every time.
Seasonal Twists: In the fall, swap the peppermint for pumpkin pie spice and top with crushed ginger snaps. In the spring, add a splash of raspberry syrup and top with fresh raspberries. In the summer (yes, people drink hot cocoa in summer), use a hint of orange zest and top with toasted coconut. I’ve done all of these, and each one feels like a completely different drink.
Allergen-Friendly: For nut-free, just skip any toppings that contain nuts (obviously). For gluten-free, make sure your candy canes and marshmallows are certified gluten-free—most are, but it’s worth checking. For sugar-free, use a sugar substitute like monk fruit or stevia in the cocoa base, and offer sugar-free marshmallows and candies.
Serving & Storage Suggestions
This hot cocoa bar is designed to be served warm, right after you set it up. Here’s how to make it shine:
Serving Temperature: Serve the cocoa piping hot, but not boiling. I aim for around 160°F (71°C)—hot enough to melt marshmallows and release the peppermint aroma, but not so hot that it burns tongues. If you’re using a thermal carafe, it will stay at the perfect temperature for about two hours.
Presentation Tips: Arrange the toppings in a rainbow order—dark to light—for visual appeal. Put the mugs at the beginning of the line, then the cocoa, then the toppings. That way guests grab a mug, fill it with cocoa, and then add their toppings in order. I use small glass jars or ramekins for the toppings, and I label each one with a cute tag. It makes the whole setup feel intentional and special.
What to Serve Alongside: This cocoa bar pairs beautifully with cookies (gingerbread, sugar cookies, or shortbread), biscotti for dipping, or even a cheese board with sharp cheddar and apple slices. The salty-sweet combo works surprisingly well. I usually set out a plate of homemade shortbread and watch them disappear.
Storage: Leftover cocoa can be stored in an airtight container in the refrigerator for up to 4 days. The flavors actually meld together overnight and taste even better the next day. To reheat, warm it gently on the stovetop over medium-low heat, whisking occasionally. You can also microwave individual servings in 30-second bursts, stirring between each. Add a splash of milk if it’s thickened too much.
Freezing: You can freeze the cocoa base in ice cube trays for future use. Just pop a few cubes into a mug, add hot milk, and stir. It’s perfect for single servings when you’re craving cocoa but don’t want to make a whole batch. I’ve done this and it works surprisingly well—just note that the texture might be slightly thinner after freezing.
Flavor Development: The cocoa is best within the first 24 hours, but it’s still good for a few days. The peppermint flavor will mellow out over time, so if you want a strong mint kick, add the extract fresh when reheating. The marshmallows and toppings should always be added fresh—they don’t store well once they’ve been in the cocoa.
Nutritional Information & Benefits
Here’s a rough estimate for one serving (about 1 cup of cocoa with 2 tablespoons of mini marshmallows and 1 teaspoon of crushed candy canes):
- Calories: Approximately 280-320
- Fat: 12-15g (mostly from milk and cream)
- Carbohydrates: 38-42g (includes sugar from cocoa and toppings)
- Protein: 8-10g
- Calcium: 30% of daily value (from milk)
- Iron: 15% of daily value (from cocoa powder)
Health Benefits: Cocoa powder is actually a good source of antioxidants, specifically flavonoids, which can help reduce inflammation and improve heart health. Milk provides calcium and vitamin D for bone health. Peppermint has been shown to aid digestion and can help soothe an upset stomach. So while this is definitely a treat, it’s not entirely without redeeming qualities.
Dietary Considerations: This recipe is naturally vegetarian. For vegan, use oat milk and skip the heavy cream and marshmallows (or use vegan marshmallows). For gluten-free, double-check your candy canes and marshmallows. For low-sugar, use a sugar substitute and skip the crushed candy canes. The cocoa base without toppings is relatively low in sugar—most of the sweetness comes from the add-ons.
Potential Allergens: This recipe contains dairy (milk, cream). It may contain traces of nuts depending on your toppings. Always check labels if you’re serving someone with allergies.
Personally, I don’t stress too much about the nutritional content of this recipe. It’s a treat, meant for special occasions and cozy nights. But it’s nice to know that the base ingredients—milk and cocoa—actually have some benefits. Everything in moderation, right?
Conclusion
This hot cocoa bar has become a winter tradition in my house, and I hope it becomes one in yours too. It’s more than just a recipe—it’s an experience. It’s the way your kitchen smells like chocolate and peppermint for hours afterward. It’s the sound of friends laughing as they try to balance marshmallows on top of their mugs. It’s that moment when someone takes their first sip and lets out a satisfied “mmm” that makes all the prep work worth it.
I love this recipe because it’s forgiving. You can mess up the measurements, forget an ingredient, or run out of marshmallows, and it still works. It’s built for real life, not for perfection. And honestly, that’s what makes it special. It’s not about impressing anyone with your culinary skills—it’s about creating a moment of warmth and connection.
So go ahead and make it your own. Add extra peppermint if you’re feeling bold. Skip the candy canes if they’re not your thing. Throw in some cinnamon or a shot of bourbon. This is your hot cocoa bar, and there are no rules. Well, except one: don’t forget the marshmallows. Trust me, you’ll regret it.
I’d love to hear how yours turns out. Drop a comment below and let me know what toppings you used, or tag me in your photos if you share them online. Did you try a variation I didn’t mention? Spill the tea—or should I say, spill the cocoa. Happy sipping!
Frequently Asked Questions
Can I make this hot cocoa bar ahead of time for a party?
Absolutely! The cocoa base can be made up to three days in advance and stored in the refrigerator. Just reheat it gently on the stovetop before serving. Set up the toppings bar right before guests arrive so everything looks fresh and inviting.
What if I don’t have peppermint extract?
No problem. You can skip the peppermint entirely for a classic hot cocoa bar, or use crushed candy canes stirred directly into the cocoa for a milder mint flavor. You can also use peppermint tea bags steeped in the milk for a subtle hint—just remove them before adding the cocoa powder.
Can I use water instead of milk?
Technically yes, but I wouldn’t recommend it. Water makes the cocoa thin and watery, lacking that rich, creamy texture that makes this recipe special. If you’re dairy-free, use oat milk or coconut milk instead. If you’re in a pinch, you can use half milk and half water, but the flavor won’t be as indulgent.
How do I keep the cocoa warm during a party?
A thermal carafe works best—it keeps the cocoa hot for about two hours without any quality loss. You can also use a slow cooker on the “warm” setting, but check it after an hour and stir occasionally to prevent a skin from forming. Avoid letting it boil, as that can scorch the milk.
Can I make this recipe vegan or dairy-free?
Yes! Use oat milk or full-fat coconut milk instead of dairy milk, and skip the heavy cream or use coconut cream. For the marshmallows, look for vegan marshmallows made without gelatin. Most candy canes are naturally vegan, but double-check the label. The result is still rich and satisfying—I’ve served it to dairy-free guests who couldn’t tell the difference.
Pin This Recipe!
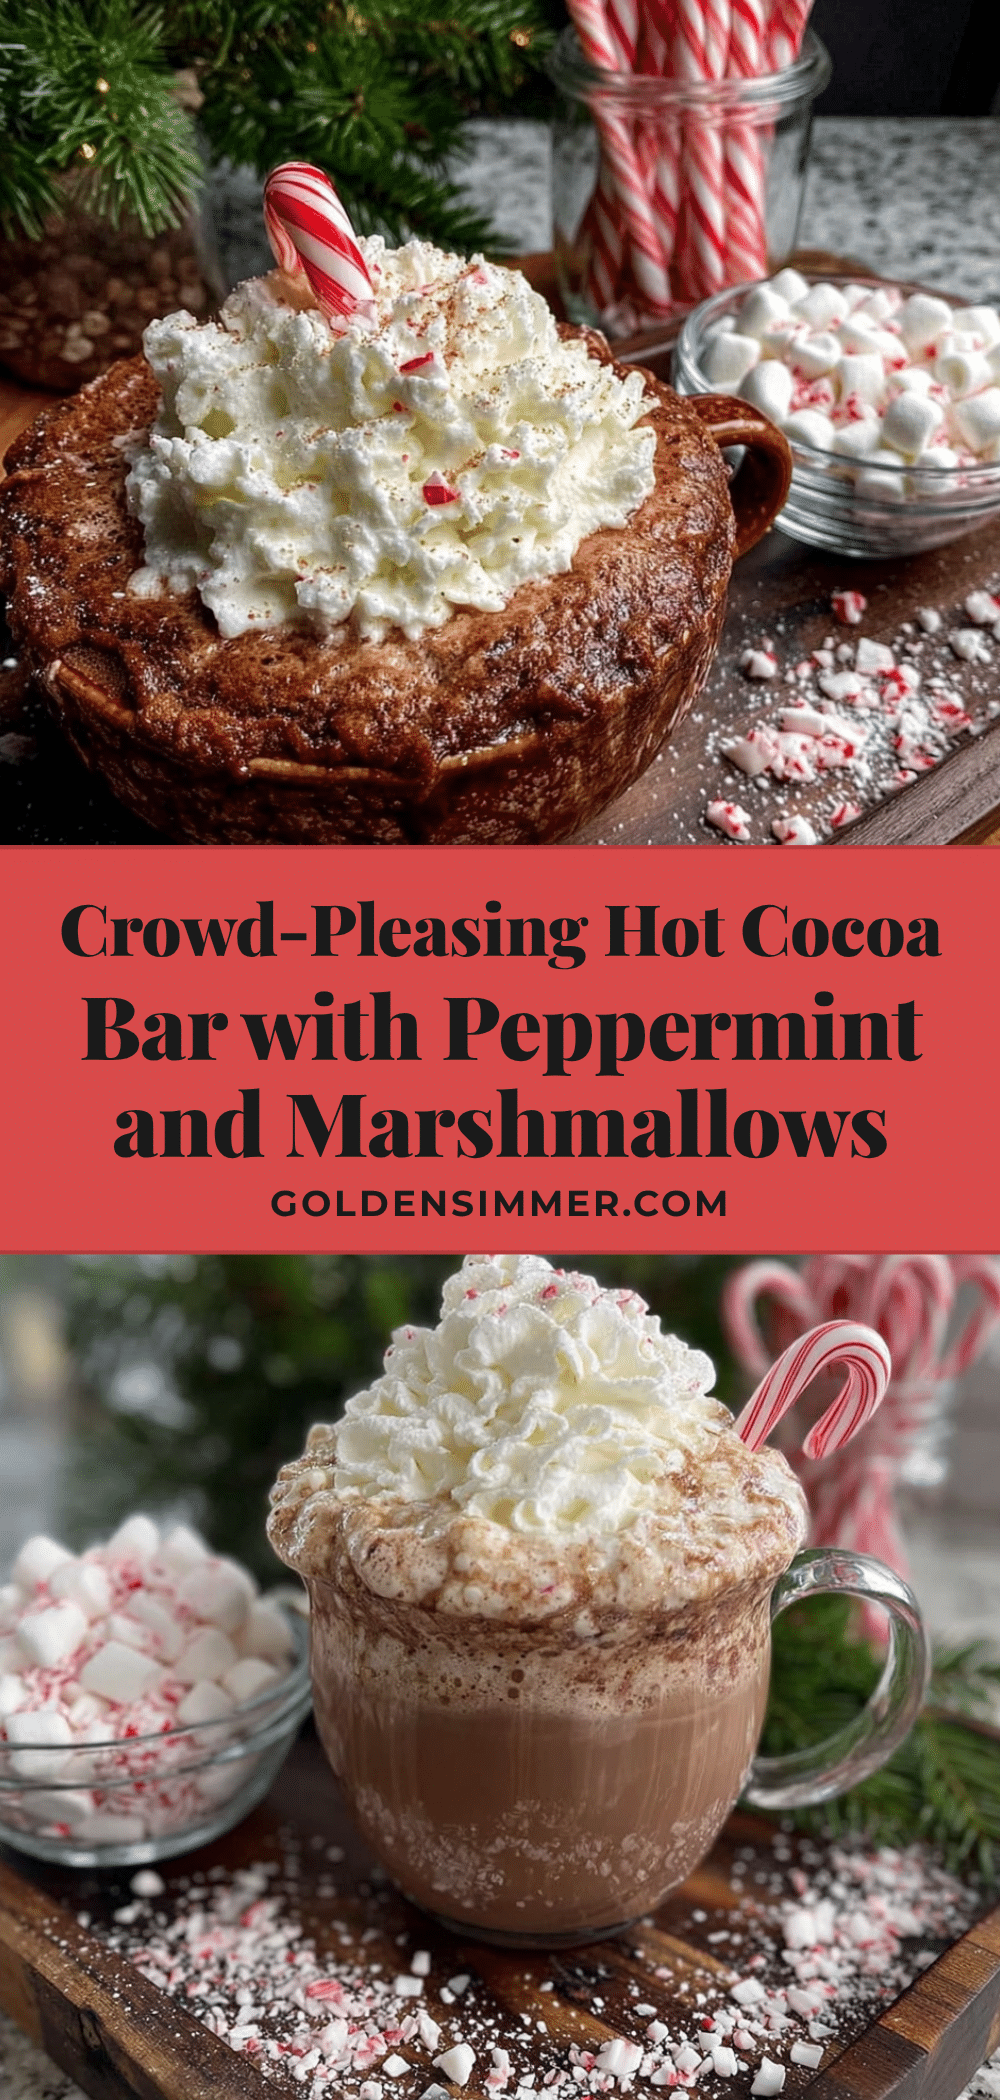
Easy Hot Cocoa Bar with Peppermint Marshmallows

A simple, crowd-pleasing hot cocoa bar with a rich cocoa base, peppermint extract, and a toppings station featuring marshmallows, crushed candy canes, and more. Perfect for holiday parties or cozy gatherings.
- Prep Time: 10 minutes
- Cook Time: 10 minutes
- Total Time: 20 minutes
- Yield: 10-15 servings 1x
- Category: Beverage
- Cuisine: American
Ingredients
- 6 cups whole milk (or 2% for a lighter version; oat milk works for dairy-free)
- 1/2 cup unsweetened cocoa powder (preferably Ghirardelli or Droste)
- 1/2 cup granulated sugar (adjust to taste)
- 1/4 teaspoon salt
- 1 teaspoon vanilla extract (pure preferred)
- 1/2 cup heavy cream (optional, for extra richness)
- 1/2 teaspoon peppermint extract (start with 1/4 teaspoon and adjust)
- 1/2 cup crushed candy canes or peppermint candies (for garnish)
- Peppermint sticks or candy canes (for stirring)
- 2 cups mini marshmallows
- 1 cup large marshmallows (for toasting)
- 1/2 cup marshmallow creme or fluff
- Chocolate shavings or curls (optional)
- Whipped cream (optional)
- Cinnamon sticks (optional)
- Caramel sauce or chocolate syrup (optional)
- Toasted coconut flakes (optional)
- Crushed pretzels (optional)
Instructions
- In a large saucepan, whisk together cocoa powder, sugar, and salt until no lumps remain.
- Add about 1/2 cup of milk and whisk into a smooth paste (slurry).
- Slowly pour in the remaining milk while whisking constantly to incorporate smoothly.
- Place saucepan over medium heat and bring to a gentle simmer, stirring occasionally, about 5-7 minutes. Do not let it boil vigorously.
- Remove from heat and stir in heavy cream (if using).
- Add vanilla extract and peppermint extract. Start with 1/4 teaspoon peppermint, taste, and add more if desired (up to 1/2 teaspoon).
- While cocoa heats, set up toppings bar: arrange small bowls with marshmallows, crushed candy canes, chocolate shavings, and other toppings. Place mugs and a ladle or pitcher nearby.
- Pour hot cocoa into a pitcher or leave in saucepan. Let guests ladle cocoa into mugs and add toppings. Suggest adding marshmallows first, then crushed candy canes for best presentation.
Notes
The cocoa base can be made up to 3 days in advance and reheated gently. For a dairy-free version, use oat milk and coconut cream. Start with 1/4 teaspoon peppermint extract and adjust to taste—it’s potent. Keep a backup batch of milk on hand for thinning or refills. Avoid using a slow cooker for extended warming as it may develop a skin.
Nutrition
- Serving Size: 1 cup
- Calories: 300
- Sugar: 35
- Sodium: 200
- Fat: 13.5
- Saturated Fat: 8
- Carbohydrates: 40
- Fiber: 2
- Protein: 9
Keywords: hot cocoa, hot chocolate, peppermint, marshmallows, cocoa bar, winter, holiday, party