Love this? Save it for later!
Share the inspiration with your friends
My neighbor Kelly wasn’t trying to impress anyone. I’d stopped by to grab a mixing bowl I’d lent her—the one with the tiny chip on the rim that I keep meaning to replace—and this warm, slightly sweet, faintly chocolatey smell hit me before I even got through her screen door. Her kids were running around in costume two weeks before Halloween (because, you know, once the costumes arrive, they’re basically worn daily), and there she was, standing at the counter with black-stained fingers and a grin that said she’d just discovered something good. She handed me one of these little ghost-shaped cupcakes without any fanfare. “Here,” she said, like it was nothing. “We’re testing Halloween recipes.”
Honestly, I took one bite and just stood there in her kitchen, staring at this little black cupcake with its puffy white ghost face. The cake was so tender and moist—nothing like the dry, crumbly black velvet situations I’d tried before—and the cream cheese frosting was sweet but not cloying. Kelly shrugged and said she’d just thrown it together because her kids wanted “spooky cupcakes” and she didn’t want to deal with food coloring disasters. She used black cocoa powder, which I’d never thought of for a vanilla-forward cake, and somehow it worked perfectly. The ghosts were just dollops of frosting with mini chocolate chip eyes. Simple. Smart. Completely unfussy.
I asked for the recipe, and she literally wiped her hands on her apron and scribbled it on a sticky note. That sticky note is now stained and crinkled and lives in my recipe box, and I’ve made these Black Velvet Ghost Cupcakes every Halloween since. Maybe you’ve been there—standing in someone’s kitchen, tasting something unexpectedly perfect, wondering why you’ve been overcomplicating things for years. That’s this recipe. It’s the one that makes you feel like a kitchen genius without actually trying very hard.
Why You’ll Love This Recipe
Let me tell you why these Black Velvet Ghost Cupcakes have become my non-negotiable Halloween bake. I’ve tested this recipe at least eight times across different ovens, different humidity levels, and with different frosting techniques. It’s survived my toddler “helping” me measure flour and my husband accidentally using salted butter instead of unsalted. It’s bulletproof.
- Kid-Friendly and Fun: The decorating part is basically a craft project. My kids spend more time giggling over ghost faces than they do eating the cupcakes—and that’s saying something.
- Simple Ingredients: You probably have everything except the black cocoa powder in your pantry right now. No neon food coloring, no specialty extracts, no weird stabilizers.
- Perfect for Halloween Parties: These disappear at school events, neighborhood gatherings, and classroom parties. I’ve brought them to three different Halloween potlucks and never brought a single one home.
- Crowd-Pleaser: The black cocoa gives a mild Oreo-like flavor that kids adore but adults find sophisticated. It’s the rare treat that makes everyone happy.
- Unbelievably Delicious: The texture is what gets me every time—so moist it almost squishes when you bite it, with a tender crumb that doesn’t crumble everywhere. The tangy cream cheese frosting cuts through the dark cocoa perfectly.
What makes this version different from other black velvet recipes is the technique. Most recipes use regular cocoa powder plus black food coloring, which can taste bitter or artificial. Black cocoa powder (the same stuff in Oreos) gives you that dramatic color naturally, with a smoother, more complex chocolate flavor. Plus, I’ve tweaked the liquid ratio to keep these cupcakes from drying out—a common problem with dark cocoa recipes. This isn’t just another Halloween cupcake. It’s the one you’ll make every year.
I mean, honestly, there’s something special about watching a kid’s face light up when they see a ghost peeking out of a black cupcake. It’s comfort food with a spooky twist—simple enough for a Tuesday night, special enough for a party.
What Ingredients You Will Need
This recipe uses simple, mostly pantry-staple ingredients to deliver that dramatic black color and tender crumb without any artificial coloring. The star is the black cocoa powder, which does all the heavy lifting in the color department.
For the Cupcakes
- 1 ½ cups (190g) all-purpose flour — Spoon and level it; don’t scoop directly from the bag or you’ll pack in too much flour
- ¾ cup (65g) black cocoa powder — I recommend Rodelle or King Arthur brands for the deepest color (regular Dutch-process cocoa works too, but your cupcakes will be dark brown instead of black)
- 1 cup (200g) granulated sugar — Adds sweetness and helps with that tender texture
- 1 teaspoon baking soda — Helps the cupcakes rise properly; don’t skip this or substitute baking powder
- ½ teaspoon salt — Balances the bitterness of the black cocoa
- 1 cup (240ml) buttermilk, room temperature — The acid in buttermilk reacts with the baking soda for a fluffy crumb. No buttermilk? Add 1 tablespoon lemon juice to regular milk and let it sit 5 minutes.
- ½ cup (120ml) vegetable oil — Keeps these cupcakes incredibly moist. Canola or any neutral oil works fine.
- 2 large eggs, room temperature — Cold eggs can seize the batter; let them sit out for 30 minutes first
- 1 teaspoon vanilla extract — Pure vanilla is best, but imitation works in a pinch
- ½ cup (120ml) hot coffee or hot water — Coffee enhances the chocolate flavor without making it taste like coffee. I promise your kids won’t notice.
For the Cream Cheese Frosting
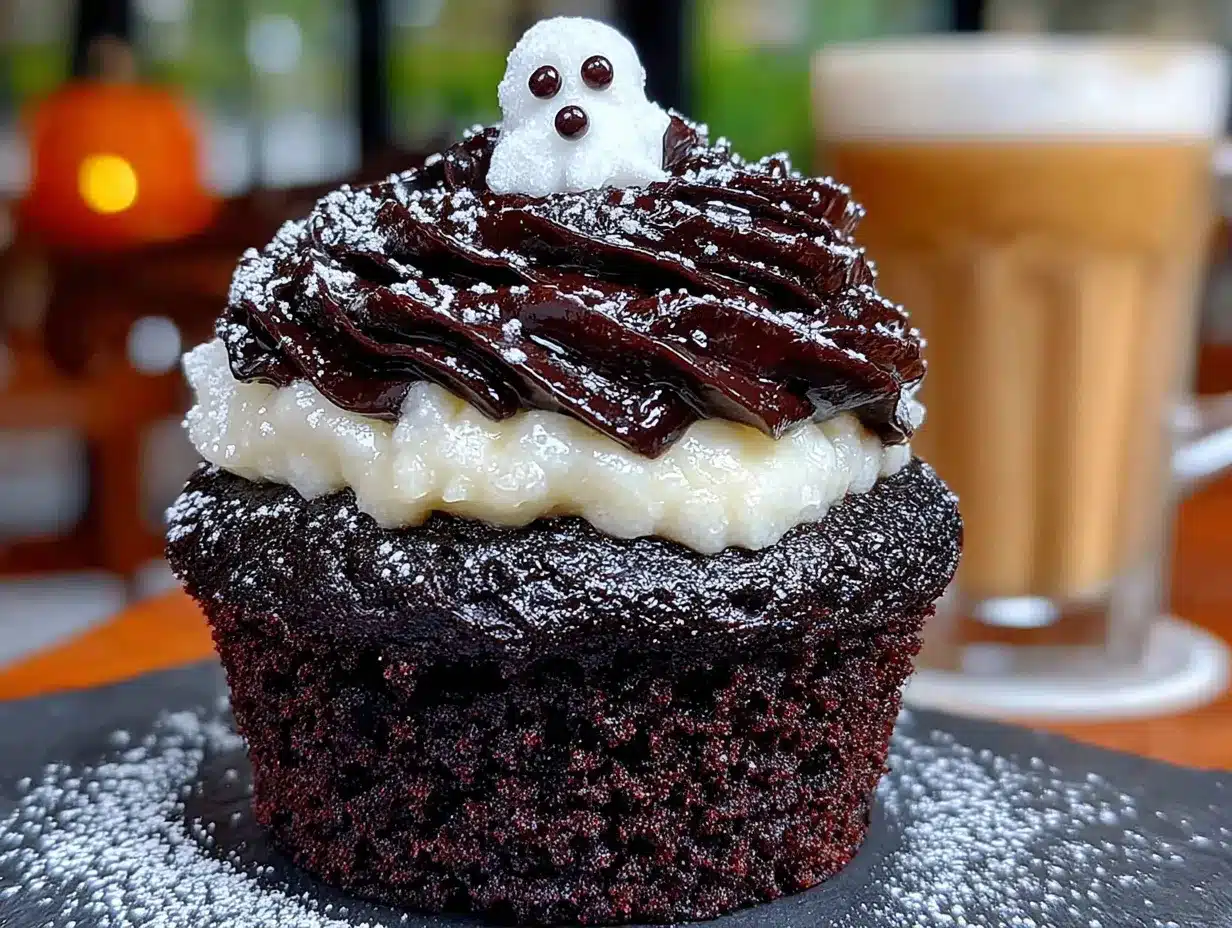
- 8 oz (226g) cream cheese, softened — Full-fat is best for stability. Let it sit at room temperature for at least an hour.
- ½ cup (113g) unsalted butter, softened — If you only have salted butter, reduce the added salt to a tiny pinch
- 3 cups (360g) powdered sugar — Sift it if it’s lumpy; nobody wants lumpy ghosts
- 1 teaspoon vanilla extract — Adds warmth and depth
- Pinch of salt — Just a tiny bit to balance sweetness
For Decorating
- Mini chocolate chips or candy eyes — For the ghost faces. Mini chips look more natural, but candy eyes are fun for kids.
- Optional: Black sanding sugar or edible glitter — For a little sparkle if you’re feeling fancy
Equipment Needed
You don’t need a professional bakery setup for these Black Velvet Ghost Cupcakes. Here’s what I use:
- Standard 12-cup muffin tin — If you only have a 6-cup tin, just bake in batches
- Paper cupcake liners — Black or white liners work best. Skip the foil liners—they can peel away from the cake.
- Two medium mixing bowls — One for dry ingredients, one for wet
- Whisk and rubber spatula — A hand mixer works too, but I actually prefer whisking by hand for this batter
- Electric hand mixer or stand mixer — For the frosting. You can whisk it by hand, but your arm will be sore.
- Piping bag or large zip-top bag — For making the ghost shapes. A round piping tip (like Wilton 1A) gives the best results, but snipping the corner of a zip-top bag works in a pinch.
- Cooling rack — Essential for even cooling; don’t skip this or your cupcakes will get soggy bottoms
- Small offset spatula — Helpful for smoothing frosting, though not strictly necessary
I’ve made these with a cheap dollar-store muffin tin and a plastic piping bag that split halfway through. They still turned out great. Don’t overthink the equipment—your hands and a little patience are the most important tools.
Preparation Method
Let me walk you through this step by step. I’ve made these Black Velvet Ghost Cupcakes enough times to know exactly where things can go wrong—and how to fix them.
Step 1: Preheat and Prep
Preheat your oven to 350°F (175°C). Line your muffin tin with 12 paper liners. I like using black liners for the full spooky effect, but white ones work fine too. Set the tin aside.
Step 2: Mix the Dry Ingredients
In a medium bowl, whisk together the flour, black cocoa powder, sugar, baking soda, and salt. Whisk for about 30 seconds to break up any cocoa lumps and aerate the flour. You’ll notice the mixture looks almost gray—that’s normal. The black cocoa is so dark it makes everything look a little dusty.
Step 3: Combine the Wet Ingredients
In a separate bowl, whisk together the buttermilk, vegetable oil, eggs, and vanilla extract until smooth. Make sure your eggs are truly room temperature—if they’re cold, they’ll make the oil solidify slightly and your batter won’t emulsify properly. I learned this the hard way when my first batch came out greasy.
Step 4: Combine Wet and Dry
Pour the wet ingredients into the dry ingredients and stir gently with a rubber spatula until just combined. A few streaks of flour are fine at this point. The batter will be thick and almost paste-like—don’t panic, that’s normal.
Step 5: Add the Hot Liquid
Pour in the hot coffee (or hot water) and stir until the batter becomes smooth and thin. This is where the magic happens. The hot liquid blooms the cocoa powder and creates that incredibly moist texture. The batter will look very liquid—almost like a thin milkshake. That’s exactly right. Scrape the sides and bottom of the bowl to make sure everything is incorporated.
Step 6: Fill and Bake
Divide the batter evenly among the 12 liners. I use a ¼-cup measuring cup and fill each liner about ⅔ full. These cupcakes don’t rise dramatically, so you don’t need to worry about overflow. Bake for 18-20 minutes, or until a toothpick inserted in the center comes out with a few moist crumbs (not wet batter). The tops will look set and spring back when lightly touched.
Here’s a tip: at 18 minutes, start checking. My oven runs hot and these are usually done at 19 minutes. Overbaking by even 2 minutes will make them dry, so watch carefully.
Step 7: Cool Completely
Let the cupcakes cool in the tin for 5 minutes, then transfer them to a wire rack to cool completely. This is crucial—if you frost them while they’re even slightly warm, the cream cheese frosting will slide right off. I’ve made that mistake before and ended up with ghost puddles. Wait until they’re completely room temperature, about 30-40 minutes.
Step 8: Make the Frosting
While the cupcakes cool, make the frosting. In a large bowl, beat the softened cream cheese and butter together with an electric mixer on medium speed until smooth and fluffy—about 2 minutes. Scrape down the sides. Add the vanilla and salt, then gradually add the powdered sugar, beating on low speed to start. Once all the sugar is incorporated, increase to medium-high and beat for another 2 minutes until light and fluffy. Don’t overbeat or the frosting can become too soft to pipe.
Step 9: Pipe the Ghosts
Transfer the frosting to a piping bag fitted with a large round tip (or snip the corner of a zip-top bag). Hold the bag vertically over each cupcake and squeeze out a tall dollop of frosting. Release pressure and pull upward to create a little peak—that’s the ghost’s head. The frosting should be thick enough to hold its shape. If it’s too soft, refrigerate it for 10 minutes.
Step 10: Add the Faces
Press two mini chocolate chips into each ghost for eyes. You can add a third for a mouth, but I find just eyes looks cuter and more ghost-like. If you’re using candy eyes, press them in gently so they stay put.
Cooking Tips & Techniques
After making these Black Velvet Ghost Cupcakes more times than I can count, I’ve collected a few hard-won lessons. Let me save you some trouble.
Don’t skip the hot liquid. I know it seems weird to add hot coffee to a cupcake batter, but it’s non-negotiable. The hot liquid dissolves the black cocoa powder more thoroughly than cold liquid can, which means a smoother texture and deeper color. Plus, it creates steam during baking that makes the crumb incredibly tender. I once tried using cold water because I was in a hurry, and the cupcakes came out dense and slightly gritty. Never again.
Room temperature ingredients matter. I cannot stress this enough. Cold cream cheese makes lumpy frosting. Cold eggs make heavy cupcakes. Take everything out of the fridge at least 30 minutes before you start baking. Set a timer if you need to—I’ve forgotten and had to microwave my cream cheese, which is a disaster waiting to happen (it melts unevenly and your frosting ends up grainy).
Pipe with confidence. When making the ghosts, don’t hesitate. Squeeze firmly and steadily, then pull straight up. If you stop and start, you’ll get weird bumps and lumps. Practice on a piece of wax paper first if you’re nervous. And remember: imperfect ghosts are charming ghosts. My kids actually prefer the ones that look a little lopsided.
Watch your oven temperature. Ovens lie. I learned this when I burned an entire batch because I trusted my oven’s display. Use an oven thermometer if you have one. If your cupcakes are browning on the edges after 12 minutes, your oven runs hot—reduce the temperature to 325°F (163°C) next time.
Make ahead tip: You can bake the cupcakes a day ahead and store them unfrosted in an airtight container at room temperature. Frost them the day you plan to serve them. The ghosts look best fresh, though they’ll hold up in the fridge for about 24 hours.
Variations & Adaptations
One of the best things about this recipe is how flexible it is. Here are some ways I’ve adapted it over the years:
Gluten-Free Version: Substitute the all-purpose flour with a 1:1 gluten-free baking flour blend (I like Bob’s Red Mill). Add ¼ teaspoon xanthan gum if your blend doesn’t already include it. The texture will be slightly more delicate, but the flavor is identical.
Dairy-Free Adaptation: Use dairy-free buttermilk (add 1 tablespoon lemon juice to 1 cup oat milk or almond milk) and substitute the cream cheese with a vegan cream cheese alternative. Miyoko’s brand works best for frosting. Use vegan butter or coconut oil in the frosting—just note that coconut oil makes it firmer when chilled.
Pumpkin Spice Ghost Cupcakes: Reduce the black cocoa powder to ½ cup and add 1 tablespoon pumpkin pie spice to the dry ingredients. Replace the hot coffee with hot water. The ghosts get a warm, fall flavor that’s perfect for November.
Mini Ghost Cupcakes: Use a mini muffin tin and bake for 10-12 minutes. You’ll get about 36 mini ghosts—perfect for classroom parties or snack-sized treats. Pipe smaller dollops of frosting for tiny ghosts.
Chocolate Ghost Variation: Add ½ cup mini chocolate chips to the batter before baking. The little pockets of melted chocolate make these extra decadent. My kids call these “chocolate chip ghosts” and request them year-round.
I once tried making these with a cream cheese frosting that had a drop of peppermint extract added. It was… interesting. My kids said they tasted like toothpaste ghosts. Stick with vanilla.
Serving & Storage Suggestions
These Black Velvet Ghost Cupcakes are best served at room temperature—the cream cheese frosting softens slightly and the cake becomes incredibly tender. If you’ve stored them in the fridge, let them sit out for about 20 minutes before serving.
For presentation, I like arranging them on a black cake stand or a simple white platter. The contrast makes the ghosts pop. Sprinkle some black sanding sugar around the base for a “haunted graveyard” effect, or add a few candy pumpkins for color. My kids love when I add little paper tombstones made from folded index cards.
Storage: Store leftover cupcakes in an airtight container in the refrigerator for up to 4 days. The cream cheese frosting needs refrigeration, but the cupcakes will stay moist. Let them come to room temperature before serving for the best texture.
Freezing: You can freeze the unfrosted cupcakes for up to 3 months. Wrap each one individually in plastic wrap, then place them in a freezer bag. Thaw at room temperature, then frost and decorate. The frosting doesn’t freeze well—it can become grainy when thawed—so always make it fresh.
Reheating: If you want that just-baked warmth, microwave an unfrosted cupcake for 8-10 seconds. Don’t microwave the frosting—it will melt into a puddle. Trust me, I’ve tried.
The flavors actually develop overnight. The black cocoa mellows and becomes more Oreo-like, and the cake gets even moister. I’ve been known to bake these a day ahead on purpose, just for that flavor boost.
Nutritional Information & Benefits
Let’s be real—these are cupcakes, not health food. But here’s the approximate nutritional breakdown for one Black Velvet Ghost Cupcake (with frosting):
- Calories: Approximately 380
- Fat: 20g
- Carbohydrates: 48g
- Protein: 4g
- Sugar: 35g
- Fiber: 2g
That said, there are a few bright spots. Black cocoa powder is rich in antioxidants called flavonoids, which can support heart health. It also contains less fat than regular cocoa powder, so these cupcakes are actually slightly lighter than traditional chocolate cupcakes. The buttermilk adds calcium and probiotics, and the eggs provide high-quality protein.
Dietary Considerations: This recipe contains gluten, dairy, and eggs. For gluten-free or dairy-free options, see the variations section above. These are not suitable for vegan diets without substitutions.
Allergen Note: The cream cheese frosting contains dairy. The cupcakes contain wheat, dairy (buttermilk), and eggs. If you’re serving these at a school party, check for allergies first.
My personal take? These are a treat. They’re meant to be enjoyed on special occasions, not eaten for breakfast (though I won’t judge if you do). The joy they bring—especially to little faces—is worth every calorie.
Conclusion
These Black Velvet Ghost Cupcakes have become my Halloween signature, and I think they’ll become yours too. They’re proof that you don’t need complicated techniques or expensive ingredients to create something truly memorable. Just black cocoa, cream cheese frosting, and a little imagination.
What I love most about this recipe is how it brings people together. I’ve made them with my kids, my niece, my neighbor Kelly (who still laughs about that sticky note), and even a classroom full of first-graders. Every time, the result is the same: happy faces, chocolate-stained smiles, and requests for “the ghost cupcakes again.”
So go ahead—make a batch this weekend. Let the kids pipe the ghosts (even if they look a little wonky). Leave some on your neighbor’s doorstep. Freeze a few for the night before Halloween when you’re scrambling for a last-minute treat. This recipe is forgiving, flexible, and genuinely delicious.
I’d love to hear how yours turn out! Drop a comment below and tell me about your ghost faces—did you go with chocolate chip eyes or candy eyes? Did your kids name their ghosts? Share your photos and tag me on social media. Happy haunting, and happy baking!
Frequently Asked Questions
Can I use regular cocoa powder instead of black cocoa powder?
Yes, but your cupcakes will be dark brown instead of black. The flavor will also be more intense and slightly more bitter. If you’re using regular cocoa powder, consider adding a teaspoon of instant espresso powder to deepen the chocolate flavor.
Why did my cupcakes turn out dry?
The most common reason is overbaking. Check your cupcakes at 18 minutes and remove them as soon as a toothpick comes out with moist crumbs. Also, make sure you measured your flour correctly—scooping directly from the bag can pack in too much flour, which dries out the batter.
Can I make these cupcakes ahead of time?
Absolutely! Bake the cupcakes up to 24 hours in advance and store them unfrosted in an airtight container at room temperature. Make the frosting and decorate them the day you plan to serve them for the best appearance.
How do I get the ghost shape perfect?
Practice makes perfect, but here’s a trick: hold the piping bag straight up and down, squeeze firmly without moving, then pull straight up when you release pressure. The frosting should form a tall, rounded dollop with a little peak on top. If it flattens out, your frosting is too soft—refrigerate it for 10 minutes first.
Can I freeze these cupcakes?
You can freeze the unfrosted cupcakes for up to 3 months. Wrap each one individually in plastic wrap and store them in a freezer bag. Thaw at room temperature, then make fresh frosting and decorate. Do not freeze the frosted cupcakes—the cream cheese frosting will become grainy when thawed.
Pin This Recipe!
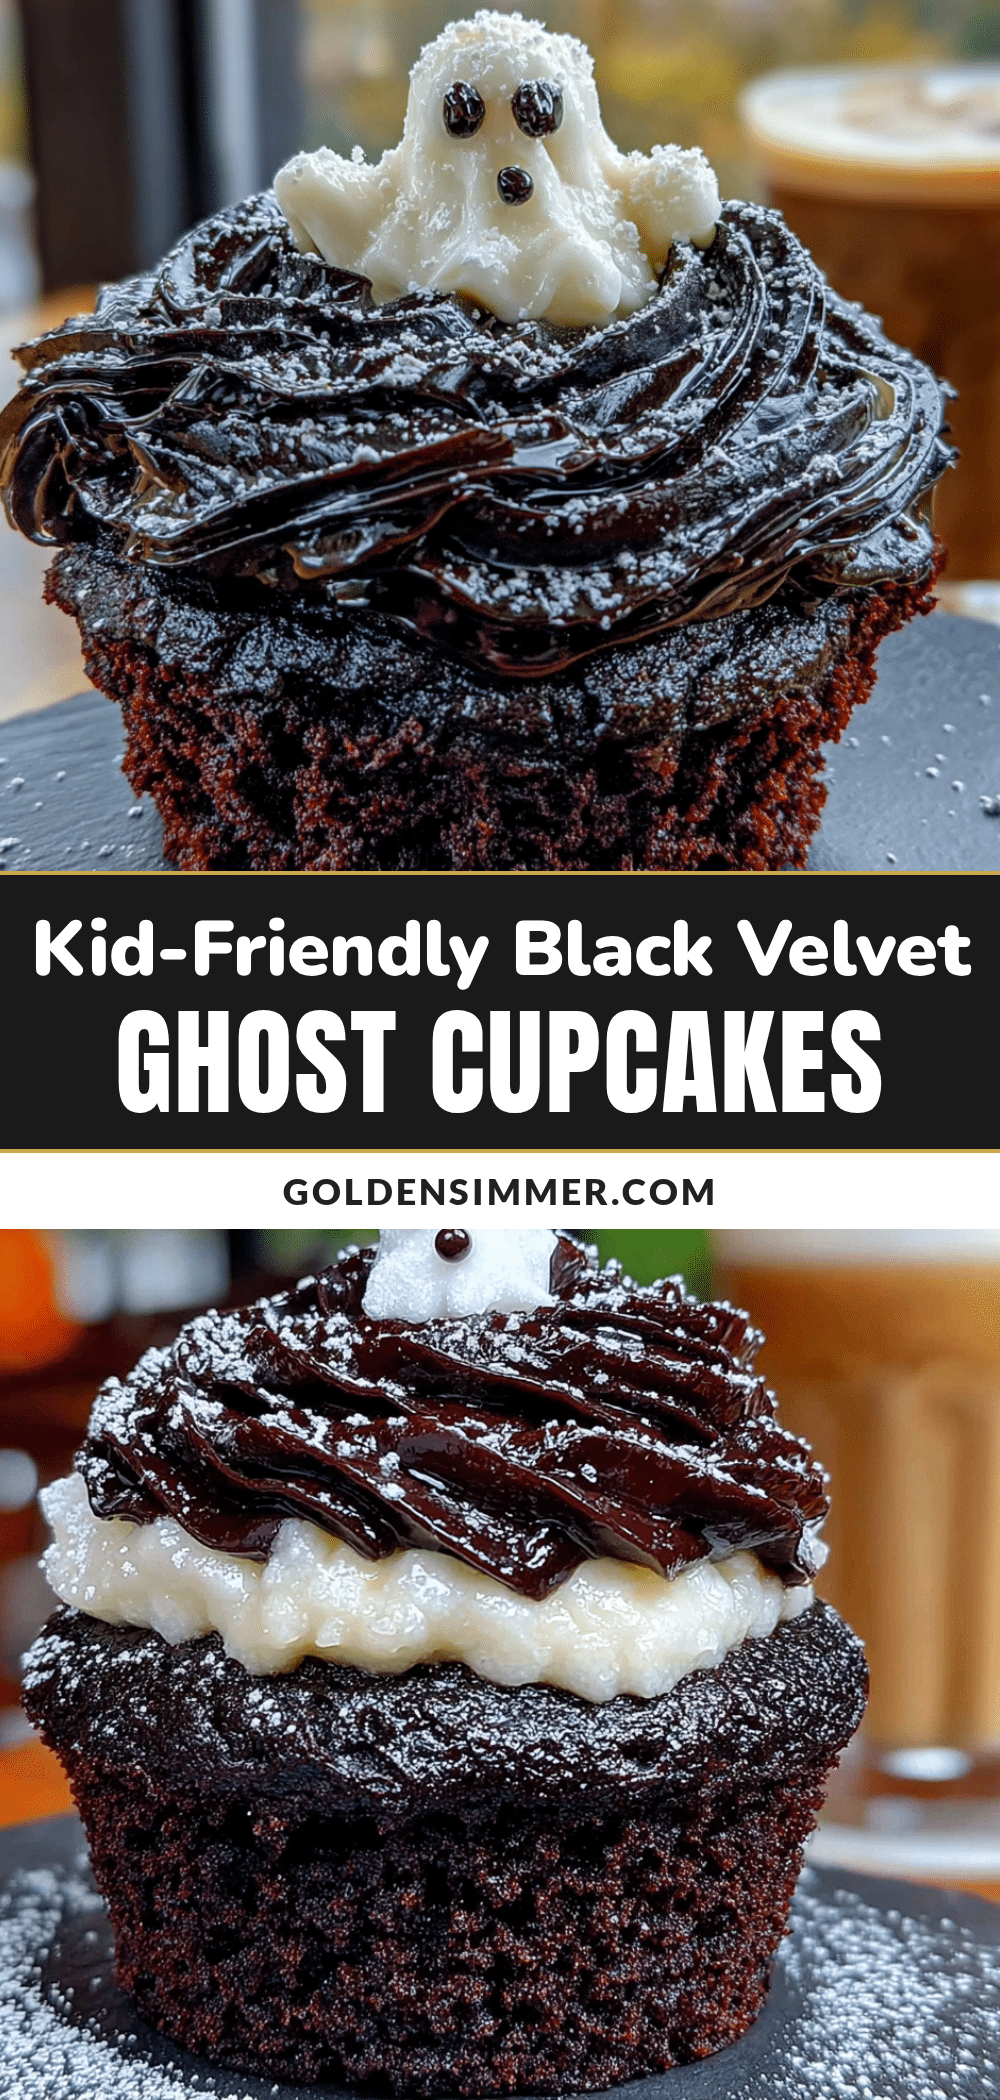
Black Velvet Ghost Cupcakes: Kid-Friendly Halloween Treat
These Black Velvet Ghost Cupcakes are tender, moist, and naturally black from black cocoa powder, topped with a tangy cream cheese frosting piped into adorable ghost shapes. A simple, kid-friendly Halloween treat that’s perfect for parties and guaranteed to disappear.
- Prep Time: 20 minutes
- Cook Time: 20 minutes
- Total Time: 40 minutes
- Yield: 12 cupcakes 1x
- Category: Dessert
- Cuisine: American
Ingredients
- 1 ½ cups (190g) all-purpose flour
- ¾ cup (65g) black cocoa powder
- 1 cup (200g) granulated sugar
- 1 teaspoon baking soda
- ½ teaspoon salt
- 1 cup (240ml) buttermilk, room temperature
- ½ cup (120ml) vegetable oil
- 2 large eggs, room temperature
- 1 teaspoon vanilla extract
- ½ cup (120ml) hot coffee or hot water
- 8 oz (226g) cream cheese, softened
- ½ cup (113g) unsalted butter, softened
- 3 cups (360g) powdered sugar
- 1 teaspoon vanilla extract
- Pinch of salt
- Mini chocolate chips or candy eyes (for decorating)
- Optional: Black sanding sugar or edible glitter (for decorating)
Instructions
- Preheat oven to 350°F (175°C). Line a 12-cup muffin tin with paper liners.
- In a medium bowl, whisk together flour, black cocoa powder, sugar, baking soda, and salt for about 30 seconds.
- In a separate bowl, whisk together buttermilk, vegetable oil, eggs, and vanilla extract until smooth.
- Pour wet ingredients into dry ingredients and stir gently with a rubber spatula until just combined. Batter will be thick.
- Pour in hot coffee (or hot water) and stir until batter becomes smooth and thin.
- Divide batter evenly among the 12 liners, filling each about ⅔ full.
- Bake for 18-20 minutes, or until a toothpick inserted in the center comes out with a few moist crumbs.
- Let cupcakes cool in the tin for 5 minutes, then transfer to a wire rack to cool completely (about 30-40 minutes).
- For frosting: In a large bowl, beat softened cream cheese and butter with an electric mixer on medium speed until smooth and fluffy (about 2 minutes).
- Add vanilla and salt, then gradually add powdered sugar, beating on low speed. Once incorporated, beat on medium-high for 2 minutes until light and fluffy.
- Transfer frosting to a piping bag fitted with a large round tip (or snip the corner of a zip-top bag).
- Pipe a tall dollop of frosting onto each cupcake, releasing pressure and pulling upward to create a peak (ghost shape).
- Press two mini chocolate chips into each ghost for eyes. Optionally add a third for a mouth.
Notes
Don’t skip the hot liquid—it blooms the cocoa and ensures a moist texture. Room temperature ingredients are crucial for best results. Cupcakes can be baked a day ahead and stored unfrosted. Frosting should be made fresh. For gluten-free, use a 1:1 gluten-free flour blend. For dairy-free, use dairy-free buttermilk and vegan cream cheese.
Nutrition
- Serving Size: 1 cupcake
- Calories: 380
- Sugar: 35
- Sodium: 280
- Fat: 20
- Saturated Fat: 8
- Carbohydrates: 48
- Fiber: 2
- Protein: 4
Keywords: Halloween cupcakes, ghost cupcakes, black velvet, cream cheese frosting, kid-friendly, Halloween dessert, black cocoa



