Love this? Save it for later!
Share the inspiration with your friends
I was digging through the back of my pantry last October, looking for a can of pumpkin that I was sure I’d seen in there, when my hand brushed against a dusty bag of tortilla chips from a party months ago. And just like that, I was seven years old, sitting cross-legged on my aunt Margo’s linoleum kitchen floor, watching her arrange vegetables on a platter for a Halloween party she threw every year. She wasn’t fancy about it—she’d just pile things on a big wooden board, and somehow it looked like art. The air smelled like cinnamon and roasting squash, and she’d let me “help” by placing the baby carrots in a neat little row, even though I always ate half of them before the guests arrived.
That memory hit me harder than I expected. Aunt Margo passed away a few years back, and I haven’t thought about her Halloween parties in ages. But that afternoon, standing in my own messy pantry, I wanted to make something that felt like her—cozy, unpretentious, and perfect for a chilly October evening. That’s how this Cozy Halloween Veggie Tray with Pumpkin Hummus was born. It’s not her recipe, exactly, but it carries the same spirit: a little bit spooky, a whole lot of warmth, and meant to be shared with people you love.
Maybe you’ve been there, too—craving something that feels like a hug on a plate, especially when the weather turns cold and the days get shorter. This tray is for those nights. It’s simple enough to throw together on a Tuesday, but special enough to serve at a Halloween gathering. And honestly, the pumpkin hummus? It’s the kind of thing you’ll want to eat by the spoonful. Let me show you how to make it.
Why You’ll Love This Recipe
Look, I’ve tested a lot of hummus recipes over the years—some were too bland, others had a weird texture that just didn’t work. But this pumpkin hummus? It’s the one I keep coming back to. Here’s why I think you’ll love it too:
- Quick & Easy: This entire tray comes together in under 30 minutes. Seriously. The hummus takes about 10 minutes in the food processor, and arranging the veggies is just a matter of washing and chopping. Perfect for those busy weeknights when you still want something special.
- Simple Ingredients: No fancy grocery trips needed. You likely already have canned pumpkin, chickpeas, tahini, and basic spices in your kitchen. The veggies are totally flexible—use whatever you have on hand.
- Perfect for Halloween Gatherings: Whether it’s a costume party, a movie night, or just a cozy evening at home, this tray fits right in. It’s festive without being over-the-top, and the orange color of the hummus is just the right amount of spooky.
- Crowd-Pleaser: I’ve brought this to potlucks and family dinners, and it always gets rave reviews. Even people who say they don’t like hummus end up going back for seconds. The pumpkin adds a subtle sweetness that balances the savory spices beautifully.
- Unbelievably Delicious: The texture is silky smooth, thanks to a little trick I learned from a chef friend—blending the chickpeas while they’re still warm. The pumpkin makes it extra creamy, and the smoked paprika on top? Absolute magic.
What makes this recipe different from the rest is the balance of flavors. Most pumpkin hummus recipes lean too sweet or too savory, but this one hits that perfect middle ground. It’s comfort food reimagined—healthier, faster, but with the same soul-soothing satisfaction. Plus, it’s the kind of dish that impresses guests without stressing you out. I mean, who doesn’t love dipping crunchy veggies into a bowl of velvety, spiced goodness?
What Ingredients You Will Need
This recipe uses simple, wholesome ingredients to deliver bold flavor and satisfying texture without the fuss. Most of these are pantry staples, so you can whip this up anytime the craving hits.
For the Pumpkin Hummus
- 1 can (15 oz) chickpeas, drained and rinsed (I prefer Biona or Whole Foods 365 for their creaminess)
- 1/2 cup canned pumpkin puree (not pumpkin pie filling—look for 100% pure pumpkin)
- 1/4 cup tahini (stir it well before measuring; the oil separates)
- 2 tablespoons extra-virgin olive oil, plus more for drizzling
- 2 tablespoons fresh lemon juice (about half a lemon)
- 1 small garlic clove, minced (start with less—you can always add more)
- 1/2 teaspoon ground cumin
- 1/2 teaspoon smoked paprika, plus more for garnish
- 1/4 teaspoon ground cinnamon (trust me on this—it’s subtle but magical)
- 1/2 teaspoon salt, or to taste
- 2-3 tablespoons ice-cold water (adds fluffiness)
For the Veggie Tray
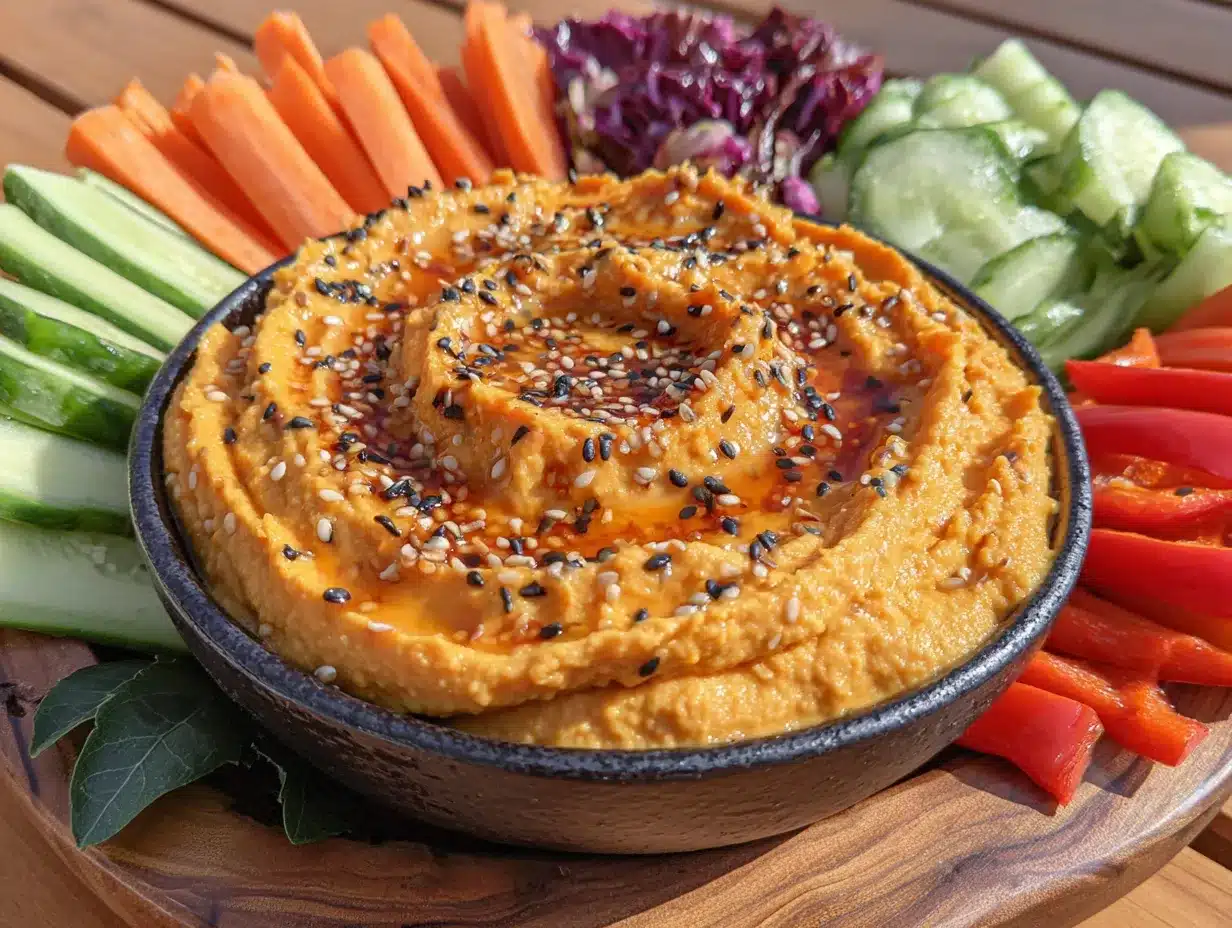
- 1 large cucumber, sliced into rounds
- 1 cup baby carrots (or regular carrots, cut into sticks)
- 1 red bell pepper, sliced into strips
- 1 cup snap peas or sugar snap peas
- 1/2 cup cherry tomatoes, halved
- 1 cup broccoli florets (blanched for 2 minutes if you prefer them tender)
- Optional: pita chips, pretzels, or crackers for extra crunch
Ingredient Selection Tips
For the chickpeas, I’ve found that using canned ones is totally fine, but if you have time, cooking dried chickpeas from scratch gives an even creamier texture. Just make sure to reserve some of the cooking liquid—it’s liquid gold for hummus. For the pumpkin, I recommend Libby’s or any brand that’s 100% pure pumpkin. Stay away from the seasoned pie filling unless you want a dessert hummus (which, honestly, could be fun too!).
Substitution Guidance
If you’re avoiding tahini, you can substitute with sunflower seed butter or Greek yogurt for a different flavor profile. For a nut-free option, skip the tahini and use an extra tablespoon of olive oil instead. And if you’re gluten-free, just pair this with veggie sticks and gluten-free crackers—it’s naturally gluten-free as written.
Equipment Needed
You don’t need a fancy kitchen to pull this off, but a few key tools make the process smoother:
- Food processor: This is non-negotiable for silky hummus. I use a Cuisinart 14-cup model, but any size works as long as it’s at least 7 cups. If you don’t have one, a high-speed blender can work—just scrape down the sides frequently.
- Vegetable peeler: For carrots and cucumber, if you prefer peeled strips.
- Sharp knife and cutting board: For chopping veggies into bite-sized pieces.
- Mixing bowls: One for the hummus, one for arranging the tray.
- Spatula: To scrape every last bit of hummus out of the processor (because wasting hummus is a tragedy).
- Serving platter or wooden board: A large board makes the tray look beautiful and rustic. I found mine at a thrift store for $5!
If you don’t have a food processor, you can mash the chickpeas by hand with a potato masher—it’ll be chunkier but still delicious. Just be prepared for a little arm workout. And honestly, I’ve made this in a blender before, and while it worked, the texture wasn’t quite as smooth. So if you can, stick with the food processor.
Preparation Method
- Prep the chickpeas: Drain and rinse the chickpeas. For extra smooth hummus, place them in a microwave-safe bowl and heat for 1 minute. This warms them up and makes them easier to blend. (I learned this trick from a Lebanese friend, and it’s a game-changer.)
- Blend the tahini and lemon juice: In your food processor, combine the tahini and lemon juice. Process for 30 seconds until it thickens and turns a pale, creamy color. This step is crucial—don’t skip it! It helps emulsify the hummus and prevents bitterness.
- Add the oil and garlic: Add the olive oil, minced garlic, and a pinch of salt. Process for another 20 seconds until well combined.
- Add the pumpkin and spices: Spoon in the pumpkin puree, cumin, smoked paprika, and cinnamon. Process for 30 seconds until everything is smooth and evenly colored. The kitchen will start smelling amazing at this point.
- Add the chickpeas: Add the warm chickpeas to the processor. Process for 1 minute, scraping down the sides halfway through. The mixture should look thick and a little grainy at this stage.
- Adjust the texture: With the processor running, slowly drizzle in 2-3 tablespoons of ice-cold water. Watch as the hummus transforms—it’ll become lighter, fluffier, and incredibly smooth. Process for another 30-60 seconds until it’s velvety. If it’s still too thick, add another tablespoon of water.
- Taste and adjust: Stop and taste. Does it need more salt? Another squeeze of lemon? A pinch more cumin? Trust your palate here. I usually end up adding a bit more smoked paprika because I love that smoky kick.
- Prepare the veggies: While the hummus rests, wash and chop all your vegetables. For the cucumber, I like to leave the skin on for color and texture. For the bell pepper, remove the seeds and white membranes before slicing into strips. Arrange them on a large platter in a way that looks inviting—group similar colors together for visual appeal.
- Plate the hummus: Transfer the hummus to a shallow bowl. Use the back of a spoon to create a swirl pattern on top. Drizzle with a little olive oil, sprinkle with smoked paprika, and add a few pumpkin seeds or a pinch of black pepper for garnish.
- Assemble the tray: Place the bowl of hummus in the center of your platter. Arrange the veggies around it in a circular pattern, alternating colors and textures. Add pita chips or crackers in any empty spaces. Serve immediately or refrigerate for up to 2 hours before serving.
Pro tip: If you’re making this ahead, keep the hummus and veggies separate until just before serving. The veggies can get soggy if they sit on the hummus too long. Also, if your hummus seems too thick after refrigeration, just stir in a little warm water to bring it back to life.
Cooking Tips & Techniques
Over the years, I’ve made my fair share of hummus disasters—lumpy, bland, or just plain sad. Here’s what I’ve learned the hard way so you don’t have to:
- Don’t skip the warm chickpeas step: This was the biggest game-changer for me. Warm chickpeas blend into a much smoother texture than cold ones. It’s like they’re more willing to cooperate, you know?
- Ice water is your secret weapon: Adding cold water while the processor is running aerates the hummus, making it fluffy and light. It’s the difference between dense, heavy hummus and the kind that makes you close your eyes and sigh.
- Taste as you go: I once made a batch that was so garlicky it could’ve warded off vampires. Now I start with a small clove and add more only after tasting. You can always add, but you can’t take away.
- Let it rest: Hummus always tastes better after sitting for at least 30 minutes. The flavors meld together and deepen. If you can, make it an hour ahead of time.
- Common mistake: over-processing: I know it sounds counterintuitive, but blending hummus for too long can actually make it gummy. Stop as soon as it’s smooth and fluffy—about 2-3 minutes total processing time.
- Timing strategy: While the hummus is processing, wash and chop your veggies. This saves time and keeps you in the flow. I’ve burned dinner more times than I’d like to admit by not multitasking properly.
One of my biggest failures was the time I forgot to add salt entirely. The hummus was so bland that even my dog turned up his nose. So yeah, don’t skip the salt—it’s essential for bringing out all the other flavors.
Variations & Adaptations
This recipe is incredibly flexible, so feel free to make it your own. Here are some variations I’ve tried and loved:
- Spicy Pumpkin Hummus: Add 1/2 teaspoon of cayenne pepper or a chopped chipotle pepper in adobo sauce. The heat pairs beautifully with the sweetness of the pumpkin. I made this for a Halloween party last year, and it was gone in 20 minutes.
- Herb-Infused Version: Blend in a handful of fresh parsley or cilantro before adding the water. It adds a bright, fresh note that’s perfect for spring. (Yes, I make this in non-Halloween months too—it’s that good.)
- Roasted Garlic Option: Instead of raw garlic, roast a whole head of garlic in the oven until soft, then squeeze out the cloves and blend them in. The flavor is mellow, sweet, and absolutely divine. It takes a bit more time, but it’s worth it for a special occasion.
- Low-Carb Adaptation: Skip the pita chips and crackers, and double up on low-carb veggies like celery, bell peppers, and cucumber slices. The hummus itself is already low in carbs compared to traditional versions.
- Nut-Free and Seed-Free: Replace tahini with an extra 2 tablespoons of olive oil and a tablespoon of Greek yogurt. It changes the flavor slightly, but it’s still creamy and delicious.
I once tried a version with roasted red peppers blended in, and it was a happy accident—the sweetness of the peppers complemented the pumpkin perfectly. Just be careful not to add too much liquid, or the hummus will be runny.
Serving & Storage Suggestions
This tray is best served at room temperature, so take the hummus out of the fridge about 15 minutes before serving. The flavors really shine when they’re not ice-cold.
For presentation, I like to arrange the veggies in a rainbow pattern around the hummus bowl—red peppers, orange carrots, yellow bell peppers, green cucumber, and purple cabbage if I have it. It looks stunning and makes people want to dig in. Sprinkle a few pumpkin seeds or pomegranate arils on top for a festive touch.
As for drinks, this pairs beautifully with a crisp apple cider or a warm mug of spiced tea. If you’re serving adults, a light Pinot Grigio or a pumpkin beer works wonderfully too.
Storage Instructions: Store leftover hummus in an airtight container in the fridge for up to 5 days. The veggies can be stored separately in a sealed bag or container for 2-3 days. I don’t recommend freezing the hummus—it tends to separate and become grainy when thawed.
Reheating: If the hummus thickens in the fridge, just stir in a teaspoon of warm water or olive oil to bring it back to its original consistency. Serve it cold or at room temperature—no need to heat it up.
One thing I’ve noticed is that the hummus actually tastes better on day two. The spices have had time to meld, and the texture settles into something even creamier. So don’t be afraid to make it ahead!
Nutritional Information & Benefits
This Cozy Halloween Veggie Tray with Pumpkin Hummus is not just delicious—it’s packed with nutrients that make you feel good about eating it.
| Nutrient | Per Serving (approx. 1/4 cup hummus + 1 cup veggies) |
|---|---|
| Calories | 180-220 |
| Protein | 6-8g |
| Fat | 10-12g (mostly healthy fats from olive oil and tahini) |
| Carbohydrates | 20-25g |
| Fiber | 5-7g |
| Vitamin A | 120% DV (thanks to the pumpkin and carrots) |
| Vitamin C | 60% DV (from bell peppers and broccoli) |
Health Benefits: Pumpkin is rich in beta-carotene, which supports eye health and immune function. Chickpeas provide plant-based protein and fiber, keeping you full and satisfied. Tahini is a great source of calcium and healthy fats. Plus, all those colorful veggies deliver a wide range of vitamins and antioxidants.
Dietary Considerations: This recipe is naturally gluten-free, dairy-free, and vegan. It’s also nut-free if you use sunflower seed butter instead of tahini. The only potential allergen is sesame (from tahini), so keep that in mind for sensitive guests.
Honestly, I love that this recipe feels indulgent but is actually good for you. It’s the kind of snack that fuels your body without weighing you down—perfect for a cozy night in.
Conclusion
This Cozy Halloween Veggie Tray with Pumpkin Hummus has become a staple in my fall rotation, and I hope it becomes one in yours too. It’s simple enough for a weeknight snack, but festive enough to impress at a party. Every time I make it, I think of Aunt Margo and her messy, beautiful vegetable platters—and how food has this amazing power to connect us to people and moments we love.
Don’t be afraid to play around with the recipe. Add more spice, swap in your favorite veggies, or serve it with warm pita bread instead of crackers. The beauty of this dish is that it’s forgiving and flexible, just like the best comfort food always is.
I’d love to hear how yours turns out! Drop a comment below and let me know what variations you tried, or tag me in your photos if you share them online. Did you add something unexpected? Did your kids actually eat the broccoli? I want to know all the details. Happy Halloween, and happy dipping!
Frequently Asked Questions
Can I make this hummus without a food processor?
Yes, you can! Use a potato masher or a fork to mash the chickpeas and pumpkin together until smooth. It’ll be chunkier, but still tasty. A high-speed blender also works—just scrape down the sides frequently.
How long does pumpkin hummus last in the fridge?
Stored in an airtight container, it stays fresh for up to 5 days. The flavors actually deepen after a day or two. Just stir in a little water or olive oil if it thickens up.
Can I use fresh pumpkin instead of canned?
Absolutely! Roast a small sugar pumpkin at 400°F for 45 minutes, then scoop out the flesh and puree it. Just make sure to drain any excess liquid—fresh pumpkin can be more watery than canned.
Is this recipe kid-friendly?
Definitely! The hummus is mild and slightly sweet, and kids love dipping veggies into it. My nephew calls it “orange dip” and asks for it all year round. You can also serve it with pretzels or apple slices for extra kid appeal.
Can I freeze the pumpkin hummus?
I don’t recommend it. The texture tends to become grainy and watery after thawing. It’s best to make it fresh or store it in the fridge for up to 5 days. If you need to make it ahead, just prepare it a day or two before serving.
Pin This Recipe!
Cozy Halloween Veggie Tray with Pumpkin Hummus

A festive and cozy Halloween veggie tray featuring silky pumpkin hummus, perfect for gatherings or a cozy night in. Quick to make with simple ingredients, it’s a crowd-pleaser that’s naturally gluten-free, dairy-free, and vegan.
- Prep Time: 15 minutes
- Cook Time: 0 minutes
- Total Time: 15 minutes
- Yield: 4 servings 1x
- Category: Appetizer
- Cuisine: American
Ingredients
- 1 can (15 oz) chickpeas, drained and rinsed
- 1/2 cup canned pumpkin puree (100% pure pumpkin)
- 1/4 cup tahini, stirred well
- 2 tablespoons extra-virgin olive oil, plus more for drizzling
- 2 tablespoons fresh lemon juice (about half a lemon)
- 1 small garlic clove, minced
- 1/2 teaspoon ground cumin
- 1/2 teaspoon smoked paprika, plus more for garnish
- 1/4 teaspoon ground cinnamon
- 1/2 teaspoon salt, or to taste
- 2–3 tablespoons ice-cold water
- 1 large cucumber, sliced into rounds
- 1 cup baby carrots (or regular carrots, cut into sticks)
- 1 red bell pepper, sliced into strips
- 1 cup snap peas or sugar snap peas
- 1/2 cup cherry tomatoes, halved
- 1 cup broccoli florets (blanched for 2 minutes if desired)
- Optional: pita chips, pretzels, or crackers for serving
Instructions
- Drain and rinse the chickpeas. For extra smooth hummus, place them in a microwave-safe bowl and heat for 1 minute until warm.
- In a food processor, combine the tahini and lemon juice. Process for 30 seconds until thickened and pale.
- Add the olive oil, minced garlic, and a pinch of salt. Process for 20 seconds until combined.
- Add the pumpkin puree, cumin, smoked paprika, and cinnamon. Process for 30 seconds until smooth.
- Add the warm chickpeas to the processor. Process for 1 minute, scraping down the sides halfway through.
- With the processor running, slowly drizzle in 2-3 tablespoons of ice-cold water. Process for 30-60 seconds until light and fluffy. Add more water if needed.
- Taste and adjust seasoning with more salt, lemon juice, or spices as desired.
- Wash and chop all vegetables. Arrange them on a large platter.
- Transfer the hummus to a shallow bowl. Use the back of a spoon to create a swirl pattern. Drizzle with olive oil, sprinkle with smoked paprika, and garnish with pumpkin seeds or black pepper if desired.
- Place the bowl of hummus in the center of the platter. Arrange the veggies around it in a circular pattern. Add pita chips or crackers in empty spaces. Serve immediately or refrigerate for up to 2 hours before serving.
Notes
For best texture, use warm chickpeas and ice-cold water. Hummus tastes better after resting for 30 minutes. Store hummus in an airtight container in the fridge for up to 5 days; stir in warm water or olive oil if it thickens. Do not freeze.
Nutrition
- Serving Size: 1/4 cup hummus + 1 c
- Calories: 200
- Sugar: 6
- Sodium: 350
- Fat: 11
- Saturated Fat: 1.5
- Carbohydrates: 22
- Fiber: 6
- Protein: 7
Keywords: Halloween, veggie tray, pumpkin hummus, fall appetizer, healthy snack, gluten-free, vegan, dairy-free



