Love this? Save it for later!
Share the inspiration with your friends
My niece, who is seven and takes her kitchen opinions very seriously, asked me why I couldn’t just crush the cookies in the bag with a rolling pin instead of dirtying the food processor. I started to explain about even texture and proper incorporation—then stopped. She was holding the bag of Oreos with this look that said she already knew the answer. So I handed her the rolling pin and let her go to town. The crumbs flew everywhere. Some ended up on the ceiling, I’m pretty sure. And you know what? The truffles turned out perfect anyway. Honestly, it was one of those moments where I realized I’ve been overcomplicating things for years. Maybe you’ve been there too—stuck in your ways, certain there’s only one right way to do something in the kitchen. This recipe humbled me in the best way. These Kid-Approved No-Bake Halloween Oreo Truffles are proof that simple, messy, and a little bit chaotic can still be absolutely delicious. I keep making them because every time I do, I remember that letting go of control in the kitchen sometimes gives you the best results.
Why You’ll Love This Recipe
These truffles have become my go-to for Halloween parties, classroom treats, and lazy weekend projects with my own kids. They are the kind of recipe that makes you look like a kitchen hero without actually doing much work.
- Quick & Easy: From start to finish, you’re looking at about 20 minutes of active prep time. The hardest part is waiting for them to chill in the fridge.
- Simple Ingredients: You only need four things. Four. And three of them are probably in your pantry right now.
- Perfect for Halloween: These are a guaranteed hit at any spooky gathering. Kids go wild for them, and adults sneak them when they think nobody is watching.
- Crowd-Pleaser: I’ve brought these to three different Halloween parties this year, and I’ve yet to bring a single one home. They disappear fast.
- Unbelievably Delicious: The texture is this perfect combination of creamy and crunchy. The chocolate coating gives way to a soft, fudge-like center. It’s next-level comfort food in a bite-sized package.
What makes these different from other truffle recipes is the no-bake factor. No oven, no stove, no complicated tempering of chocolate. Just a food processor (or a rolling pin and a Ziploc bag, as my niece proved), a bowl, and a refrigerator. It’s the kind of recipe that builds confidence in young cooks because it’s practically foolproof. And honestly, it’s the kind that makes you close your eyes after the first bite because it tastes way more complicated than it actually is.
What Ingredients You Will Need
This recipe keeps things refreshingly simple. You don’t need to hunt down specialty baking supplies or spend a fortune at the grocery store. These are everyday ingredients that come together to create something truly special.
- 1 (14.3-ounce) package Oreo cookies (regular, not Double Stuf—the original ratio of cookie to cream is perfect here)
- 1 (8-ounce) block cream cheese, softened to room temperature (I always use Philadelphia brand; the texture is consistently the best for truffles)
- 12 ounces orange candy melts (I like Wilton brand for their smooth melting and vibrant color)
- 1 tablespoon coconut oil or vegetable shortening (this helps thin the candy melts for easier dipping and a shinier finish)
For decoration (optional but highly recommended):
- Black and green candy melts for drizzling and piping
- Halloween sprinkles (eyeballs, bats, ghosts—the spookier the better)
- Pretzel sticks broken in half to look like bones (this is my kids’ favorite addition)
A few notes on ingredient selection. I’ve tried this with reduced-fat Oreos, and honestly, the texture of the truffle filling wasn’t as creamy. Stick with the original if you can. For the cream cheese, make sure it’s truly softened. If it’s cold, you’ll end up with lumpy truffles, and nobody wants that. I usually take mine out of the fridge about an hour before I start. If you’re short on time, you can microwave it in 10-second bursts until it’s soft but not warm. As for the candy melts, I’ve tested this with white chocolate chips and regular chocolate chips too. They work, but the candy melts give you that perfect snap when you bite into the truffle, and the colors are so much more vibrant for Halloween decorating. For a dairy-free option, use a vegan cream cheese and dairy-free dark chocolate chips instead of candy melts.
Equipment Needed
You don’t need a fancy kitchen to make these truffles. Here’s what you’ll actually use:
- Food processor (or a sturdy Ziploc bag and a rolling pin—my niece’s method works perfectly)
- Large mixing bowl
- Electric hand mixer or sturdy spatula (the mixer makes it easier to get the cream cheese fully incorporated)
- Baking sheet lined with parchment paper or a silicone baking mat
- Small microwave-safe bowls for melting the candy coatings
- Fork or dipping tool for coating the truffles
- Piping bags or small Ziploc bags for decorating
If you don’t have a food processor, don’t run out and buy one just for this recipe. The Ziploc bag method is actually kind of fun, especially if you have kids who need to burn off some energy. I’ve also used a rolling pin on cookies spread out on a cutting board. It’s messier, but it works. For the dipping tool, I’ve used chopsticks, skewers, and even a bent paperclip in a pinch. A regular fork works fine too—just tap the excess chocolate off gently.
Preparation Method
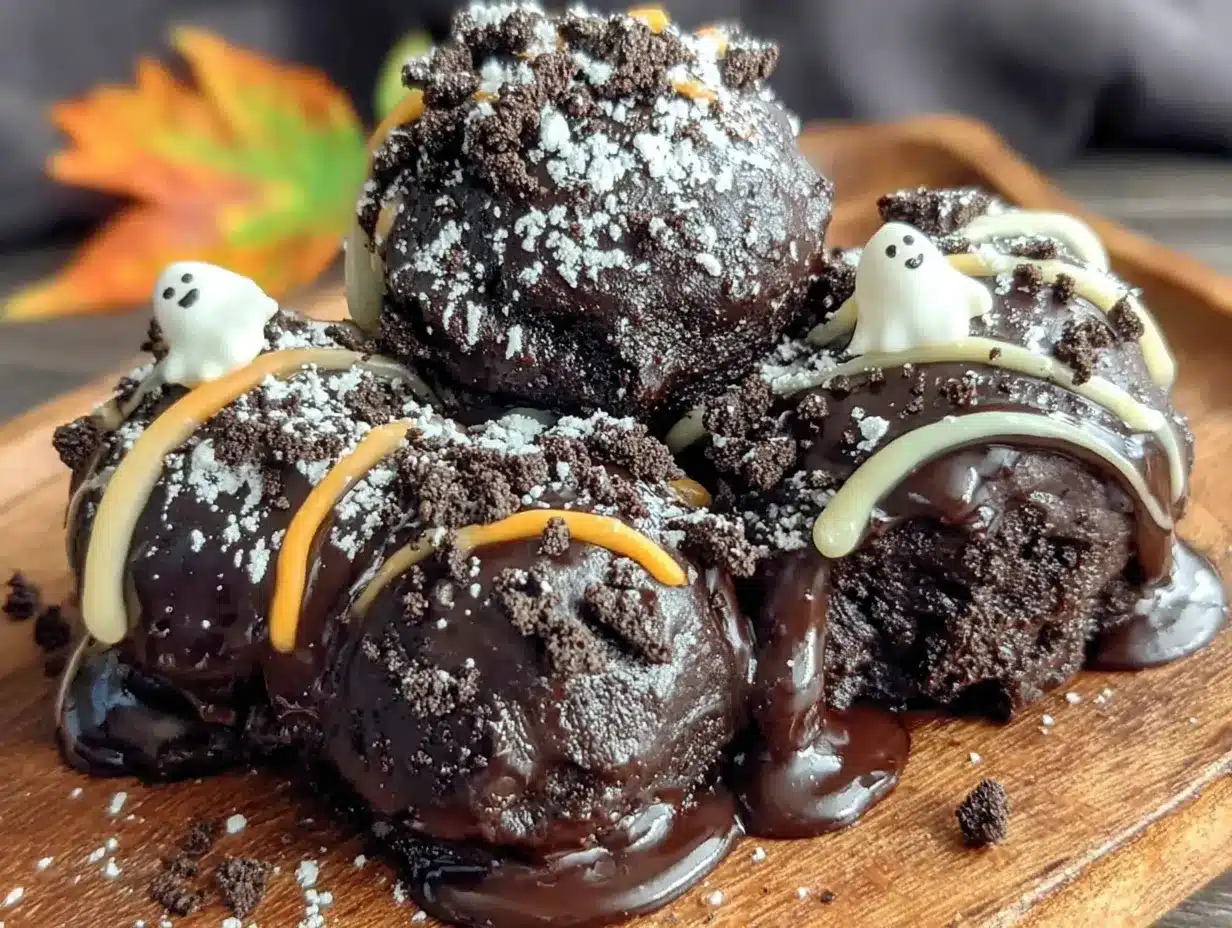
Let’s get into the actual making of these little bites of Halloween happiness. This is where the magic happens.
- Crush the Oreos. Place the entire package of Oreos (filling and all) into your food processor. Pulse until you have fine crumbs. If you’re going the rolling pin route, put the cookies in a large Ziploc bag, squeeze out the air, and go to town. You want crumbs that are mostly uniform, with no large chunks remaining. This should take about 30 seconds in the food processor or about 2 minutes of enthusiastic rolling pin action.
- Mix in the cream cheese. Transfer the Oreo crumbs to your large mixing bowl. Add the softened cream cheese. Using your hand mixer on low speed (or a sturdy spatula if you want an arm workout), mix until everything is fully combined. The mixture should look like a uniform, dark brown dough. It will be quite stiff. Don’t overmix, or the truffles can become greasy. About 1 minute with the mixer or 2 minutes by hand is perfect. Taste a tiny bit—I won’t tell anyone.
- Form the truffle balls. Using a small cookie scoop or your hands, roll the mixture into 1-inch balls. I like to use a 1-tablespoon measuring spoon to keep them uniform. Place each ball on your parchment-lined baking sheet. You should get about 24 to 28 truffles from this batch. If your hands get sticky, lightly dampen them with water. Once all the balls are formed, pop the baking sheet into the refrigerator for at least 30 minutes. This is crucial—chilled truffles are much easier to dip without them falling apart in the melted coating.
- Melt the orange candy melts. Place the orange candy melts and the coconut oil in a microwave-safe bowl. Microwave in 30-second intervals, stirring thoroughly after each interval, until completely smooth. Be careful not to overheat, or the candy will seize and become grainy. If it does seize, you can try stirring in a tiny bit more coconut oil, but it’s usually better to start fresh. The coconut oil helps the coating flow smoothly and gives it a beautiful shine.
- Dip the truffles. Remove the chilled truffle balls from the fridge. Working with one at a time, drop a truffle into the melted orange coating. Using your fork or dipping tool, gently turn it to coat completely. Lift it out and let the excess drip off. You can tap the fork gently on the edge of the bowl to help. Place the coated truffle back on the parchment-lined baking sheet. Repeat with all the truffles. Work quickly—if the coating starts to thicken, pop it back in the microwave for 10 seconds. If the truffles start to feel soft, put the whole tray back in the fridge for 10 minutes before continuing.
- Decorate (the fun part). While the orange coating is still wet, add your Halloween sprinkles. For the black and green drizzles, melt a small amount of black and green candy melts separately (about 1/4 cup each) in the microwave. Transfer each to a small piping bag or a Ziploc bag with the tiniest corner snipped off. Drizzle over the set truffles in whatever spooky pattern you like. Spider webs, ghosts, or just random zigzags all work great. If you’re using pretzel sticks for bones, press one into the side of each truffle before the coating sets completely.
- Let them set. Place the decorated truffles back in the refrigerator for another 15 to 20 minutes, or until the coating is completely firm. Then they’re ready to serve.
Cooking Tips & Techniques
I’ve made these truffles maybe a dozen times now, and I’ve learned a few things the hard way so you don’t have to.
Don’t skip the chilling step. The first time I made these, I was in a hurry and only chilled the truffle balls for about 10 minutes. Big mistake. They started falling apart in the melted coating, and I ended up with a bowl of chocolate soup with Oreo bits floating in it. Lesson learned. Thirty minutes minimum in the fridge, and an hour is even better. If you have time, you can even freeze them for 15 minutes before dipping.
Temperature matters for the coating. If your candy melts are too hot, they’ll melt the truffle balls and you’ll get that same sad soup situation. If they’re too cool, the coating will be thick and lumpy. The sweet spot is when the melted candy is warm to the touch but not hot. Think bathwater temperature, not coffee temperature.
Work in small batches. Don’t try to dip all the truffles at once if you’re not experienced. Take out 6 to 8 from the fridge at a time, dip them, decorate them, and then move on to the next batch. This keeps the truffles cold and the coating from getting too thick.
Multitask smartly. While the truffle balls are chilling in the fridge, melt your candy melts and get your decorations ready. Set up a little assembly line on your counter. It makes the whole process go much faster and is less stressful.
If the coating cracks. Sometimes the coating on the finished truffles will crack after they’ve set. This usually happens if the truffle balls were too cold when you dipped them, or if the temperature change was too drastic. It’s purely cosmetic, and honestly, cracked truffles look kind of cool for Halloween—like they’re ancient artifacts or something.
Variations & Adaptations
One of the best things about this recipe is how easy it is to change up. Here are some variations I’ve tried and loved.
- Peanut Butter Monster Truffles: Swap out 2 tablespoons of the cream cheese for creamy peanut butter. The peanut butter adds a salty note that balances the sweetness perfectly. My kids call these “monster brains” and they disappear even faster than the originals.
- Dark Chocolate Witches’ Brew: Use dark chocolate candy melts instead of orange for a more sophisticated version. Drizzle with white chocolate to look like spider webs. These are great for adult Halloween parties where you want something a little less sugary.
- Minty Ghost Truffles: Add 1/2 teaspoon of peppermint extract to the Oreo mixture along with the cream cheese. Coat in white candy melts and add tiny black eyes with black candy melts. They taste like thin mints and look adorable.
- Gluten-Free Friendly: Use gluten-free chocolate sandwich cookies (like Glutino or Kinnikinnick brands) instead of Oreos. Everything else in the recipe is naturally gluten-free. I’ve made these for a friend with celiac disease, and she said they were the best truffles she’d ever had.
- Vegan Version: Use vegan cream cheese and dairy-free chocolate chips (melted with a bit of coconut oil) instead of candy melts. The texture is slightly different—a bit softer—but the taste is still incredible.
Serving & Storage Suggestions
These truffles are best served cold, straight from the fridge. The coating has a satisfying snap, and the filling is firm but creamy. I like to arrange them on a platter with some fake spider webs and plastic spiders scattered around for maximum Halloween effect. A few candy corn scattered around never hurts either.
They pair beautifully with a glass of cold milk for the kids or a hot cup of coffee for the adults. If you’re serving them at a party, you can also set them out on a bed of crushed black Oreos to look like dirt. It’s a little extra, but it always gets compliments.
Storage: Keep these truffles in an airtight container in the refrigerator. They’ll stay fresh for up to 2 weeks, though I’ve never had them last that long in my house. You can also freeze them for up to 3 months. To freeze, place the finished truffles in a single layer in a freezer-safe container, with parchment paper between layers. Thaw in the refrigerator overnight before serving.
The flavors actually develop and meld together after a day or two in the fridge. The truffles become even creamier and more fudge-like. So if you can resist eating them all immediately, they’re even better the next day.
For reheating (if you can even call it that), just let them sit at room temperature for about 5 minutes before serving. This takes the chill off without making them soft.
Nutritional Information & Benefits
Let’s be real—these are a treat, not a health food. But here’s the breakdown if you’re curious.
Per truffle (based on 24 servings): approximately 150 calories, 8g fat, 19g carbohydrates, 2g protein, 12g sugar. These numbers will vary slightly depending on your specific ingredients and how much coating you use.
The cream cheese adds a small amount of calcium and protein, and the Oreos provide a quick burst of energy (mostly from sugar, let’s be honest). The dark chocolate version offers a bit of antioxidants from the cocoa. But the real benefit here is the joy these bring to a Halloween celebration. Sometimes food is about more than nutrients—it’s about making memories with your kids and sharing something delicious with the people you love.
For those with dietary restrictions, the gluten-free and vegan variations above work beautifully. And if you’re watching your sugar intake, you can cut the truffles in half and make them smaller—they’re rich enough that a little goes a long way.
Conclusion
These Kid-Approved No-Bake Halloween Oreo Truffles have become a staple in my Halloween rotation, and I don’t see that changing anytime soon. They’re simple enough for a seven-year-old to help make (and improve upon), impressive enough to bring to any party, and delicious enough that everyone fights over the last one. The best part? You can customize them to fit whatever spooky theme you’re going for. Spider webs, ghosts, pumpkins, monsters—the decorating possibilities are endless. I’d love to hear how yours turn out. Drop a comment below and tell me what decorations you used, or tag me in your photos. And if you come up with a variation I haven’t tried, definitely share that too. Happy Halloween, and happy cooking!
Frequently Asked Questions
Can I use Double Stuf Oreos for this recipe?
You can, but the truffles will be a bit softer and sweeter because there’s more filling. If you use Double Stuf, you might want to reduce the cream cheese by about 2 tablespoons to keep the texture right. I’ve tried it both ways, and I prefer the original for a firmer truffle.
Why did my candy melts seize up?
This usually happens when the candy melts get too hot or when even a tiny drop of water gets into the bowl. Make sure your bowl and utensils are completely dry. Microwave in short bursts and stir well between each one. If it does seize, you can try adding a teaspoon of coconut oil and stirring vigorously, but sometimes it’s better to just start fresh.
Can I make these truffles ahead of time?
Absolutely. In fact, they taste better after a day in the fridge. You can make them up to 2 weeks in advance and store them in an airtight container in the refrigerator. They’re also freezer-friendly for up to 3 months. Just thaw them in the fridge overnight before serving.
My truffle balls are too sticky to roll. What did I do wrong?
This usually means your cream cheese was too soft or you added too much. If the mixture is too sticky, pop it in the fridge for 15 to 20 minutes to firm up. If it’s still too sticky after that, you can add a few more crushed Oreos to balance it out. Conversely, if the mixture is too dry and crumbly, add a tiny bit more cream cheese.
Can I use white chocolate chips instead of candy melts?
Yes, but white chocolate chips don’t melt as smoothly and won’t give you that vibrant orange color. If you use white chocolate, add a teaspoon of coconut oil to help thin it out, and use gel food coloring (not liquid, which can cause the chocolate to seize) to get your Halloween colors.
Pin This Recipe!

Kid-Approved No-Bake Halloween Oreo Truffles: 4-Ingredient Easy

These no-bake Halloween Oreo truffles are a quick and easy treat made with just four simple ingredients. Perfect for parties, they feature a creamy Oreo filling coated in vibrant orange candy melts and decorated with spooky sprinkles.
- Prep Time: 20 minutes
- Cook Time: 0 minutes
- Total Time: 1 hour 10 minutes (includes chilling time)
- Yield: 24 servings 1x
- Category: Dessert
- Cuisine: American
Ingredients
- 1 (14.3-ounce) package Oreo cookies (regular, not Double Stuf)
- 1 (8-ounce) block cream cheese, softened to room temperature
- 12 ounces orange candy melts
- 1 tablespoon coconut oil or vegetable shortening
- Black and green candy melts for drizzling and piping (optional)
- Halloween sprinkles (optional)
- Pretzel sticks broken in half to look like bones (optional)
Instructions
- Crush the Oreos: Place the entire package of Oreos (filling and all) into a food processor. Pulse until you have fine crumbs. Alternatively, put the cookies in a large Ziploc bag and crush with a rolling pin until mostly uniform crumbs form.
- Mix in the cream cheese: Transfer the Oreo crumbs to a large mixing bowl. Add the softened cream cheese. Using a hand mixer on low speed or a sturdy spatula, mix until fully combined and a uniform, dark brown dough forms. Do not overmix.
- Form the truffle balls: Using a small cookie scoop or your hands, roll the mixture into 1-inch balls. Place each ball on a parchment-lined baking sheet. You should get about 24 to 28 truffles. Refrigerate for at least 30 minutes.
- Melt the orange candy melts: Place the orange candy melts and coconut oil in a microwave-safe bowl. Microwave in 30-second intervals, stirring thoroughly after each, until completely smooth.
- Dip the truffles: Remove the chilled truffle balls from the fridge. Working one at a time, drop a truffle into the melted orange coating. Using a fork or dipping tool, turn to coat completely. Lift out and let excess drip off. Place back on the parchment-lined baking sheet. Repeat with all truffles.
- Decorate: While the orange coating is still wet, add Halloween sprinkles. For drizzles, melt black and green candy melts separately, transfer to piping bags or Ziploc bags with a tiny corner snipped off, and drizzle over the set truffles. If using pretzel sticks, press one into the side of each truffle before the coating sets.
- Let them set: Place the decorated truffles back in the refrigerator for another 15 to 20 minutes, or until the coating is completely firm. Serve cold.
Notes
Don’t skip the chilling step—chilled truffle balls are easier to dip. If the candy melts seize, try adding a teaspoon of coconut oil. For best results, use original Oreos and full-fat cream cheese. Truffles can be stored in an airtight container in the refrigerator for up to 2 weeks or frozen for up to 3 months.
Nutrition
- Serving Size: 1 truffle
- Calories: 150
- Sugar: 12
- Sodium: 85
- Fat: 8
- Saturated Fat: 4
- Carbohydrates: 19
- Protein: 2
Keywords: Halloween Oreo truffles, no-bake truffles, easy Halloween dessert, Oreo truffles, 4-ingredient dessert, kid-friendly Halloween treat



