Love this? Save it for later!
Share the inspiration with your friends
My sister asked why I couldn’t just roast the squash whole instead of peeling and cubing it first. I stared at her for a second, a paring knife in one hand and a dangerously slippery honeynut squash in the other. I started to explain why that wouldn’t work — then stopped. Honestly, I had no good reason. I’d just always done it the hard way because that’s how the recipe said to do it.
So I tried it her way. I stabbed the little squashes a few times with a fork, threw them on a sheet pan, and roasted them until they were collapsing and caramelized. Let me tell you, it was a game-changer. The flesh scooped out like butter, and the flavor was way more concentrated because it hadn’t been diluted by water or steam during a stovetop boil. I felt a little silly, honestly, for not figuring this out sooner. My sister just gave me a look — the kind that says I told you so — and went back to her phone.
That moment changed how I make this quick honeynut squash soup. It went from a weekend project to a weeknight miracle. You know that feeling when you find a shortcut that actually makes the food better? That’s this recipe. The brown butter adds this nutty, toasty depth that makes the soup taste like it simmered all day, even though it comes together in about 30 minutes of active time. Maybe you’ve been there — staring at a squash, wondering if there’s an easier way. There is. And it starts with trusting the person who asks the simple question.
Why You’ll Love This Recipe
This isn’t just another squash soup recipe. I tested this version on a Tuesday night when I had exactly zero patience for complicated steps, and it worked so well it became my go-to. Here’s why I think you’ll feel the same way:
- Quick & Easy: From fridge to table in about 45 minutes, with only about 10 minutes of hands-on work. The oven does everything for you.
- Simple Ingredients: You need honeynut squash, butter, onion, garlic, broth, and a few pantry spices. That’s it.
- Perfect for Weeknights: This is the kind of meal that feels special but requires almost no effort. It’s cozy without being complicated.
- Crowd-Pleaser: I’ve served this to picky eaters, squash skeptics, and full-on foodies. Everyone goes back for seconds.
- Unbelievably Delicious: The brown butter takes this from “good” to “I can’t stop eating this” territory. It’s rich, nutty, and deeply comforting.
What makes this recipe different from the rest? It’s the technique. Roasting the squash whole locks in sweetness and prevents the soup from becoming watery. Then you finish it with brown butter that adds a layer of complexity you usually only get from hours of simmering. This is comfort food reimagined — faster, easier, but with the same soul-soothing satisfaction. Perfect for impressing your family on a busy Tuesday or turning a simple dinner into something memorable without the stress.
What Ingredients You Will Need
This recipe uses simple, wholesome ingredients to deliver bold flavor and satisfying texture without the fuss. Most of these are pantry staples or easy to find at any grocery store. Here’s what you’ll need:
For the Soup
- 4-5 honeynut squash (about 2 pounds total) — Look for squashes that feel heavy for their size with firm, unblemished skin. You can substitute butternut squash if needed, but honeynuts are sweeter and creamier.
- 1 tablespoon olive oil — Just enough to coat the squash before roasting. Use a good quality one for better flavor.
- 1 medium yellow onion, chopped — Adds savory depth. A sweet onion works well here too.
- 3 cloves garlic, smashed — I prefer smashing rather than mincing here because it releases flavor without burning during the sauté.
- 3 cups low-sodium vegetable broth — I recommend Better Than Bouillon for the best flavor. You can also use chicken broth if you’re not keeping it vegetarian.
- 1/2 teaspoon ground ginger — Adds warmth without overpowering. Fresh ginger works too — use about 1 teaspoon grated.
- 1/4 teaspoon cayenne pepper (optional) — Just a pinch for warmth. Leave it out if you prefer a milder soup.
- Salt and black pepper to taste — I use about 1 teaspoon of salt and 1/4 teaspoon of pepper, but adjust based on your broth.
For the Brown Butter Finish
- 3 tablespoons unsalted butter — Use a good quality butter here since it’s a star ingredient. Salted butter works too — just reduce the added salt.
- 1 tablespoon fresh sage leaves (optional) — Adds an earthy, aromatic note that pairs beautifully with the brown butter. Fry them in the butter for extra crunch.
- 1/4 cup heavy cream or coconut milk (optional) — For a richer, silkier texture. I often skip this on busy nights and it’s still fantastic.
Substitution Tip: For a dairy-free version, use vegan butter for the brown butter and coconut milk for the cream. The flavor profile shifts slightly but remains delicious. If you can’t find honeynut squash, butternut squash is the best substitute — just add an extra 10 minutes to the roasting time since they’re larger.
Equipment Needed
You don’t need a ton of fancy equipment for this recipe, which is part of why I love it. Here’s what you’ll need:
- Baking sheet — A half-sheet pan works perfectly. Line it with parchment paper for easier cleanup.
- Sharp knife and cutting board — For halving the squash after roasting and chopping the onion.
- Large pot or Dutch oven — I use my 5.5-quart Le Creuset, but any heavy-bottomed pot works. You need something that can hold the soup and withstand high heat for browning butter.
- Immersion blender — This is my preferred tool for silky smooth soup. If you don’t have one, a regular blender works — just work in batches and vent the lid to avoid steam buildup.
- Wooden spoon or silicone spatula — For stirring the brown butter and sautéing the aromatics.
- Measuring spoons and cups — Basic but necessary for accuracy.
Budget-Friendly Tip: If you don’t have an immersion blender, a standard countertop blender works fine. Just let the soup cool for a few minutes before blending, and hold the lid down with a kitchen towel to prevent splatters. I’ve used my $20 blender for years and it gets the job done perfectly.
Preparation Method
Let’s get cooking. This method is designed to be efficient — you’ll multitask where it makes sense and avoid washing extra dishes. Here’s how it goes:
- Preheat your oven to 400°F (200°C). While it heats, wash the honeynut squashes and pat them dry. Use a fork or sharp knife to poke 4-5 holes in each squash — this lets steam escape and prevents any explosive situations in your oven. Place them on a parchment-lined baking sheet and drizzle with the olive oil. Rub the oil all over the skins with your hands — yes, it’s a little messy, but it’s worth it.
- Roast the squash for 35-45 minutes. They’re done when you can easily pierce them with a fork and the skin looks slightly wrinkled and caramelized. The smell at this point is incredible — sweet and roasty. While they roast, you can prep your onion and garlic. Set them aside.
- Remove the squash from the oven and let them cool for 5 minutes. This is important — trying to handle them right away will burn your fingers. Once they’re cool enough to touch, slice each one in half lengthwise. Scoop out the seeds and stringy bits with a spoon and discard them. Then scoop the flesh into a bowl. It should come out easily, almost like pumpkin puree.
- While the squash cools, start the brown butter. Place your large pot or Dutch oven over medium heat. Add the 3 tablespoons of butter and let it melt, swirling the pan occasionally. It will foam up, then the foam will subside, and you’ll start to see brown specks forming at the bottom. This takes about 3-4 minutes. Watch it carefully — brown butter goes from perfect to burnt very quickly. Once it smells nutty and toasty and the specks are a deep amber color, immediately remove the pot from the heat.
- Set aside 1 tablespoon of the brown butter for drizzling later. Pour it into a small bowl and set it near the stove. Return the pot to medium heat with the remaining brown butter.
- Add the chopped onion to the pot. Sauté for 4-5 minutes until softened and translucent, scraping up any brown bits from the bottom of the pot. Add the smashed garlic and cook for another minute until fragrant. The smell at this point is heavenly — nutty butter, sweet onion, and garlic all mingling together.
- Add the roasted squash flesh and the vegetable broth. Stir in the ground ginger, cayenne (if using), and a generous pinch of salt and pepper. Bring the soup to a gentle simmer, then reduce the heat to low and let it cook for 5 minutes. This allows all the flavors to meld together.
- Remove the pot from the heat. Use your immersion blender to puree the soup until completely smooth. If you’re using a countertop blender, work in batches and fill it no more than halfway. Remove the center cap from the lid and cover it with a kitchen towel to let steam escape. Blend until velvety smooth.
- Stir in the heavy cream or coconut milk if using. Taste and adjust the seasoning — you might want more salt, a pinch more cayenne, or a crack of black pepper. The soup should taste rich, sweet from the roasted squash, and deeply nutty from the brown butter.
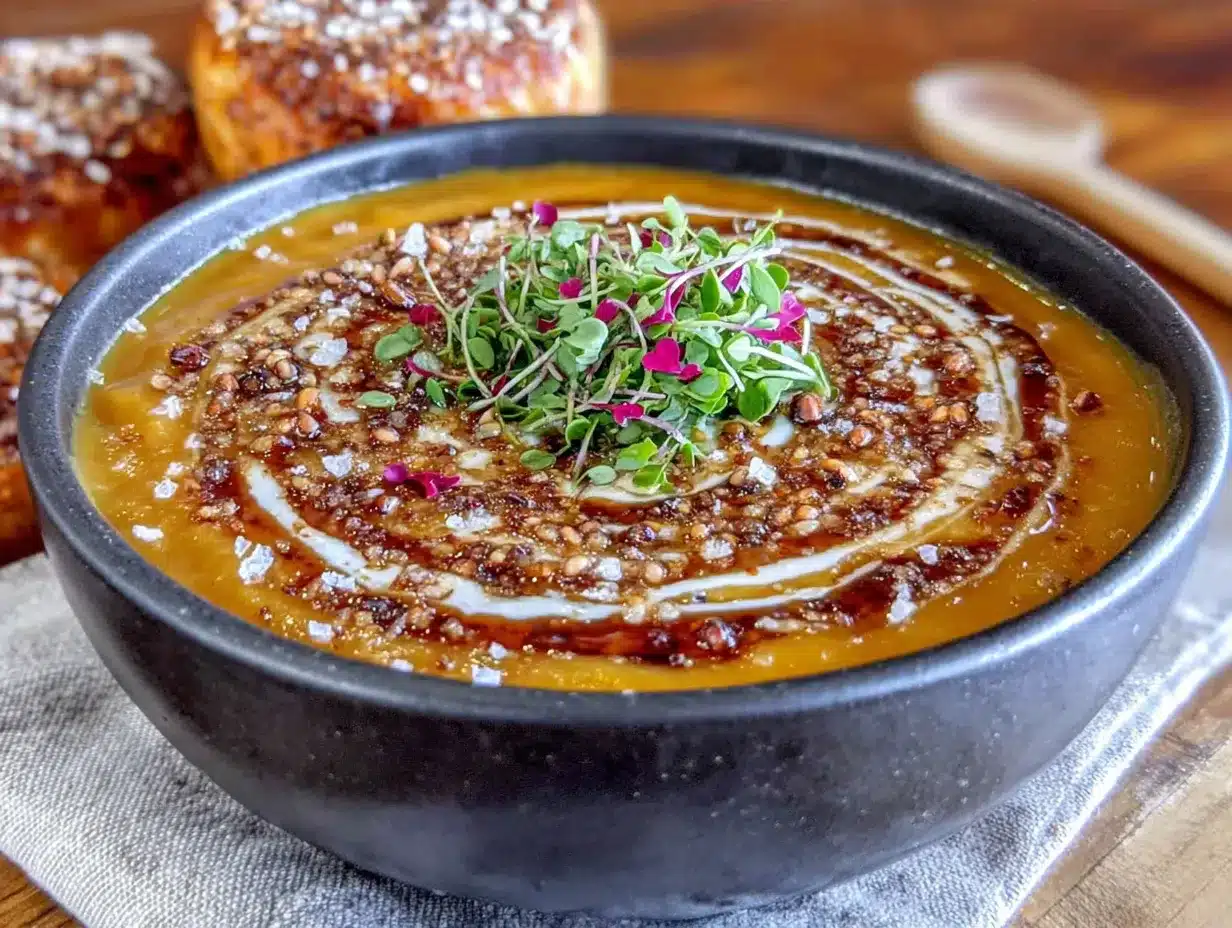
- Ladle the soup into bowls. Drizzle the reserved brown butter over the top. If you fried sage leaves in the brown butter earlier, crumble them over each bowl for a gorgeous finish. Serve immediately with crusty bread or a simple green salad.
Cooking Tips & Techniques
I’ve made this soup more times than I can count, and I’ve learned a few things along the way. Here are my best tips for getting it right every time:
- Don’t skip the poking step. I once forgot to poke the squash and one exploded in my oven. It wasn’t a disaster, but cleaning caramelized squash off the oven floor is not how I wanted to spend my evening. Just poke them.
- Brown butter is all about timing. The first time I made brown butter, I walked away to answer a text and came back to burnt butter that smelled like burnt popcorn. Stay at the stove, watch it closely, and remove it from heat the second you see brown specks. The residual heat will continue cooking it slightly.
- Use low-sodium broth. This lets you control the salt level. I’ve made the mistake of using regular broth and ending up with soup that was way too salty, especially after the brown butter added its own salty notes.
- Toast the ginger for extra depth. If you have an extra minute, add the ground ginger to the pot with the onion and let it toast for 30 seconds before adding the broth. It wakes up the spices and makes them more aromatic.
- Blend in stages if needed. If your immersion blender isn’t powerful enough, don’t force it. Transfer the soup to a regular blender in batches. I learned this the hard way when my old immersion blender overheated and shut off mid-blend.
- Make it ahead. This soup actually tastes better the next day after the flavors have had time to meld. Make it on Sunday and enjoy it for lunch all week. Just reheat gently on the stove or in the microwave.
Variations & Adaptations
This recipe is flexible, and I’ve tried several variations depending on what I have in the fridge or my mood. Here are some of my favorites:
- Spicy Thai Twist: Swap the ginger and cayenne for 1 tablespoon of red curry paste. Add a can of coconut milk instead of cream. Finish with fresh cilantro and a squeeze of lime. The spicy, creamy, tangy flavors are incredible together.
- Smoky & Savory: Add 1/2 teaspoon of smoked paprika and a pinch of chipotle powder when you sauté the onion. Top with crispy bacon bits and a dollop of sour cream. This version feels almost like a loaded baked potato soup.
- Vegan & Dairy-Free: Use vegan butter for the brown butter (Miyoko’s works beautifully) and replace the cream with full-fat coconut milk. The coconut milk adds a subtle sweetness that complements the squash perfectly.
- Apple-Squash Fusion: Roast a peeled and chopped apple alongside the squash. Add it to the pot with the broth. The apple adds natural sweetness and a hint of tartness that brightens the whole soup.
- Herb-Infused: Add a sprig of fresh rosemary and a few sprigs of thyme to the pot while the soup simmers. Remove them before blending. The herbal notes make the soup feel extra elegant.
I personally love the Thai twist version on cold, rainy days when I want something warming with a kick. It’s become my secret weapon for impressing dinner guests without much extra effort.
Serving & Storage Suggestions
This soup is versatile and works for so many occasions. Here’s how I like to serve and store it:
- Serving Temperature: Serve it hot, straight from the pot. The brown butter drizzle on top should be warm and liquid — if it solidifies, just reheat it gently in the microwave for a few seconds.
- Presentation: Ladle the soup into wide, shallow bowls. Drizzle the reserved brown butter in a zigzag pattern. Top with a few fried sage leaves, a sprinkle of flaky sea salt, and a crack of black pepper. It looks stunning with minimal effort.
- Complementary Dishes: This soup pairs beautifully with crispy garlic bread for dipping, or a simple arugula salad with lemon vinaigrette to cut through the richness. For a heartier meal, serve it alongside a simple roasted chicken or a grilled cheese sandwich.
- Storage: Let the soup cool completely, then transfer it to an airtight container. It will keep in the refrigerator for up to 5 days. The flavors actually deepen and improve over time.
- Freezing: This soup freezes beautifully. Pour it into freezer-safe bags or containers, leaving about an inch of headspace for expansion. It will keep for up to 3 months. Thaw overnight in the refrigerator before reheating.
- Reheating: Reheat gently on the stove over medium-low heat, stirring occasionally. If the soup has thickened, add a splash of broth or water to thin it out. You can also microwave individual portions in 30-second bursts, stirring between each.
Nutritional Information & Benefits
This soup is as good for you as it is delicious. Here’s a rough breakdown per serving (based on 4 servings, without the optional cream):
- Calories: ~180 per serving
- Fat: 10g (from the brown butter and olive oil)
- Carbohydrates: 22g
- Fiber: 4g
- Protein: 3g
- Vitamin A: Over 200% of your daily needs (hello, eye health!)
- Vitamin C: About 20% of your daily needs
Honeynut squash is packed with beta-carotene, which your body converts into vitamin A. It’s also a good source of fiber, which keeps you full and supports digestion. The brown butter adds healthy fats that help your body absorb the fat-soluble vitamins in the squash. This soup is naturally gluten-free and can easily be made vegan or dairy-free with the substitutions mentioned above. It’s a bowl of comfort that actually nourishes you — my favorite kind of meal.
Conclusion
This quick honeynut squash soup with brown butter has become a staple in my kitchen for good reason. It’s the recipe I turn to when I want something that feels special but doesn’t demand hours of my time. The roasted squash gives it a natural sweetness, the brown butter adds a nutty depth, and the whole thing comes together with minimal fuss. It’s proof that you don’t need complicated techniques or a long ingredient list to make something truly memorable.
I’d love for you to try this and make it your own. Maybe you’ll add extra spice, swap in coconut milk, or serve it with a giant hunk of crusty bread. Whatever you do, trust your instincts — even if they go against what the recipe says. My sister taught me that much. If you make this soup, drop a comment below and let me know how it turned out. Share your variations, your wins, your happy accidents. Happy cooking, friends!
Frequently Asked Questions
Can I use butternut squash instead of honeynut?
Absolutely. Butternut squash is the best substitute. Since they’re larger, you’ll need about one medium butternut squash (around 2 pounds) and you’ll need to roast it for about 50-60 minutes instead of 35-45. The flavor will be slightly less sweet, but it’s still delicious.
How do I prevent the brown butter from burning?
Stay close to the stove and watch it carefully. Once the butter melts, it will foam, then the foam will subside, and you’ll see brown specks form at the bottom. The second you see those specks and smell a nutty aroma, remove it from the heat. The residual heat will continue cooking it slightly.
Can I make this soup in an Instant Pot?
Yes! Use the sauté function to brown the butter and cook the onion and garlic. Add the roasted squash and broth, then pressure cook on high for 5 minutes. Quick release, then blend as directed. It saves even more time on busy nights.
Is this soup freezer-friendly?
Yes, it freezes beautifully. Let it cool completely, then transfer to freezer-safe containers or bags. It will keep for up to 3 months. Thaw overnight in the refrigerator and reheat gently on the stove. The texture remains smooth and creamy after thawing.
What can I use instead of heavy cream to keep it dairy-free?
Full-fat coconut milk is my favorite dairy-free substitute. It adds a subtle sweetness and creamy texture that pairs beautifully with the squash. You can also use cashew cream or oat milk for a lighter option, though the soup won’t be as rich.
Pin This Recipe!

Quick & Easy Honeynut Squash Soup with Brown Butter

This quick honeynut squash soup with brown butter is a weeknight miracle—roasting the squash whole locks in sweetness and prevents a watery soup, while the nutty brown butter adds deep, comforting flavor. It comes together in about 45 minutes with minimal hands-on work.
- Prep Time: 10 minutes
- Cook Time: 35 minutes
- Total Time: 45 minutes
- Yield: 4 servings 1x
- Category: Soup
- Cuisine: American
Ingredients
- 4–5 honeynut squash (about 2 pounds total)
- 1 tablespoon olive oil
- 1 medium yellow onion, chopped
- 3 cloves garlic, smashed
- 3 cups low-sodium vegetable broth
- 1/2 teaspoon ground ginger
- 1/4 teaspoon cayenne pepper (optional)
- Salt and black pepper to taste
- 3 tablespoons unsalted butter
- 1 tablespoon fresh sage leaves (optional)
- 1/4 cup heavy cream or coconut milk (optional)
Instructions
- Preheat your oven to 400°F (200°C). Wash the honeynut squashes and pat them dry. Use a fork or sharp knife to poke 4-5 holes in each squash. Place them on a parchment-lined baking sheet and drizzle with olive oil. Rub the oil all over the skins.
- Roast the squash for 35-45 minutes until easily pierced with a fork and the skin looks wrinkled and caramelized. While they roast, prep the onion and garlic.
- Remove the squash from the oven and let them cool for 5 minutes. Slice each in half lengthwise, scoop out the seeds and stringy bits, then scoop the flesh into a bowl.
- While the squash cools, start the brown butter. Place a large pot or Dutch oven over medium heat. Add the 3 tablespoons of butter and let it melt, swirling occasionally. It will foam, then the foam will subside, and brown specks will form at the bottom (about 3-4 minutes). Once it smells nutty and the specks are deep amber, immediately remove from heat.
- Set aside 1 tablespoon of the brown butter for drizzling later. Return the pot to medium heat with the remaining brown butter.
- Add the chopped onion to the pot. Sauté for 4-5 minutes until softened and translucent. Add the smashed garlic and cook for another minute until fragrant.
- Add the roasted squash flesh and the vegetable broth. Stir in the ground ginger, cayenne (if using), and a generous pinch of salt and pepper. Bring to a gentle simmer, then reduce heat to low and cook for 5 minutes.
- Remove the pot from the heat. Use an immersion blender to puree the soup until completely smooth. If using a countertop blender, work in batches, fill no more than halfway, remove the center cap from the lid, and cover with a kitchen towel to let steam escape. Blend until velvety smooth.
- Stir in the heavy cream or coconut milk if using. Taste and adjust seasoning.
- Ladle the soup into bowls. Drizzle the reserved brown butter over the top. If using, crumble fried sage leaves over each bowl. Serve immediately with crusty bread or a simple green salad.
Notes
Don’t skip poking the squash to prevent explosions. Brown butter can burn quickly—watch it closely. Use low-sodium broth to control salt. For a dairy-free version, use vegan butter and coconut milk. The soup tastes even better the next day.
Nutrition
- Serving Size: 1 serving (about 1.5
- Calories: 180
- Sugar: 8
- Sodium: 480
- Fat: 10
- Saturated Fat: 5
- Carbohydrates: 22
- Fiber: 4
- Protein: 3
Keywords: honeynut squash soup, brown butter, quick soup, fall soup, easy weeknight dinner, vegetarian soup, gluten-free soup



