Love this? Save it for later!
Share the inspiration with your friends
My brother claimed to hate pumpkin for thirty-four years. Thirty-four years of declining pumpkin pie at Thanksgiving, making faces at pumpkin spice lattes, and giving me that look whenever I mentioned anything remotely gourd-related. Then I made these Biscoff Pumpkin Cheesecake Bars for our annual fall gathering, and I found him standing at the kitchen counter with crumbs on his shirt, holding a second bar, saying, “Wait, these have pumpkin in them?”
I mean, honestly, I didn’t plan it that way. I was just trying to bring something that would actually get eaten. You know that feeling when you spend hours on a dish and it sits there untouched? Yeah, I’ve been there too many times. So I went with a crowd-pleaser approach – the kind of dessert that disappears before you even get a chance to grab one for yourself. And let me tell you, watching my pumpkin-skeptic brother go back for thirds was one of those quiet victories you just don’t forget.
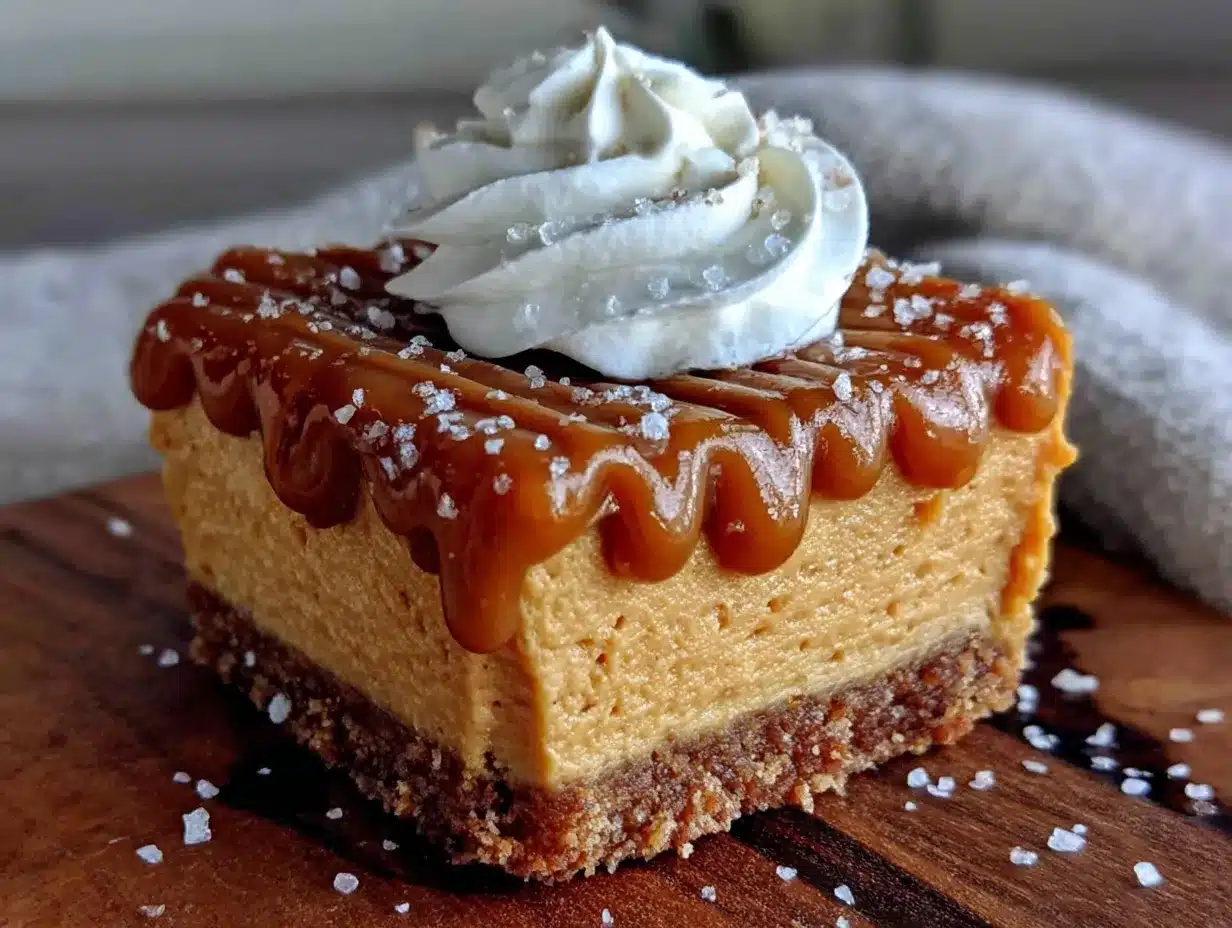
These bars start with a buttery Biscoff cookie crust that’s basically impossible to resist. Then comes a layer of creamy cheesecake swirled with spiced pumpkin puree, all topped with more crushed Biscoff cookies because why stop at one layer? The texture is this perfect combination of crunchy, creamy, and silky all at once. And the flavor? It’s like fall decided to throw a party and invited all the best ingredients.
The thing that really got me, though, was how simple they are to put together. No water bath, no complicated techniques, no fussing over cracks in the cheesecake. Just straightforward steps that deliver something that looks like you spent all day in the kitchen. Perfect for when you’re hosting and want to impress without the stress.
Why You’ll Love This Recipe
Look, I’ve tested a lot of pumpkin cheesecake recipes over the years. Some were too dense, some were too sweet, and some just didn’t have that wow factor you want when you’re serving guests. These bars are different. They’ve got that something special that makes people ask for the recipe before they even finish their first bite.
- Quick & Easy: Comes together in under an hour, with most of that time being hands-off baking. Perfect for busy weeknights or last-minute dinner party additions.
- Simple Ingredients: No fancy grocery trips needed. You likely already have most of these pantry staples, and Biscoff cookies are easy to find these days.
- Perfect for Fall Gatherings: Great for Thanksgiving, Friendsgiving, potlucks, or any occasion where you want to bring something that screams autumn without being basic.
- Crowd-Pleaser: Always gets rave reviews from kids and adults alike. Even pumpkin skeptics (I’ve got the proof) come back for seconds.
- Unbelievably Delicious: The combination of spiced pumpkin, tangy cream cheese, and caramelized Biscoff is next-level comfort food. It’s the kind of dessert that makes you close your eyes after the first bite.
What makes this recipe different from the rest? It’s the balance. The Biscoff crust isn’t too sweet, the cheesecake layer is perfectly tangy, and the pumpkin swirl adds just enough spice without overwhelming everything. I spent three batches getting the ratios right, and let me tell you, my neighbors were very happy about that testing phase.
This recipe isn’t just good – it’s the kind that makes you want to host a dinner party just so you have an excuse to make it again. It’s comfort food reimagined, with that perfect combination of textures and flavors that feels both familiar and exciting. Perfect for impressing guests without stress, or turning a simple fall evening into something memorable.
What Ingredients You Will Need
This recipe uses simple, wholesome ingredients to deliver bold flavor and satisfying texture without the fuss. Most of these are pantry staples, especially if you’re already a fan of fall baking.
For the Biscoff Crust
- 2 cups Biscoff cookie crumbs (about 25-30 cookies, crushed finely)
- 1/4 cup granulated sugar
- 6 tablespoons unsalted butter, melted
- 1/4 teaspoon salt (balances the sweetness)
For the Cheesecake Filling
- 16 ounces cream cheese, softened (full-fat works best, but reduced-fat is okay)
- 3/4 cup granulated sugar
- 2 large eggs, room temperature
- 1 teaspoon vanilla extract
- 1/2 cup sour cream (adds richness and prevents cracking)
For the Pumpkin Swirl
- 1 cup pumpkin puree (not pumpkin pie filling)
- 1/4 cup brown sugar, packed
- 1 teaspoon pumpkin pie spice
- 1/2 teaspoon cinnamon
- 1/4 teaspoon nutmeg
For the Topping
- 1/2 cup Biscoff cookies, crushed (for that extra crunch)
- Optional: 2 tablespoons Biscoff spread, melted (for drizzling)
Ingredient Tips: I recommend using Philadelphia cream cheese for best texture – it’s creamier and less likely to cause lumps. For the pumpkin puree, Libby’s is my go-to because it’s consistently thick and not watery. If you can’t find Biscoff cookies, speculoos cookies work perfectly as a substitute. And here’s a little trick I learned: warming your eggs to room temperature by placing them in a bowl of warm water for 5 minutes makes a huge difference in the smoothness of your cheesecake batter.
Substitution Guidance: Use dairy-free cream cheese and sour cream for a lactose-friendly version. Swap Biscoff with gluten-free speculoos cookies for a gluten-free option. For a lower-sugar version, reduce the sugar in the cheesecake filling to 1/2 cup and use a sugar substitute in the crust.
Equipment Needed
You don’t need a fancy kitchen to make these bars. Here’s what you’ll need:
- 9×13-inch baking pan (glass or metal both work fine)
- Parchment paper (for easy removal – trust me on this one)
- Food processor or zip-top bag (for crushing cookies)
- Rolling pin (if using the bag method)
- Electric mixer (hand mixer or stand mixer)
- Large mixing bowls
- Spatula
- Measuring cups and spoons
I’ve made these bars with just a zip-top bag and a rolling pin when my food processor was on the fritz. It takes a little more elbow grease, but the results are the same. If you don’t have an electric mixer, you can mix the cheesecake filling by hand – just make sure your cream cheese is really soft and beat it until smooth with a wooden spoon. It’s a good arm workout!
Budget-Friendly Tip: Don’t have a 9×13 pan? An 8×8 pan works too – just increase the baking time by about 10 minutes and expect thicker bars. Also, a simple potato masher works surprisingly well for crushing cookies if you don’t have a food processor.
Preparation Method
Alright, let’s get to the good part. Here’s how to make these crowd-pleasing Biscoff Pumpkin Cheesecake Bars step by step.
- Preheat your oven to 350°F (175°C). Line your 9×13-inch baking pan with parchment paper, leaving some overhang on the sides. This makes lifting the bars out so much easier later. I learned this the hard way after a cheesecake bar extraction disaster that involved a spatula, some choice words, and a very messy counter.
- Make the crust. Crush your Biscoff cookies into fine crumbs. If using a food processor, pulse until you get a sand-like texture. If using a bag, seal those cookies up and go to town with your rolling pin. Mix the crumbs with sugar and salt, then pour in the melted butter. Stir until everything looks like wet sand – it should hold together when you squeeze it.
- Press the crust into the pan. Dump the mixture into your prepared pan and press it down firmly. I use the bottom of a measuring cup to get it really even. Don’t skimp on this step – a tight, compact crust means bars that hold together when you cut them. Bake for 10 minutes, then set aside to cool slightly.
- Make the cheesecake filling. In a large bowl, beat the softened cream cheese until smooth and creamy. This takes about 2 minutes with an electric mixer. Add the sugar and beat until combined, scraping down the sides as needed. Add eggs one at a time, beating on low after each addition. Mix in the vanilla and sour cream until just combined. Don’t overmix – you don’t want to incorporate too much air, which can cause cracks.
- Make the pumpkin swirl. In a separate bowl, whisk together the pumpkin puree, brown sugar, pumpkin pie spice, cinnamon, and nutmeg until smooth. This mixture should be thick and fragrant – it’s basically fall in a bowl.
- Layer it up. Pour the cheesecake filling over the crust and spread it evenly. Drop spoonfuls of the pumpkin mixture over the top. Now here’s the fun part – use a knife or skewer to swirl the pumpkin into the cheesecake. Don’t over-swirl or you’ll lose the distinct layers. I like to do figure-eight motions for a marbled effect.
- Add the topping. Sprinkle the crushed Biscoff cookies evenly over the top. This adds that wonderful crunch that makes these bars so addictive.
- Bake. Place the pan in the preheated oven and bake for 35-40 minutes. The edges should be set and slightly puffed, but the center should still have a slight jiggle when you shake the pan. That jiggle is your friend – it means a creamy, not-overbaked cheesecake.
- Cool completely. Let the bars cool on a wire rack for about an hour at room temperature. Then transfer to the refrigerator and chill for at least 4 hours, preferably overnight. I know the waiting is the hardest part, but this step is crucial for clean slices and the best texture.
- Slice and serve. Use the parchment paper overhang to lift the bars out of the pan. Cut into squares with a sharp knife, wiping the blade clean between cuts for neat edges. Drizzle with melted Biscoff spread if you’re feeling fancy.
Cooking Tips & Techniques
After making these bars about a dozen times (it’s a tough job, but someone’s got to do it), I’ve picked up some tricks that make a real difference.
Room temperature ingredients matter. I know, I know, everyone says this. But seriously, cold cream cheese leads to lumpy batter, and cold eggs can make the mixture curdle. Take everything out of the fridge about 30 minutes before you start. If you forget, microwave the cream cheese in 10-second bursts until soft (but not melted).
Don’t overmix the cheesecake batter. This was my biggest mistake early on. I’d beat the mixture until it was super fluffy, and then wonder why my cheesecake cracked. Overmixing incorporates too much air, which expands during baking and then collapses, creating cracks. Mix until just combined – a few tiny lumps are fine.
Use a water bath alternative. Traditional cheesecakes need a water bath to prevent cracking, but these bars are more forgiving. The sour cream in the batter helps keep things moist, and the crust provides stability. If you’re worried about cracking, place a pan of hot water on the oven rack below your cheesecake bars. The steam creates a humid environment that prevents the top from drying out.
Patience with chilling. The hardest lesson I learned was rushing the chilling process. I once tried to cut these bars after only 2 hours in the fridge, and it was a mess. The bars need that full 4 hours (or overnight) to set properly. Trust the process – your future self will thank you.
Sharp knife for clean cuts. Use a long, sharp knife and wipe it clean between each cut. Run the knife under hot water, dry it, then slice. This gives you those beautiful, clean edges that look like they came from a bakery.
Variations & Adaptations
One of the best things about this recipe is how adaptable it is. Here are some variations I’ve tried and loved:
Gluten-Free Version: Swap the Biscoff cookies with gluten-free speculoos cookies. The texture and flavor are almost identical, and no one will know the difference. I tested this for a friend with celiac disease, and she said it was the best dessert she’d had in years.
Dairy-Free Adaptation: Use dairy-free cream cheese (I like Kite Hill) and coconut cream instead of sour cream. The texture is slightly different – a bit less dense – but still delicious. Make sure your Biscoff cookies are dairy-free, which most brands are.
Extra Spiced Version: Double the spices in the pumpkin swirl and add 1/4 teaspoon of ground ginger and a pinch of cloves. This gives a more intense, chai-like flavor that’s perfect for spice lovers. My husband prefers this version, so I often split the batch and do half regular, half extra-spiced.
No-Bake Option: For a no-bake version, skip the eggs and use a no-bake cheesecake recipe as your base. The crust still needs a quick bake, but the filling sets in the fridge. The texture is lighter and mousse-like, which is actually lovely for warmer days.
Individual Servings: Make these in a muffin tin for perfectly portioned individual bars. Line a muffin tin with paper liners, press the crust into each cup, and fill with the cheesecake and pumpkin mixture. Bake for about 18-20 minutes. These are great for parties where people want to grab and go.
Serving & Storage Suggestions
These bars are versatile when it comes to serving. Here’s how to make the most of them:
Serving Temperature: Serve chilled or at room temperature. I prefer them straight from the fridge for clean slices, but letting them sit out for 10 minutes takes the chill off and makes the flavors more pronounced. For an extra touch, warm a spoonful of Biscoff spread and drizzle it over each bar right before serving.
Presentation Tips: Arrange the bars on a platter with a dusting of cinnamon or powdered sugar. Add a few whole Biscoff cookies on the side for decoration. If you’re serving at a dinner party, a dollop of whipped cream and a sprinkle of crushed cookies takes these from “homemade” to “restaurant-quality.”
What to Serve Alongside: These bars pair beautifully with coffee, especially a cinnamon latte or a simple espresso. For a dessert spread, serve alongside apple crisp, pecan pie bites, or a warm spiced cider. They also work great as a sweet ending to a fall-themed dinner with roasted squash soup and a hearty salad.
Storage Instructions: Store leftover bars in an airtight container in the refrigerator for up to 5 days. The flavors actually develop and deepen over the first couple of days, so don’t be surprised if they taste even better on day two. For longer storage, wrap individual bars in plastic wrap and place in a freezer-safe container. They’ll keep for up to 3 months in the freezer.
Reheating Tips: If you prefer your bars warm, microwave individual servings for 15-20 seconds. This softens the cheesecake and makes the Biscoff topping slightly gooey. For frozen bars, thaw overnight in the refrigerator before serving.
Nutritional Information & Benefits
While these bars are definitely a treat, they do have some redeeming qualities. Here’s a rough estimate of the nutritional content per bar (based on 12 servings):
| Nutrient | Amount per Bar |
|---|---|
| Calories | 380 |
| Total Fat | 24g |
| Saturated Fat | 13g |
| Cholesterol | 85mg |
| Sodium | 290mg |
| Total Carbohydrates | 38g |
| Dietary Fiber | 2g |
| Sugars | 26g |
| Protein | 6g |
| Vitamin A | 45% DV |
| Calcium | 6% DV |
Health Highlights: Pumpkin is packed with vitamin A, which supports eye health and immune function. It’s also a good source of fiber and antioxidants. The cream cheese provides calcium and protein, while the Biscoff cookies add a touch of iron from the molasses. Of course, these are still an indulgence, but knowing there’s some pumpkin in there makes me feel a little better about going back for seconds.
Dietary Considerations: This recipe contains dairy, gluten, and eggs. For gluten-free and dairy-free options, see the variations section above. These bars are not suitable for vegan diets, but the no-bake option can be adapted with vegan cream cheese and egg substitutes.
Conclusion
These Biscoff Pumpkin Cheesecake Bars have become my go-to fall dessert for a reason. They’re the kind of recipe that makes you look like a hero without the stress of a complicated technique. The combination of crunchy Biscoff crust, creamy cheesecake, and spiced pumpkin swirl is just unbeatable – and watching people’s faces light up when they take that first bite never gets old.
Honestly, what I love most about this recipe is how it brings people together. Whether it’s a Thanksgiving dinner, a casual potluck, or just a Tuesday night when you need something sweet, these bars deliver. They’re forgiving, adaptable, and always, always delicious.
I’d love to hear how yours turn out! Leave a comment below and let me know if you tried any variations, or tag me in your photos on social media. Did you catch someone who claimed to hate pumpkin going back for seconds? I’d love to hear that story too. Happy baking, friends – and remember, a little extra Biscoff on top never hurt anyone.
Frequently Asked Questions
Can I make these bars ahead of time?
Absolutely! In fact, I recommend it. These bars need at least 4 hours to chill, but making them a day ahead is even better. The flavors meld together and the texture becomes perfectly creamy. Just keep them covered in the refrigerator until you’re ready to serve.
Can I freeze these cheesecake bars?
Yes, they freeze beautifully. Wrap individual bars in plastic wrap, then place them in a freezer-safe container or bag. They’ll keep for up to 3 months. Thaw overnight in the refrigerator before serving. I often make a double batch and freeze half for later – it’s like having a dessert emergency kit.
What if I can’t find Biscoff cookies?
No problem! Speculoos cookies are the same thing, just under a different brand name. You can also use gingersnaps or graham crackers in a pinch, though the flavor will be different. Gingersnaps add a nice spicy kick, while graham crackers make a milder, more traditional crust.
Why did my cheesecake crack?
Cracks usually happen from overmixing or overbaking. Make sure you’re not beating the batter too much after adding the eggs, and pull the bars out when the center still has a slight jiggle. The residual heat will finish the cooking process. Also, cooling them gradually – first on the counter, then in the fridge – helps prevent sudden temperature changes that cause cracks.
Can I use pumpkin pie filling instead of pumpkin puree?
I wouldn’t recommend it. Pumpkin pie filling is already sweetened and spiced, which would throw off the balance of this recipe. Stick with 100% pure pumpkin puree for the best results. If you only have pumpkin pie filling, reduce the sugar and spices in the pumpkin swirl, but honestly, the texture and flavor won’t be quite right.
Pin This Recipe!
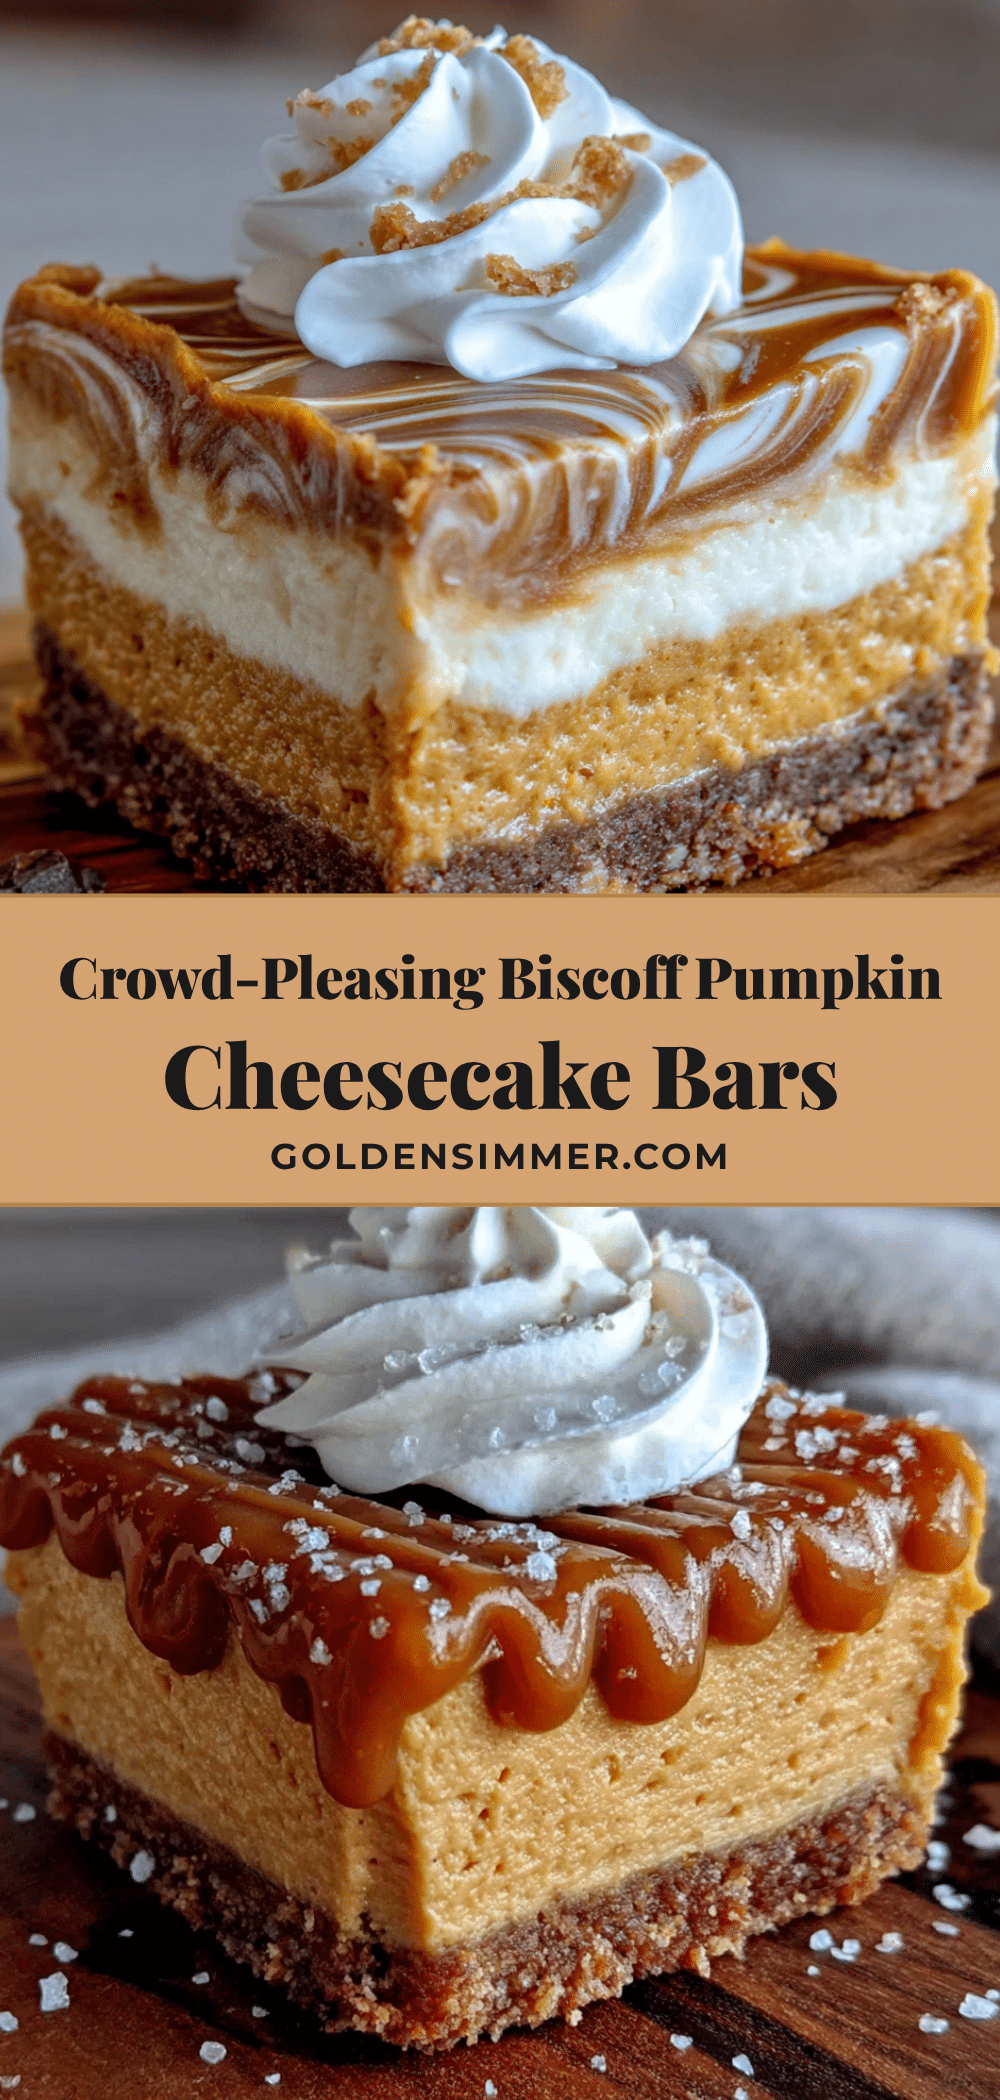
Best Biscoff Pumpkin Cheesecake Bars Recipe (Easy & Delicious)
These Biscoff Pumpkin Cheesecake Bars feature a buttery Biscoff cookie crust, creamy cheesecake swirled with spiced pumpkin puree, and a crunchy Biscoff topping. They’re easy to make, crowd-pleasing, and perfect for fall gatherings.
- Prep Time: 20 minutes
- Cook Time: 35-40 minutes
- Total Time: 55 minutes (plus 4 hours chilling)
- Yield: 12 servings 1x
- Category: Dessert
- Cuisine: American
Ingredients
- 2 cups Biscoff cookie crumbs (about 25–30 cookies, crushed finely)
- 1/4 cup granulated sugar
- 6 tablespoons unsalted butter, melted
- 1/4 teaspoon salt
- 16 ounces cream cheese, softened
- 3/4 cup granulated sugar
- 2 large eggs, room temperature
- 1 teaspoon vanilla extract
- 1/2 cup sour cream
- 1 cup pumpkin puree (not pumpkin pie filling)
- 1/4 cup brown sugar, packed
- 1 teaspoon pumpkin pie spice
- 1/2 teaspoon cinnamon
- 1/4 teaspoon nutmeg
- 1/2 cup Biscoff cookies, crushed (for topping)
- Optional: 2 tablespoons Biscoff spread, melted (for drizzling)
Instructions
- Preheat your oven to 350°F (175°C). Line your 9×13-inch baking pan with parchment paper, leaving some overhang on the sides.
- Make the crust: Crush Biscoff cookies into fine crumbs. Mix crumbs with sugar and salt, then pour in melted butter. Stir until mixture looks like wet sand.
- Press the crust mixture firmly into the prepared pan using the bottom of a measuring cup. Bake for 10 minutes, then set aside to cool slightly.
- Make the cheesecake filling: In a large bowl, beat softened cream cheese until smooth and creamy (about 2 minutes). Add sugar and beat until combined. Add eggs one at a time, beating on low after each addition. Mix in vanilla and sour cream until just combined. Do not overmix.
- Make the pumpkin swirl: In a separate bowl, whisk together pumpkin puree, brown sugar, pumpkin pie spice, cinnamon, and nutmeg until smooth.
- Layer it up: Pour cheesecake filling over crust and spread evenly. Drop spoonfuls of pumpkin mixture over the top. Use a knife or skewer to swirl the pumpkin into the cheesecake in figure-eight motions for a marbled effect.
- Add the topping: Sprinkle crushed Biscoff cookies evenly over the top.
- Bake for 35-40 minutes. The edges should be set and slightly puffed, but the center should still have a slight jiggle when shaken.
- Cool completely on a wire rack for about 1 hour at room temperature. Then transfer to the refrigerator and chill for at least 4 hours, preferably overnight.
- Slice and serve: Use parchment paper overhang to lift bars out of the pan. Cut into squares with a sharp knife, wiping the blade clean between cuts. Drizzle with melted Biscoff spread if desired.
Notes
Use room temperature ingredients for best results. Do not overmix the cheesecake batter to avoid cracks. For clean slices, chill bars for at least 4 hours or overnight. For a gluten-free version, use gluten-free speculoos cookies. For dairy-free, use dairy-free cream cheese and coconut cream instead of sour cream.
Nutrition
- Serving Size: 1 bar
- Calories: 380
- Sugar: 26
- Sodium: 290
- Fat: 24
- Saturated Fat: 13
- Carbohydrates: 38
- Fiber: 2
- Protein: 6
Keywords: Biscoff, pumpkin, cheesecake bars, fall dessert, easy recipe, crowd-pleaser



