Love this? Save it for later!
Share the inspiration with your friends
The Halloween party was in three hours and I had completely forgotten. My neighbor, Diane, had texted me that morning with a cheerful reminder about the neighborhood potluck, and I felt that familiar cold dread in my stomach. Everyone else would be bringing elaborate themed dishes—I’d seen the sign-up sheet. There was a witch’s cauldron dip, mummy hot dogs, and someone was even doing a graveyard cake. I had a bag of sad-looking clementines and a cantaloupe that was probably past its prime.
Let me tell you, I stood in my kitchen staring at that melon like it owed me money. I mean, what was I supposed to do? Show up with a fruit salad in a plastic bowl? Not happening. These people take their Halloween seriously, and I’d already earned a reputation for my cookie bars at the summer block party. The pressure was real, honestly.
Then it hit me—what if I carved the melon like a pumpkin? Not a jack-o-lantern for decoration, but an actual serving piece. I grabbed a sharp knife, held my breath, and started cutting. The cantaloupe was softer than I expected, and I nearly sliced through the bottom twice. My hands were shaking a little, and there was melon juice everywhere. But when I scooped out the seeds and saw that hollowed-out shell, I knew I was onto something.
I filled it with green grapes, blueberries, and those clementines I’d peeled into little segments. The orange rind against the dark fruit looked incredible—like a real pumpkin spilling out its guts, but in a way that was actually appetizing. You know that feeling when you panic-cook something and it turns out better than anything you’d planned? That was this moment.
Diane texted me a photo later that night from the party. The fruit tray was the first thing gone, and people kept asking who brought the pumpkin melon. I played it cool, but inside I was doing a victory dance. That’s the thing about this recipe—it looks like you spent hours on it, but really, it’s just a melon and some fruit with a little imagination. Maybe you’ve been there too, scrambling at the last minute for something that looks impressive. Trust me, this is your secret weapon.
Why You’ll Love This Recipe
This pumpkin-shaped fruit tray is the kind of recipe that makes you look like a Halloween hero without breaking a sweat. I’ve tested this at three different gatherings now, and every single time, it steals the show. Here’s why it works so well:
- Incredibly Easy to Make: You only need about 20 minutes of active prep time. The melon does all the heavy lifting visually.
- Healthy Halloween Option: Let’s face it—Halloween is a sugar bomb. This gives guests something fresh and light to balance out all the candy and cupcakes.
- Perfect for Parties: It serves a crowd easily (8-10 people), and you can prep it hours ahead without worrying about it getting soggy or sad.
- No Special Equipment: Just a sharp knife, a spoon, and whatever fruit you have on hand. No cookie cutters, no molds, no fuss.
- Kid-Friendly and Adult-Approved: I’ve watched toddlers grab handfuls and adults go back for seconds. It’s universally loved.
What makes this different from a regular fruit platter is the presentation. That pumpkin shape creates a natural centerpiece that draws people in. It’s not just fruit on a tray—it’s a conversation starter. Plus, you can customize the filling based on what’s in season or what your guests like. I’ve done versions with tropical fruit, all berries, and even a fall-themed mix with apple slices and pears.
Honestly, this recipe is perfect for hosts who want to impress without stress. You can assemble it while chatting with guests, and it doesn’t require any cooking or baking. That’s a win in my book.
What Ingredients You Will Need
This recipe uses simple, fresh ingredients that are easy to find at any grocery store. The star of the show is the melon, which acts as both the serving vessel and part of the filling.
For the Pumpkin Shell
- 1 large cantaloupe or orange-fleshed melon (about 3-4 pounds) – Look for one that’s firm but gives slightly at the stem end. A round, symmetrical shape works best for the pumpkin look.
- 1 small cucumber or celery stalk – This becomes the pumpkin stem. I prefer cucumber because it’s the right green color and has a nice texture contrast.
For the Fruit Filling
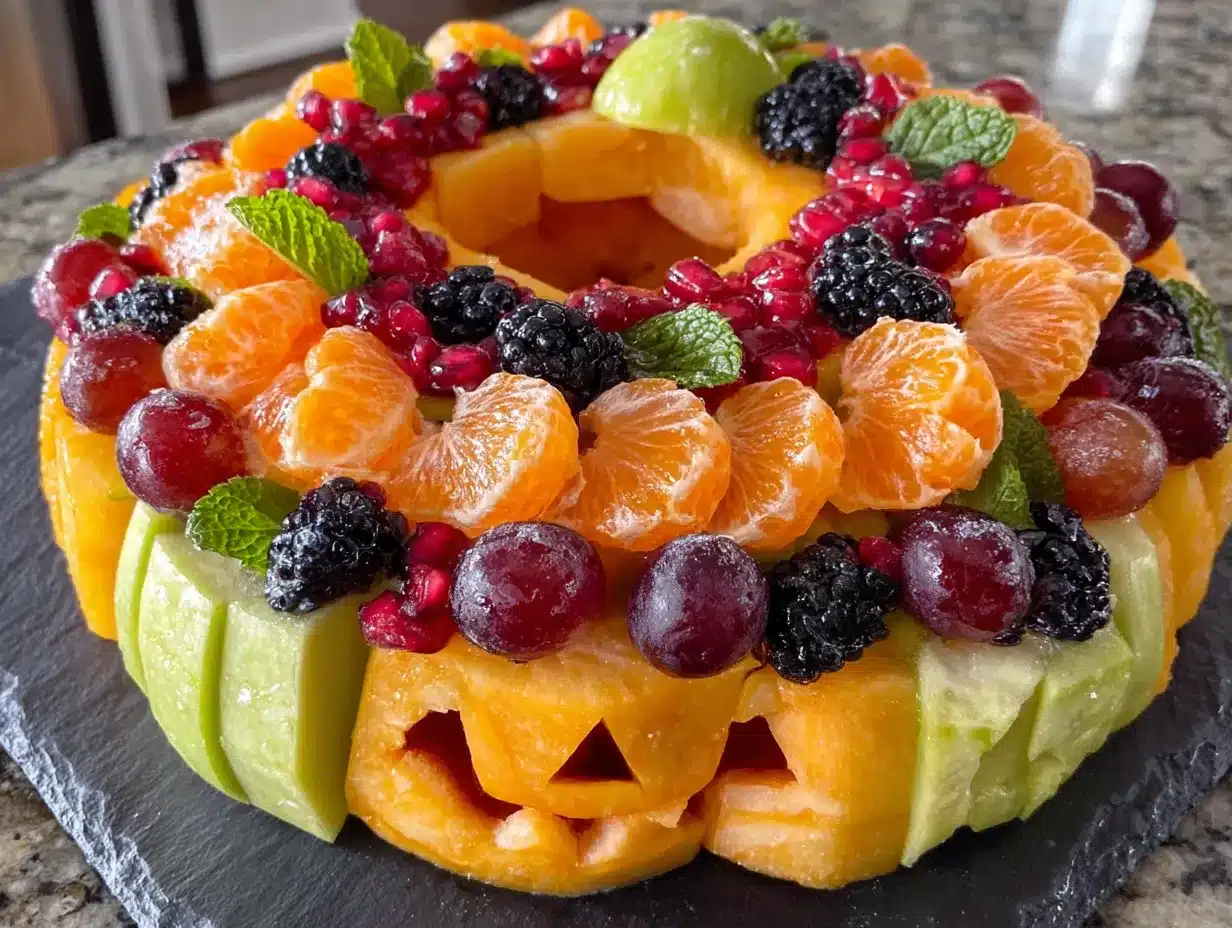
- 2 cups green grapes – Seedless, washed and dried. The green color pops beautifully against the orange melon.
- 1 cup blueberries – Fresh, washed. These add that dark, dramatic contrast that makes the tray look Halloween-ready.
- 3-4 clementines or mandarin oranges – Peeled and separated into segments. The bright orange ties everything together.
- 1 cup cubed cantaloupe – From the inside of your pumpkin melon. Don’t waste that fruit!
- 1 cup strawberries – Hulled and halved if large. The red adds another festive color.
- Optional: 1/2 cup pomegranate arils – These look like little jewels and add a tart pop. I love using them when they’re in season.
Ingredient Tips and Substitutions
I recommend using a cantaloupe that’s slightly underripe for the shell—it holds its shape better when carved. If you can only find a very ripe one, just be extra gentle when hollowing it out. For the fruit filling, really anything works. I’ve used honeydew chunks, blackberries, sliced kiwis, and even cubed mango. The key is contrast: mix light and dark fruits for maximum visual impact.
If you’re serving a crowd with dietary restrictions, this recipe is naturally gluten-free, dairy-free, and vegan. Just double-check that your fruit is fresh and nothing is processed with shared equipment if that’s a concern.
One more thing—don’t skip drying the fruit after washing it. Excess moisture will make the melon shell soggy faster. Pat everything dry with paper towels before assembling.
Equipment Needed
- Sharp chef’s knife – For cutting the melon. A 8-inch knife works well.
- Large metal spoon – For scooping out seeds and flesh.
- Melon baller (optional) – Useful if you want uniform fruit balls, but not necessary.
- Cutting board – Preferably with a groove to catch juice.
- Paper towels – For drying fruit and patting the melon shell.
- Serving platter or large plate – Big enough to hold the melon with some space around it for extra fruit or decoration.
- Small paring knife – For carving the stem hole and any decorative details.
You don’t need anything fancy here. I’ve made this using a dull knife from my college apartment and a soup spoon, and it still worked. The melon baller is nice if you have one, but honestly, cubes are just as pretty. If you’re buying a new knife for this, go with something mid-range—you don’t need a professional set.
Preparation Method
- Wash and dry all fruit thoroughly. This is important—any dirt or residue can affect the taste and appearance. Pat everything dry with paper towels.
- Prepare the melon shell. Place the cantaloupe on your cutting board. Using your sharp knife, cut off the top quarter of the melon (about 1-2 inches from the stem end). This creates the lid of your pumpkin. Set the lid aside.
- Scoop out the seeds. Use your large spoon to scrape out all the seeds and stringy pulp from the center of the melon. Be gentle—you don’t want to puncture the bottom or sides. Rinse the inside with cold water and pat dry with paper towels.
- Remove the flesh. Using your spoon or melon baller, scoop out the remaining cantaloupe flesh from inside the shell. Leave about 1/2 inch of flesh attached to the rind for structural integrity. You should get about 2 cups of cantaloupe chunks. Set these aside for the filling.
- Create the stem. Take your cucumber or celery stalk and cut a 2-inch piece. Using your paring knife, carve a small hole in the center of the melon lid. Insert the cucumber piece so it stands upright like a pumpkin stem. If it’s loose, use a toothpick to secure it.
- Optional: Carve a face. If you want a jack-o-lantern look, use your paring knife to cut small triangle eyes and a jagged mouth into the melon shell. I’ve done this once, and it looked adorable, but it’s totally optional. The plain pumpkin shape is elegant enough for most parties.
- Cut the filling fruit. Halve your grapes if they’re large. Hull and halve the strawberries. Peel and separate the clementines. Cube the reserved cantaloupe into bite-sized pieces. Keep everything in separate bowls for easy assembly.
- Assemble the fruit tray. Place the hollowed melon shell on your serving platter. Start filling it with the mixed fruit, layering different colors for visual appeal. Don’t just dump everything in—arrange it so the dark blueberries and bright clementines are visible. Overfill slightly so it looks abundant.
- Arrange extra fruit around the base. Place additional fruit around the melon on the platter. This makes the tray look fuller and gives guests easy access to the fruit without having to reach into the pumpkin. I like to scatter a few grapes and berries artfully around the edges.
- Replace the lid. Place the stem-topped lid slightly askew on top of the filled melon, like a pumpkin that’s been opened. This shows off the fruit inside while keeping the pumpkin shape recognizable.
- Chill until serving. Refrigerate the finished tray for at least 30 minutes before serving. This helps the fruit firm up and keeps everything crisp. You can make this up to 4 hours ahead.
Pro tip: If you’re transporting this to a party, assemble it on the platter you’ll serve it on. Wrap the whole thing in plastic wrap and keep it level in your car. I learned this the hard way after my first attempt slid off the seat and ended up as a melon disaster on my floor mats.
Cooking Tips & Techniques
Here are some things I’ve learned through trial and error—mostly error, if I’m being honest.
Choose the right melon. A round, symmetrical cantaloupe works best. Avoid ones with flat sides or weird bumps. Give it a gentle squeeze—it should yield slightly but not feel mushy. A too-soft melon will collapse when you hollow it out.
Keep the shell thick enough. I once got too aggressive with my scooping and ended up with a melon shell that had a thin spot. It held up for about an hour before developing a crack. Leave at least half an inch of flesh inside the rind. It’s better to have a little extra melon than a broken pumpkin.
Dry fruit is happy fruit. Wet fruit makes the melon shell soggy and creates a pool of juice at the bottom of your platter. After washing, spread your fruit on a clean kitchen towel and let it air dry for 10 minutes. Pat everything dry with paper towels before assembling.
Prep in stages. Hollow out the melon and cut your fruit up to 4 hours ahead. Store them separately in the fridge. Assemble right before serving or up to an hour ahead. This way, the melon stays firm and the fruit stays crisp.
Use toothpicks for stability. If your melon wobbles on the platter, stick a few toothpicks into the bottom to anchor it. Or cut a thin slice off the bottom to create a flat surface. Just don’t cut too much—you don’t want to create a hole.
Don’t overfill. It’s tempting to cram as much fruit as possible into the melon, but overfilling can cause the shell to split. Fill it to about an inch below the rim, then pile extra fruit around the base on the platter.
I once forgot to dry the grapes and ended up with a sad, watery mess at the bottom of my pumpkin. Everyone still ate it, but it wasn’t as pretty as it could have been. Learn from my mistakes, friend.
Variations & Adaptations
This recipe is endlessly adaptable. Here are some versions I’ve tried and loved:
Tropical Halloween Twist
Swap the grapes and berries for diced mango, pineapple chunks, kiwi slices, and dragon fruit. The bright colors still look festive, and the tropical flavors are a nice surprise at a fall party. I made this for a Halloween brunch, and it was a hit.
All-Berry Version
Fill the melon with only berries—strawberries, blueberries, raspberries, and blackberries. The deep reds and purples against the orange melon look incredibly dramatic. This is my go-to for adult parties where people want something elegant.
Fall Harvest Mix
Combine diced apples (tossed in lemon juice to prevent browning), sliced pears, pomegranate arils, and toasted pecans. This version feels more autumnal and pairs well with cheese boards and warm cider.
Dairy-Free and Vegan
This recipe is already plant-based, but if you’re serving it alongside other dishes, make sure any dips or accompaniments are also vegan. A simple yogurt dip made with coconut yogurt works great.
Mini Pumpkin Fruit Cups
For individual servings, use small melons or even oranges. Hollow them out and fill with fruit. These are perfect for kids’ parties or as place settings at a dinner party. I did this for my niece’s birthday, and each kid got their own little pumpkin.
Savory Option
Okay, this one’s a stretch, but hear me out—you can use the same pumpkin melon shell to serve a fruit salsa or a savory dip. Fill it with a mixture of diced mango, red onion, jalapeño, and cilantro for a sweet-spicy appetizer. Just don’t leave it out too long at room temperature.
Serving & Storage Suggestions
This fruit tray is best served chilled, straight from the fridge. The cold fruit stays crisp, and the melon shell holds its shape better when it’s cool. If you’re serving it outdoors at a fall gathering, keep it in the shade or set the platter on ice.
For presentation, I like to arrange the tray on a large wooden cutting board or a white platter. The contrast makes the orange pumpkin pop. Add a few fall leaves or small gourds around the base for extra Halloween flair. Just make sure any decorations are food-safe and not touching the fruit.
This recipe pairs beautifully with other party foods. Serve it alongside a cheese board, veggie platter, or warm appetizers like spinach dip or meatballs. For drinks, it goes well with sparkling cider, pumpkin spice lattes, or a crisp white wine.
Storage: Leftover fruit can be stored in an airtight container in the fridge for up to 2 days. The melon shell will soften after a day, so it’s best to eat this the same day you make it. If you have extra fruit that didn’t fit in the pumpkin, just serve it on the side.
Reheating: There’s no reheating here—this is a cold dish. If the fruit has been sitting out for more than 2 hours, discard any leftovers for food safety reasons.
One thing I love about this recipe is that the flavors actually meld together a bit after an hour or so in the fridge. The melon infuses the other fruit with a subtle sweetness, and everything just tastes more cohesive. It’s not a dramatic change, but it’s noticeable.
Nutritional Information & Benefits
This fruit tray is packed with vitamins and antioxidants, making it a healthy choice for any Halloween gathering. Here’s a rough estimate per serving (based on 8 servings):
- Calories: 85-100 per serving
- Carbohydrates: 22g
- Fiber: 3g
- Sugar: 16g (natural from fruit)
- Vitamin C: 60% of daily value
- Vitamin A: 50% of daily value
Cantaloupe is rich in beta-carotene, which supports eye health and immune function. Blueberries are loaded with antioxidants that fight inflammation. Grapes provide resveratrol, which is great for heart health. And clementines offer a solid dose of vitamin C to keep your immune system strong during cold season.
This recipe is naturally low in fat and sodium, and it’s free from added sugars. It’s also suitable for most dietary restrictions—gluten-free, dairy-free, vegan, and nut-free (if you skip the optional pecans in the fall variation).
I love that I can serve something this healthy at a Halloween party and nobody feels deprived. It’s a guilt-free indulgence that actually makes you feel good.
Conclusion
This pumpkin-shaped melon fruit tray has become my secret weapon for Halloween gatherings. It’s the recipe that looks like you spent hours on it but comes together in under 30 minutes. The best part? It’s healthy, beautiful, and completely customizable based on what fruit you have on hand.
I’ve made this for neighborhood potlucks, office parties, and family gatherings, and it always gets the same reaction—people are genuinely surprised that something so simple can look so impressive. There’s something about that pumpkin shape that brings out the kid in everyone.
I’d love to hear how yours turns out! Did you add a face? Use different fruit? Forget to dry the grapes and end up with a melon puddle? (No judgment here, I’ve been there.) Drop a comment below and let me know your version. And if you’re looking for more easy party ideas, check out my easy Halloween appetizers or no-bake desserts for parties for more stress-free entertaining.
Happy Halloween, and happy fruit carving!
Frequently Asked Questions
Can I make this fruit tray the night before?
You can prep the melon shell and cut the fruit up to 24 hours in advance, but store them separately in the fridge. Assemble the tray no more than 4 hours before serving for the best texture and appearance.
What if I can’t find a round cantaloupe?
Any orange-fleshed melon will work, including sugar melon or orange honeydew. You can also use a large pumpkin-shaped squash (like a butternut) as a serving vessel, though you’ll need to cook it first if you want to eat it.
How do I keep the fruit from browning?
Apples and pears will brown quickly. Toss them in a little lemon juice or lime juice before adding them to the tray. For other fruits like grapes and berries, browning isn’t an issue.
Can I use frozen fruit?
Fresh fruit is best for texture and appearance. Frozen fruit will release water as it thaws, making the melon shell soggy. If you’re in a pinch, thaw frozen fruit completely and pat it very dry before using.
How many people does this serve?
A large cantaloupe filled with fruit serves about 8-10 people as part of a party spread. If you’re serving it as a main snack or at a kid’s party, it might serve 6-8. Always make extra fruit to scatter around the base—people will eat more than you expect.
Pin This Recipe!
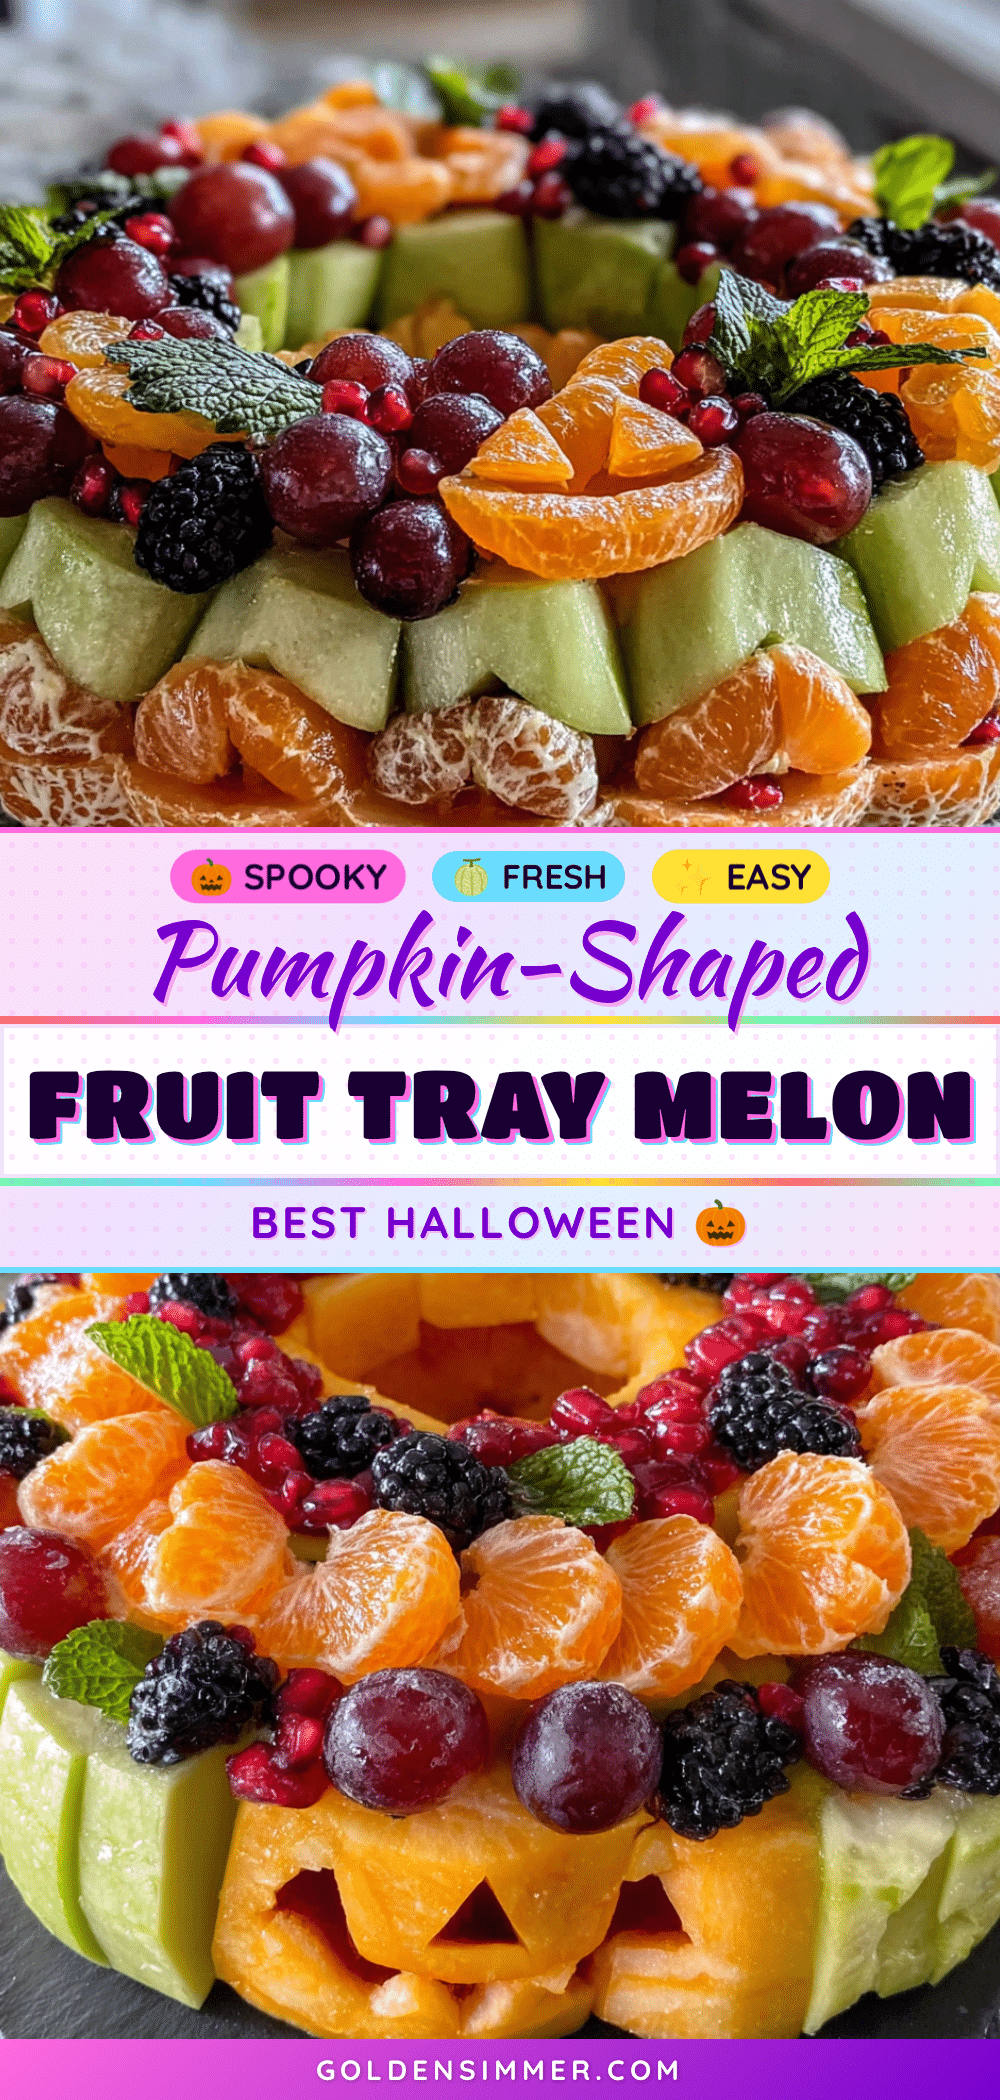
Easy Pumpkin-Shaped Melon Fruit Tray for Halloween
A stunning Halloween centerpiece made from a hollowed cantaloupe filled with fresh fruit. This easy, no-bake recipe looks impressive but comes together in just 20 minutes, perfect for last-minute party planning.
- Prep Time: 20 minutes
- Cook Time: 0 minutes
- Total Time: 20 minutes
- Yield: 8-10 servings 1x
- Category: Appetizer
- Cuisine: American
Ingredients
- 1 large cantaloupe or orange-fleshed melon (about 3–4 pounds)
- 1 small cucumber or celery stalk
- 2 cups green grapes, seedless
- 1 cup blueberries, fresh
- 3–4 clementines or mandarin oranges, peeled and separated
- 1 cup cubed cantaloupe (from inside the melon)
- 1 cup strawberries, hulled and halved
- 1/2 cup pomegranate arils (optional)
Instructions
- Wash and dry all fruit thoroughly. Pat everything dry with paper towels.
- Place the cantaloupe on a cutting board. Using a sharp knife, cut off the top quarter of the melon (about 1-2 inches from the stem end) to create the lid. Set the lid aside.
- Use a large spoon to scrape out all the seeds and stringy pulp from the center of the melon. Be gentle to avoid puncturing the bottom or sides. Rinse the inside with cold water and pat dry with paper towels.
- Using a spoon or melon baller, scoop out the remaining cantaloupe flesh from inside the shell, leaving about 1/2 inch of flesh attached to the rind. Set aside about 2 cups of cantaloupe chunks for the filling.
- Take the cucumber or celery stalk and cut a 2-inch piece. Using a paring knife, carve a small hole in the center of the melon lid. Insert the cucumber piece so it stands upright like a pumpkin stem. Secure with a toothpick if needed.
- Optional: Use a paring knife to cut small triangle eyes and a jagged mouth into the melon shell for a jack-o-lantern look.
- Halve large grapes. Hull and halve strawberries. Peel and separate clementines. Cube reserved cantaloupe into bite-sized pieces. Keep everything in separate bowls.
- Place the hollowed melon shell on a serving platter. Fill it with the mixed fruit, layering different colors for visual appeal. Overfill slightly so it looks abundant.
- Arrange extra fruit around the base of the melon on the platter for a fuller look and easy access.
- Place the stem-topped lid slightly askew on top of the filled melon.
- Refrigerate the finished tray for at least 30 minutes before serving. Can be made up to 4 hours ahead.
Notes
Choose a round, slightly underripe cantaloupe for best structural integrity. Leave at least 1/2 inch of flesh inside the rind to prevent cracking. Dry fruit thoroughly after washing to avoid sogginess. Can be assembled up to 4 hours ahead. For transport, assemble on the serving platter and wrap with plastic wrap, keeping level.
Nutrition
- Serving Size: 1 serving (about 1 c
- Calories: 85100
- Sugar: 16
- Sodium: 15
- Fat: 0.5
- Carbohydrates: 22
- Fiber: 3
- Protein: 1
Keywords: Halloween fruit tray, pumpkin melon, fruit platter, Halloween appetizer, healthy Halloween, cantaloupe pumpkin, party fruit tray



