Love this? Save it for later!
Share the inspiration with your friends
My neighbor Mark had refused to eat pumpkin pie for fifteen years. Fifteen years. “It’s baby food in a crust,” he’d announce every Thanksgiving, pushing the dessert plate away with this look of genuine offense. I’d roll my eyes, we’d move on, and I’d silently judge his life choices. Then last October, I was testing mini pie recipes for a fall gathering and made a batch specifically for myself—because I knew he wouldn’t touch them. I walked back into the kitchen to grab the whipped cream, and when I returned, there he was. Standing at my counter. Eating one. Caught red-handed, crumbs on his shirt, trying to look casual about the whole thing.
“These are… not terrible,” he said, reaching for another.
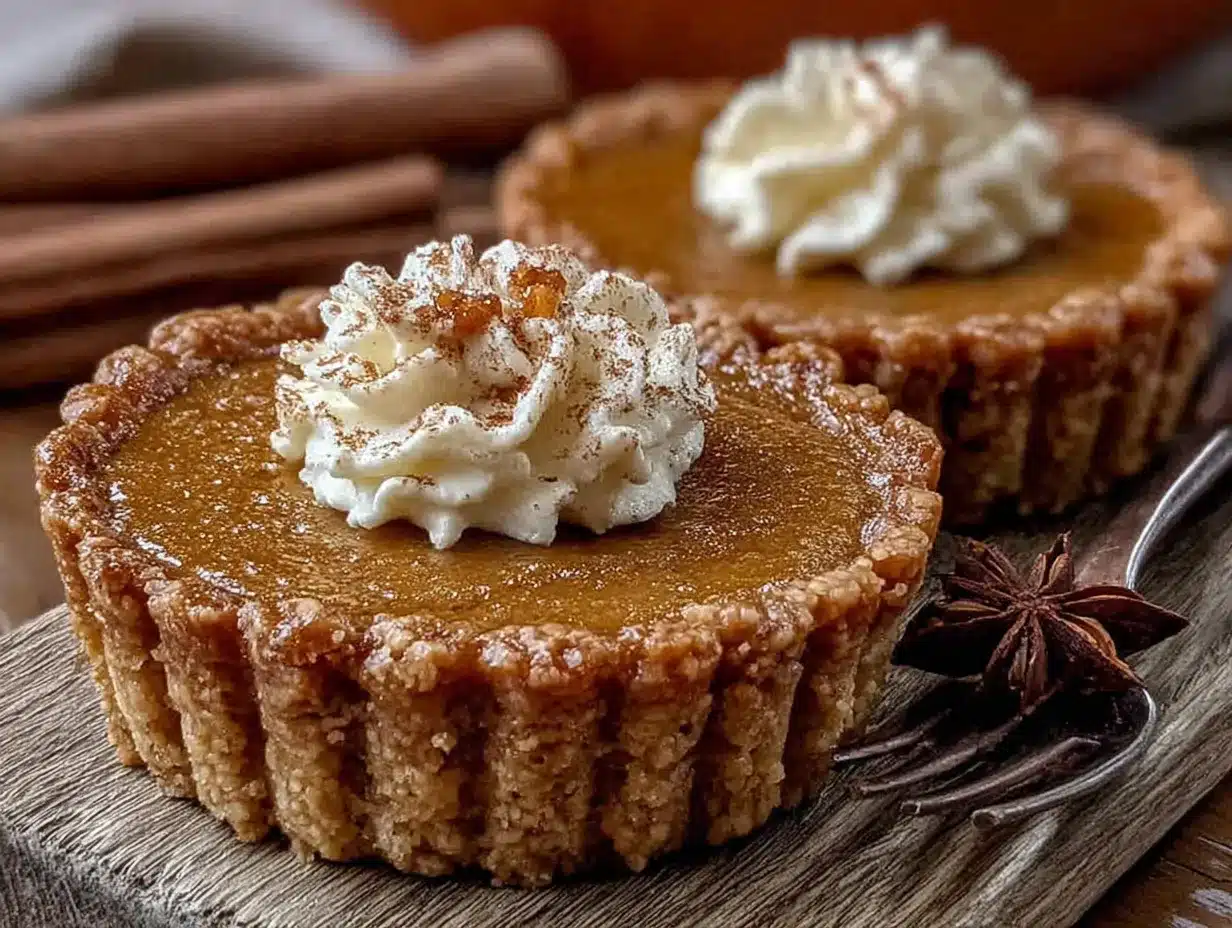
That’s the thing about these homemade mini pumpkin pies with a perfectly crisp crust. They don’t scream “pumpkin spice overload” or taste like someone dumped a whole can of purée into a tart shell. The filling is silky and spiced just right—warm, not aggressive—and the crust? Honestly, I spent two years getting that crust right. Too many sad, soggy bottoms. Too many times I pulled out a mini pie that looked perfect but collapsed the second you bit into it. The trick, as it turns out, is a technique I stumbled onto by accident one Tuesday night when I was out of butter and had to get creative. Maybe you’ve been there—staring into your fridge at 9 PM, determined to make something work.
These little pies have become my signature fall thing. I bring them to potlucks, I make them for friends who swear they “don’t do dessert,” and I keep a stash in my freezer for those random Wednesday cravings when you just need a bite of something cozy. They’re the reason Mark now asks me every September when “those mini pies” are happening. And honestly? That feels better than any recipe award.
Why You’ll Love This Recipe
Let me tell you why these mini pumpkin pies have earned a permanent spot in my fall rotation—and why they’ll probably end up in yours too.
- Perfect Portion Control: No more fighting over the last slice or committing to a whole pie. Each one is just enough to satisfy that craving without the food coma.
- Crispy Crust, Every Time: I tested this crust seven different ways. Seven. The winning method uses a butter-shortening blend and a pre-bake trick that keeps the bottom from turning into a sad, soggy mess.
- Make-Ahead Friendly: These freeze beautifully. I always keep a batch in my freezer for unexpected guests or those “I need a little treat” moments.
- No Special Equipment Needed: You don’t need a fancy mini pie pan or a pastry cutter that costs more than your dinner. A muffin tin and your hands will do the job.
- Crowd-Pleasing Size: Kids love them because they’re tiny. Adults love them because they feel fancy. Everyone wins.
What makes these different from every other mini pumpkin pie recipe out there? It’s the crust. I’m not exaggerating when I say I’ve spent years perfecting it. The secret is a technique called “blind baking with a twist”—you pre-bake the crust with a little egg wash before adding the filling, which creates a barrier that keeps the pastry crisp even after the wet filling goes in. It’s a trick I picked up from an old baking book my grandmother left me, and it works like magic.
This is the kind of recipe that makes you close your eyes after the first bite. It’s comfort food that feels special but doesn’t require a culinary degree to pull off. Perfect for impressing your in-laws, winning over pumpkin skeptics, or just treating yourself on a chilly fall evening.
What Ingredients You Will Need
This recipe uses simple, honest ingredients to create something that tastes way more complicated than it actually is. Most of these are pantry staples, which means you’re probably already halfway there.
For the Crust
- 1 ¼ cups all-purpose flour (spooned and leveled—don’t scoop straight from the bag or you’ll pack it too tight)
- ½ teaspoon salt (I use fine sea salt; table salt works too, just cut back to ¼ teaspoon)
- 1 tablespoon granulated sugar (just a touch of sweetness for the crust)
- 4 tablespoons cold unsalted butter, cubed (Kerrygold is my go-to for flavor, but any good butter works)
- 3 tablespoons cold shortening (Crisco is fine—this is what gives the crust that flaky texture)
- 3-4 tablespoons ice water (you might need a little more or less depending on humidity)
- 1 egg yolk + 1 tablespoon water (for the egg wash that seals the crust)
For the Pumpkin Filling
- ¾ cup pumpkin purée (not pumpkin pie filling—make sure you grab the plain stuff. Libby’s is my preferred brand for consistent texture)
- ½ cup heavy cream (adds richness; you can substitute half-and-half if that’s what you have)
- ¼ cup packed brown sugar (light or dark both work; dark gives a deeper molasses flavor)
- 2 tablespoons granulated sugar
- 1 large egg (room temperature if you remember to take it out ahead of time)
- 1 teaspoon vanilla extract (pure, not imitation—it makes a difference)
- 1 teaspoon pumpkin pie spice (store-bought is fine, or make your own with cinnamon, ginger, nutmeg, and cloves)
- ¼ teaspoon salt (don’t skip this—salt balances the sweetness and brings out the pumpkin flavor)
For Topping (Optional but Recommended)
- Whipped cream (homemade if you’re feeling fancy, store-bought if you’re not)
- A dusting of cinnamon or nutmeg
Ingredient Note: If you’re using a different brand of pumpkin purée, check the consistency. Some are more watery than others. If yours seems thin, let it drain in a fine-mesh sieve for about 30 minutes before using. This prevents the filling from getting too runny and making the crust soggy.
Substitution Tip: For a dairy-free version, use coconut cream instead of heavy cream and a vegan butter stick (like Earth Balance) in the crust. The texture will be slightly different, but still delicious.
Equipment Needed
You don’t need a fancy bakery setup for these. Here’s what you’ll actually use:
- Muffin tin (standard 12-cup size—this recipe makes exactly 12 mini pies)
- Rolling pin (a wine bottle works in a pinch, I’ve been there)
- 3-inch round cookie cutter (or a drinking glass with a similar diameter)
- Mixing bowls (one medium, one small)
- Whisk (for the filling)
- Pastry blender or two forks (for cutting the butter into the flour)
- Plastic wrap (for chilling the dough)
- Fork (for docking the crust—poking holes to prevent bubbles)
- Cooling rack (helps the bottoms stay crisp)
If you don’t have a pastry blender, honestly, two forks or even your fingertips work fine. Just work quickly so the butter doesn’t warm up too much. I’ve also used a food processor in a pinch—just pulse until the mixture looks like coarse sand, then add the water.
One tip: invest in a good metal muffin tin if you can. Dark nonstick pans tend to brown the bottoms faster, which is actually a bonus here since we want that crisp crust.
Preparation Method
Alright, let’s make some pies. Take your time with the first few steps—the crust needs a little patience, but I promise it’s worth it.
- Make the crust dough. In a medium bowl, whisk together the flour, salt, and sugar. Add the cold butter cubes and shortening chunks. Using a pastry blender or your fingertips, cut the fats into the flour until the mixture looks like coarse meal with some pea-sized butter pieces remaining. You want visible bits of butter—that’s what creates flaky layers.
- Add the water. Sprinkle 3 tablespoons of ice water over the flour mixture and stir with a fork until the dough starts coming together. If it seems dry, add the remaining tablespoon of water one teaspoon at a time. The dough should hold together when squeezed but not feel sticky. Turn it out onto a piece of plastic wrap, flatten into a disk, and refrigerate for at least 30 minutes. (I’ve rushed this step before and regretted it—the dough needs that chill time to relax the gluten and keep the butter cold.)
- Preheat your oven to 375°F (190°C). Position a rack in the lower third of the oven—this helps the bottoms cook through without burning the tops.
- Roll out the dough. Lightly flour your work surface and rolling pin. Roll the chilled dough to about ⅛-inch thickness. Don’t go thinner than that, or the crust won’t hold up to the filling. Use your 3-inch cutter to cut out 12 rounds. Gather the scraps, gently re-roll, and cut more rounds if needed. You should get exactly 12.
- Fit the rounds into the muffin tin. Press each round gently into a cup of the muffin tin, making sure the dough touches the bottom and sides evenly. Don’t stretch the dough—if it tears, just press it back together. Use your fingers to crimp the edges slightly so they look pretty.
- Dock and pre-bake the crusts. Prick the bottom of each crust several times with a fork (this prevents bubbles). In a small bowl, whisk the egg yolk with 1 tablespoon water. Brush a thin layer of this egg wash over the bottom and sides of each crust. This is my secret weapon—it creates a waterproof seal that keeps the crust crisp even after the filling goes in. Bake the empty crusts for 8 minutes, then remove from the oven and let them cool slightly while you make the filling.
- Make the filling. In a medium bowl, whisk together the pumpkin purée, heavy cream, both sugars, egg, vanilla extract, pumpkin pie spice, and salt. Whisk until completely smooth—no streaks of egg white or lumps of spice. The mixture should be thick but pourable, like a milkshake consistency.
- Fill the crusts. Spoon the filling into each pre-baked crust, filling them almost to the top—leave about ⅛ inch of space. The filling won’t puff up much, so you can be generous here. I use a small cookie scoop for this; it makes the process so much cleaner.
- Bake the pies. Bake at 375°F (190°C) for 18-22 minutes, or until the filling is set around the edges but still has a slight jiggle in the center. You’ll know they’re done when a knife inserted near the center comes out mostly clean. The crust should be golden brown and the filling should have a few tiny cracks on the surface.
- Cool completely. Let the pies cool in the muffin tin for 10 minutes, then carefully transfer them to a wire rack. Use a small offset spatula or butter knife to gently loosen the edges if needed. Let them cool completely—at least 1 hour—before serving. The filling continues to set as it cools.
Sensory Cue: When the pies are done, your kitchen will smell like every good fall memory you’ve ever had. The crust should look deeply golden, and the filling should have a slight sheen. If you tap the pan gently, the filling shouldn’t slosh—just a gentle wobble.
Cooking Tips & Techniques
I’ve made these mini pumpkin pies more times than I can count, and I’ve learned a few things the hard way. Here’s what I wish someone had told me:
Don’t skip the egg wash on the crust. I know it seems like an extra step, but trust me on this. The first time I made these, I skipped it because I was in a hurry. The bottoms came out soft and almost doughy. The egg wash creates a barrier that keeps the crust crisp even after the filling bakes. It’s non-negotiable now.
Watch your oven temperature. Ovens run differently—I learned this when my first batch came out with burnt edges and raw centers. If your oven runs hot, reduce the temperature to 350°F and bake a few minutes longer. If it runs cool, keep it at 375°F but check at 18 minutes. Get to know your oven’s personality.
Let them cool completely. I know it’s tempting to eat one right out of the oven—I’ve burned my tongue more than once doing exactly that. But the filling needs time to set properly. If you cut into them too early, you’ll get a runny mess. Give them at least an hour on the cooling rack. Overnight in the fridge is even better.
Use room temperature ingredients. This matters more for the filling than the crust. If your egg and cream are cold, they’ll seize up when mixed and create a lumpy texture. Leave them on the counter for 30 minutes before starting.
Don’t overwork the dough. The more you handle it, the tougher it gets. Mix until it just comes together, then stop. A slightly shaggy dough is better than a smooth one.
One mistake I made early on was overfilling the crusts. I thought more filling meant more pie, but it just meant overflow and a mess in my muffin tin. Leave that tiny bit of space at the top—it’s there for a reason.
Variations & Adaptations
Once you’ve mastered the basic recipe, feel free to play around. Here are some variations I’ve tried and loved:
Spiced Maple Pumpkin Pies: Replace the granulated sugar with maple syrup (use 3 tablespoons instead of 2 since syrup is less sweet). Add ¼ teaspoon of ground ginger and a pinch of cloves. The maple flavor pairs beautifully with the pumpkin and gives it a cozy, autumn feel.
Chocolate Pumpkin Mini Pies: Melt 2 ounces of dark chocolate and spread a thin layer on the bottom of each pre-baked crust before adding the filling. The chocolate adds a rich, almost mocha-like depth that complements the pumpkin spice. My friend Sarah tried this and now refuses to make them any other way.
Gluten-Free Version: Substitute the all-purpose flour with a 1:1 gluten-free baking blend that contains xanthan gum (I like King Arthur’s Measure for Measure). The crust will be a bit more delicate, so handle it gently. Bake for the same amount of time, but check at 20 minutes.
Vegan Adaptation: Use coconut cream instead of heavy cream, a flax egg (1 tablespoon ground flaxseed + 3 tablespoons water) instead of the regular egg, and vegan butter in the crust. The texture won’t be quite as rich, but it’s still delicious. I made these for a vegan friend’s birthday and they disappeared in minutes.
Savory Pumpkin Pies: This is a weird one, but hear me out. Omit the sugar and pumpkin pie spice from the filling. Add ½ teaspoon salt, ¼ teaspoon black pepper, ¼ teaspoon garlic powder, and a pinch of cayenne. Fill the crusts and bake as directed. Top with a dollop of sour cream and chives. It’s like a savory pumpkin tart—great for appetizers.
Serving & Storage Suggestions
These mini pumpkin pies are best served at room temperature or slightly warm. If you’re serving them at a party, arrange them on a platter with a dollop of whipped cream on each one and a light dusting of cinnamon or nutmeg. They look gorgeous on a cake stand or even a simple wooden board.
What to serve with them:
- A scoop of vanilla ice cream (the cold creaminess against the warm spiced filling is heaven)
- A drizzle of caramel sauce (homemade or store-bought, no judgment)
- A strong cup of black coffee or chai latte (the bitterness balances the sweetness)
- A glass of cold milk (sometimes simple is best)
Storage: These keep beautifully! Store them in an airtight container in the refrigerator for up to 5 days. The crust will soften slightly over time, but they’re still delicious. If you want to keep that crisp texture, reheat them in a 300°F oven for 5-7 minutes before serving.
Freezer Instructions: These freeze like a dream. Place the cooled pies on a baking sheet and freeze until solid (about 2 hours). Transfer to a freezer-safe bag or container, separating layers with parchment paper. They’ll keep for up to 3 months. To serve, thaw in the refrigerator overnight or at room temperature for about an hour. Reheat in the oven if you want that fresh-baked feel.
Flavor Development: Honestly, these taste even better the next day. The spices meld together and the filling becomes more cohesive. If you can resist eating them all on day one, you’ll be rewarded on day two.
Nutritional Information & Benefits
Here’s a rough estimate per mini pie (without whipped cream):
- Calories: 185
- Fat: 11g
- Carbohydrates: 20g
- Protein: 3g
- Fiber: 1g
- Sugar: 10g
These aren’t health food, but they’re not terrible either. Each mini pie is a reasonable portion—you get the satisfaction of a full dessert without the calorie bomb of a giant slice. The pumpkin purée is packed with vitamin A (great for your eyes and immune system) and fiber. The spices—cinnamon, ginger, nutmeg—have anti-inflammatory properties. And honestly? Sometimes a little indulgence is good for the soul.
If you’re watching your sugar intake, you can reduce the granulated sugar to 1 tablespoon and the brown sugar to 2 tablespoons. The pies will be less sweet but still have that warm pumpkin flavor. For a lower-fat version, use whole milk instead of heavy cream—the texture will be lighter but still good.
Allergen Note: This recipe contains wheat (gluten), dairy, and eggs. See the variations section for vegan and gluten-free adaptations.
Conclusion
These homemade mini pumpkin pies with a perfectly crisp crust have become my fall signature for a reason. They’re not fussy or pretentious—they’re just really, really good. The kind of dessert that makes people close their eyes and go “mm” without thinking about it. The kind that converts pumpkin skeptics (yes, Mark, I’m looking at you) into loyal fans.
What I love most about this recipe is how adaptable it is. You can dress it up for a holiday dinner party or keep it casual for a Tuesday night treat. You can make a batch ahead of time and pull them out whenever you need a little comfort. They’re forgiving, they’re delicious, and they make your kitchen smell like autumn.
I’d love to hear how yours turn out! Did you try any of the variations? Did you come up with your own twist? Drop a comment below and let me know—I read every single one and I’m always looking for new ideas. And if you loved this recipe, share it with a friend who needs a little pumpkin pie in their life. Happy baking!
Frequently Asked Questions
Can I use store-bought pie crust instead of making my own?
Absolutely! If you’re short on time, a refrigerated pie crust from the store works fine. Just roll it out, cut your rounds, and follow the same pre-baking instructions. The texture won’t be quite as flaky as homemade, but it’ll still be delicious.
Why did my crust turn out soggy?
This usually happens for one of two reasons: either you skipped the egg wash step, or the filling was too watery. Make sure you’re using the egg wash on the crust before pre-baking, and if your pumpkin purée seems thin, drain it in a sieve for 30 minutes first.
Can I make these ahead of time for a party?
Yes! These are actually better made a day ahead. Bake them, cool completely, and store them in the refrigerator. Before serving, let them come to room temperature for about 30 minutes. You can even freeze them up to 3 months in advance.
How do I prevent the filling from cracking?
Overbaking is usually the culprit. The filling should still have a slight jiggle in the center when you pull them out of the oven—it’ll continue to set as it cools. Also, don’t open the oven door too often during baking; temperature fluctuations can cause cracking.
Can I use a different spice blend?
Of course! If you don’t have pumpkin pie spice, make your own with ½ teaspoon cinnamon, ¼ teaspoon ginger, ⅛ teaspoon nutmeg, and a pinch of cloves. Or experiment with your own combination—cardamom and allspice are lovely additions.
Pin This Recipe!
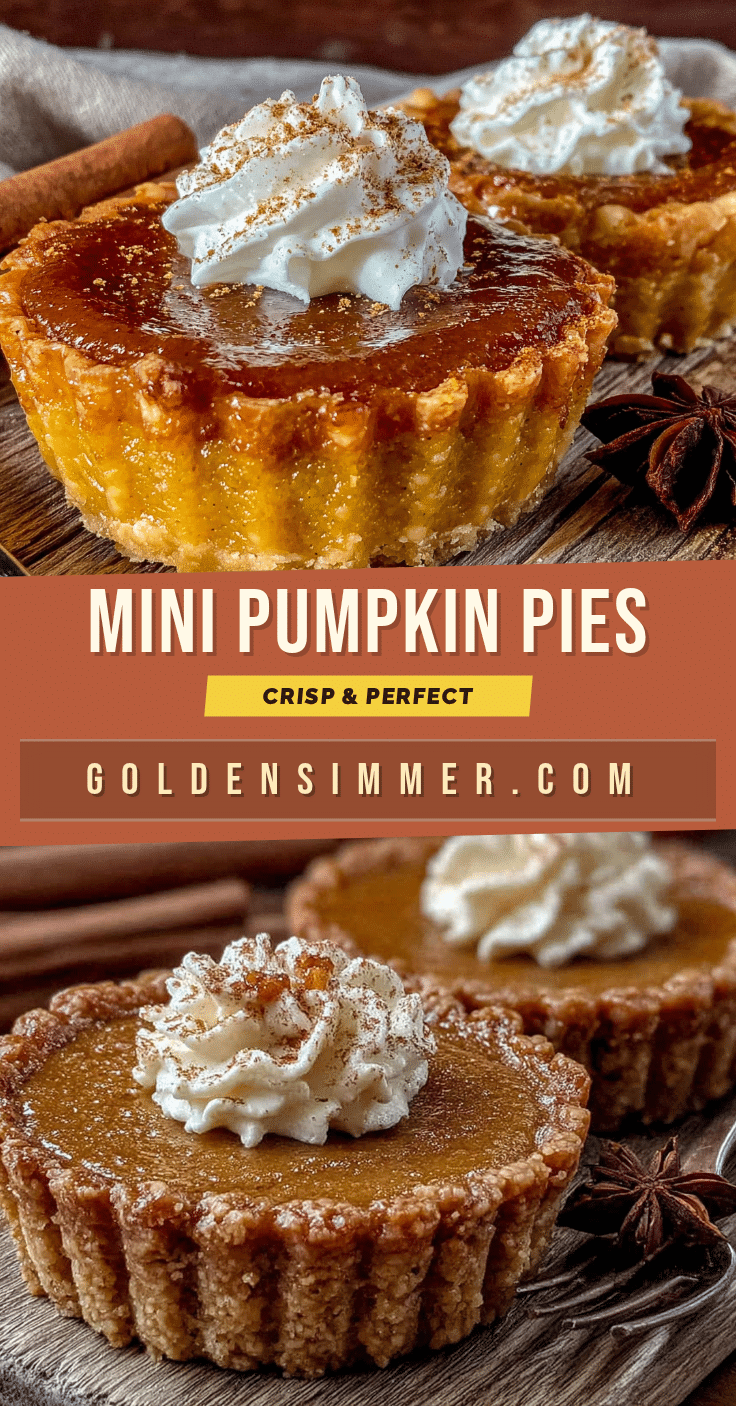
Easy Mini Pumpkin Pies with a Perfectly Crisp Crust
These homemade mini pumpkin pies feature a silky, perfectly spiced filling and a crisp, flaky crust that converts even the most stubborn pumpkin skeptics. Perfect for fall gatherings, potlucks, or a cozy treat any time.
- Prep Time: 30 minutes
- Cook Time: 30 minutes
- Total Time: 1 hour 30 minutes
- Yield: 12 mini pies 1x
- Category: Dessert
- Cuisine: American
Ingredients
- 1 ¼ cups all-purpose flour
- ½ teaspoon fine sea salt
- 1 tablespoon granulated sugar
- 4 tablespoons cold unsalted butter, cubed
- 3 tablespoons cold shortening
- 3–4 tablespoons ice water
- 1 egg yolk + 1 tablespoon water (for egg wash)
- ¾ cup pumpkin purée (not pumpkin pie filling)
- ½ cup heavy cream
- ¼ cup packed brown sugar (light or dark)
- 2 tablespoons granulated sugar
- 1 large egg (room temperature)
- 1 teaspoon vanilla extract (pure)
- 1 teaspoon pumpkin pie spice
- ¼ teaspoon salt
- Whipped cream (for topping, optional)
- A dusting of cinnamon or nutmeg (for topping, optional)
Instructions
- Make the crust dough: In a medium bowl, whisk together flour, salt, and sugar. Add cold butter cubes and shortening chunks. Using a pastry blender or fingertips, cut the fats into the flour until the mixture looks like coarse meal with some pea-sized butter pieces remaining.
- Add the water: Sprinkle 3 tablespoons of ice water over the flour mixture and stir with a fork until the dough starts coming together. If dry, add remaining water one teaspoon at a time. Turn dough onto plastic wrap, flatten into a disk, and refrigerate for at least 30 minutes.
- Preheat oven to 375°F (190°C). Position a rack in the lower third of the oven.
- Roll out the dough: Lightly flour work surface and rolling pin. Roll chilled dough to about ⅛-inch thickness. Use a 3-inch round cutter to cut out 12 rounds. Gather scraps, re-roll, and cut more rounds if needed.
- Fit the rounds into a standard 12-cup muffin tin, pressing gently into each cup. Crimp edges slightly.
- Dock and pre-bake the crusts: Prick the bottom of each crust with a fork. In a small bowl, whisk egg yolk with 1 tablespoon water. Brush a thin layer of egg wash over the bottom and sides of each crust. Bake empty crusts for 8 minutes. Remove and let cool slightly.
- Make the filling: In a medium bowl, whisk together pumpkin purée, heavy cream, both sugars, egg, vanilla extract, pumpkin pie spice, and salt until completely smooth.
- Fill the crusts: Spoon filling into each pre-baked crust, filling almost to the top (leave about ⅛ inch space).
- Bake the pies: Bake at 375°F (190°C) for 18-22 minutes, until filling is set around the edges but still has a slight jiggle in the center. Crust should be golden brown.
- Cool completely: Let pies cool in muffin tin for 10 minutes, then transfer to a wire rack. Cool completely (at least 1 hour) before serving.
Notes
Don’t skip the egg wash on the crust—it creates a waterproof seal that keeps the crust crisp. Let pies cool completely before serving to allow filling to set. For best results, use room temperature ingredients for the filling. If pumpkin purée seems watery, drain in a fine-mesh sieve for 30 minutes before using.
Nutrition
- Serving Size: 1 mini pie
- Calories: 185
- Sugar: 10
- Sodium: 180
- Fat: 11
- Saturated Fat: 6
- Carbohydrates: 20
- Fiber: 1
- Protein: 3
Keywords: mini pumpkin pies, pumpkin pie, fall dessert, Thanksgiving, mini pies, pumpkin spice, easy dessert, homemade pie crust



