Love this? Save it for later!
Share the inspiration with your friends
My friend Jen asked why I couldn’t just roast the squash whole instead of peeling and cubing it first. I remember the moment clearly—a Tuesday afternoon, her standing at my kitchen island with a cup of coffee, watching me wrestle with a particularly stubborn butternut squash. I started to explain why that wouldn’t work—something about even cooking and caramelization—then stopped. Honestly, I had no good reason. I’d just always done it the hard way because that’s how the recipes said to do it.
So I tried her method. I stabbed the squash a few times, threw it on a baking sheet, and roasted it until it was soft enough to collapse under a fork. And you know what? It worked perfectly. Better, actually. The flesh came out silky and sweet, and I didn’t lose a single knuckle to that vegetable peeler. I felt a little sheepish, I’ll admit. Jen just raised her eyebrows and took another sip of her coffee. She didn’t say “I told you so,” but she didn’t need to.
That moment changed how I make this soup. The brown butter came later—a happy accident from a batch I let go a few seconds too long, the nutty aroma filling my kitchen and making everything smell like toasted hazelnuts. Now I can’t imagine this soup without it. The whole thing comes together in about an hour, most of it hands-off while the squash roasts. Maybe you’ve been there—sticking to a method just because it’s what you’ve always done, only to find out there’s a much easier way. This soup is that lesson in a bowl.
Why You’ll Love This Recipe
Let me tell you why this creamy butternut squash soup with brown butter has become my go-to for every fall gathering. It’s the dish I bring to Friendsgiving, the one my family requests for Thanksgiving dinner, and honestly, it’s the recipe that made my neighbor ask for cooking lessons. Here’s what makes it special:
- Deceptively Simple: The whole squash roasts without any peeling or cubing. You’ll save at least 15 minutes of prep time and keep all your fingers intact.
- Pantry-Friendly Ingredients: Besides the squash, you probably have everything else in your kitchen right now. Onion, garlic, broth, butter—that’s it.
- Perfect for Hosting: This soup looks and tastes like you spent hours fussing, but you can make it entirely ahead of time. Reheat it while your guests arrive and pour yourself a glass of wine instead.
- Crowd-Pleasing Magic: I’ve served this to vegans, picky kids, and my uncle who “doesn’t like soup.” Every single bowl came back empty.
- That Brown Butter Finish: Drizzling brown butter on top takes this from a simple soup to something that makes people close their eyes when they taste it. The nutty aroma alone gets compliments before anyone even takes a bite.
What makes this version different from the dozens of squash soup recipes out there? It’s the roasting method, for one. Roasting the squash whole locks in all the moisture and concentrates the natural sweetness without any added sugar. No peeling, no chopping, no mess. And the brown butter isn’t just a garnish—it’s swirled into the soup at the end, adding a depth that makes everyone ask what your secret ingredient is. This isn’t just another squash soup. It’s the one that will earn you a permanent spot on the potluck invitation list.
What Ingredients You Will Need
This recipe uses simple, wholesome ingredients to deliver that rich, velvety texture and complex flavor without any fuss. Most of these are staples you likely already have, and the few that aren’t are easy to find at any grocery store.
For the Soup Base
- 1 medium butternut squash, about 2 ½ to 3 pounds — Look for one that feels heavy for its size with a matte, beige skin. Avoid any with soft spots or green patches. (I’ve found that squashes from farmers’ markets tend to be sweeter than grocery store ones.)
- 1 tablespoon olive oil — Just enough to coat the squash before roasting. A good quality extra virgin works fine here since it’s not the star of the show.
- 1 medium yellow onion, roughly chopped — About 1 ½ cups. Yellow onions give the best savory backbone, but a sweet onion would work too.
- 3 cloves garlic, smashed — Smashing them with the flat side of your knife releases more flavor than slicing. Leave them whole-ish—you’ll blend them later anyway.
- 4 cups vegetable or chicken broth — I prefer Swanson’s vegetable broth for its clean flavor, but homemade is always better if you have it. Low-sodium is best so you can control the salt level.
- ½ teaspoon salt — Plus more to taste at the end. I use fine sea salt.
- ¼ teaspoon black pepper — Freshly ground, please. It makes a difference.
- ¼ teaspoon nutmeg, freshly grated — This is non-negotiable for me. The pre-ground stuff is fine in a pinch, but freshly grated nutmeg adds a warmth that takes this soup from good to unforgettable.
For the Brown Butter

- 4 tablespoons unsalted butter — Use a good quality butter here since it’s the finishing touch. Kerrygold or any European-style butter with higher fat content browns more evenly and tastes nuttier. (Salted butter works too—just skip the extra pinch of salt at the end.)
Optional Garnishes
- Heavy cream or coconut milk — A swirl on top adds a beautiful finish. About ¼ cup is plenty.
- Fresh thyme or sage leaves — Fried sage leaves in the leftover brown butter are incredible. Trust me on this one.
- Roasted pepitas — For crunch and color. I toast mine in a dry pan until they pop.
- Crumbled bacon — If you’re not serving vegetarians, this adds a smoky saltiness that’s hard to beat.
Equipment Needed
You don’t need a fancy kitchen to make this soup. Here’s what you’ll actually use:
- Baking sheet — Any rimmed baking sheet works. Line it with parchment paper for easier cleanup, though it’s not strictly necessary since the squash doesn’t stick much.
- Large pot or Dutch oven — A 5 to 6-quart pot is ideal. I use my Lodge enameled Dutch oven because it holds heat beautifully and looks nice on the table if I’m serving straight from it. A regular stockpot works just fine.
- Immersion blender — This is my preferred tool for silky-smooth soup without transferring hot liquid to a blender in batches. The Cuisinart SmartStick has lasted me years. If you don’t have one, a regular blender works—just let the soup cool slightly and blend in batches, filling the blender no more than halfway each time. Hold the lid with a towel to prevent steam burns.
- Small skillet — For browning the butter. A light-colored pan (stainless steel or enameled) helps you see the color change clearly. Dark nonstick pans make it harder to judge when the butter is done.
- Chef’s knife and cutting board — You’ll only need these for the onion and garlic since the squash goes in whole. A sharp knife makes the onion work quick and tear-free.
That’s it. No food processor, no special soup pot, no gadgets you’ll use once and shove in the back of a cabinet. If you have these basics, you’re ready.
Preparation Method
This method is designed to be as hands-off as possible. Most of the cooking time is inactive roasting, so you can prep your garnishes, set the table, or just sit down and relax while your oven does the work.
- Preheat your oven to 400°F (200°C). Position the rack in the middle of the oven. While it heats, wash your squash thoroughly—you’re roasting it with the skin on, so you want any dirt or residue off the surface.
- Prepare the squash for roasting. Using a sharp knife, carefully pierce the squash in 5 to 6 places. This lets steam escape and prevents any explosive incidents in your oven. (I learned this the hard way. The sound was alarming, and the cleanup was worse.) Rub the whole squash with the olive oil and place it on your baking sheet. Don’t bother with foil or parchment—the skin won’t stick.
- Roast the squash for 45 to 60 minutes. The exact time depends on the size and density of your squash. It’s done when a fork slides easily into the thickest part with no resistance. The skin will look wrinkled and slightly caramelized. Let it cool on the baking sheet for about 10 minutes—long enough to handle, but still warm enough that the flesh is easy to scoop.
- While the squash roasts, start the aromatics. In your large pot, heat a drizzle of olive oil over medium heat. Add the chopped onion and cook, stirring occasionally, until it’s soft and translucent—about 6 to 8 minutes. You want it to soften without browning, so keep the heat moderate. Add the smashed garlic cloves and cook for another minute until fragrant. Remove the pot from the heat and set it aside.
- Scoop the roasted squash. Once the squash is cool enough to handle, cut it in half lengthwise. Scoop out the seeds and stringy bits with a spoon and discard them. Then scoop the soft flesh away from the skin—it should come out in large, tender pieces. Add all the squash flesh to the pot with the cooked onions and garlic. The skin gets discarded at this point.
- Add the broth and seasonings. Pour in the 4 cups of broth, then add the salt, pepper, and nutmeg. Stir everything together and bring it to a gentle simmer over medium heat. Let it bubble softly for 5 minutes—this allows the flavors to meld and ensures everything is piping hot before blending.
- Blend until silky smooth. If using an immersion blender, submerge it fully and blend until the soup is completely smooth, moving it around to catch any chunks. This takes about 2 to 3 minutes. If using a regular blender, work in batches: fill the blender no more than halfway, hold the lid firmly with a folded towel, and blend starting on low speed. Transfer each batch to a clean pot or serving bowl. Taste the soup and adjust salt and pepper as needed.
- Make the brown butter. While the soup is still warm, melt the butter in a small skillet over medium heat. Swirl the pan occasionally as the butter melts and foams. After about 3 to 4 minutes, the foam will subside and you’ll see golden brown specks forming at the bottom of the pan. The butter will smell intensely nutty—that’s your cue. Immediately remove it from the heat and pour it into a heatproof bowl to stop the cooking. Don’t walk away during this step—brown butter goes from perfect to burnt in about 15 seconds.
- Finish and serve. Ladle the soup into bowls. Drizzle a spoonful of brown butter over each serving, swirling it gently into the surface. Add any garnishes you like—a swirl of cream, a few fried sage leaves, a sprinkle of pepitas. Serve immediately while the soup is hot and the brown butter is still liquid and aromatic.
Cooking Tips & Techniques
After making this soup probably two dozen times (I lost count somewhere around last November), I’ve picked up a few tricks that make a real difference. Here are the ones worth knowing:
Don’t skip the nutmeg. I know it seems like a small detail, but that warm, slightly sweet spice is what keeps people taking “just one more bite” when they’re already full. Grate it fresh if you can—the pre-ground stuff loses its punch after a few months in the cabinet. A microplane zester works perfectly for this.
Watch the brown butter like a hawk. I ruined my first three batches. Here’s what to look for: the butter will melt, then foam up dramatically, then the foam will subside. Right when the foam clears, you’ll see tiny brown specks appear at the bottom of the pan. The aroma shifts from milky to nutty almost instantly. Pull it off the heat the second you smell that toasted scent. Pour it into a cold bowl immediately—the residual heat in the pan will keep cooking it otherwise.
Roast the squash whole. I cannot emphasize this enough. Yes, you can peel and cube the squash before roasting. I did it that way for years. But roasting it whole saves time, reduces mess, and produces a sweeter, more evenly cooked result. The skin acts as a natural steamer, trapping moisture and concentrating the squash’s natural sugars. Plus, you avoid the very real risk of losing a fingertip to a slippery butternut squash and a sharp knife.
Let the soup rest before serving. If you’re making this ahead (which I highly recommend for hosting), the flavors actually deepen overnight in the refrigerator. The garlic mellows, the nutmeg spreads, and everything becomes more cohesive. Reheat it gently over medium-low heat, stirring occasionally, and finish with the brown butter just before serving.
Thicken or thin as needed. Different squashes have different water contents. If your soup seems too thin, simmer it uncovered for an extra 5 to 10 minutes to reduce it. If it’s too thick, add broth or water a few tablespoons at a time until it reaches your preferred consistency. The ideal texture should coat the back of a spoon but still pour easily.
Variations & Adaptations
One of the best things about this soup is how flexible it is. I’ve made it for vegans, for gluten-free friends, and for people who want something a little different every time. Here are my favorite variations:
Vegan Version: Swap the butter for a high-quality vegan butter or coconut oil. For the brown butter finish, use a store-bought vegan brown butter (yes, it exists) or make your own by browning vegan butter with a pinch of nutritional yeast for that nutty depth. Use vegetable broth and skip any cream garnish. I’ve served this to non-vegans who didn’t notice the difference.
Spicy Roasted Squash Soup: Add a halved jalapeño or serrano pepper to the roasting pan with the squash. Remove the seeds if you want mild heat, leave them in for more kick. You can also stir in ½ teaspoon of smoked paprika and a pinch of cayenne pepper with the broth. The smokiness plays beautifully with the brown butter.
Apple-Butternut Blend: Add one peeled and chopped apple (Granny Smith or Honeycrisp work well) to the pot when you cook the onions. The apple adds a subtle sweetness and brightness that cuts through the richness of the brown butter. I stumbled onto this combination when I had a leftover apple in my fruit bowl and decided to toss it in. Now it’s my preferred version for fall dinner parties.
Coconut Curry Twist: Replace 1 cup of the broth with full-fat coconut milk. Add 1 tablespoon of red curry paste when you cook the onions, and finish with a squeeze of lime juice instead of the brown butter. This version is completely different—warming, aromatic, and perfect for a cold winter night when you want something that feels like a hug in a bowl.
Make It a Meal: Stir in 2 cups of cooked white beans (cannellini or great northern) after blending for added protein and creaminess. The beans blend in completely and make the soup hearty enough to serve as a main dish with crusty bread and a simple salad.
Serving & Storage Suggestions
This soup shines brightest when you’re hosting. Here’s how to serve it like you do this every day:
Serve it hot. The brown butter needs warmth to stay liquid and aromatic. If the soup has cooled, reheat it gently before adding the brown butter garnish. I like to serve this in wide, shallow bowls—the surface area lets the brown butter spread out and creates a beautiful presentation. A drizzle of cream or coconut milk in a swirl pattern adds visual appeal that looks impressive with almost no effort.
What to serve alongside: A crusty sourdough or baguette is perfect for sopping up every last drop. For a full meal, pair it with a simple arugula salad dressed with lemon vinaigrette—the peppery greens and bright acid cut through the soup’s richness. If you’re hosting a dinner party, serve this as a starter followed by a roasted chicken or a hearty pasta dish. It also works beautifully as a main course for a lighter meal, especially with the white bean addition.
Storage instructions: This soup keeps beautifully in the refrigerator for up to 5 days. Store it in an airtight container. The flavors actually improve after a day or two as they meld together. Do not add the brown butter until you’re ready to serve—it will solidify in the fridge and lose its magic texture.
Freezer tips: This soup freezes exceptionally well for up to 3 months. Let it cool completely, then transfer to freezer-safe containers or zip-top bags. Leave about an inch of headroom for expansion. Thaw overnight in the refrigerator and reheat gently on the stovetop. Make the brown butter fresh when you’re ready to serve—it takes only 4 minutes and makes all the difference.
Reheating method: Reheat the soup over medium-low heat, stirring occasionally. If it seems too thick after refrigeration, thin it with a splash of broth or water. Never microwave this soup in large batches—it heats unevenly and can develop hot spots that ruin the texture. Individual portions are fine in the microwave, just stir well halfway through.
Nutritional Information & Benefits
Here’s the thing about this soup—it feels indulgent, but it’s actually packed with nutrients. One serving (about 1 ½ cups, without heavy cream garnish) contains approximately:
- Calories: 220
- Fat: 12g (from the brown butter and olive oil)
- Carbohydrates: 28g
- Fiber: 6g
- Protein: 4g
- Vitamin A: Over 400% of the daily value (hello, beta-carotene from the squash)
- Vitamin C: 35% of the daily value
- Potassium: 650mg
Butternut squash is a powerhouse of vitamin A, which supports eye health and immune function. The fiber content keeps you full and aids digestion, while the brown butter adds healthy fats that help your body absorb the fat-soluble vitamins in the squash. This soup is naturally gluten-free and can easily be made vegan or dairy-free. The only potential allergen is the dairy in the butter, which is easily substituted.
I love that I can serve this to guests without worrying about dietary restrictions. It’s one of those rare dishes that feels both nourishing and luxurious—like you’re treating yourself while actually doing something good for your body. That’s my favorite kind of cooking, honestly.
Conclusion
This creamy butternut squash soup with brown butter has become my signature dish for fall gatherings, and I think it deserves a spot in your rotation too. It’s the kind of recipe that looks complicated but isn’t, that impresses guests without stressing you out, and that tastes like you spent hours in the kitchen when you actually spent most of that time sitting on the couch while your oven did the work.
I love that I learned this from being wrong—from letting someone else’s suggestion change how I approach a simple vegetable. It reminds me that the best recipes often come from breaking the rules or trying something that seems a little unconventional. So go ahead and roast that squash whole. Let the butter go a shade darker than you think it should. Trust your instincts, and don’t be afraid to experiment.
I’d love to hear how this turns out for you. Did you add your own twist? Did your guests ask for the recipe? Drop a comment below and let me know—I read every single one, and your adaptations often inspire my next batch. And if you’re looking for another crowd-pleasing dish to round out your menu, try this creamy garlic mashed potatoes—they pair beautifully with the soup and are just as make-ahead friendly.
Frequently Asked Questions
Can I use frozen butternut squash instead of fresh?
You can, but the texture won’t be quite as silky. Frozen squash releases more water during cooking, which can make the soup thinner. If using frozen, thaw it first, pat it dry, and roast it on a baking sheet at 400°F for about 25 minutes before adding it to the pot. You’ll still get good flavor, just not the same concentrated sweetness you get from roasting a whole squash.
How do I make the soup thicker?
If your soup turns out thinner than you’d like, simmer it uncovered for 5 to 10 minutes to evaporate some of the liquid. You can also stir in a peeled and diced potato when you add the broth—the potato breaks down and acts as a natural thickener. Alternatively, blend in a handful of raw cashews (soaked in hot water for 15 minutes) for added creaminess without changing the flavor.
Can I make the brown butter ahead of time?
You can make brown butter up to a week in advance and store it in an airtight container in the refrigerator. However, it will solidify and lose some of its aromatic intensity. I strongly recommend making it fresh right before serving—it takes only 4 minutes and the difference in flavor is noticeable. If you do make it ahead, reheat it gently before drizzling over the soup.
Is this soup freezer-friendly?
Yes, absolutely. Freeze the soup without the brown butter in airtight containers for up to 3 months. Thaw overnight in the refrigerator and reheat gently on the stovetop. Make fresh brown butter when you’re ready to serve. I often double the batch and freeze half for busy weeknights—it’s a lifesaver when you need a comforting meal with zero effort.
What can I use instead of nutmeg?
If you don’t have nutmeg, you can substitute ¼ teaspoon of ground cinnamon or ⅛ teaspoon of ground allspice. Both add warmth and depth, though the flavor profile shifts slightly. Cinnamon makes it taste a bit more like pumpkin pie, while allspice adds a more complex, slightly peppery note. I’ve also used a pinch of curry powder in a pinch—it sounds odd but works surprisingly well with the brown butter.
Pin This Recipe!
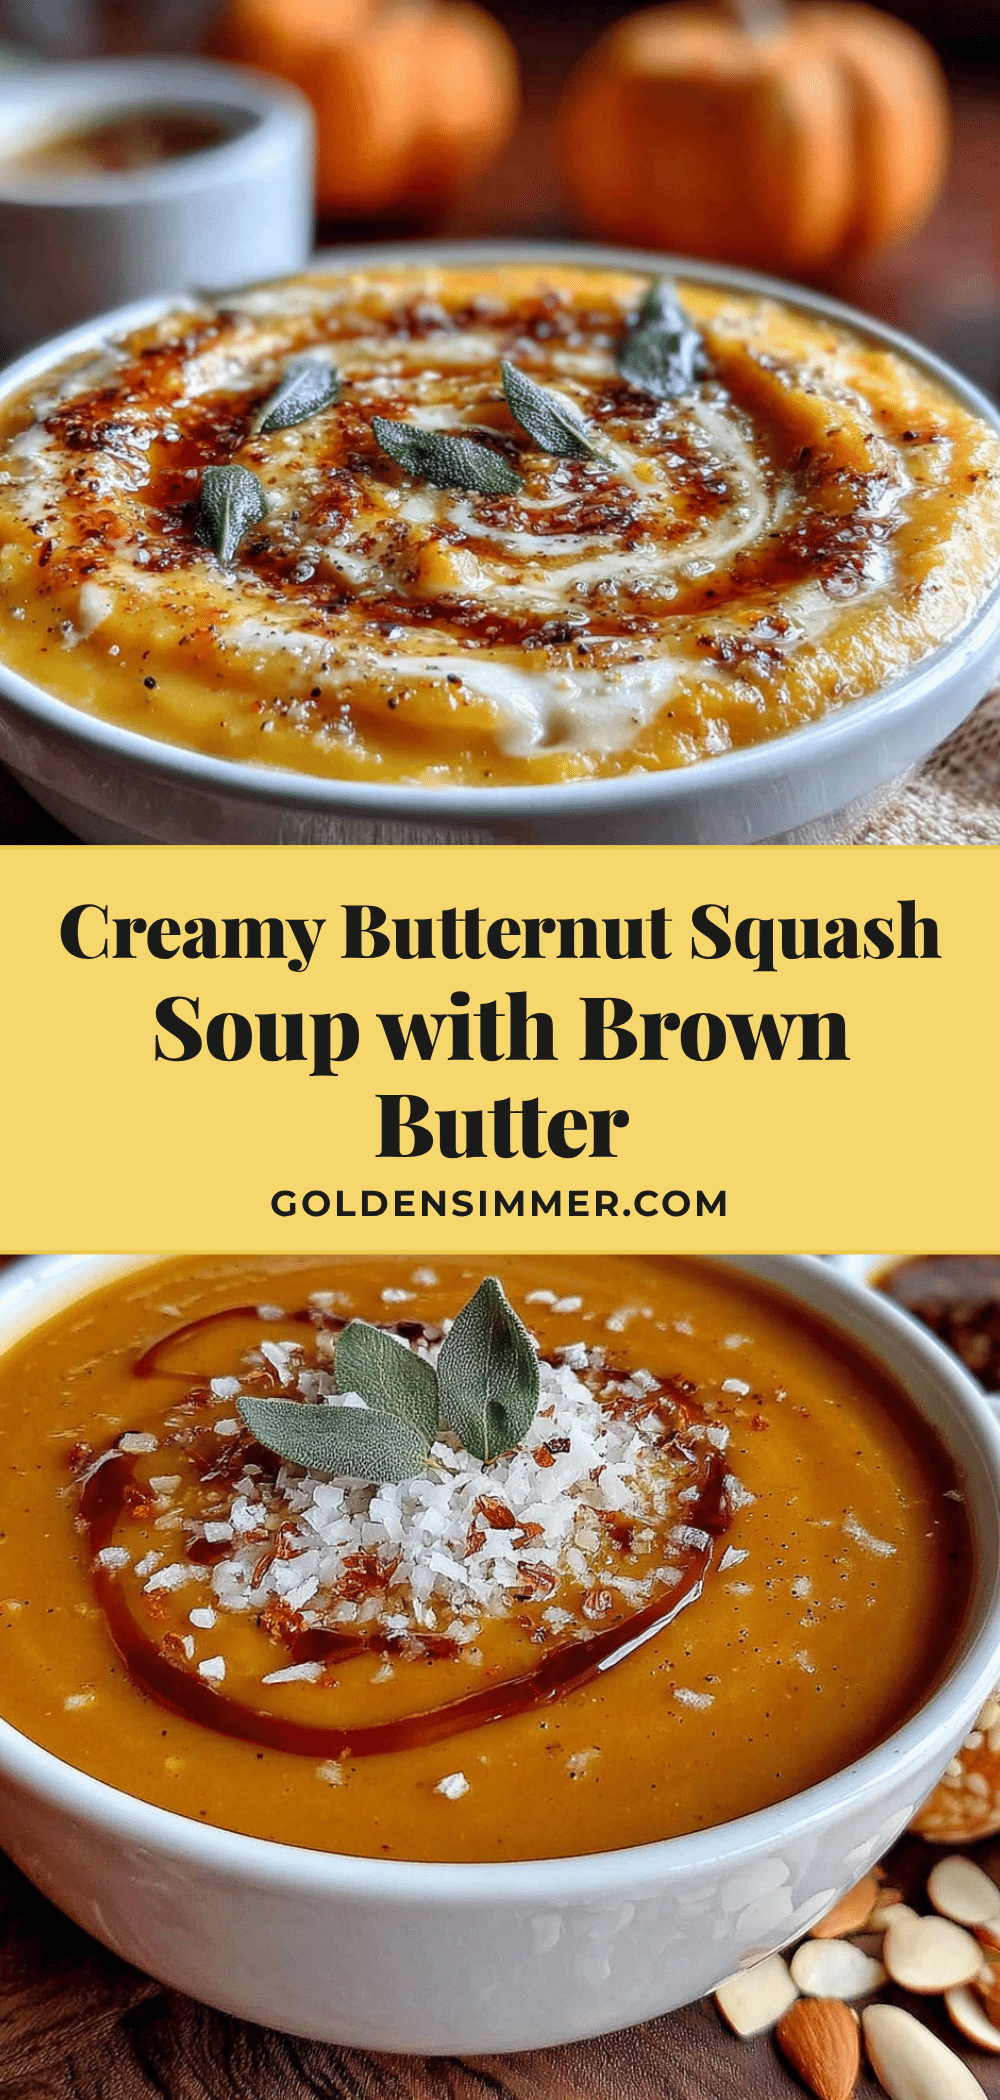
Creamy Butternut Squash Soup with Easy Brown Butter Recipe

This creamy butternut squash soup with brown butter is deceptively simple, roasting the squash whole for maximum sweetness and minimal prep. It’s a crowd-pleasing, make-ahead dish that looks and tastes like you spent hours fussing.
- Prep Time: 15 minutes
- Cook Time: 45 minutes
- Total Time: 1 hour
- Yield: 4 servings 1x
- Category: Soup
- Cuisine: American
Ingredients
- 1 medium butternut squash, about 2 ½ to 3 pounds
- 1 tablespoon olive oil
- 1 medium yellow onion, roughly chopped (about 1 ½ cups)
- 3 cloves garlic, smashed
- 4 cups vegetable or chicken broth (low-sodium preferred)
- ½ teaspoon salt (fine sea salt), plus more to taste
- ¼ teaspoon black pepper, freshly ground
- ¼ teaspoon nutmeg, freshly grated
- 4 tablespoons unsalted butter (for brown butter)
- Optional garnishes: heavy cream or coconut milk, fresh thyme or sage leaves, roasted pepitas, crumbled bacon
Instructions
- Preheat your oven to 400°F (200°C). Position the rack in the middle of the oven. Wash the squash thoroughly.
- Using a sharp knife, carefully pierce the squash in 5 to 6 places. Rub the whole squash with olive oil and place it on a baking sheet.
- Roast the squash for 45 to 60 minutes, until a fork slides easily into the thickest part. Let cool on the baking sheet for about 10 minutes.
- While the squash roasts, heat a drizzle of olive oil in a large pot over medium heat. Add the chopped onion and cook until soft and translucent, about 6 to 8 minutes. Add the smashed garlic and cook for another minute until fragrant. Remove from heat.
- Once the squash is cool enough to handle, cut it in half lengthwise. Scoop out the seeds and stringy bits and discard. Scoop the soft flesh away from the skin and add it to the pot with the onions and garlic.
- Add the 4 cups of broth, salt, pepper, and nutmeg. Stir and bring to a gentle simmer over medium heat. Let it bubble softly for 5 minutes.
- Blend the soup until silky smooth using an immersion blender (about 2 to 3 minutes) or in batches in a regular blender. Taste and adjust salt and pepper as needed.
- While the soup is still warm, make the brown butter: melt the butter in a small skillet over medium heat. Swirl occasionally. After about 3 to 4 minutes, the foam will subside and golden brown specks will form. The butter will smell nutty. Immediately remove from heat and pour into a heatproof bowl.
- Ladle the soup into bowls. Drizzle a spoonful of brown butter over each serving. Add any desired garnishes and serve immediately.
Notes
Roast the squash whole to save prep time and enhance sweetness. Watch the brown butter carefully—it goes from perfect to burnt in seconds. The soup can be made ahead and refrigerated for up to 5 days; flavors deepen overnight. Freeze without brown butter for up to 3 months. For a vegan version, use vegan butter and vegetable broth.
Nutrition
- Serving Size: 1 ½ cups
- Calories: 220
- Sugar: 8
- Sodium: 480
- Fat: 12
- Saturated Fat: 6
- Carbohydrates: 28
- Fiber: 6
- Protein: 4
Keywords: butternut squash soup, creamy soup, brown butter, fall soup, easy soup, vegetarian, gluten-free



