Love this? Save it for later!
Share the inspiration with your friends
Introduction
“The power went out halfway through my movie night last Friday, and honestly, I wasn’t ready to let the evening fizzle out,” I remember telling my friend over coffee the next day. Clueless about dessert options without electricity, I rummaged through the pantry and fridge, hoping for a quick sweet fix. That’s when I stumbled upon a half-used jar of golden caramel sauce and a tub of heavy cream. I figured, why not try making ice cream without an ice cream maker? What came out was this dreamy, creamy no-churn salted caramel swirl ice cream that tasted like a little miracle on a spoon.
You know that feeling when a simple idea turns into your new favorite? This recipe is exactly that—a fuss-free, rich, and velvety dessert that doesn’t require fancy equipment or hours of churning. Plus, the salted caramel swirl adds that perfect balance of sweet and savory that keeps you sneaking spoonfuls at midnight. Maybe you’ve been there too: craving something indulgent but lacking the time or tools. Let me tell you, this recipe has stayed in my rotation ever since that blackout night, and it’s become my go-to for impressing friends who think homemade ice cream is complicated.
So if you’re looking for a luscious, easy-to-make treat that combines creamy texture with a salty caramel kick, this no-churn salted caramel swirl ice cream is about to become your best friend.
Why You’ll Love This Recipe
From my many kitchen experiments, this creamy no-churn salted caramel swirl ice cream stands out for so many reasons—it’s one of those desserts that feels special but is honestly super simple to pull off. Here’s why it’s worth your time:
- Quick & Easy: Ready to enjoy in under 6 hours, most of which is freezing time—perfect for busy days or spontaneous cravings.
- Simple Ingredients: Uses pantry staples and common grocery finds—no fancy ice cream maker needed.
- Perfect for Any Occasion: Whether it’s a casual family dinner, a weekend treat, or even a last-minute party dessert, it fits right in.
- Crowd-Pleaser: The salted caramel swirl is universally loved, and it gets rave reviews from both kids and grown-ups alike.
- Unbelievably Delicious: That silky, creamy texture combined with the salty-sweet ripple is pure comfort food magic.
What sets this recipe apart is the way the caramel is swirled in just right—not mixed completely—creating those beautiful ribbons of flavor that look as good as they taste. Plus, I use a little sea salt to boost the caramel’s depth without overpowering, which makes every bite a perfect balance. Honestly, this isn’t your average no-churn ice cream; it’s the version I keep coming back to because it’s both straightforward and satisfying. It’s the kind of dessert that makes you pause, close your eyes, and savor.
What Ingredients You Will Need
This recipe uses simple, wholesome ingredients to deliver bold flavor and satisfying texture without the fuss. Most of these you likely already have on hand, and substitutions are pretty forgiving if you need them.
- Heavy Cream (2 cups / 480 ml): The base for that rich, creamy texture. I suggest using at least 36% fat content for best results.
- Sweetened Condensed Milk (1 can, 14 oz / 397 g): Adds natural sweetness and smoothness. I prefer La Lechera brand—consistent quality.
- Salted Caramel Sauce (¾ cup / 180 ml): For the swirl. You can use store-bought or homemade (see tips below). Make sure it’s thick enough to hold its shape.
- Sea Salt (½ teaspoon): Enhances the caramel’s flavor. Himalayan or fleur de sel works wonderfully.
- Vanilla Extract (1 teaspoon): Brings warmth and depth to the ice cream base.
Optional additions:
- Chopped nuts like pecans or walnuts for some crunch (about ½ cup / 60 g)
- A splash of bourbon or rum to deepen the caramel flavor (1 tablespoon)
Substitutions: Use coconut cream instead of heavy cream for a dairy-free version (results slightly less creamy), and swap sweetened condensed milk for a vegan condensed milk alternative if needed. If you want a gluten-free treat, this recipe is naturally safe—no flour or additives.
Equipment Needed
- Mixing Bowls: A large bowl for whipping cream and a medium bowl for folding ingredients—glass or metal works best.
- Electric Hand Mixer or Stand Mixer: To whip the cream to soft peaks. You can whisk by hand if you’re feeling ambitious, but it takes more elbow grease!
- Spatula: For gentle folding—silicone ones are my favorite because they’re flexible and don’t damage the cream.
- Loaf Pan or Freezer-Safe Container: To freeze the ice cream. I’ve used anything from metal loaf pans to plastic containers; just cover tightly to avoid ice crystals.
- Measuring Cups and Spoons: For accuracy; essential for balance in sweetness and saltiness.
If you don’t have a hand mixer, a whisk and some patience can do the trick, but the texture might not be as light. Also, keep your mixing bowl and beaters chilled in the fridge beforehand—this little trick helps the cream whip faster and fluffier. I once forgot this step and ended up with a slightly denser base, so trust me, it’s worth the extra minute!
Preparation Method
- Chill Your Equipment: Place your mixing bowl and beaters in the refrigerator for at least 15 minutes before starting. Cold tools help the cream whip up better.
- Whip the Heavy Cream: Pour 2 cups (480 ml) of heavy cream into the chilled bowl. Using an electric mixer, beat on medium-high speed until soft peaks form—about 3-4 minutes. You’ll know it’s ready when the cream holds gentle peaks but isn’t grainy or overwhipped.
- Add Sweetened Condensed Milk and Vanilla: Gently fold in the entire 14 oz (397 g) can of sweetened condensed milk and 1 teaspoon of vanilla extract with a spatula. Be careful to keep the mixture light and airy; overmixing can deflate the whipped cream.
- Prepare Salted Caramel: If using store-bought, give it a quick stir, then mix in ½ teaspoon of sea salt. If homemade, make sure it’s cooled but still pourable.
- Layer the Ice Cream Mixture: Pour half of the cream mixture into your loaf pan or container. Drizzle half of the salted caramel sauce over the top in ribbons. Use a knife or skewer to swirl the caramel gently—don’t overmix, or you’ll lose those pretty swirls.
- Add the Remaining Cream and Caramel: Repeat the layering with the remaining cream mixture and caramel, swirling again lightly for a marbled effect.
- Freeze: Cover the container tightly with a lid or plastic wrap. Freeze for at least 6 hours, ideally overnight, until firm.
- Serve: Take the ice cream out 5-10 minutes before scooping to soften slightly—makes for easier serving and better texture.
Pro Tip: When swirling the caramel, less is more. I used to try mixing it all in, but the visual and flavor contrast is so much better when you keep that ripple effect intact. Also, if you want to add crunch, sprinkle chopped nuts between layers before freezing.
Cooking Tips & Techniques
Let me share some kitchen wisdom I picked up while perfecting this creamy no-churn salted caramel swirl ice cream recipe. First, whipping the cream to just the right softness is crucial. Too loose, and the ice cream can become icy; too stiff, and it might turn grainy or buttery. I usually watch for soft peaks that hold their shape but still look pillowy.
Another tip is about the caramel—if it’s too runny, it won’t hold those beautiful swirls and will simply blend into the cream. To fix this, gently warm the caramel to thicken it or simmer it a little longer if homemade.
One mistake I made early on was skipping the salt. Honestly, it’s what brought the caramel to life. The salt cuts through the sweetness and makes every bite pop. Don’t forget it!
Timing is your friend here. Freezing overnight is best, but if you’re impatient like me, a solid 6 hours works too. Just make sure the ice cream is firm before serving. If you want to multitask, whip the cream while prepping other parts of dinner—it only takes a few minutes.
Lastly, when folding the condensed milk into the whipped cream, be gentle. I learned the hard way that overmixing deflates the cream, resulting in a denser final texture. Using a spatula and slow folding motion keeps the mixture light and airy.
Variations & Adaptations
This recipe is a great foundation for customization, so feel free to put your spin on it. Here are a few of my favorite variations:
- Chocolate Caramel Swirl: Add ¼ cup (30 g) of cocoa powder to the cream base and swirl in chocolate fudge sauce along with the caramel for a double chocolate-caramel delight.
- Vegan Version: Use full-fat coconut cream instead of heavy cream and substitute sweetened condensed milk with a coconut milk-based condensed milk alternative. The texture is slightly different but still creamy.
- Nutty Crunch: Fold in ½ cup (60 g) toasted pecans or almonds for added texture. Toasting the nuts brings out a deeper flavor that pairs beautifully with caramel.
- Spiced Caramel: Stir a pinch of cinnamon or cardamom into the caramel before swirling for a warm, cozy twist.
Once, I even tried adding a splash of espresso to the base, which gave it a subtle mocha taste that was surprisingly addictive. Feel free to adapt based on your pantry or mood—this ice cream is forgiving and fun to experiment with.
Serving & Storage Suggestions
Serve this creamy no-churn salted caramel swirl ice cream slightly softened for the best scoopability and texture. A little tip: let it sit at room temperature for 5-10 minutes before serving. It pairs wonderfully with warm desserts like apple crisp or a simple brownie for that temperature contrast.
For a simple presentation, drizzle extra caramel sauce on top and sprinkle coarse sea salt or chopped nuts for a fancy touch that’s effortless. It also tastes fantastic alongside fresh berries or a shot of espresso for adults.
Store the ice cream tightly covered in the freezer to prevent ice crystals and maintain creaminess. It keeps well for up to 2 weeks but tastes best within the first week. When reheating leftovers (yes, it happens!), let it thaw slightly on the counter rather than microwaving to keep the texture intact.
Over time, the flavors meld beautifully—if you make it ahead, the caramel ribbons soften into the creamy base, creating a mellow, luscious taste that’s honestly hard to beat.
Nutritional Information & Benefits
Per serving (about ½ cup / 125 ml), this no-churn salted caramel swirl ice cream contains approximately:
- Calories: 280-320
- Fat: 18-22g (mostly from heavy cream)
- Sugar: 22-26g
- Protein: 3-4g
The heavy cream provides a good source of fat-soluble vitamins like A and D, while the sea salt adds essential minerals. Using high-quality ingredients like real vanilla and natural caramel sauce means fewer additives and more authentic flavor. While indulgent, this dessert can fit into a balanced lifestyle when enjoyed in moderation.
For those watching carbs, swapping sweetened condensed milk with a lower-sugar alternative or using coconut cream can reduce sugar content. Just keep in mind texture changes slightly.
Conclusion
This creamy no-churn salted caramel swirl ice cream recipe is proof that homemade desserts don’t have to be complicated to be spectacular. It’s simple, sweet, and packed with flavor that feels like a special treat anytime. I love how it combines the ease of no-churn preparation with the wow factor of salted caramel ribbons that truly sing on the palate.
Feel free to tweak the flavors, add nuts or chocolate, or keep it classic—the recipe is forgiving and always rewarding. If you try it, I’d love to hear how you made it your own. Drop a comment below or share your favorite twists so we can all get inspired!
Let this recipe bring a little sweetness to your day—because, honestly, who can resist creamy ice cream with a salty-sweet surprise?
FAQs
Can I make this ice cream without sweetened condensed milk?
You can try using homemade or store-bought dairy-free condensed milk alternatives, or reduce sugar and increase cream slightly, but the texture might be less creamy and more icy.
How long can I store the ice cream in the freezer?
Stored properly in an airtight container, it stays delicious up to 2 weeks, but for best texture and flavor, enjoy within 7 days.
Can I use regular caramel sauce instead of salted caramel?
Yes, but I recommend adding a pinch of sea salt to balance the sweetness and bring out the flavors.
Is it possible to make this recipe nut-free?
Absolutely! The base is naturally nut-free unless you add nuts as a variation, so just skip them if you have allergies.
What’s the best way to serve this ice cream?
Serve it slightly softened at room temperature for easy scooping. It pairs beautifully with warm desserts, fresh fruit, or simply by itself with a drizzle of extra caramel.
Pin This Recipe!
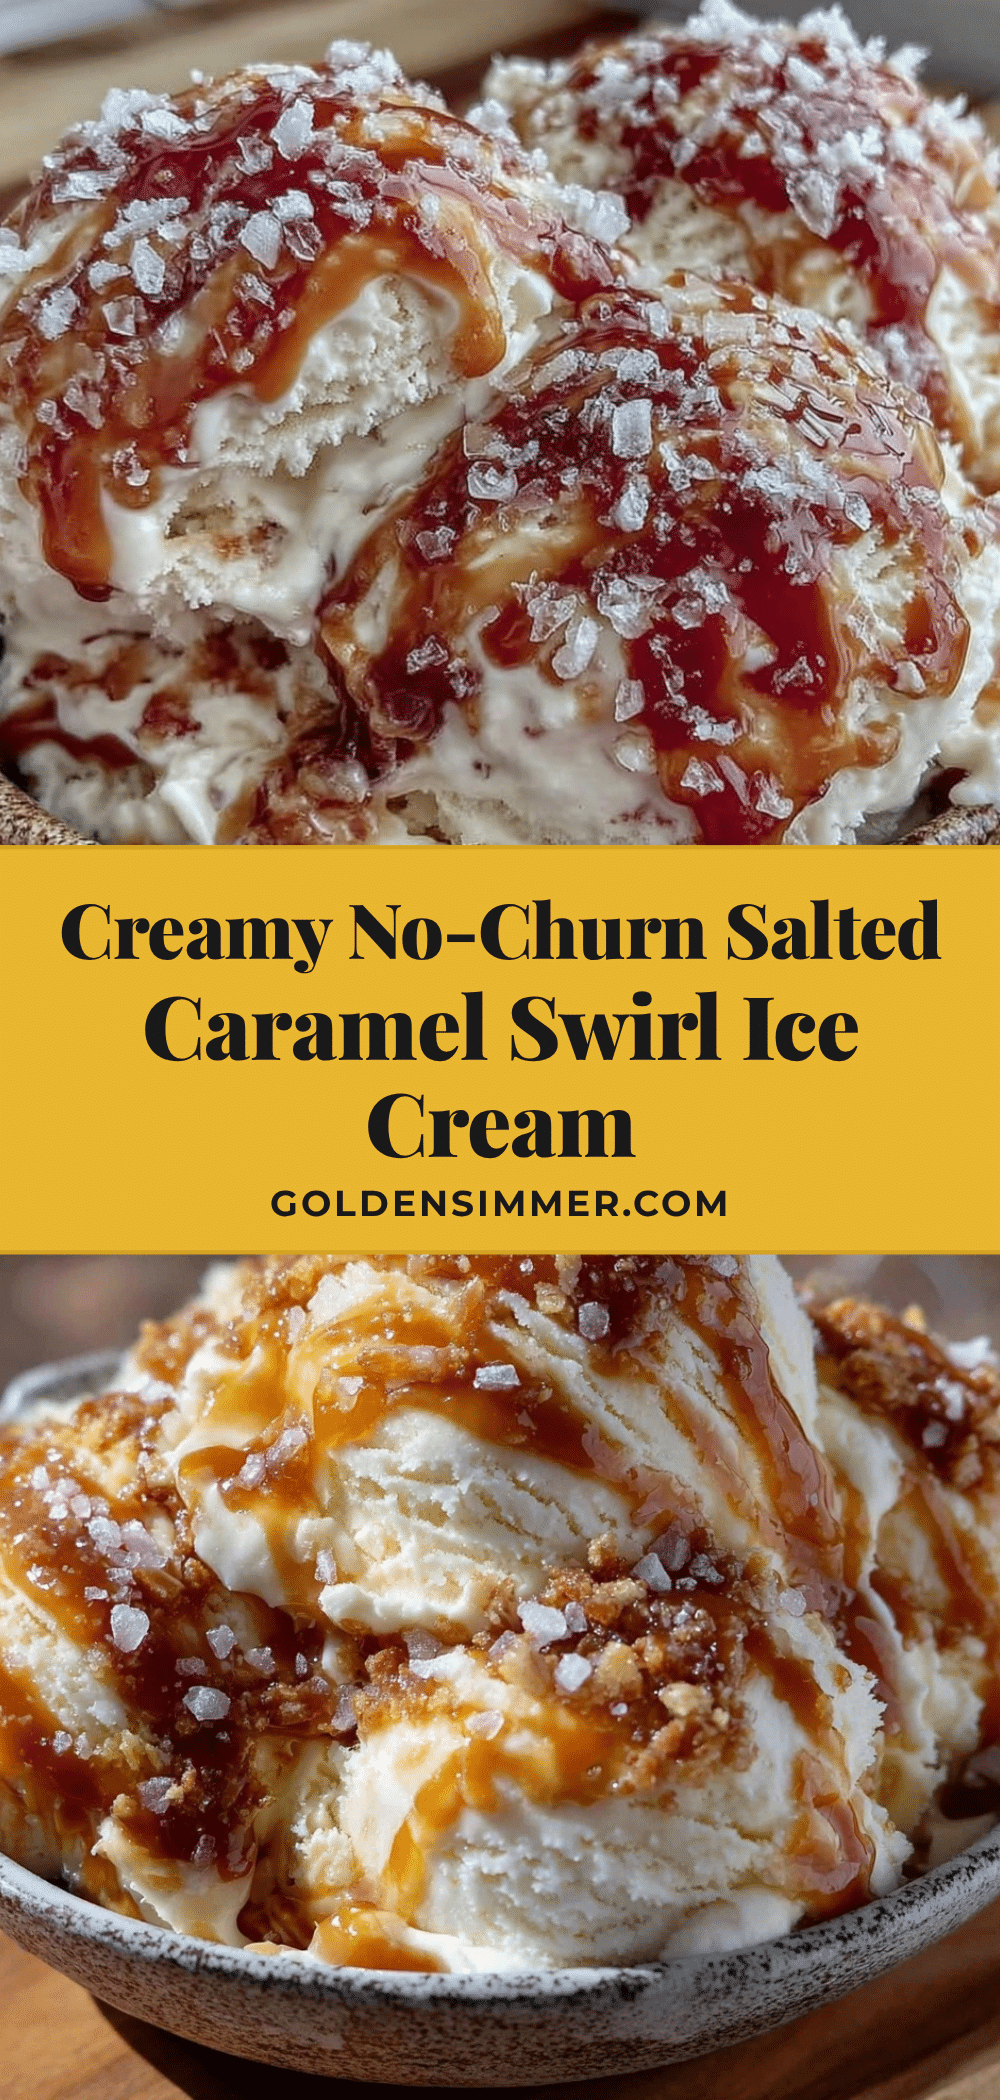
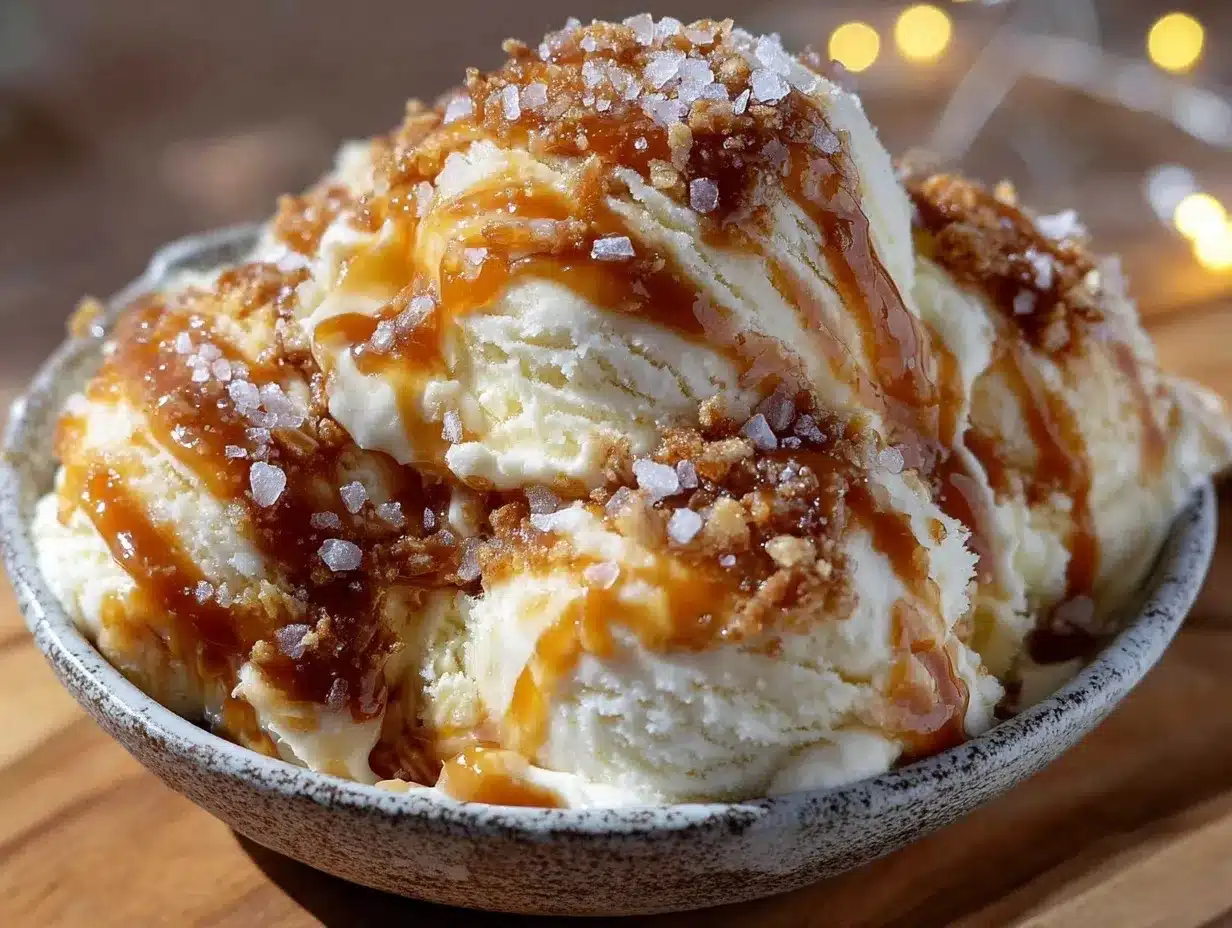
Creamy No-Churn Salted Caramel Swirl Ice Cream
A fuss-free, rich, and velvety no-churn ice cream featuring a perfect balance of sweet and savory salted caramel swirls. Easy to make without an ice cream maker and ready in under 6 hours of freezing.
- Prep Time: 15 minutes
- Cook Time: 0 minutes
- Total Time: 6 hours 15 minutes
- Yield: 8 servings 1x
- Category: Dessert
- Cuisine: American
Ingredients
- 2 cups (480 ml) heavy cream (at least 36% fat)
- 1 can (14 oz / 397 g) sweetened condensed milk
- 3/4 cup (180 ml) salted caramel sauce (store-bought or homemade)
- 1/2 teaspoon sea salt (Himalayan or fleur de sel recommended)
- 1 teaspoon vanilla extract
- Optional: 1/2 cup (60 g) chopped nuts like pecans or walnuts
- Optional: 1 tablespoon bourbon or rum
Instructions
- Chill your mixing bowl and beaters in the refrigerator for at least 15 minutes before starting.
- Pour 2 cups (480 ml) of heavy cream into the chilled bowl. Using an electric mixer, beat on medium-high speed until soft peaks form, about 3-4 minutes.
- Gently fold in the entire 14 oz (397 g) can of sweetened condensed milk and 1 teaspoon of vanilla extract with a spatula, keeping the mixture light and airy.
- If using store-bought caramel, stir it and mix in 1/2 teaspoon of sea salt. If homemade, ensure it is cooled but still pourable.
- Pour half of the cream mixture into a loaf pan or freezer-safe container. Drizzle half of the salted caramel sauce over the top in ribbons and gently swirl with a knife or skewer without overmixing.
- Repeat layering with the remaining cream mixture and caramel, swirling lightly again for a marbled effect.
- Cover the container tightly with a lid or plastic wrap and freeze for at least 6 hours, ideally overnight, until firm.
- Before serving, take the ice cream out 5-10 minutes to soften slightly for easier scooping.
Notes
Chill your mixing bowl and beaters before whipping cream for better texture. Use thick caramel sauce to maintain swirl shape. Avoid overmixing to keep the ice cream light and airy. Let ice cream soften 5-10 minutes before serving for best scoopability. Optional additions include nuts or a splash of bourbon/rum. For dairy-free, substitute coconut cream and vegan condensed milk alternative.
Nutrition
- Serving Size: 1/2 cup (125 ml)
- Calories: 280320
- Sugar: 2226
- Fat: 1822
- Protein: 34
Keywords: no-churn ice cream, salted caramel ice cream, easy homemade dessert, no ice cream maker, creamy ice cream, caramel swirl, quick dessert