Love this? Save it for later!
Share the inspiration with your friends
“You’ve got to try these bars,” my yoga instructor said casually after class one humid Tuesday evening. Honestly, I wasn’t expecting much—just another snack recommendation—but the way she described her Easy Gluten-Free No-Bake Peanut Butter Oat Bars with Dark Chocolate made me curious. She mentioned how she whips them up quickly between work and family chaos, and that they satisfy her late-night sweet tooth without derailing her clean-eating goals.
I’ll admit, I was a bit skeptical at first. No-bake and gluten-free? Those can sometimes mean bland or crumbly. But the next day, I found myself in my kitchen trying to recreate what she’d described. I made a bit of a mess (there was peanut butter everywhere—don’t ask), forgot to set a timer, and debated whether to add more chocolate chips. Yet, the result was incredible: chewy, nutty, with just the right touch of rich dark chocolate that melted softly on the tongue.
Maybe you’ve been there—looking for a quick, wholesome snack that doesn’t involve endless baking or obscure ingredients. That’s exactly why these bars stuck with me. They’re simple, satisfying, and perfect for anyone juggling a busy life while trying to eat well. Let me tell you, this recipe has become my go-to snack when I need a little boost or a sweet pick-me-up without the guilt.
Why You’ll Love This Recipe
After testing this recipe multiple times, let me share why the Easy Gluten-Free No-Bake Peanut Butter Oat Bars with Dark Chocolate are a keeper in my kitchen:
- Quick & Easy: Ready in under 15 minutes, no oven required—ideal for last-minute snack cravings.
- Simple Ingredients: Uses pantry staples like oats, peanut butter, and honey; no fancy or hard-to-find items.
- Perfect for On-the-Go: Great for packed lunches, post-workout snacks, or afternoon energy boosts.
- Crowd-Pleaser: My friends (even the picky eaters) always ask for seconds—gluten-free and delicious!
- Unbelievably Delicious: The chewy oats combined with creamy peanut butter and bittersweet dark chocolate create a texture and flavor combo that’s tough to beat.
What sets this recipe apart is the balance and technique. For example, I blend the peanut butter with a touch of honey and a pinch of salt to bring out a deep, rich flavor instead of just sweetness. Also, melting the dark chocolate and drizzling it on top instead of mixing it in keeps each bite indulgently smooth and slightly crunchy. Honestly, it’s not just a snack—it’s a little moment of joy in your day.
What Ingredients You Will Need
This recipe uses simple, wholesome ingredients to deliver bold flavor and satisfying texture without the fuss. Most are pantry staples, and you can easily swap a few depending on your preferences or dietary needs.
- Old-Fashioned Rolled Oats (2 cups / 180 g) – Use gluten-free certified oats to keep the recipe celiac-safe.
- Natural Creamy Peanut Butter (1 cup / 250 g) – I recommend brands like Smucker’s Natural or Justin’s for the best creaminess and flavor.
- Honey (⅓ cup / 113 g) – Acts as a natural sweetener and binder; you can substitute with maple syrup for a vegan twist.
- Vanilla Extract (1 tsp) – Adds depth and warmth.
- Sea Salt (¼ tsp) – Enhances the peanut butter’s nuttiness and balances sweetness.
- Dark Chocolate Chips (½ cup / 90 g) – Use at least 70% cacao for a rich, slightly bitter contrast that pairs beautifully with peanut butter.
- Chopped Nuts (Optional) (¼ cup / 30 g) – Toasted almonds or walnuts add crunch if desired.
- Chia Seeds or Flaxseeds (Optional) (2 tbsp) – For a subtle nutrition boost without changing flavor.
Feel free to customize with mix-ins like dried fruit or shredded coconut, but keep the base ingredients intact for best results. If you’re allergic to peanuts, almond or sunflower seed butter can substitute nicely here.
Equipment Needed
- Mixing Bowl: A medium to large bowl for combining ingredients. I prefer a glass bowl for easy cleanup.
- Spatula: For stirring and pressing the mixture evenly into the pan.
- 8×8-inch Baking Pan or Square Dish: Line it with parchment paper to lift bars out easily.
- Microwave-Safe Bowl or Double Boiler: To melt the dark chocolate gently without burning.
- Measuring Cups and Spoons: Accurate measurements make all the difference in texture.
If you don’t have a microwave, melting chocolate over a double boiler works just as well (and honestly, I prefer this method to avoid scorching). For budget-friendly options, silicone spatulas and reusable parchment paper liners save you money and reduce waste.
Preparation Method
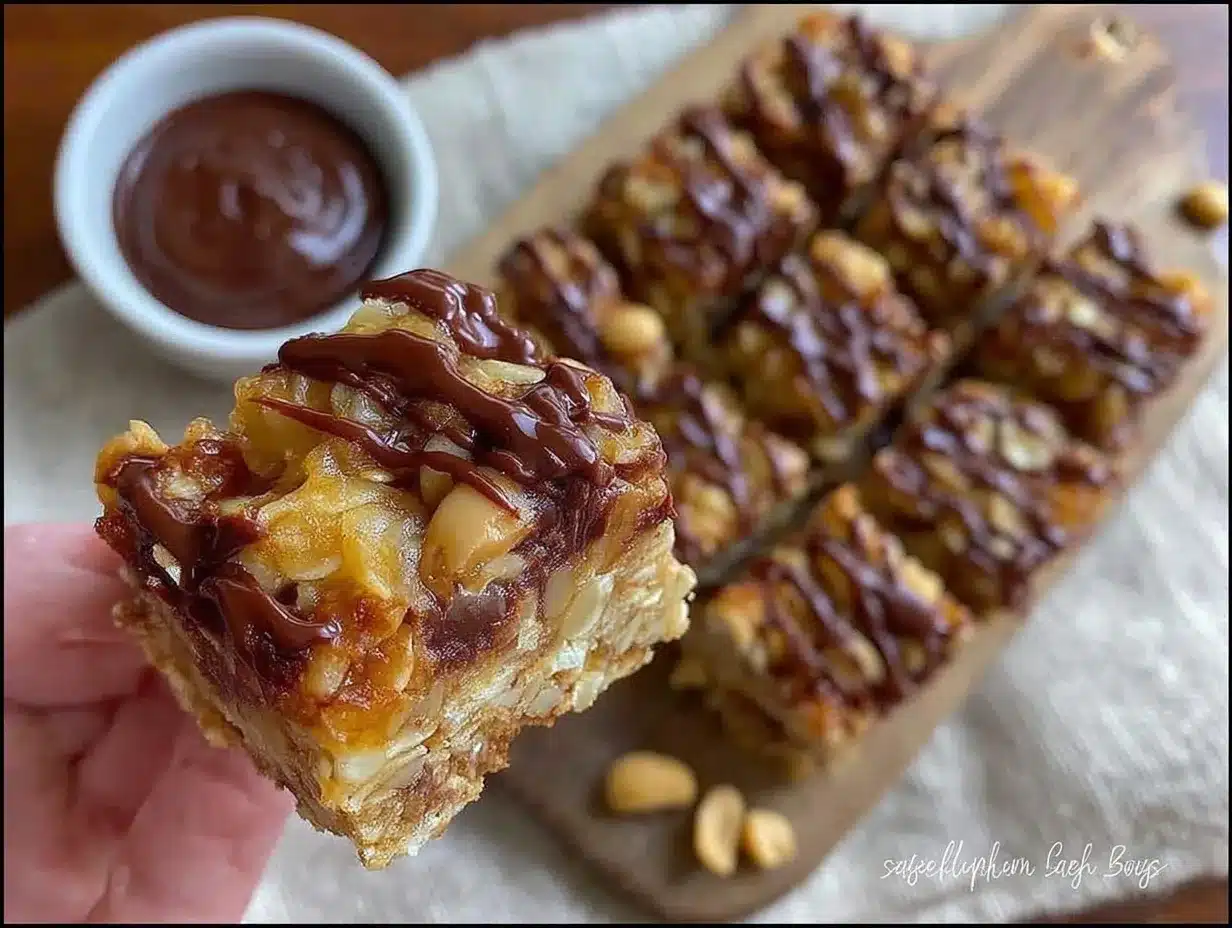
- Prepare Your Pan: Line an 8×8-inch (20×20 cm) baking pan with parchment paper, leaving some overhang on the sides for easy removal. This step saves you from sticky messes later. (5 minutes)
- Mix the Wet Ingredients: In your mixing bowl, combine 1 cup (250 g) of natural creamy peanut butter, ⅓ cup (113 g) honey, 1 tsp vanilla extract, and ¼ tsp sea salt. Stir until smooth and well-blended. You’ll notice the mixture gets glossy and thick—this is the magic binding agent. (3-4 minutes)
- Add the Dry Ingredients: Stir in 2 cups (180 g) of gluten-free rolled oats, optional 2 tbsp chia or flaxseeds, and any chopped nuts if using. Mix gently but thoroughly, making sure every oat is coated with the peanut butter mixture. The texture should be sticky but not soggy. If it feels dry, add a teaspoon of water or more honey. (3-5 minutes)
- Press into the Pan: Transfer the mixture to your lined pan. Use a spatula or clean hands to press it down firmly and evenly, creating a compact layer about 1-inch (2.5 cm) thick. This helps the bars hold together after chilling. Don’t be shy—apply some muscle here! (3 minutes)
- Melt the Chocolate: Place ½ cup (90 g) dark chocolate chips in a microwave-safe bowl. Microwave in 20-second bursts, stirring in between, until smooth. Alternatively, use a double boiler on low heat. Be careful not to overheat or burn the chocolate. (3-4 minutes)
- Drizzle the Chocolate: Spoon or drizzle the melted chocolate over the pressed oat mixture. Use a fork or spatula to spread it gently if you want a thin, even layer or just leave it drizzle-style for a rustic look. (2 minutes)
- Chill & Set: Place the pan in the refrigerator for at least 2 hours or until firm. This step is crucial; it lets the bars solidify so they won’t crumble when cut. (2+ hours)
- Cut & Serve: Use the parchment overhang to lift the bars out. Transfer to a cutting board and slice into 10-12 bars, depending on size preference. Store extras in an airtight container in the fridge. (5 minutes)
Pro tip: If your bars seem crumbly, press them even firmer next time and don’t skip the chilling step. And if the chocolate hardens too fast while drizzling, gently warm it again for easier spreading.
Cooking Tips & Techniques
These bars are forgiving, but a few tips can make your batch shine:
- Choosing the Right Oats: Old-fashioned rolled oats work best for texture. Instant oats can turn mushy, and steel-cut oats won’t soften enough in no-bake recipes.
- Peanut Butter Consistency: Use natural, creamy peanut butter without too much oil separation. Stir well before measuring. Chunky varieties can be used but change texture.
- Sweetness Balance: Honey adds not just sweetness but moisture and stickiness. Measure carefully—too little and bars fall apart, too much and they become overly sticky.
- Melting Chocolate: Melt slowly and stir often to prevent burning. A little coconut oil (about 1 tsp) mixed into the chocolate can help with smoothness and shine.
- Pressing the Mixture: Don’t be shy about applying pressure when packing the bars. A densely packed layer helps them hold together well once chilled.
- Storage: These bars keep best refrigerated because the peanut butter and honey make them soft at room temp. For longer storage, freeze them wrapped individually.
I once tried skipping the chilling step because I was impatient—big mistake! The bars crumbled everywhere and ended up as snack “crumbs.” Learned my lesson the hard way!
Variations & Adaptations
This recipe is super adaptable to different tastes and dietary needs:
- Nut-Free Version: Swap peanut butter for sunflower seed butter and ensure oats are processed in a nut-free facility.
- Vegan Option: Use maple syrup instead of honey and check that chocolate chips are dairy-free.
- Flavor Twist: Add a teaspoon of cinnamon or a splash of espresso powder to the oat mixture for subtle warmth or a mocha flavor.
- Seasonal Add-ins: Stir in dried cranberries or chopped apricots during fall for a fruity touch.
- Chocolate Variation: Mix chocolate chips directly into the oat mixture before pressing, then drizzle with white chocolate for contrast.
One time, I tried adding shredded coconut and a pinch of sea salt on top before chilling—heavenly! Feel free to experiment but keep the base ratios similar for texture.
Serving & Storage Suggestions
These bars are best served chilled or slightly cool. They’re perfect as a grab-and-go snack or a quick breakfast paired with a cup of coffee or tea. For a more indulgent treat, warm one briefly in the microwave (10-15 seconds) so the chocolate softens just a bit.
Store leftovers in an airtight container in the fridge for up to a week. If you want to keep them longer, wrap individual bars in parchment and freeze for up to 3 months. When ready to eat, just thaw at room temperature for 15 minutes or warm slightly.
Over time, the flavors meld beautifully—the peanut butter tastes even richer, and the oats soften slightly but keep their chewiness. This means these bars can be made a day ahead for better flavor and convenience.
Nutritional Information & Benefits
Each bar (assuming 12 servings) offers approximately:
| Calories | 180-200 kcal |
|---|---|
| Protein | 5-6 g |
| Fat | 10-12 g (mostly healthy fats from peanut butter) |
| Carbohydrates | 18-20 g (mostly complex carbs and natural sugars) |
| Fiber | 3-4 g |
The oats provide sustained energy and fiber, while peanut butter contributes plant-based protein and heart-healthy fats. Dark chocolate adds antioxidants and a satisfying richness without too much sugar. Plus, this recipe is free from gluten and can be made dairy-free, making it accessible for many dietary needs.
From a wellness perspective, these bars offer a balanced snack that won’t spike your blood sugar—perfect for keeping energy steady during busy days.
Conclusion
The Easy Gluten-Free No-Bake Peanut Butter Oat Bars with Dark Chocolate have become a staple in my snack rotation for good reason. They’re fast to make, delicious, and flexible enough to suit a variety of diets and taste preferences. I love how a handful of simple ingredients can come together to create something this satisfying—and honestly, it feels like a small treat every time I bite into one.
Whether you’re a busy parent, a student, or just someone who appreciates a wholesome snack, I encourage you to try this recipe your way. Maybe add your favorite nuts, swap in a different nut butter, or experiment with spices. Let me know how yours turn out—comments and adaptations are always welcome!
Here’s to easy snacks that taste like a little bit of homemade love and keep you fueled for whatever’s next.
FAQs
Can I use quick oats instead of rolled oats for these bars?
Quick oats tend to get mushy and won’t provide the chewy texture these bars are known for. For best results, stick with old-fashioned rolled oats.
How long do these bars last in the fridge?
Stored in an airtight container, they stay fresh for up to one week. Beyond that, they may start to lose their firmness and texture.
Is it possible to make these bars without any sweetener?
The honey or maple syrup is essential as a binder and adds needed sweetness. Omitting it will likely cause the bars to fall apart and taste bland.
Can I freeze these bars?
Absolutely! Wrap them individually in parchment paper and freeze for up to 3 months. Thaw at room temperature before eating.
What can I substitute for peanut butter if I have a nut allergy?
Sunflower seed butter or soy nut butter are great alternatives that keep the recipe nut-free while maintaining a similar creamy texture.
For a snack that’s equally wholesome yet packed with savory flavor, you might enjoy my crispy garlic chicken recipe. It’s a great dinner option after your snack-filled day!
Pin This Recipe!
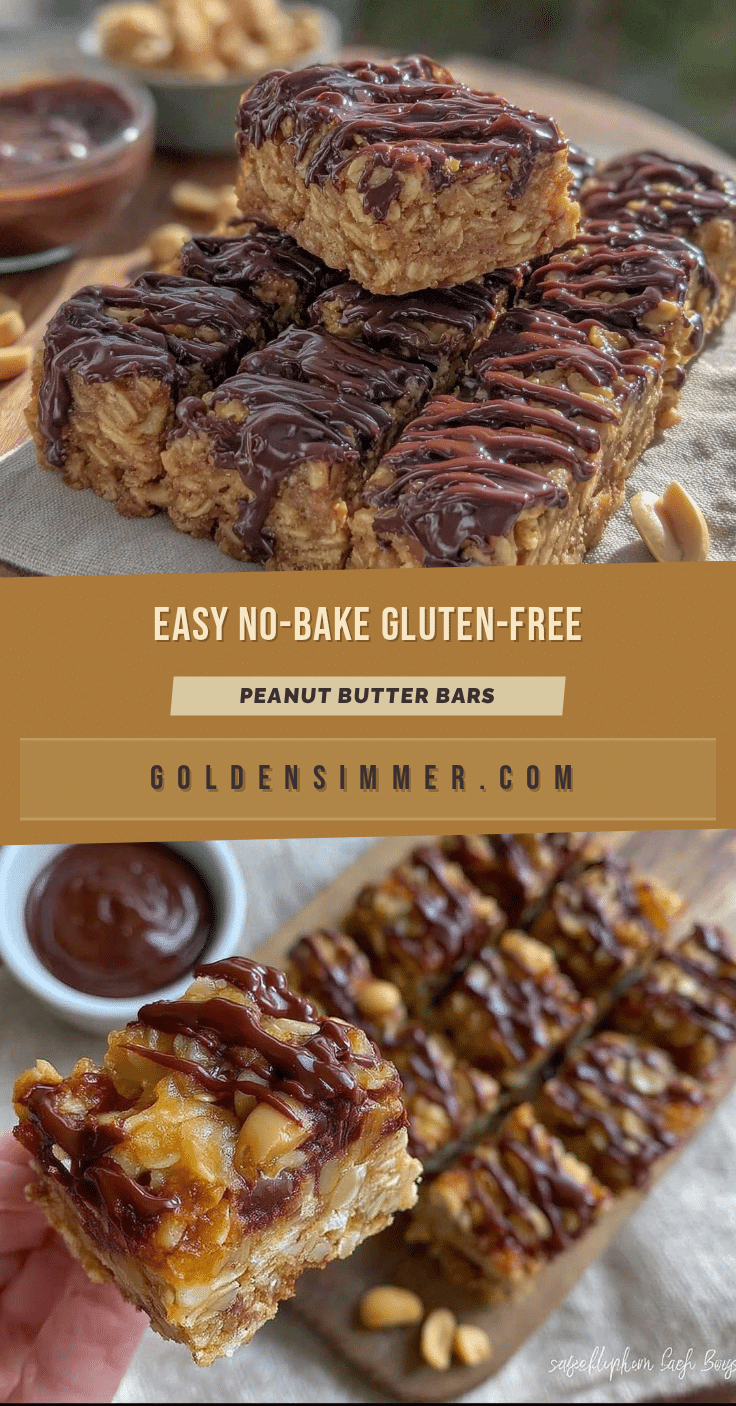
Easy Gluten-Free No-Bake Peanut Butter Oat Bars
Quick and simple no-bake bars made with gluten-free oats, creamy peanut butter, honey, and dark chocolate. Perfect for a healthy, satisfying snack on the go.
- Prep Time: 15 minutes
- Cook Time: 0 minutes
- Total Time: 2 hours 15 minutes
- Yield: 10-12 bars 1x
- Category: Snack
- Cuisine: American
Ingredients
- 2 cups (180 g) old-fashioned rolled oats (gluten-free certified)
- 1 cup (250 g) natural creamy peanut butter
- ⅓ cup (113 g) honey (or maple syrup for vegan option)
- 1 tsp vanilla extract
- ¼ tsp sea salt
- ½ cup (90 g) dark chocolate chips (70% cacao or higher)
- ¼ cup (30 g) chopped nuts (optional, toasted almonds or walnuts)
- 2 tbsp chia seeds or flaxseeds (optional)
Instructions
- Line an 8×8-inch (20×20 cm) baking pan with parchment paper, leaving some overhang for easy removal. (5 minutes)
- In a mixing bowl, combine peanut butter, honey, vanilla extract, and sea salt. Stir until smooth and well blended. (3-4 minutes)
- Add rolled oats, optional chia or flaxseeds, and chopped nuts if using. Mix gently but thoroughly until every oat is coated. If mixture feels dry, add a teaspoon of water or more honey. (3-5 minutes)
- Transfer mixture to the lined pan and press down firmly and evenly to create a compact 1-inch (2.5 cm) thick layer. (3 minutes)
- Melt dark chocolate chips in a microwave-safe bowl in 20-second bursts, stirring between, or use a double boiler on low heat. (3-4 minutes)
- Drizzle melted chocolate over the pressed oat mixture and spread gently if desired. (2 minutes)
- Refrigerate for at least 2 hours or until firm. (2+ hours)
- Lift bars out using parchment overhang and cut into 10-12 bars. Store extras in an airtight container in the fridge. (5 minutes)
Notes
Use old-fashioned rolled oats for best texture; avoid quick or steel-cut oats. Press mixture firmly into pan and do not skip chilling step to prevent crumbling. Melt chocolate slowly to avoid burning; adding 1 tsp coconut oil can improve smoothness. Store bars refrigerated for up to one week or freeze individually for up to 3 months.
Nutrition
- Serving Size: 1 bar (assuming 12 b
- Calories: 190
- Sugar: 8
- Sodium: 70
- Fat: 11
- Saturated Fat: 2
- Carbohydrates: 19
- Fiber: 3.5
- Protein: 5.5
Keywords: gluten-free, no-bake, peanut butter, oat bars, healthy snacks, dark chocolate, quick snack, vegan option



