Love this? Save it for later!
Share the inspiration with your friends
The summer I turned thirty, I threw a Halloween party in July. It was hot, humid, and completely ridiculous, but I had this vision of a dessert table that looked like a miniature cemetery. My friend Marcus, who claims he “doesn’t do cute food,” spent twenty minutes arranging gummy worms around a pudding cup, muttering about the structural integrity of crushed cookies. I knew I had something good when he asked for seconds without looking up.
I used to think themed desserts were more trouble than they were worth. Honestly, the idea of layering pudding, crushing cookies, and hunting down plastic skeletons felt like a project I’d abandon halfway through. But then I made these Easy Spooky Graveyard Dirt Pudding Cups for a neighbor’s kid’s birthday, and I found myself standing in the kitchen, licking chocolate pudding off a spatula at eleven o’clock at night, grinning like an idiot. These spooky graveyard dirt pudding cups are that rare thing—a treat that looks impressive but takes almost no real effort. You know that feeling when a recipe looks like you spent hours on it, but really you just threw things together and hoped for the best? That’s exactly this.
Maybe you’ve been there, scrolling through Halloween desserts that require fondant, special molds, or a pastry degree. These cups are the opposite of that. They’re forgiving, adaptable, and genuinely fun to assemble. The first time I made them, I forgot to chill the pudding long enough and the cookies sank into a sad, brown mush. My nephew still ate three and asked for the recipe. That’s when I knew this was a keeper—a recipe that works even when you mess it up a little.
Why You’ll Love This Recipe
Let me tell you why these Easy Spooky Graveyard Dirt Pudding Cups have become my go-to Halloween dessert, year after year. I’ve tested this recipe through countless parties, last-minute school events, and even a few grown-up dinner parties where everyone secretly wanted the spooky dessert.
- Quick & Easy: Comes together in about 20 minutes of active time, plus a short chill. Perfect for busy weeknights when you need a Halloween treat without the all-day project.
- Simple Ingredients: You probably have most of these in your pantry right now. No weird gelatin, no specialty extracts, no trips to three different stores.
- Perfect for Halloween Parties: These individual cups are self-serve, portable, and visually striking. Great for classroom parties, office potlucks, or a spooky movie night.
- Crowd-Pleaser: Kids go wild for the gummy worms and cookie “dirt.” Adults secretly love the nostalgic chocolate pudding. I’ve never brought these anywhere without someone asking for the recipe.
- Unbelievably Delicious: The combination of creamy chocolate pudding, crunchy cookie crumbs, and chewy gummy candies is next-level comfort food. It’s the texture trifecta.
What makes this recipe different from the rest? It’s the technique of layering the pudding and “dirt” so that every spoonful gives you the perfect ratio of creamy to crunchy. I also add a tiny pinch of salt to the cookie crumbs, which balances the sweetness and makes the chocolate flavor pop. It’s a small thing, but it makes a big difference. This isn’t just another dirt cup recipe—it’s the one I’ve perfected through trial and error, and the one I always come back to.
This recipe is the kind that makes you close your eyes after the first bite. It’s Halloween fun reimagined—simpler, faster, but with the same nostalgic satisfaction. Perfect for impressing a crowd of kids without stress, or turning a simple dessert into something memorable.
What Ingredients You Will Need
This recipe uses simple, pantry-friendly ingredients to deliver a dessert that looks like it came from a bakery. Most of these are staples you likely already have, which is exactly the point.
- For the Pudding Layer
- 2 (3.9-ounce) boxes instant chocolate pudding mix (I prefer Jell-O brand for consistent texture)
- 4 cups (960 ml) cold whole milk (2% works too, but whole milk gives a creamier result)
- 1/2 teaspoon vanilla extract (optional, but adds a subtle warmth)
- For the Dirt Layer
- 1 (14.3-ounce) package chocolate sandwich cookies, like Oreos (about 36 cookies)
- 2 tablespoons unsalted butter, melted (adds richness and helps the crumbs clump slightly)
- 1/8 teaspoon salt (balances sweetness—don’t skip this)
- For the Graveyard Decorations
- 1 cup gummy worms (I recommend Trolli or Black Forest brand for best chew)
- 12 small rectangular cookies, like Milano or Pirouline, for tombstones (or use store-bought chocolate wafers)
- Black decorating gel or icing pen (for writing “RIP” on tombstones)
- Optional: candy bones, plastic skeletons, or edible eyeballs for extra spookiness
For the pudding, instant mix is non-negotiable here—it sets quickly and gives that classic, silky texture that reminds you of school lunches. I’ve tried making this with from-scratch pudding, and honestly, it’s too rich and takes too long to set. The instant version is perfect for this recipe. Look for boxes that say “instant” on the label, not “cook & serve.”
For the cookie crumbs, you want chocolate sandwich cookies with the cream filling still intact. The filling helps the crumbs stick together and adds a subtle sweetness. If you’re feeling ambitious, you can use the double-stuf variety for extra creamy dirt. I won’t judge.
For the tombstones, any flat, rectangular cookie works. I’ve used shortbread cookies, chocolate wafers, and even graham crackers cut into rectangles. The key is something sturdy enough to stand upright in the pudding without crumbling immediately. Milano cookies are my favorite because they have a nice, clean edge for writing.
Equipment Needed
You don’t need fancy equipment for these Easy Spooky Graveyard Dirt Pudding Cups, which is part of their charm. Here’s what you’ll need:
- Large mixing bowl and whisk (for the pudding—an electric mixer works too, but whisking by hand is meditative)
- Food processor or zip-top bag and rolling pin (for crushing cookies)
- 12 small cups or glasses (clear plastic cups show off the layers best, but any 6-8 ounce container works)
- Measuring cups and spoons
- Spatula for scraping every last bit of pudding (because waste is not spooky)
- Small piping bag or zip-top bag with the corner snipped (for writing on tombstones)
If you don’t have a food processor, don’t worry. Place the cookies in a zip-top bag, seal it, and go to town with a rolling pin. It’s a great stress reliever and gives you more control over the crumb size. I actually prefer this method because you can leave some larger chunks for texture. My first batch, I pulsed the cookies too fine and ended up with something that looked more like potting soil than dirt. A few chunky bits make it look more realistic.
For the cups, I like using 8-ounce clear plastic cups from the party supply store. They’re inexpensive, show off the layers, and make clean-up a breeze. But any small glass jar, mason jar, or even a coffee mug works. I’ve made these in teacups for a Victorian Gothic vibe, and it was delightful.
Preparation Method
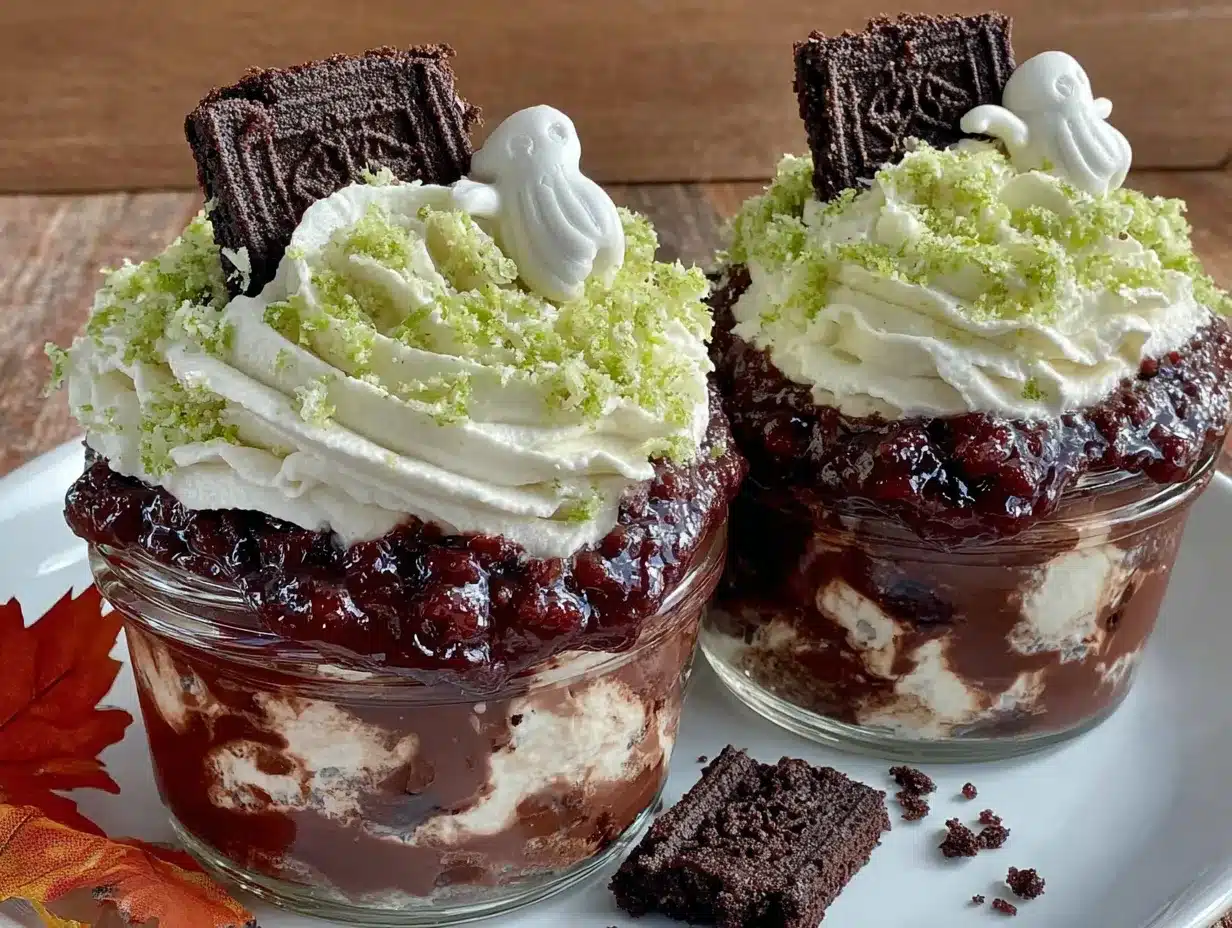
Here’s how to make these spooky graveyard dirt pudding cups, step by step. I’ve included all the little details I learned from making these dozens of times.
- Make the Pudding (5 minutes): In a large bowl, whisk together the instant chocolate pudding mix and cold milk. Whisk vigorously for about 2 minutes, until the mixture thickens. It should look glossy and smooth, with no lumps. Add the vanilla extract and whisk once more. Let it sit for 5 minutes to set slightly. The pudding will continue to thicken as it chills, so don’t worry if it seems a little loose at this stage.
- Crush the Cookies (5 minutes): While the pudding sets, crush the chocolate sandwich cookies. If using a food processor, pulse until you have a mixture of fine crumbs and small chunks—about 10-12 pulses. If using the bag method, place cookies in a zip-top bag and crush with a rolling pin until you have a mix of textures. You want some fine crumbs and some pea-sized pieces for realistic “dirt.” Transfer to a bowl and stir in the melted butter and salt until combined. The crumbs should look like damp soil.
- Prepare the Tombstones (10 minutes): While the pudding chills, prepare your tombstones. Using the black decorating gel, write “RIP” on each rectangular cookie. Get creative—some can say “BOO” or have a little skull drawn on them. Let the gel dry for a few minutes while you assemble the cups. Pro tip: write on the cookies before you assemble the cups, so you’re not leaning over the pudding with a wobbly hand.
- Layer the Cups (10 minutes): Spoon about 2 tablespoons of the cookie crumbs into the bottom of each cup. This creates the “dirt” base. Gently press down with the back of a spoon to compact it slightly. Next, spoon or pipe the chocolate pudding over the crumbs, filling each cup about halfway. Tap the cups gently on the counter to settle the pudding and remove any air bubbles. Add another layer of cookie crumbs on top of the pudding, leaving about 1/2 inch of space at the top of the cup. This top layer of crumbs should cover the pudding completely—it’s the “surface” of your graveyard.
- Decorate the Graveyard (5 minutes): This is the fun part. Stick a gummy worm halfway into the pudding at the edge of each cup, so it looks like it’s crawling out of the dirt. Place one or two tombstones in the center of each cup, pressing the bottom gently into the crumbs so they stand upright. Add any extra decorations—candy bones, plastic skeletons, or edible eyeballs—around the tombstones. I like to scatter a few extra cookie crumbs on top to cover any bare spots.
- Chill Before Serving (30 minutes minimum): Refrigerate the cups for at least 30 minutes before serving. This allows the pudding to fully set and the flavors to meld. The cups can be made up to 24 hours in advance, which is perfect for party prep. Just add the gummy worms and tombstones right before serving to keep them looking fresh.
Sensory Cues: The pudding should be thick enough to coat the back of a spoon but still pourable. The cookie crumbs should clump slightly when pressed together, like damp sand. When you take a bite, you should get the creamy pudding first, followed by the crunchy, slightly salty cookie dirt, then the chewy gummy worm. It’s a texture journey.
Cooking Tips & Techniques
After making these Easy Spooky Graveyard Dirt Pudding Cups more times than I care to count, I’ve learned a few things the hard way. Here are my best tips for success.
Don’t overmix the pudding. Whisk just until the powder dissolves and the mixture thickens. Overmixing can make the pudding grainy or cause it to separate. I learned this the hard way when I got distracted and whisked for five minutes straight. The result was a weird, watery mess. Two minutes is plenty.
Chill the pudding before layering. If you layer the cups immediately, the cookie crumbs will sink into the warm pudding and create a muddy layer. Let the pudding sit for 5-10 minutes before assembling. This is the most common mistake people make, and it’s the difference between distinct layers and a brown blob.
Use a piping bag for the pudding. Spooning the pudding into cups works fine, but using a piping bag (or a zip-top bag with the corner snipped) gives you more control and keeps the sides of the cups clean. This is especially important if you’re using clear cups and want those Instagram-worthy layers.
Keep the tombstones upright. If your tombstones keep falling over, press them into the cookie crumbs at a slight angle, leaning against the side of the cup. You can also use a dab of frosting as “glue” to hold them in place. I’ve had entire graveyards collapse because I didn’t press hard enough.
Make extra cookie crumbs. You’ll want extra for snacking, and it’s nice to have a backup if you accidentally make the layers too thin. Leftover crumbs are also great on ice cream or yogurt.
Variations & Adaptations
One of the best things about these Easy Spooky Graveyard Dirt Pudding Cups is how adaptable they are. Here are some variations I’ve tried and loved.
Peanut Butter Dirt: Substitute 1/4 cup creamy peanut butter for the melted butter in the cookie crumbs. Stir until well combined. The peanut butter adds a savory note that pairs beautifully with the chocolate. My brother-in-law, a peanut butter fanatic, declared this version “the best thing I’ve ever put in my mouth.”
Vegan Version: Use a plant-based milk like oat or almond milk for the pudding, and vegan chocolate sandwich cookies (many brands are accidentally vegan). Use melted coconut oil instead of butter. The texture will be slightly different, but still delicious. I made this for a friend with dairy allergies, and she didn’t feel like she was missing out.
Spooky Spider Cups: Instead of tombstones, top each cup with a chocolate spider. Use a large chocolate kiss for the body and pretzel sticks for the legs. Arrange four pretzel sticks on each side of the kiss to create eight legs. It’s a fun twist that takes about two extra minutes.
Pumpkin Patch Version: Swap the tombstones for small pumpkin candies or orange jelly beans. Use green icing to draw little vines. This is perfect for fall gatherings that aren’t specifically Halloween, like a harvest party or Thanksgiving dessert table.
Individual Trifle: Double the recipe and layer everything in a large glass trifle bowl instead of individual cups. It makes a stunning centerpiece for a party. Just make sure to refrigerate for at least 2 hours before serving so the layers set properly.
Serving & Storage Suggestions
These spooky graveyard dirt pudding cups are best served cold, straight from the refrigerator. The contrast between the cold, creamy pudding and the room-temperature cookie crumbs is part of the magic.
Presentation Tips: Arrange the cups on a black platter or a serving tray lined with fake spiderwebs for maximum spooky effect. Scatter a few extra gummy worms and candy bones around the base of the cups. If you’re serving these at a party, label them with a small sign that says “Graveyard Dirt” or “Worm Farm.”
Complementary Dishes: These cups pair beautifully with a warm apple cider or a pumpkin spice latte. For a full Halloween menu, serve them alongside mummy hot dogs, pumpkin-shaped cheese balls, and witch finger pretzels. The sweetness of the pudding balances the savory snacks perfectly.
Storage Instructions: Store any leftover cups in the refrigerator, covered with plastic wrap or a lid, for up to 3 days. The cookie crumbs will soften over time, but the pudding stays creamy. If you’re making these ahead for a party, I recommend assembling the pudding and crumbs separately, then layering and decorating the day of the event for the best texture.
Freezing: I don’t recommend freezing these cups. The pudding will become watery when thawed, and the cookie crumbs will turn into a soggy mess. These are best enjoyed fresh or within a few days of making.
Flavor Development: Interestingly, the flavors actually meld and improve after a day in the fridge. The cookie crumbs absorb some moisture from the pudding and become almost cake-like. If you prefer a crunchier texture, add a fresh layer of crumbs just before serving.
Nutritional Information & Benefits
Let’s be honest—these are a treat, not a health food. But here’s the nutritional breakdown for one serving (based on 12 servings), along with some context.
| Nutrient | Amount Per Serving |
|---|---|
| Calories | 285 |
| Total Fat | 12g |
| Saturated Fat | 5g |
| Cholesterol | 15mg |
| Sodium | 380mg |
| Total Carbohydrates | 42g |
| Dietary Fiber | 2g |
| Sugars | 30g |
| Protein | 5g |
While these aren’t exactly a health food, they do offer a small amount of calcium from the milk and a little iron from the chocolate cookies. The portion-controlled individual cups make it easier to enjoy a reasonable serving without going overboard. I like to think of these as a fun, occasional treat that brings joy without requiring a full day of meal prep. If you’re looking to lighten them up, you can use sugar-free pudding mix and low-fat milk, though the texture will be slightly less creamy.
Conclusion
These Easy Spooky Graveyard Dirt Pudding Cups are everything I want in a Halloween dessert: fun, delicious, and ridiculously simple to make. They look like you spent hours crafting a miniature cemetery, when really you just crushed some cookies and stirred some pudding. That’s the kind of magic I can get behind.
I love that this recipe is forgiving enough for a beginner but impressive enough for a party. It’s the dessert equivalent of a costume that looks elaborate but is actually just a sheet with eye holes cut out—except it tastes way better. Whether you’re making these for a kid’s classroom party, a spooky movie night, or just because you want to eat chocolate pudding with gummy worms, they deliver every time.
I’d love to hear how your graveyard turns out! Leave a comment below with your favorite decoration idea or any variations you tried. Did you use candy bones? Did you make a spider version? Share your spooky creations—I’m always looking for new ideas. And if you found this recipe helpful, please share it with a friend who needs a last-minute Halloween dessert. Happy haunting!
Frequently Asked Questions
Can I use homemade chocolate pudding instead of instant mix?
You can, but I don’t recommend it for this recipe. Homemade pudding is richer and takes longer to set, which means the cookie crumbs will sink and become soggy. Instant pudding gives you the perfect texture and sets quickly enough to keep the layers distinct. If you really want to use homemade, make it a day ahead and chill it thoroughly before assembling.
How far in advance can I make these cups?
You can make the pudding and crush the cookies up to 3 days in advance and store them separately in the refrigerator. Assemble the cups up to 24 hours before serving, but wait to add the gummy worms and tombstones until right before serving to keep them looking fresh. The cookie crumbs will soften slightly overnight, which some people actually prefer.
Can I make these gluten-free?
Yes! Use gluten-free chocolate sandwich cookies (many brands make them now) and ensure your pudding mix is gluten-free. Most instant pudding mixes are gluten-free, but always check the label. Everything else in the recipe is naturally gluten-free, including the milk and gummy worms (check the worm label for wheat starch).
What can I use instead of gummy worms?
Any gummy candy works here. Gummy spiders, gummy bats, or even gummy bones are great alternatives. If you’re not a fan of gummy texture, try using candy corn, chocolate spiders, or even small plastic toys (just warn your guests!). I’ve also used sour gummy worms for a tangy contrast to the sweet pudding.
How do I keep the tombstones from falling over?
Press the bottom of the cookie into the cookie crumbs at a slight angle, leaning against the side of the cup. You can also use a small dab of frosting or melted chocolate as “glue” on the bottom of the cookie before pressing it into the crumbs. If all else fails, serve the tombstones on the side and let guests add them themselves.
Pin This Recipe!
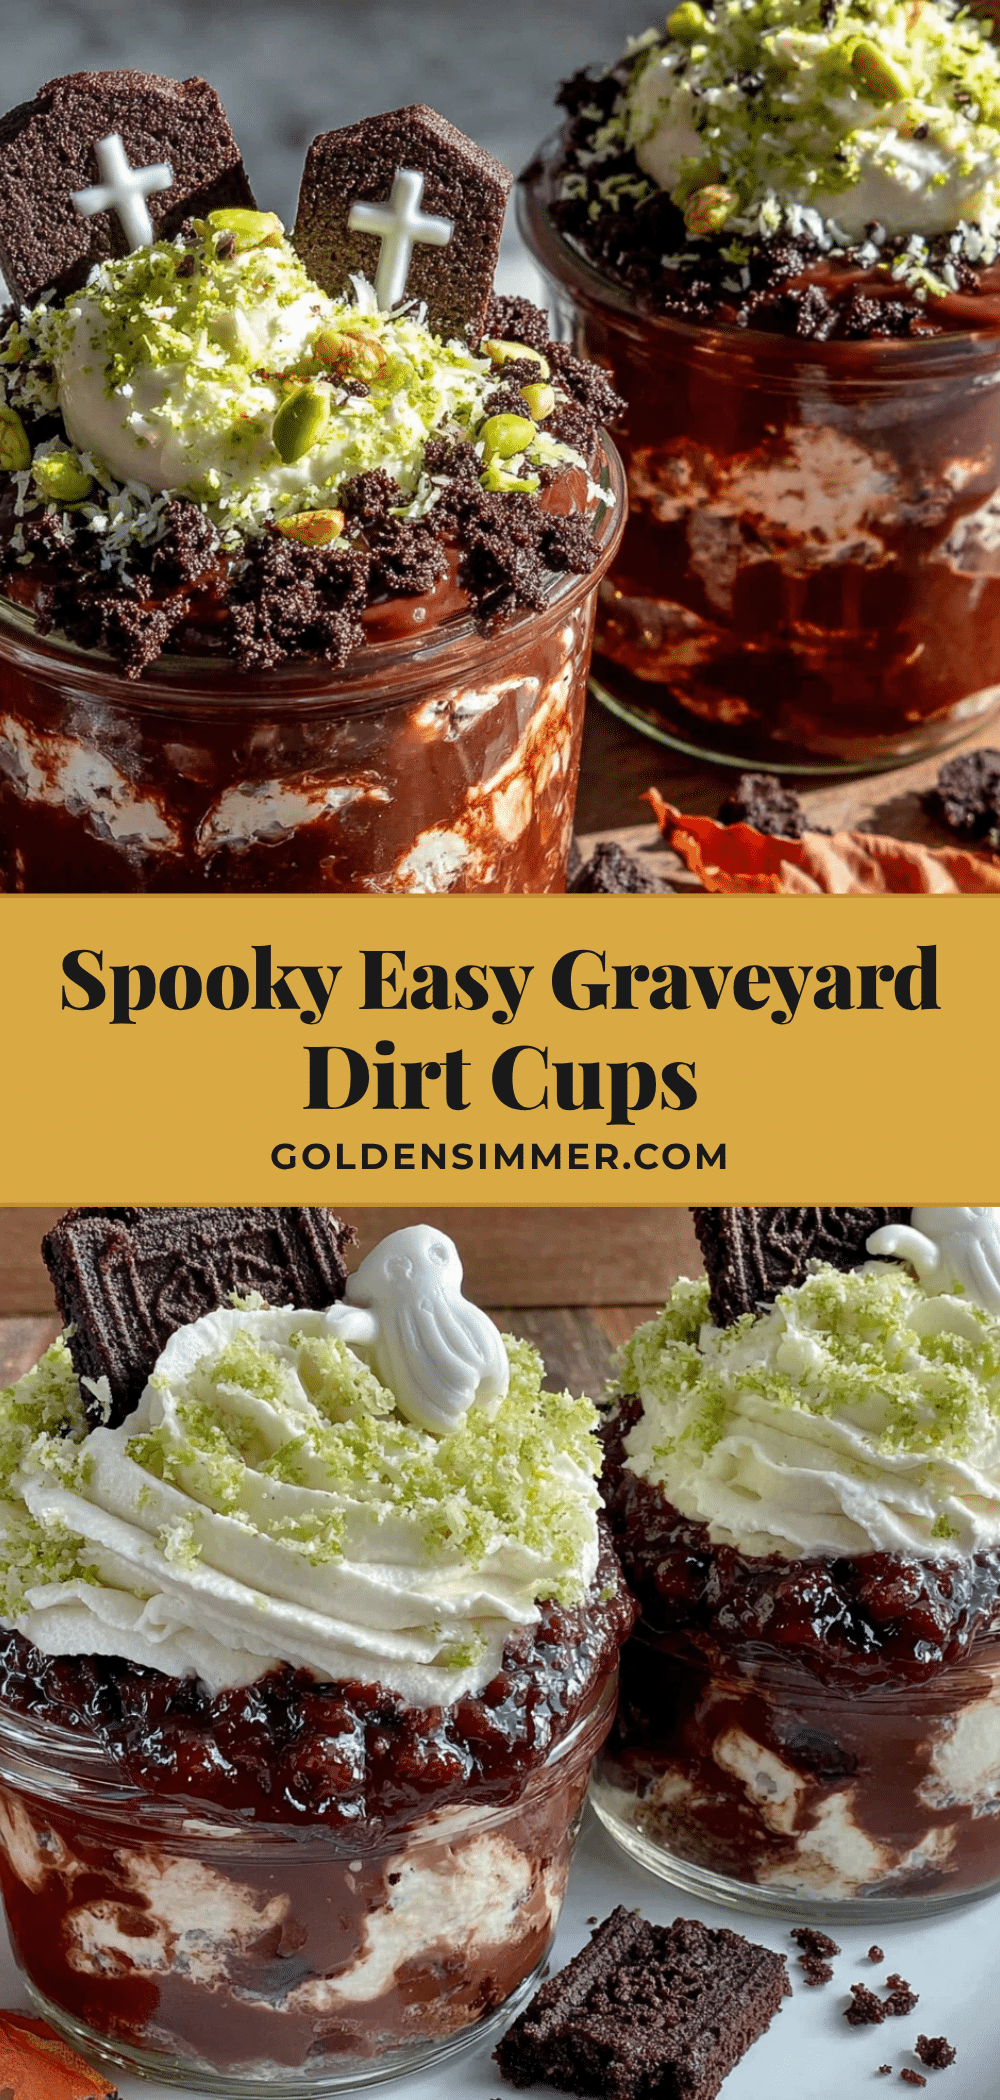
Easy Spooky Graveyard Dirt Pudding Cups: Best Halloween Treat
These spooky graveyard dirt pudding cups are a fun, delicious, and ridiculously simple Halloween dessert that looks impressive but takes almost no real effort. Perfect for parties, they feature layers of creamy chocolate pudding, crunchy cookie ‘dirt,’ and gummy worms with tombstones.
- Prep Time: 20 minutes
- Cook Time: 0 minutes
- Total Time: 50 minutes (including 30 minutes chilling)
- Yield: 12 servings 1x
- Category: Dessert
- Cuisine: American
Ingredients
- 2 (3.9-ounce) boxes instant chocolate pudding mix (Jell-O brand recommended)
- 4 cups (960 ml) cold whole milk (2% works too)
- 1/2 teaspoon vanilla extract (optional)
- 1 (14.3-ounce) package chocolate sandwich cookies (like Oreos, about 36 cookies)
- 2 tablespoons unsalted butter, melted
- 1/8 teaspoon salt
- 1 cup gummy worms (Trolli or Black Forest recommended)
- 12 small rectangular cookies (like Milano or Pirouline, for tombstones)
- Black decorating gel or icing pen (for writing ‘RIP’ on tombstones)
- Optional: candy bones, plastic skeletons, or edible eyeballs for extra spookiness
Instructions
- Make the Pudding (5 minutes): In a large bowl, whisk together the instant chocolate pudding mix and cold milk. Whisk vigorously for about 2 minutes, until the mixture thickens. It should look glossy and smooth, with no lumps. Add the vanilla extract and whisk once more. Let it sit for 5 minutes to set slightly.
- Crush the Cookies (5 minutes): While the pudding sets, crush the chocolate sandwich cookies. If using a food processor, pulse until you have a mixture of fine crumbs and small chunks—about 10-12 pulses. If using the bag method, place cookies in a zip-top bag and crush with a rolling pin until you have a mix of textures. Transfer to a bowl and stir in the melted butter and salt until combined. The crumbs should look like damp soil.
- Prepare the Tombstones (10 minutes): While the pudding chills, prepare your tombstones. Using the black decorating gel, write ‘RIP’ on each rectangular cookie. Get creative—some can say ‘BOO’ or have a little skull drawn on them. Let the gel dry for a few minutes while you assemble the cups.
- Layer the Cups (10 minutes): Spoon about 2 tablespoons of the cookie crumbs into the bottom of each cup. This creates the ‘dirt’ base. Gently press down with the back of a spoon to compact it slightly. Next, spoon or pipe the chocolate pudding over the crumbs, filling each cup about halfway. Tap the cups gently on the counter to settle the pudding and remove any air bubbles. Add another layer of cookie crumbs on top of the pudding, leaving about 1/2 inch of space at the top of the cup. This top …
- Decorate the Graveyard (5 minutes): Stick a gummy worm halfway into the pudding at the edge of each cup, so it looks like it’s crawling out of the dirt. Place one or two tombstones in the center of each cup, pressing the bottom gently into the crumbs so they stand upright. Add any extra decorations—candy bones, plastic skeletons, or edible eyeballs—around the tombstones. Scatter a few extra cookie crumbs on top to cover any bare spots.
- Chill Before Serving (30 minutes minimum): Refrigerate the cups for at least 30 minutes before serving. This allows the pudding to fully set and the flavors to meld. The cups can be made up to 24 hours in advance, which is perfect for party prep. Just add the gummy worms and tombstones right before serving to keep them looking fresh.
Notes
Don’t overmix the pudding; whisk just until powder dissolves and mixture thickens (about 2 minutes). Let pudding sit for 5-10 minutes before layering to prevent cookie crumbs from sinking. Use a piping bag for cleaner layers. If tombstones fall over, press them into crumbs at a slight angle or use a dab of frosting as glue. Make extra cookie crumbs for snacking or backup. Store leftovers covered in refrigerator for up to 3 days; cookie crumbs will soften over time. Not recommended for freezing.
Nutrition
- Serving Size: 1 cup
- Calories: 285
- Sugar: 30
- Sodium: 380
- Fat: 12
- Saturated Fat: 5
- Carbohydrates: 42
- Fiber: 2
- Protein: 5
Keywords: Halloween dessert, dirt pudding cups, graveyard pudding, chocolate pudding, easy Halloween treat, spooky dessert, no-bake dessert



