Love this? Save it for later!
Share the inspiration with your friends
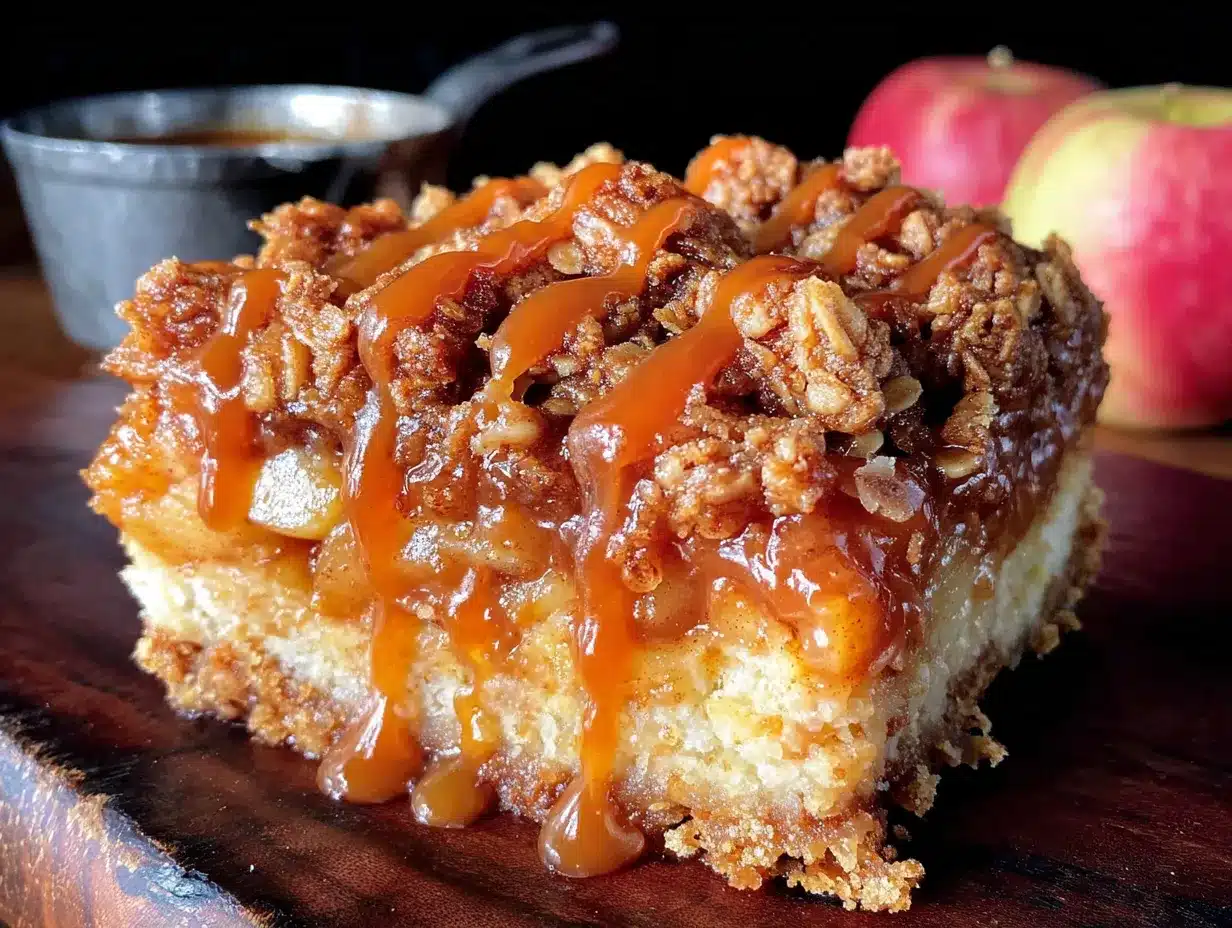
My brother swore he hated apple desserts. For years. Every Thanksgiving, he’d bypass the pie, the crisp, the cobbler, all of it, claiming they were always “too mushy” or “not sweet enough.” He’d load up on the pecan pie instead, and I’d just roll my eyes. Then, last October, I was testing this recipe for an upcoming potluck. I had a whole 9×13 pan of these caramel apple crumble bars cooling on the counter, and I stepped out to grab the mail. When I came back, I caught him red-handed, standing over the pan with a fork, a guilty look on his face, and a crumb trail leading from the pan to his mouth. He didn’t even try to deny it. He just mumbled, “Okay, fine. These are actually incredible.” That was the moment I knew I had something special. Honestly, I think the texture is what got him—a sturdy, buttery shortbread crust, a layer of soft, spiced apples, and a crunchy, oat-filled crumble that doesn’t get soggy. It’s the kind of dessert that wins over the skeptics, the ones who think they’ve had it all before. Maybe you’ve had a similar experience with a picky eater in your life. These bars are my secret weapon for those moments.
Why You’ll Love This Recipe
These aren’t just any apple bars. They are the result of many, many test batches—some were too sweet, some fell apart, and some just didn’t have that perfect crunch-to-softness ratio. I’ve done the work so you don’t have to. Here is why this version stands out, especially when you’re cooking to impress a crowd.
- Perfect for a Crowd: This recipe makes a full 9×13 pan, giving you 24 generous bars. It’s the ideal dessert for a dinner party, a fall potluck, or a festive Thanksgiving gathering. No more running out of dessert!
- Simple, Trusted Ingredients: You don’t need to hunt down weird specialty items. Everything is a pantry staple—flour, oats, butter, apples, and a jar of good caramel sauce. It’s comfort food at its most accessible.
- Make-Ahead Magic: This is a host’s best friend. You can assemble the entire pan a day in advance and bake it just before your guests arrive. Or, bake it fully, let it cool, and store it in the fridge. The flavors actually get better after a day.
- Unbelievably Delicious Texture: The magic is in the layers. A firm, not-too-sweet shortbread base holds everything together. The apple filling is tender but not mushy, and the crumble topping stays crunchy even after a day or two. It’s a textural dream.
- Always Gets Rave Reviews: I’ve brought these to everything from casual brunches to holiday dinners. They disappear fast. People always ask for the recipe, and they’re always surprised at how easy it is. It feels like you spent hours in the kitchen, but you really didn’t.
This recipe is different because of the technique. We par-bake the crust to ensure it stays crisp, and we toss the apples in a little cornstarch and lemon juice to keep the filling from turning into a watery mess. It’s a small step that makes a huge difference. This isn’t just another apple dessert—it’s the one that will have your guests closing their eyes after the first bite.
What Ingredients You Will Need
This recipe uses simple, wholesome ingredients to deliver a bold, comforting flavor. Most of these are probably already in your pantry, which makes this a great last-minute dessert to whip up for unexpected guests.
For the Shortbread Crust
- 1 cup (226g) unsalted butter, softened – This is the base of the crust. I always use unsalted so I can control the salt level. Make sure it’s truly softened, not melted, for the best texture.
- 1/2 cup (100g) granulated sugar – Adds just enough sweetness to the crust without overpowering the apples.
- 2 cups (250g) all-purpose flour – Gives the crust structure. You can substitute a 1:1 gluten-free baking flour if needed.
- 1/4 teaspoon salt – Balances the sweetness and enhances the buttery flavor.
For the Apple Filling
- 4-5 medium apples (about 600g), peeled, cored, and diced – I recommend a mix of tart and sweet apples. Honeycrisp and Granny Smith are a perfect combination. The Granny Smith holds its shape well, and the Honeycrisp adds natural sweetness. Avoid Red Delicious, as they get too mushy.
- 1/4 cup (50g) granulated sugar – Helps to draw out the juices from the apples and sweeten the filling.
- 1 tablespoon all-purpose flour – This helps thicken the apple juices as they bake, preventing a soggy bottom crust.
- 1 teaspoon ground cinnamon – The quintessential fall spice. I use a good quality Vietnamese cinnamon for a stronger flavor.
- 1/4 teaspoon ground nutmeg – Adds a warm, slightly nutty note. Freshly grated is best if you have it.
- 1 tablespoon lemon juice – Prevents the apples from browning and adds a touch of acidity to balance the sweetness.
For the Crumble Topping
- 1 cup (125g) all-purpose flour – The base of the crumble.
- 1 cup (80g) old-fashioned rolled oats – Do not use quick oats here. Old-fashioned oats give a much better, crunchier texture. I prefer Quaker Oats for their consistent size.
- 1/2 cup (100g) packed light brown sugar – Adds moisture and a deep, caramel-like sweetness to the crumble.
- 1/2 cup (113g) unsalted butter, cold and cut into small cubes – The cold butter is key for creating those beautiful, clumpy crumbs. If the butter gets too warm, the crumble will turn into a paste.
- 1/2 teaspoon ground cinnamon – To tie the flavors together.
- 1/4 teaspoon salt – Essential for balancing the sweetness in the topping.
For the Caramel Drizzle
- 1/2 cup (120ml) good quality store-bought or homemade caramel sauce – I’m a fan of the jarred Ghirardelli or Stonewall Kitchen brands. You want a thick, rich sauce, not a thin syrup. If you’re feeling ambitious, a simple homemade caramel is amazing here.
Equipment Needed
You don’t need a lot of fancy gadgets for this recipe, which is part of its charm. Here’s what you’ll need to get the job done.
- 9×13-inch baking pan – This is non-negotiable. A metal pan will give you a crisper crust than a glass one. If you only have glass, reduce the oven temperature by 25°F and keep a close eye on the bottom crust.
- Parchment paper – A lifesaver for easy removal and cleanup. Let an overhang on the long sides to use as handles.
- Large mixing bowls – You’ll need one for the crust, one for the filling, and one for the crumble. I just use my standard nesting bowls.
- Pastry cutter or two forks – For cutting the cold butter into the flour for the crumble. You can also use your fingers, but work quickly so the butter doesn’t warm up.
- Chef’s knife and cutting board – For dicing the apples. I prefer a sharp chef’s knife for clean, even cuts.
- Vegetable peeler – Speeds up the process of peeling the apples.
- Measuring cups and spoons – For accuracy.
Preparation Method
Follow these steps carefully, and you’ll have a pan of perfect bars. The key is to not rush the par-baking of the crust.
- Preheat and Prep: Preheat your oven to 350°F (175°C). Line your 9×13-inch baking pan with parchment paper, leaving a 2-inch overhang on the two long sides. This will be your “sling” to lift the bars out later.
- Make the Crust: In a large bowl, beat the softened butter and granulated sugar together until light and fluffy, about 2-3 minutes. Add the flour and salt, and mix until a soft dough forms. It will be crumbly, but it should hold together when you pinch it. Press this mixture firmly and evenly into the bottom of your prepared pan. I use the bottom of a flat measuring cup to get it really even.
- Par-Bake the Crust: Bake the crust for 15-18 minutes, or until it is just set and the edges are very lightly golden. It shouldn’t be fully browned. This step is crucial—it prevents the crust from getting soggy when you add the apple filling. Let it cool on a wire rack for 10 minutes while you prepare the filling.
- Prepare the Apple Filling: While the crust cools, place the diced apples in a large bowl. Toss them with the 1/4 cup sugar, 1 tablespoon flour, cinnamon, nutmeg, and lemon juice until every piece is evenly coated.
- Make the Crumble Topping: In a separate bowl, whisk together the flour, oats, brown sugar, cinnamon, and salt. Add the cold, cubed butter. Use your pastry cutter or two forks to cut the butter into the dry ingredients until the mixture resembles coarse meal with some pea-sized butter pieces remaining. Don’t overwork it—those butter lumps are what create a crunchy crumble.
- Assemble the Layers: Spread the apple mixture evenly over the pre-baked crust. Sprinkle the crumble topping over the apples, covering them completely. Don’t press the crumble down; just let it fall naturally.
- Bake: Place the pan back in the oven and bake for 35-40 minutes, or until the crumble topping is a deep golden brown and the apple filling is bubbling up around the edges. If the top is browning too quickly, loosely tent it with foil for the last 10 minutes.
- Cool and Drizzle: Let the bars cool completely in the pan on a wire rack. This is important—if you try to cut them while they’re warm, they will fall apart. Once cool, lift the bars out using the parchment paper sling. Drizzle the caramel sauce generously over the top just before serving.
Cooking Tips & Techniques
I’ve made these bars more times than I can count, and I’ve definitely had a few flops along the way. Here are the lessons I learned so you can avoid them.
- Don’t Skip Par-Baking: I learned this the hard way. The first time I made these, I just poured the filling right onto the raw crust. The result was a soggy, sad bottom layer. Par-baking creates a barrier that keeps the crust crisp and sturdy, even with all that juicy apple goodness on top.
- Cold Butter is Non-Negotiable: For the crumble, the butter must be cold. I pop my cubed butter in the freezer for 5 minutes before I start. Warm butter gets absorbed into the flour and oats, creating a paste instead of a crumble. You want distinct, clumpy bits.
- Use a Mix of Apples: Don’t just use one type. Granny Smith apples provide structure and tartness, while Honeycrisp or Fuji add sweetness and a softer texture. This balance is what makes the filling so good. I once used only Gala apples, and the filling was a little too one-note and mushy.
- Let Them Cool Completely: I know it’s tempting to cut into a warm pan of bars, but patience is a virtue here. Warm bars will crumble and slide apart. If you’re in a rush, you can pop the pan in the fridge for 30 minutes after it’s cooled to room temperature to speed up the setting process.
- Multitask Wisely: While the crust is par-baking, make your apple filling and crumble topping. This way, everything is ready to go as soon as the crust comes out of the oven, keeping your workflow smooth.
Variations & Adaptations
One of the best things about this recipe is how easily it adapts. Don’t be afraid to make it your own.
- Gluten-Free Version: I’ve made this for a friend with celiac disease, and it worked beautifully. Simply substitute the all-purpose flour in the crust and crumble with a high-quality 1:1 gluten-free baking flour blend (I like King Arthur Measure for Measure). Make sure your oats are certified gluten-free as well.
- Add Some Nuts: For extra crunch, add 1/2 cup of chopped pecans or walnuts to the crumble topping. Toast them lightly in a dry pan first for even more flavor. I did this for a Thanksgiving gathering, and it was a huge hit.
- Spice It Up: Feeling adventurous? Add a pinch of cardamom or ground ginger to the apple filling. You can also add a 1/4 teaspoon of almond extract to the crumble for a subtle, nutty undertone that pairs beautifully with the apples.
- Dairy-Free Option: You can easily make this dairy-free. Use a high-quality vegan butter stick (like Miyoko’s or Earth Balance) in both the crust and the crumble. Just make sure it’s cold when you add it to the crumble.
- Different Fruit: This base recipe is fantastic with other fruits. Try it with sliced pears and a little fresh ginger, or use a mix of fresh or frozen berries. If using frozen berries, toss them in an extra tablespoon of flour to soak up the extra moisture.
Serving & Storage Suggestions
These bars are incredibly versatile, whether you’re serving them for a casual get-together or a fancy dinner party.
- Serving: These bars are best served at room temperature or slightly warm. For an extra decadent touch, serve a bar with a scoop of vanilla bean ice cream or a dollop of fresh whipped cream. The cold creaminess against the crunchy crumble is pure magic.
- Presentation: For a dinner party, cut the bars into clean, uniform squares. I like to wipe my knife clean between cuts for the neatest edges. Arrange them on a large wooden board or a white platter. Drizzle the caramel sauce right before serving so it looks glossy and fresh.
- What to Serve Alongside: These bars are rich enough to stand alone, but they pair wonderfully with a hot cup of coffee, a spiced chai latte, or even a glass of cold milk. If you’re serving them as part of a larger dessert spread, they go beautifully with a simple classic pumpkin pie or a batch of spiced apple cider donuts.
- Storage: Store leftover bars in an airtight container at room temperature for up to 3 days. For longer storage, place them in the refrigerator for up to a week. The crumble topping will soften slightly in the fridge, but they’ll still be delicious.
- Freezing: These bars freeze like a dream. Once they are completely cool and you’ve cut them, place them in a single layer on a baking sheet and freeze for 1 hour. Then, transfer the frozen bars to a freezer-safe container or zip-top bag, separating layers with parchment paper. They will keep for up to 3 months. Thaw them in the refrigerator overnight or at room temperature for a few hours before serving.
Nutritional Information & Benefits
While these are definitely a treat, there are a few bright spots in the ingredient list. The apples provide a good dose of fiber and vitamin C, and the oats offer some heart-healthy soluble fiber. Using a good quality butter and not overdoing the sugar in the crust keeps things relatively balanced for a dessert.
Here is an approximate nutritional breakdown per bar (based on 24 servings):
| Nutrient | Amount per Serving |
|---|---|
| Calories | 245 |
| Fat | 14g |
| Saturated Fat | 8g |
| Carbohydrates | 30g |
| Sugar | 17g |
| Fiber | 2g |
| Protein | 3g |
Note: These values are estimates and will vary based on the specific brands and ingredients you use, especially the caramel sauce.
This recipe contains gluten (from the flour and oats) and dairy (from the butter). For those with allergies, please refer to the variations section for suitable substitutions.
Conclusion
So, there you have it. The dessert that turned my apple-hating brother into a believer. These caramel apple crumble bars are more than just a recipe; they’re a reliable crowd-pleaser that makes you look like a hero with minimal effort. The combination of a buttery crust, tender spiced apples, and a crunchy oat crumble, all tied together with a ribbon of caramel, is simply unbeatable. They are perfect for every fall gathering, from a casual family dinner to a big holiday party.
I really hope you give these a try. Don’t be afraid to make them your own—add some nuts, swap the fruit, or double the caramel drizzle. I’d love to hear how they turn out! Leave a comment below and tell me about your experience, or tag me in your photos on social media. Happy baking, friends! I can’t wait for you to taste the magic.
Frequently Asked Questions
Can I use quick oats instead of old-fashioned oats?
I wouldn’t recommend it. Quick oats are more finely processed and will absorb too much moisture, resulting in a denser, less crunchy crumble. Old-fashioned oats give that perfect, hearty texture that makes these bars so special.
My crumble topping turned out like a paste. What went wrong?
This usually happens when the butter is too warm. Make sure you use cold butter straight from the fridge, and work it into the dry ingredients quickly with a pastry cutter. If your kitchen is very warm, you can chill the flour and oats for 10 minutes before you start.
Can I prepare this recipe in advance for a party?
Absolutely! You have two options. You can assemble the entire pan (crust, filling, and crumble) a day ahead, cover it tightly with plastic wrap, and store it in the fridge. Then, just bake it off before your guests arrive. Or, you can bake it fully, let it cool, and store it in the fridge. The flavors actually meld together beautifully overnight.
How do I get clean, neat slices?
The key is patience. You must let the bars cool completely before you even think about cutting them. For the cleanest cuts, chill the pan in the fridge for 30 minutes after it has cooled to room temperature. Then, use a sharp chef’s knife, wiping the blade clean with a damp paper towel between each cut.
Can I use homemade caramel sauce instead of store-bought?
Yes, please do! A good homemade caramel sauce takes these bars over the top. Just make sure it’s a thick, pourable consistency—not too thin or runny. If it’s too thick, you can gently warm it up before drizzling it over the bars.
Pin This Recipe!
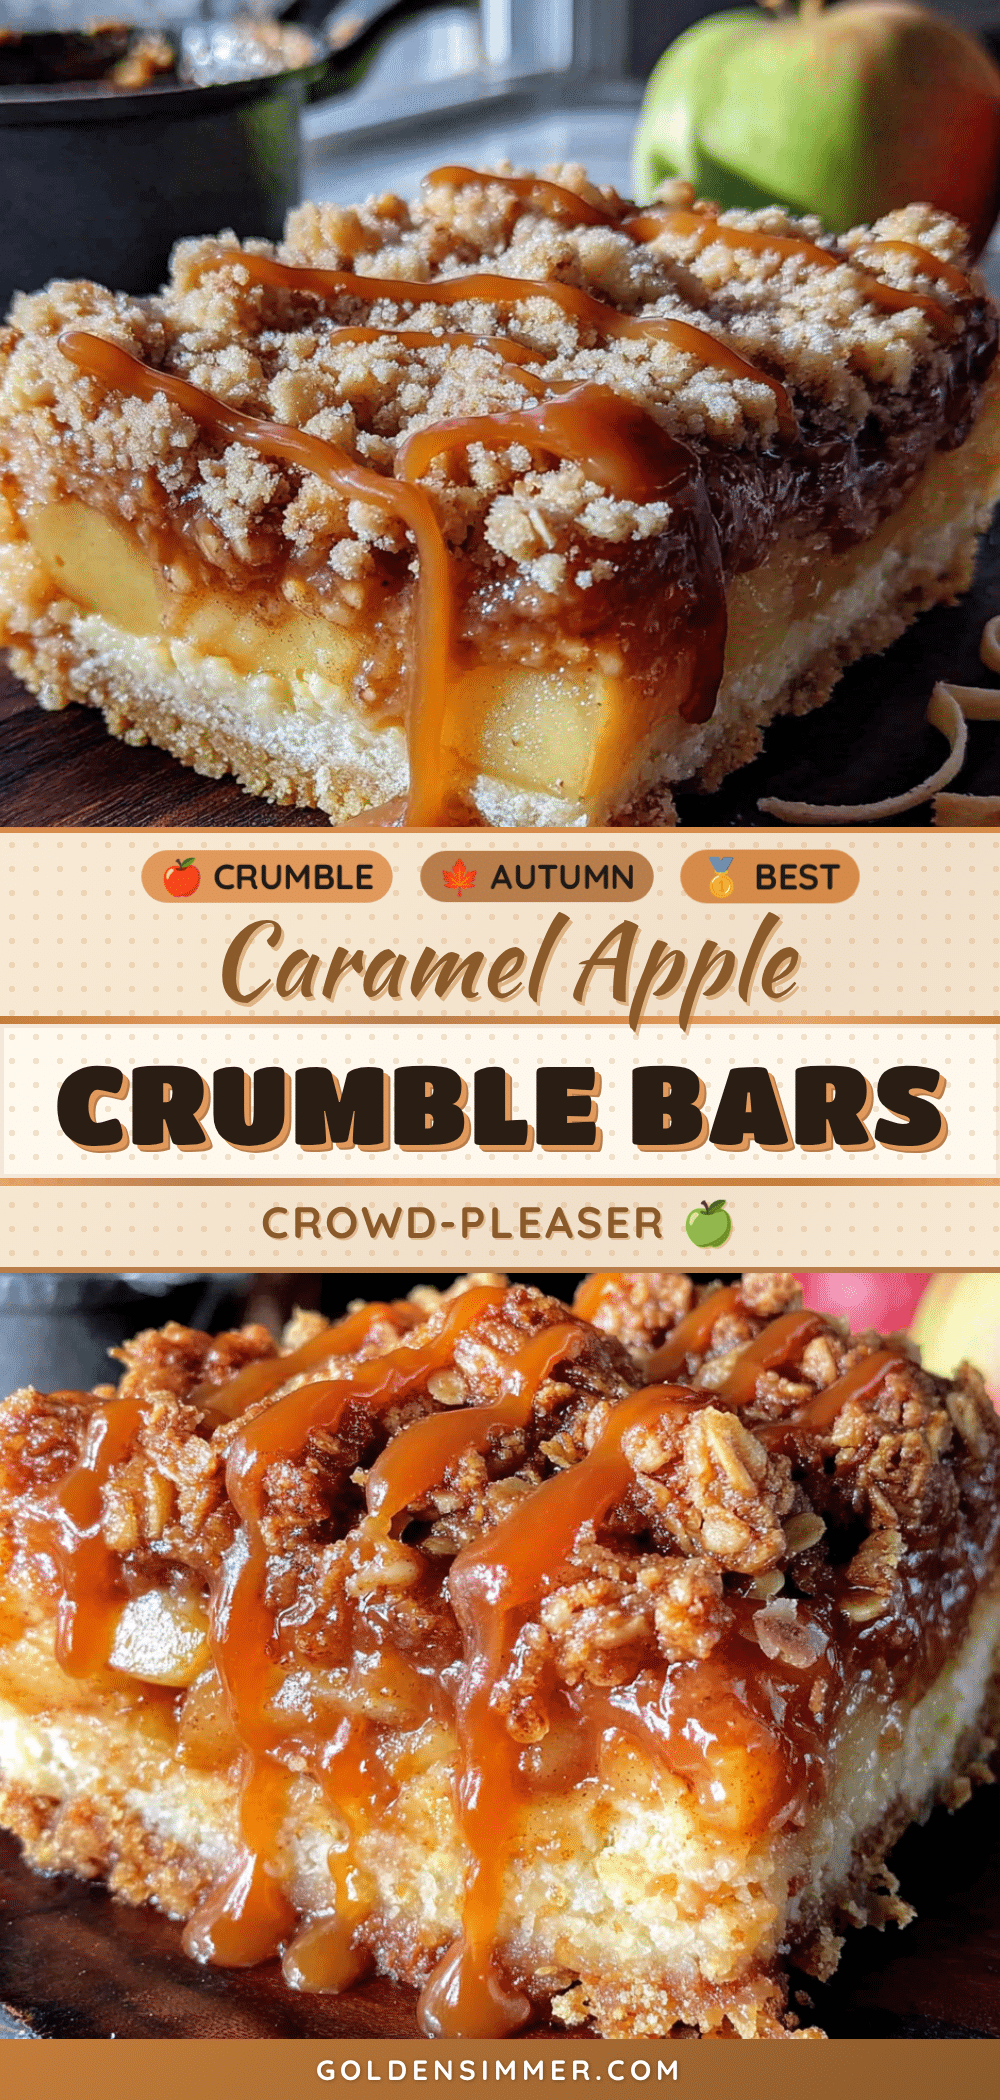
Best Caramel Apple Crumble Bars: Easy Fall Dessert
These caramel apple crumble bars feature a buttery shortbread crust, a layer of tender spiced apples, and a crunchy oat crumble, all topped with a drizzle of caramel sauce. They are the perfect fall dessert for a crowd and are sure to win over even the pickiest eaters.
- Prep Time: 20 minutes
- Cook Time: 50 minutes
- Total Time: 1 hour 10 minutes
- Yield: 24 bars 1x
- Category: Dessert
- Cuisine: American
Ingredients
- 1 cup (226g) unsalted butter, softened
- 1/2 cup (100g) granulated sugar
- 2 cups (250g) all-purpose flour
- 1/4 teaspoon salt
- 4–5 medium apples (about 600g), peeled, cored, and diced
- 1/4 cup (50g) granulated sugar
- 1 tablespoon all-purpose flour
- 1 teaspoon ground cinnamon
- 1/4 teaspoon ground nutmeg
- 1 tablespoon lemon juice
- 1 cup (125g) all-purpose flour
- 1 cup (80g) old-fashioned rolled oats
- 1/2 cup (100g) packed light brown sugar
- 1/2 cup (113g) unsalted butter, cold and cut into small cubes
- 1/2 teaspoon ground cinnamon
- 1/4 teaspoon salt
- 1/2 cup (120ml) good quality store-bought or homemade caramel sauce
Instructions
- Preheat your oven to 350°F (175°C). Line your 9×13-inch baking pan with parchment paper, leaving a 2-inch overhang on the two long sides.
- Make the Crust: In a large bowl, beat the softened butter and granulated sugar together until light and fluffy, about 2-3 minutes. Add the flour and salt, and mix until a soft dough forms. Press this mixture firmly and evenly into the bottom of your prepared pan.
- Par-Bake the Crust: Bake the crust for 15-18 minutes, or until it is just set and the edges are very lightly golden. Let it cool on a wire rack for 10 minutes while you prepare the filling.
- Prepare the Apple Filling: While the crust cools, place the diced apples in a large bowl. Toss them with the 1/4 cup sugar, 1 tablespoon flour, cinnamon, nutmeg, and lemon juice until every piece is evenly coated.
- Make the Crumble Topping: In a separate bowl, whisk together the flour, oats, brown sugar, cinnamon, and salt. Add the cold, cubed butter. Use your pastry cutter or two forks to cut the butter into the dry ingredients until the mixture resembles coarse meal with some pea-sized butter pieces remaining.
- Assemble the Layers: Spread the apple mixture evenly over the pre-baked crust. Sprinkle the crumble topping over the apples, covering them completely. Don’t press the crumble down.
- Bake: Place the pan back in the oven and bake for 35-40 minutes, or until the crumble topping is a deep golden brown and the apple filling is bubbling up around the edges. If the top is browning too quickly, loosely tent it with foil for the last 10 minutes.
- Cool and Drizzle: Let the bars cool completely in the pan on a wire rack. Once cool, lift the bars out using the parchment paper sling. Drizzle the caramel sauce generously over the top just before serving.
Notes
Don’t skip par-baking the crust to prevent sogginess. Use cold butter for the crumble to ensure a crunchy texture. Let the bars cool completely before cutting to avoid them falling apart. For clean slices, chill the pan in the fridge for 30 minutes after cooling.
Nutrition
- Serving Size: 1 bar
- Calories: 245
- Sugar: 17
- Fat: 14
- Saturated Fat: 8
- Carbohydrates: 30
- Fiber: 2
- Protein: 3
Keywords: caramel apple crumble bars, apple bars, fall dessert, apple crumble, easy dessert, crowd-pleaser, Thanksgiving dessert



