Love this? Save it for later!
Share the inspiration with your friends
I was standing in the baking aisle of my local grocery store last October, staring at a row of Halloween sprinkles, when a tiny ghost-shaped cookie cutter slipped off the peg and clattered to the floor. The sound — that sharp, plastic ping — hit me, and suddenly I was seven years old at my neighbor Mrs. Kowalski’s kitchen table, elbows deep in powdered sugar.
Mrs. K, as we called her, wasn’t related to me. She was just this sweet older lady who lived three houses down and apparently had nothing better to do than teach a hyperactive kid how to roll dough. She always used the same cutters — a cat, a pumpkin, and a bat that was missing one wing. I remember thinking her cookies were the chewiest things I’d ever eaten, not crunchy like the store-bought ones my mom bought. I asked her once how she did it, and she just winked and said, “That’s my secret, kiddo.”
Honestly, I forgot about those cookies for years. But the other day, when I picked that cutter up off the floor, I could almost feel the dough between my fingers again. I bought the cutter — the ghost — and went home determined to figure out what made those cookies so perfectly chewy. It took me four tries (and one batch that went straight in the trash), but I finally cracked it.
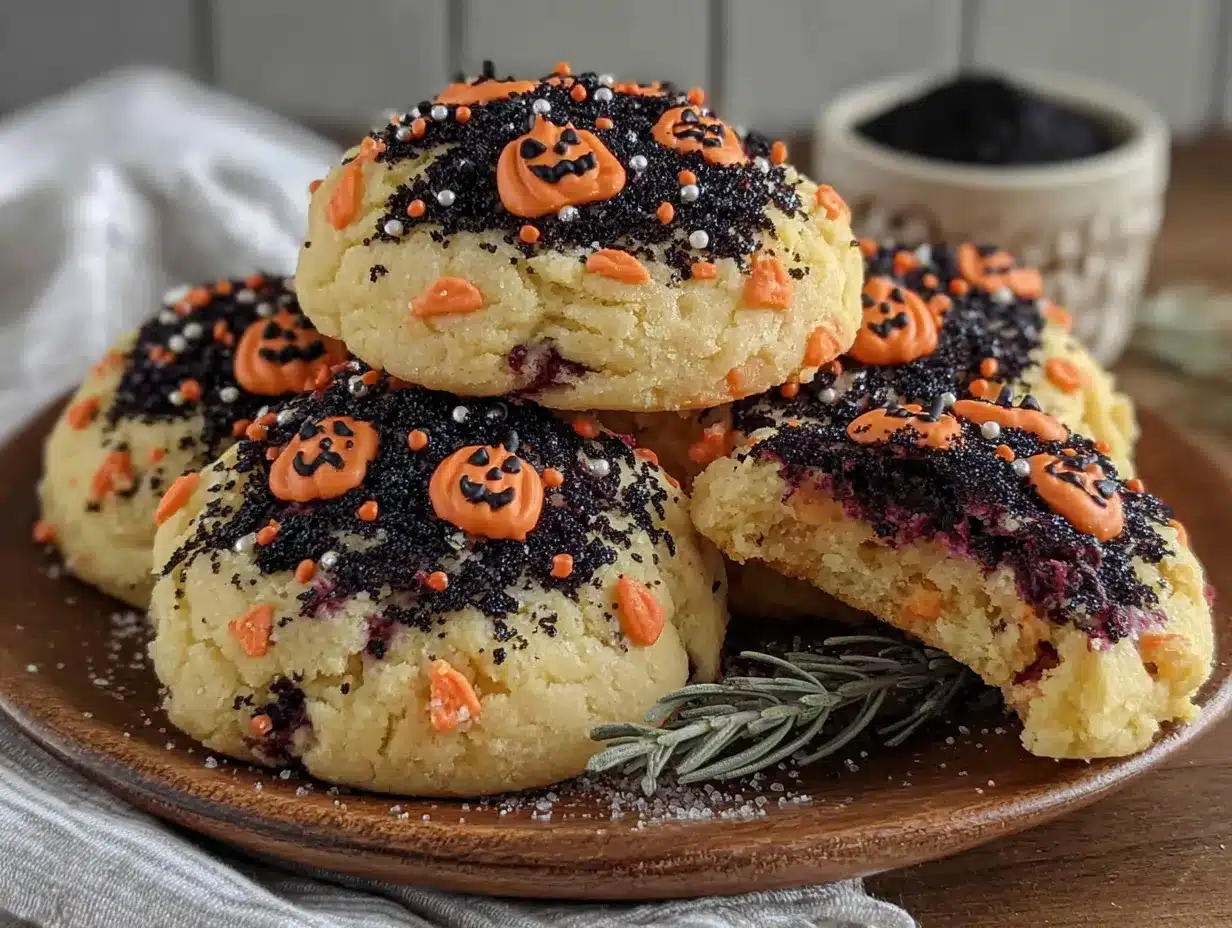
These chewy Halloween sugar cookies with royal icing are my love letter to Mrs. Kowalski’s kitchen. They’re soft in the middle, slightly crisp at the edges, and sturdy enough to hold a layer of royal icing without crumbling. Maybe you’ve had that moment where a recipe just feels like coming home. That’s what this one is for me.
Why You’ll Love This Recipe
Let me tell you, I tested this recipe six times before I felt confident sharing it. And you know what? Every single batch disappeared at my son’s Halloween party before the cupcakes even got touched. That’s the kind of recipe this is.
- Perfectly Chewy Texture: Most sugar cookies for decorating turn out hard as rocks by day two. Not these. The secret is a combination of cream cheese and an extra egg yolk — a trick I picked up from a pastry chef friend who swears by it for soft-baked cookies.
- Easy Royal Icing That Actually Sets: No more runny, messy icing that bleeds into itself. This recipe uses meringue powder and just the right amount of water to give you a smooth, glossy finish that hardens within a few hours.
- Simple Ingredients: Butter, sugar, flour, eggs, and a few pantry staples. Nothing weird or hard to find — I promise you won’t need to visit a specialty store.
- Perfect for Halloween: Ghosts, pumpkins, bats, or just spooky swirls — these cookies are a blank canvas for your creativity. Kids love decorating them, and adults love eating them.
- Make-Ahead Friendly: The dough freezes beautifully, and the baked cookies can be stored for up to a week. You can prep everything in advance and decorate when you have time.
What makes this different from every other sugar cookie recipe out there? It’s the texture, honestly. Most decorated cookies sacrifice chewiness for structure, but I figured out how to get both. The cream cheese adds a subtle tang that balances the sweetness, and the royal icing stays put without cracking. It’s the best of both worlds — a cookie that looks professional but tastes like something your grandma would make.
What Ingredients You Will Need
This recipe uses simple, wholesome ingredients that come together to create a cookie with a soft, chewy center and crisp edges. You probably have most of these in your kitchen already.
For the Cookie Dough
- Unsalted butter, softened (1 cup / 226g) — I prefer using Land O’Lakes for consistent results. Make sure it’s at room temperature, not melted.
- Cream cheese, softened (2 ounces / 57g) — This is the secret to chewiness. Use full-fat cream cheese for best texture.
- Granulated sugar (1 cup / 200g) — Regular white sugar works perfectly.
- Large egg (1) plus one egg yolk (save the white for something else) — The extra yolk adds richness and tenderness.
- Vanilla extract (2 teaspoons) — Pure vanilla, not imitation, makes a noticeable difference in flavor.
- All-purpose flour (2 ½ cups / 312g) — Spoon and level your flour for accuracy. Scooping directly from the bag packs it down and makes cookies dry.
- Baking powder (1 teaspoon) — Gives a slight lift without spreading too much.
- Salt (½ teaspoon) — Balances the sweetness.
For the Royal Icing
- Meringue powder (3 tablespoons) — This is what gives royal icing its structure. I recommend Wilton brand for reliability.
- Powdered sugar (4 cups / 480g) — Sift it first to avoid lumps.
- Warm water (about 5-6 tablespoons) — Add slowly; you may need slightly more or less depending on humidity.
- Vanilla extract (½ teaspoon) — Optional, but adds a nice flavor.
- Gel food coloring (orange, black, purple, green) — Gel colors are concentrated and won’t thin out your icing like liquid drops will.
For the icing, I’ve tried several brands of meringue powder, and Wilton consistently gives me the best results — it whips up glossy and sets hard without being brittle. If you can’t find meringue powder, you can substitute with powdered egg whites, but the texture may vary slightly.
Equipment Needed
- Stand mixer or hand mixer — You need something to cream the butter and sugar properly. A stand mixer with a paddle attachment is ideal.
- Rolling pin — I use a wooden rolling pin with adjustable rings to get even thickness every time.
- Halloween cookie cutters — Ghosts, pumpkins, cats, bats — whatever spooky shapes you love.
- Baking sheets (2) — Lined with parchment paper or silicone baking mats.
- Piping bags or squeeze bottles — For the royal icing. I actually prefer squeeze bottles for flooding because they give more control.
- Small round piping tips (size 2 or 3) — For outlining the cookies before flooding.
- Cooling rack — Essential for letting cookies cool completely before decorating.
- Toothpicks or scribe tool — For popping air bubbles and spreading icing into corners.
If you don’t have piping bags, you can use a small zip-top bag with the corner snipped off. It’s not fancy, but it works in a pinch. I’ve done it more times than I’d like to admit.
Preparation Method
-
Cream the butter, cream cheese, and sugar. In a large mixing bowl, beat the softened butter, cream cheese, and granulated sugar together on medium speed for about 3 minutes, until light and fluffy. Scrape down the sides of the bowl halfway through. The mixture should look pale and airy.
-
Add the egg, yolk, and vanilla. Beat in the whole egg, then the egg yolk, and finally the vanilla extract. Mix until just combined — don’t overbeat here, or your cookies might spread too much. The mixture might look slightly curdled, but that’s okay.
-
Combine the dry ingredients. In a separate bowl, whisk together the flour, baking powder, and salt. Gradually add the dry mixture to the wet mixture, mixing on low speed. Stop as soon as the flour disappears. Overmixing develops gluten, which makes cookies tough.
-
Chill the dough. Divide the dough into two discs, wrap each tightly in plastic wrap, and refrigerate for at least 2 hours. This is non-negotiable — chilled dough is easier to roll, holds its shape better, and gives you those clean cookie edges. I’ve skipped this step before, and my ghost cookies turned into blobs.
-
Preheat and prepare. When you’re ready to bake, preheat your oven to 350°F (175°C). Line two baking sheets with parchment paper or silicone mats.
-
Roll and cut. On a lightly floured surface, roll one disc of dough to about ¼-inch thickness. Flour your cookie cutters before pressing down to prevent sticking. Cut out as many shapes as you can, then gather the scraps, re-roll, and cut again. Place cookies about 1 inch apart on the prepared baking sheets.
-
Chill again (yes, again). Pop the cut cookies into the freezer for 10 minutes before baking. This step locks in the shape and prevents spreading. Trust me on this one.
-
Bake. Bake for 8-10 minutes, rotating the pan halfway through. The cookies should look set around the edges but still pale in the center. They will continue to firm up as they cool on the baking sheet for 5 minutes, then transfer to a wire rack to cool completely.
-
Make the royal icing. In a clean mixing bowl, combine the meringue powder and powdered sugar. Add 5 tablespoons of warm water and the vanilla extract. Beat on low speed for 1 minute, then increase to medium-high and beat for 4-5 minutes until the icing is glossy and forms stiff peaks. Add more water, ½ teaspoon at a time, if the icing is too thick.
-
Color and thin the icing. Divide the icing into separate bowls for each color. Add gel food coloring a little at a time until you reach your desired shade. For flooding (filling in the cookies), thin each color with water, ½ teaspoon at a time, until the icing flows like honey and a ribbon sinks back into itself within 10 seconds.
-
Decorate. Fit a piping bag with a small round tip and outline each cookie with the thicker icing. Let the outlines dry for 15 minutes. Then, fill a squeeze bottle or piping bag with the thinner flooding icing and fill in the outlines. Use a toothpick to spread the icing into corners and pop any air bubbles.
-
Let the icing set. Allow the decorated cookies to dry at room temperature for at least 4 hours, or overnight. The icing should be completely hard to the touch before stacking or storing.
Cooking Tips & Techniques
I learned most of these the hard way — by making mistakes. Let me save you some trouble.
Don’t skip the chilling steps. I know it’s tempting to rush, but chilled dough is the difference between a perfect ghost and a melted mess. The first time I made these, I was impatient and only chilled the dough for 30 minutes. My bats looked like lumpy clouds. Now I always chill for at least 2 hours, and I freeze the cut shapes for 10 minutes before baking. It makes a world of difference.
Watch your oven temperature. Every oven runs differently. My old oven ran hot, and I burned two batches before I figured it out. Invest in an oven thermometer — they’re cheap and worth every penny. If your cookies are browning too fast, lower the temperature by 25 degrees.
Royal icing consistency is everything. If your icing is too thick, it won’t spread smoothly. Too thin, and it’ll run right off the cookie. The perfect flooding consistency is when you lift your spoon and the icing falls back into the bowl in a ribbon that disappears within 10 seconds. It takes practice, but once you get the feel, you’ll know.
Work in batches. Don’t try to decorate all your cookies at once. Royal icing dries out quickly when exposed to air. Cover your bowls with a damp paper towel while you work, and only fill your piping bags with as much icing as you’ll use in 15 minutes.
Use a scribe tool. A toothpick works, but a proper scribe tool has a tiny hook that’s perfect for pulling icing into tight corners. I bought a set on Amazon for five bucks, and it made decorating way less frustrating.
Variations & Adaptations
One of the best things about this recipe is how flexible it is. Here are some ways to make it your own.
Gluten-Free Version: Substitute the all-purpose flour with a 1:1 gluten-free baking flour blend that contains xanthan gum. I’ve used Bob’s Red Mill with great results. The cookies will be slightly more delicate, so handle them gently.
Vegan Adaptation: Use vegan butter and dairy-free cream cheese. Replace the egg with a flax egg (1 tablespoon ground flaxseed mixed with 3 tablespoons water, let sit for 5 minutes). For the royal icing, use aquafaba (the liquid from a can of chickpeas) instead of meringue powder — 3 tablespoons of aquafaba whisked with powdered sugar works beautifully.
Flavor Twists: Add ½ teaspoon of almond extract along with the vanilla for a subtle nutty flavor. Or try lemon zest — about 1 tablespoon — for a bright, citrusy note that pairs surprisingly well with royal icing.
No-Cutter Option: If you don’t have Halloween cookie cutters, just roll the dough into balls and flatten them slightly with a glass. Decorate them as spooky eyeballs or monster faces. Kids love this approach because every cookie looks different.
Spiced Version: Add 1 teaspoon of cinnamon, ½ teaspoon of ginger, and ¼ teaspoon of nutmeg to the dry ingredients for a pumpkin-spiced twist. These are incredible with a simple vanilla glaze instead of royal icing.
Serving & Storage Suggestions
These cookies are best served at room temperature, with the royal icing fully set. I like to arrange them on a platter with some candy corn and mini pumpkins for a festive look. They’re perfect for Halloween parties, classroom treats, or just a fun afternoon baking project with the kids.
Storage: Store undecorated cookies in an airtight container at room temperature for up to 1 week. Decorated cookies can be stored in a single layer (or between layers of parchment paper) in an airtight container for up to 10 days. Do not refrigerate — the humidity can make the icing sticky.
Freezing: You can freeze the unbaked cookie dough for up to 3 months. Wrap it tightly in plastic wrap and then foil. Thaw in the refrigerator overnight before rolling and cutting. Baked, undecorated cookies also freeze well for up to 2 months. Thaw at room temperature before decorating.
Reheating: These cookies are meant to be eaten at room temperature, but if you want a warm cookie, pop one in the microwave for about 10 seconds. The icing will soften slightly, but it’s still delicious.
Flavor Development: Honestly, these cookies taste even better the day after baking. The flavors meld together, and the texture becomes even more tender. So don’t stress about making them all in one day — bake the cookies one day and decorate the next.
Nutritional Information & Benefits
Let’s be real — these are a treat, not a health food. But here’s the estimated nutrition per cookie (based on a 3-inch cookie with icing):
| Nutrient | Amount |
|---|---|
| Calories | 175 |
| Total Fat | 8g |
| Saturated Fat | 5g |
| Carbohydrates | 24g |
| Sugar | 16g |
| Protein | 2g |
The cream cheese in the dough adds a small amount of calcium and protein, and the butter provides vitamin A. But honestly, these cookies are about joy, not nutrition. They’re meant to be shared and enjoyed in moderation. If you’re looking for a healthier option, you can reduce the sugar in the cookie dough by ¼ cup without affecting the texture too much.
These cookies are not gluten-free, dairy-free, or vegan in their standard form, but I’ve included adaptations above for those with dietary restrictions. The royal icing contains meringue powder, which is made from egg whites, so it’s not suitable for those with egg allergies.
Frequently Asked Questions
Can I make these cookies ahead of time?
Absolutely. You can make the dough up to 3 days ahead and keep it refrigerated. You can also bake the cookies and freeze them undecorated for up to 2 months. I often bake a double batch a week before Halloween and decorate them the day before the party.
Why did my cookies spread too much?
This usually happens for one of three reasons: the dough wasn’t chilled enough, the butter was too soft, or the baking sheet was too warm. Make sure your butter is softened but not melted, chill the dough for at least 2 hours, and always use cool baking sheets. I keep an extra sheet in the freezer to rotate.
How do I get my royal icing perfectly smooth?
The key is consistency. Your flooding icing should be thin enough to flow but thick enough to hold its shape. When you lift your spoon, the icing should fall back into the bowl in a ribbon that disappears within 10 seconds. Also, use a toothpick or scribe tool to spread the icing into corners and pop any air bubbles immediately.
Can I use store-bought icing instead?
You can, but it won’t set the same way. Store-bought icing stays soft and can get messy when you stack the cookies. Royal icing dries hard, which makes it perfect for decorating and storing. If you’re short on time, a simple glaze made from powdered sugar and milk works in a pinch.
How long do decorated cookies last?
Decorated cookies will stay fresh for up to 10 days in an airtight container at room temperature. Keep them in a single layer or separate layers with parchment paper to prevent the icing from sticking. Do not refrigerate them — the humidity can make the icing tacky.
Conclusion
These chewy Halloween sugar cookies with royal icing are everything I want in a holiday treat — they’re fun to make, beautiful to look at, and absolutely delicious to eat. Every time I make them, I think about Mrs. Kowalski and her one-winged bat cutter, and I smile.
What I love most about this recipe is how forgiving it is. The dough is sturdy, the icing is easy to work with, and even if your ghosts end up looking a little lopsided, they’ll still taste amazing. That’s the beauty of homemade baking — perfection is overrated. What matters is the time spent in the kitchen, the flour on your counter, and the joy of sharing something you made with your own hands.
I’d love to see your Halloween creations! Tag me when you make these, and let me know what shapes and colors you chose. And if you have a trick for getting royal icing just right, share it in the comments — I’m always learning new things from this community. Happy Halloween, and happy baking!
Pin This Recipe!

Best Chewy Halloween Sugar Cookies with Perfect Royal Icing

These chewy Halloween sugar cookies with royal icing are soft in the middle, slightly crisp at the edges, and sturdy enough to hold a layer of royal icing without crumbling. They’re a love letter to childhood memories and perfect for Halloween parties.
- Prep Time: 30 minutes
- Cook Time: 10 minutes
- Total Time: 2 hours 40 minutes (includes chilling and cooling)
- Yield: 24 servings 1x
- Category: Dessert
- Cuisine: American
Ingredients
- 1 cup (226g) unsalted butter, softened
- 2 ounces (57g) cream cheese, softened
- 1 cup (200g) granulated sugar
- 1 large egg
- 1 large egg yolk
- 2 teaspoons vanilla extract
- 2 ½ cups (312g) all-purpose flour
- 1 teaspoon baking powder
- ½ teaspoon salt
- 3 tablespoons meringue powder
- 4 cups (480g) powdered sugar, sifted
- 5–6 tablespoons warm water
- ½ teaspoon vanilla extract (optional)
- Gel food coloring (orange, black, purple, green)
Instructions
- Cream the butter, cream cheese, and sugar together on medium speed for about 3 minutes until light and fluffy.
- Beat in the whole egg, then the egg yolk, and finally the vanilla extract until just combined.
- In a separate bowl, whisk together the flour, baking powder, and salt. Gradually add to the wet mixture on low speed until just combined.
- Divide the dough into two discs, wrap tightly in plastic wrap, and refrigerate for at least 2 hours.
- Preheat oven to 350°F (175°C). Line baking sheets with parchment paper or silicone mats.
- On a lightly floured surface, roll one disc of dough to ¼-inch thickness. Cut out shapes with floured cookie cutters.
- Place cut cookies on prepared baking sheets and freeze for 10 minutes.
- Bake for 8-10 minutes, rotating the pan halfway through. Cool on baking sheet for 5 minutes, then transfer to a wire rack to cool completely.
- For royal icing: Combine meringue powder and powdered sugar. Add 5 tablespoons warm water and vanilla. Beat on low for 1 minute, then medium-high for 4-5 minutes until glossy with stiff peaks.
- Divide icing into bowls and add gel food coloring. Thin each color with water, ½ teaspoon at a time, until it flows like honey.
- Pipe outlines with thicker icing, let dry 15 minutes, then fill with thinner flooding icing. Use a toothpick to spread and pop bubbles.
- Let icing set at room temperature for at least 4 hours or overnight until hard.
Notes
Don’t skip the chilling steps – chilled dough prevents spreading. For perfect royal icing consistency, the flooding icing should flow like honey and a ribbon should disappear within 10 seconds. Store decorated cookies in an airtight container at room temperature for up to 10 days. Do not refrigerate.
Nutrition
- Serving Size: 1 cookie (3-inch wit
- Calories: 175
- Sugar: 16
- Sodium: 75
- Fat: 8
- Saturated Fat: 5
- Carbohydrates: 24
- Protein: 2
Keywords: Halloween sugar cookies, chewy sugar cookies, royal icing, decorated cookies, Halloween baking, ghost cookies, pumpkin cookies