Love this? Save it for later!
Share the inspiration with your friends
I was folding laundry last Tuesday—a truly mindless activity—when the smell hit me. It wasn’t coming from my kitchen. It was coming from somewhere outside, drifting through the cracked window. That specific, warm cloud of cinnamon, nutmeg, and something almost caramel-like. And suddenly I was seven years old, standing on a step stool in my aunt Carol’s tiny galley kitchen, my fingers dusted with flour. She wasn’t actually my aunt, you know. She was our next-door neighbor, a retired home economics teacher with no kids of her own, who somehow adopted me every November. She’d let me press the dough into her mini muffin tins, her hands guiding mine over the bumpy edges. I can still see the way she’d wink and say, “The secret’s in the crimp, kiddo.” I haven’t thought about that kitchen in years. She passed away when I was in high school, and I never got her recipe for those little pies. Honestly, I’ve been chasing that exact feeling—that perfect ratio of buttery crust to spiced filling in a single, guiltless bite—ever since. Maybe you’ve been there, trying to recreate a taste that lives more in your memory than on your tongue. This is my attempt to get it right. These Light Mini Pumpkin Pie Bites aren’t just a dessert. They’re a little time machine, and I think I finally cracked the code.
Why You’ll Love This Recipe
Let me be honest with you. I’ve tested this recipe six times in the last three weeks. My coworkers are tired of seeing mini pie tins on my desk. But I kept tweaking because I knew there was a perfect version—one that felt indulgent but didn’t leave you in a food coma. These little bites are it.
- Quick & Easy: These come together in about 35 minutes from start to finish. No rolling out a full pie crust. No blind baking drama. The muffin tin does all the heavy lifting.
- Simple Ingredients: You probably have 90% of this already. Pumpkin puree, eggs, a little sugar, and some pantry spices. The crust uses refrigerated biscuits—I know, trust me on this one. It’s a game changer.
- Perfect for Holiday Gatherings: These are the hero of any Thanksgiving potluck or Friendsgiving spread. Everyone gets their own little pie. No slicing, no fighting over the corner piece.
- Crowd-Pleaser: I brought a batch to my book club last week, and four people asked for the recipe before I even sat down. Kids love them because they’re bite-sized. Adults love them because they feel like a treat without the commitment of a full slice.
- Unbelievably Delicious: The texture is what gets me. That flaky, tender crust against the silky, spiced pumpkin filling. And because we’re using a lighter filling—thanks to a swap I’ll explain in a minute—you can eat two without a second thought.
What makes this recipe different from all the other pumpkin pie bites out there? It’s the crust. Using refrigerated biscuits gives you that soft, almost buttery texture without the hassle of homemade dough. And the filling? I swapped in Greek yogurt for some of the heavy cream. It cuts the fat, adds protein, and you honestly can’t taste the difference. This isn’t just another version. It’s the one I keep making on repeat.
What Ingredients You Will Need
This recipe uses simple, wholesome ingredients to deliver that classic pumpkin pie flavor in a lighter, more portable package. Most of these are pantry staples, especially if you do any fall baking.
For the Crust
- 1 can (16.3 oz) refrigerated buttermilk biscuits (I prefer Pillsbury Grands! for their fluffiness, but any brand works—just make sure they’re the large, flaky layer kind, not the tiny ones)
- 2 tablespoons unsalted butter, melted (adds richness and helps the crust brown beautifully)
- 1 tablespoon granulated sugar (for a light, sweet crunch on the edges)
- ½ teaspoon ground cinnamon (mixed with the sugar for a cinnamon-sugar dusting)
For the Light Pumpkin Filling
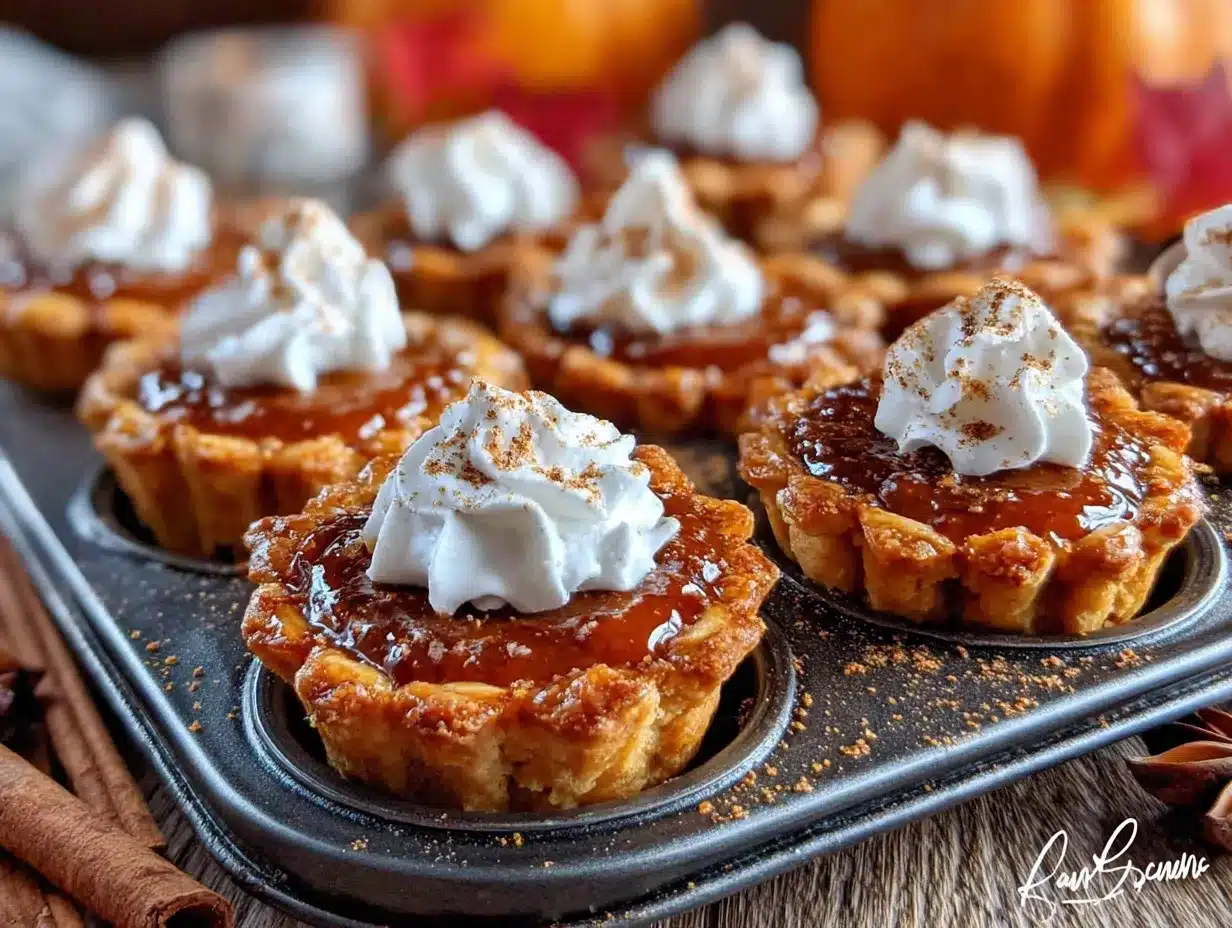
- 1 cup canned pumpkin puree (not pumpkin pie filling—make sure it’s 100% pure pumpkin. I use Libby’s for consistent texture)
- ⅓ cup plain Greek yogurt (this is our lighter swap. Use full-fat or 2% for the creamiest result. Dairy-free coconut yogurt works too)
- ¼ cup heavy cream (or half-and-half if you want it even lighter)
- ½ cup light brown sugar, packed (adds depth and moisture. Dark brown sugar works if that’s what you have)
- 1 large egg, room temperature (helps the filling set properly)
- 1 teaspoon vanilla extract
- 1½ teaspoons pumpkin pie spice (store-bought is fine, but I’ll share my homemade blend in the tips section)
- ¼ teaspoon salt (balances the sweetness and enhances the spices)
For Topping (Optional but Recommended)
- ¼ cup whipped cream or coconut whipped cream (a tiny dollop on each bite is pure magic)
- A light dusting of cinnamon or nutmeg (for that final, pretty finish)
Ingredient Selection Tip: When buying pumpkin puree, look for cans that feel heavy for their size—that means more pumpkin, less water. And for the Greek yogurt, I recommend Fage or Chobani. Their thickness helps mimic the richness of traditional fillings without being watery.
Equipment Needed
You don’t need a fancy kitchen for these, which is part of their charm. Here’s what you’ll need:
- 12-cup standard muffin tin (non-stick is ideal, but any will work with proper greasing)
- Large mixing bowl (for the filling)
- Medium bowl (for the cinnamon-sugar mixture)
- Pastry brush (for brushing the melted butter on the crusts. A silicone one is easiest to clean)
- Rolling pin (or a clean wine bottle if you’re improvising—I’ve done it)
- Small round cookie cutter or a shot glass (about 2½ inches wide, to cut the biscuit rounds. A juice glass works too)
- Whisk (for the filling)
- Measuring cups and spoons
- Cooling rack (helps the bottoms stay crisp, not soggy)
Budget-Friendly Tip: If you don’t have a rolling pin, just press the biscuit dough flat with your palm. It doesn’t have to be perfectly even—rustic is charming. And if you don’t have a cookie cutter, the rim of a small drinking glass works perfectly. I’ve used a mason jar lid in a pinch.
Preparation Method
Alright, let’s make these little bites of fall. I’ll walk you through every step, including the little things I learned the hard way.
- Preheat your oven to 375°F (190°C). Generously spray your 12-cup muffin tin with non-stick cooking spray. Don’t skip this—even with non-stick pans, the biscuit dough likes to cling. I learned this the messy way on my first test batch.
- Make the cinnamon-sugar mixture. In a small bowl, combine the 1 tablespoon of granulated sugar and ½ teaspoon of ground cinnamon. Set it aside. This will be our crust’s golden ticket.
- Prepare the biscuit dough. Open the can of refrigerated biscuits—carefully, because they like to pop. You should have 8 biscuits. Take each biscuit and cut it in half horizontally (like you’re splitting an English muffin) so you have 16 thin rounds. Don’t worry if they’re not perfect. Place each round between two sheets of plastic wrap or wax paper and gently roll them out with your rolling pin until they’re about 3 inches wide. You want them thin enough to press into the muffin cups but thick enough to hold the filling. If they tear a little, just press them back together—no one will know.
- Form the crusts. Press each rolled-out biscuit round into a muffin cup, gently pushing it up the sides to form a little bowl. The edges should come up about ½ inch above the rim. Don’t worry if it looks a bit messy. That’s the charm of homemade. Repeat with all 16 rounds. You’ll have 4 empty muffin cups—that’s fine. Fill them halfway with water so the tin heats evenly.
- Brush and dust the crusts. Using your pastry brush, lightly brush each biscuit crust with the melted butter. Then sprinkle a pinch of the cinnamon-sugar mixture over each one. This step is non-negotiable—it’s what gives you that sweet, buttery, almost caramelized edge. Pop the tin in the oven for 5 minutes. This par-bakes the crusts so they don’t get soggy later. You’ll see them puff up slightly and turn golden at the edges.
- Make the filling while the crusts bake. In your large mixing bowl, whisk together the pumpkin puree, Greek yogurt, and heavy cream until smooth. There shouldn’t be any streaks of yogurt. Add the brown sugar, egg, vanilla extract, pumpkin pie spice, and salt. Whisk until everything is combined and velvety. The mixture will be thick but pourable. Taste it—yes, raw egg and all. I do it every time. It should taste like a slightly sweet, spiced pumpkin butter. Adjust spices if you like it bolder.
- Fill the crusts. Pull the muffin tin out of the oven. Carefully spoon the filling into each pre-baked crust, filling them almost to the top—about ¾ full. They’ll puff up a little in the oven but settle as they cool. A small cookie scoop or a tablespoon works great here. Try not to overfill, or they’ll spill over and get messy.
- Bake the pie bites. Return the tin to the oven and bake for 12 to 15 minutes. You’ll know they’re done when the filling is set around the edges but still has a slight jiggle in the very center—like a cheesecake. The crusts should be deep golden brown. If the edges start to get too dark before the filling is set, tent the tin loosely with foil for the last 3 minutes.
- Cool completely. This is the hardest part, I know. Let the pie bites cool in the tin for 10 minutes. Then, using a small offset spatula or a butter knife, gently loosen the edges and transfer them to a cooling rack. Let them cool completely—at least 30 minutes. The filling continues to set as it cools. If you try to eat one too soon (I have, many times), the filling will be too soft. Patience, friend.
- Top and serve. Once cool, add a tiny dollop of whipped cream to each bite and a light dusting of cinnamon. Or don’t. They’re fantastic on their own too. Serve at room temperature or slightly warm.
Cooking Tips & Techniques
After making these six times, I’ve collected a few hard-won lessons. Let me save you some trouble.
The crust is the star, so don’t rush it. I tried skipping the par-bake step once. Big mistake. The bottoms turned into a dense, doughy mess. That 5-minute head start in the oven makes all the difference. Also, if your biscuit dough tears while you’re pressing it into the tin, just patch it with a scrap of dough. No one will ever know. I had one batch where half the crusts looked like Frankenstein, and they still came out beautiful.
Room temperature ingredients matter. I know, I know—it’s annoying. But cold egg or cold yogurt will make the filling lumpy and it won’t bake evenly. Take everything out of the fridge 20 minutes before you start. Set a timer if you’re forgetful like me.
Watch your oven like a hawk. Ovens are liars. My friend’s oven runs 25 degrees hot. These little bites bake fast, so start checking at the 10-minute mark. You’re looking for that slight jiggle in the center. If the filling is completely still when you gently shake the tin, you’ve overbaked them. They’ll still taste good, but the texture will be a little rubbery instead of silky.
My biggest failure: On test batch three, I used fat-free Greek yogurt and skim milk. The filling tasted watery and never set properly. Don’t do it. You need at least 2% yogurt and some cream for that lush texture. This is a lighter recipe, not a no-fat recipe. There’s a difference.
Multitasking tip: While the crusts are doing their 5-minute par-bake, whisk together your filling. That way, everything is ready to go. You’ll have the filling in the crusts and back in the oven in under 10 minutes total.
Variations & Adaptations
One of the best things about this recipe is how flexible it is. Here are a few ways I’ve tweaked it depending on my mood or who I’m feeding.
Gluten-Free Version: Use gluten-free refrigerated biscuit dough. I’ve tested this with the brand “Impossible” and it works surprisingly well. The texture is a bit more crumbly, so handle the dough gently. Alternatively, you can make a simple gluten-free crust using almond flour and butter (press it into the tins like a tart shell).
Vegan Option: Swap the Greek yogurt with a thick coconut yogurt (like CocoJune) and use a flax egg (1 tablespoon ground flaxseed mixed with 3 tablespoons water, let sit for 5 minutes). For the cream, use full-fat coconut cream from a can. The biscuits are a problem—most refrigerated biscuits contain buttermilk. Look for Annie’s organic crescent rolls, which are accidentally vegan. Or make a simple oat flour crust.
Spice It Up: I made a batch last week with a pinch of cayenne pepper and a teaspoon of fresh grated ginger in the filling. It was incredible—warm and a little surprising. If you love a little heat with your sweet, give it a try.
Chocolate Pumpkin Bites: For my friend’s Halloween party, I added a teaspoon of cocoa powder to the filling and topped each bite with a mini dark chocolate chip before baking. They looked like little pumpkin pies with a chocolate surprise inside. Huge hit.
Savory Version: This might sound weird, but hear me out. Omit the sugar and pumpkin pie spice from the crust. Use the same biscuit base, but fill with a savory pumpkin mixture: pumpkin puree, sautéed onions, garlic, sage, and a little parmesan. Bake the same way. These make amazing appetizers for a fall dinner party.
Serving & Storage Suggestions
These little bites are versatile, which is why I keep a batch in my freezer at all times during the fall.
Serving Temperature: I prefer them at room temperature. The filling is silkiest and the crust has just the right amount of give. If you want them warm, pop them in a 300°F oven for 5 minutes. Don’t microwave them—the crust gets chewy and the filling can separate.
Presentation Ideas: Arrange them on a wooden board or a pretty cake stand. Add a few cinnamon sticks, star anise, or small pumpkins around them for a fall tablescape. If you’re serving a crowd, put out a bowl of extra whipped cream and a small dish of cinnamon sugar so people can customize their own.
What to Serve With Them: A cup of hot apple cider or a spiced chai latte is perfect. For a dessert spread, pair them with a dark chocolate tart or a simple vanilla panna cotta. They also work beautifully alongside a cheese board—the sweetness cuts through the saltiness of a good aged cheddar.
Storage: Keep them in an airtight container in the refrigerator for up to 5 days. Place a paper towel at the bottom of the container to absorb any excess moisture. Change the paper towel every other day if you’re storing them longer.
Freezer Instructions: These freeze like a dream. Let them cool completely. Place them on a baking sheet in a single layer and freeze for 1 hour (this is called a flash freeze). Then transfer them to a freezer-safe bag or container. They’ll keep for up to 3 months. To thaw, just leave them in the fridge overnight or on the counter for an hour.
Reheating from Frozen: No need to thaw first. Place them on a baking sheet and warm in a 325°F oven for 8-10 minutes. They’ll taste almost fresh-baked. I do this all the time when I need a last-minute dessert.
Nutritional Information & Benefits
I’m not a nutritionist, but I do pay attention to what goes into my body. Here’s the breakdown for one mini pie bite (without the whipped cream topping):
- Calories: Approximately 145
- Fat: 6g
- Carbohydrates: 20g
- Fiber: 2g
- Sugar: 11g
- Protein: 4g
Why this is a smart choice: Pumpkin is packed with Vitamin A (great for your eyes and immune system) and fiber. The Greek yogurt adds protein and probiotics, which are good for gut health. By swapping out some of the heavy cream for yogurt, we cut about 40 calories and 5 grams of fat per serving compared to traditional mini pumpkin pies. That means you can enjoy two of these for roughly the same calories as one regular slice of pumpkin pie.
Dietary Considerations: This recipe is vegetarian. For a gluten-free version, use the adaptations I mentioned above. It’s naturally low in sodium (about 180mg per bite) and can easily be made nut-free by checking your biscuit brand.
Allergen Note: Contains dairy, wheat, and eggs. For vegan and dairy-free options, see the variations section.
Conclusion
These Light Mini Pumpkin Pie Bites are everything I want in a fall dessert—comforting, easy, and just a little bit nostalgic. They remind me of that tiny kitchen and my aunt Carol’s patient hands, but they also stand on their own as a genuinely delicious, crowd-pleasing recipe. Whether you’re making them for a Thanksgiving feast, a cozy night in, or just because you found a can of pumpkin in the back of your pantry, I think you’ll fall in love with them.
Don’t be afraid to play with the recipe. Add more spice. Skip the whipped cream. Use a different biscuit brand. The best recipes are the ones that become yours over time. And honestly, the first batch doesn’t have to be perfect. My first batch was a mess—filling everywhere, crusts that looked like little volcanoes. But they still tasted like fall. And that’s what matters.
I’d love to hear how yours turn out! Leave a comment below and let me know if you tried any fun variations. Did you add chocolate? Go the savory route? Make them for a party? Share your photos and tag me—I want to see your little pumpkin bites in all their glory. Happy baking, friend.
Frequently Asked Questions
Can I use homemade pie crust instead of biscuit dough?
Absolutely. If you have a favorite pie crust recipe, roll it out thin and cut it into rounds. The biscuit shortcut is just that—a shortcut. Homemade crust will be flakier but takes more time. Just remember to par-bake it for 5 minutes so it doesn’t get soggy.
Why did my filling turn out watery?
This usually happens for one of two reasons: either you used a low-fat yogurt that had too much water, or you didn’t bake them long enough. Make sure you’re using at least 2% Greek yogurt and that you let them cool completely before serving. The filling firms up as it cools.
Can I make these ahead of time for a party?
Yes, and I actually recommend it. They taste even better the next day after the flavors have had time to meld. Bake them a day ahead, store them in the fridge, and add the whipped cream just before serving.
My crust stuck to the muffin tin. What did I do wrong?
Two things to check: Did you grease the tin well enough? I use a generous spray of non-stick cooking spray, getting into all the crevices. And did you let them cool in the tin for the full 10 minutes? If you try to remove them while they’re still hot, the crust is too fragile and will stick.
Can I use a mini muffin tin instead?
You sure can. You’ll get about 24 mini bites. Reduce the baking time by about 3-4 minutes and keep a close eye on them. They’ll look like little pumpkin buttons, which is actually adorable for a party appetizer or dessert table.
Pin This Recipe!
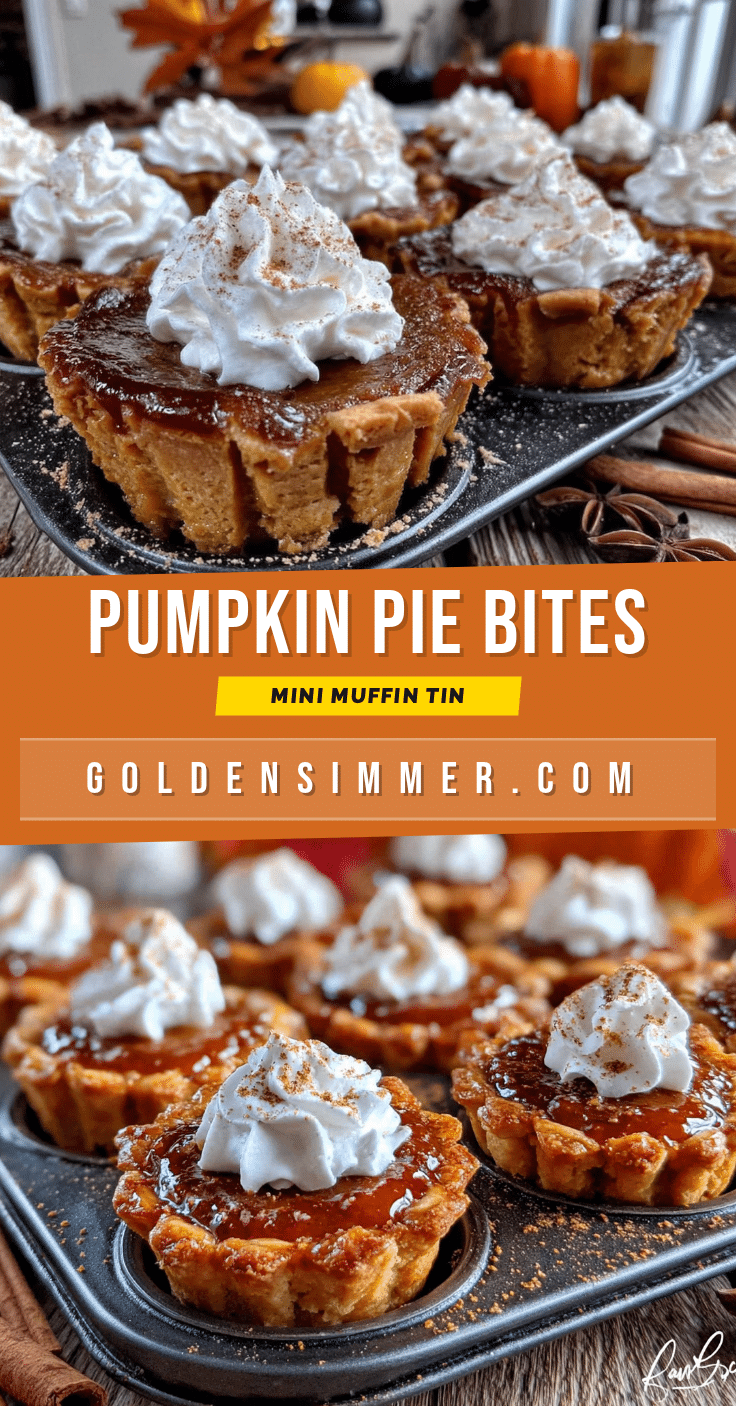
Best Easy Mini Pumpkin Pie Bites Made in a Muffin Tin

These light and delicious mini pumpkin pie bites are made in a muffin tin with a buttery biscuit crust and a silky spiced pumpkin filling. Perfect for holiday gatherings, they’re quick, easy, and a crowd-pleaser.
- Prep Time: 15 minutes
- Cook Time: 20 minutes
- Total Time: 35 minutes
- Yield: 16 mini pie bites 1x
- Category: Dessert
- Cuisine: American
Ingredients
- 1 can (16.3 oz) refrigerated buttermilk biscuits (e.g., Pillsbury Grands!)
- 2 tablespoons unsalted butter, melted
- 1 tablespoon granulated sugar
- ½ teaspoon ground cinnamon
- 1 cup canned pumpkin puree (100% pure pumpkin, not pie filling)
- ⅓ cup plain Greek yogurt (full-fat or 2%)
- ¼ cup heavy cream (or half-and-half)
- ½ cup light brown sugar, packed
- 1 large egg, room temperature
- 1 teaspoon vanilla extract
- 1½ teaspoons pumpkin pie spice
- ¼ teaspoon salt
- ¼ cup whipped cream or coconut whipped cream (optional, for topping)
- A light dusting of cinnamon or nutmeg (optional, for topping)
Instructions
- Preheat your oven to 375°F (190°C). Generously spray a 12-cup standard muffin tin with non-stick cooking spray.
- In a small bowl, combine 1 tablespoon granulated sugar and ½ teaspoon ground cinnamon. Set aside.
- Open the can of refrigerated biscuits. Cut each biscuit in half horizontally to make 16 thin rounds. Place each round between two sheets of plastic wrap or wax paper and roll out to about 3 inches wide.
- Press each rolled-out biscuit round into a muffin cup, pushing it up the sides to form a little bowl. The edges should come up about ½ inch above the rim. Fill any empty cups halfway with water for even heating.
- Brush each biscuit crust with melted butter, then sprinkle a pinch of the cinnamon-sugar mixture over each. Bake for 5 minutes to par-bake the crusts.
- While the crusts bake, make the filling: In a large bowl, whisk together pumpkin puree, Greek yogurt, and heavy cream until smooth. Add brown sugar, egg, vanilla extract, pumpkin pie spice, and salt. Whisk until combined and velvety.
- Remove the muffin tin from the oven. Spoon the filling into each pre-baked crust, filling about ¾ full.
- Return the tin to the oven and bake for 12 to 15 minutes, until the filling is set around the edges but still slightly jiggly in the center. If edges brown too quickly, tent with foil.
- Let the pie bites cool in the tin for 10 minutes. Then gently loosen edges and transfer to a cooling rack. Cool completely, at least 30 minutes.
- Once cool, top each bite with a dollop of whipped cream and a light dusting of cinnamon, if desired. Serve at room temperature or slightly warm.
Notes
For best results, use at least 2% Greek yogurt and room temperature ingredients. Par-baking the crust is essential to prevent sogginess. Cool completely before serving for the filling to set properly. These can be stored in the refrigerator for up to 5 days or frozen for up to 3 months.
Nutrition
- Serving Size: 1 mini pie bite
- Calories: 145
- Sugar: 11
- Sodium: 180
- Fat: 6
- Saturated Fat: 3
- Carbohydrates: 20
- Fiber: 2
- Protein: 4
Keywords: mini pumpkin pie bites, pumpkin pie bites, easy pumpkin dessert, Thanksgiving dessert, muffin tin pumpkin pie, light pumpkin pie, fall dessert



