Love this? Save it for later!
Share the inspiration with your friends
My neighbor Miriam watched me struggle with a sticky, misshapen blob of dough on my kitchen counter last September. She didn’t say anything at first—just leaned against the doorframe with her arms crossed and a knowing smile. Then she walked over, dipped her fingers in olive oil, and gently coaxed the dough into a smooth ball without saying a word. “You’re fighting it,” she finally said. “Challah dough wants to be handled gently, like you’re holding something precious.”
I had been trying to make a decent challah for years, honestly. Every Rosh Hashanah, I’d buy a bakery loaf and promise myself next year would be different. But my attempts always came out dense, dry, or just plain ugly. Miriam, who learned from her grandmother in Israel, spent the next hour teaching me the rhythm of challah—the way the dough should feel when it’s rested enough, the trick to a golden crust that glistens like honey itself. I messed up the braiding twice, flour ended up on my ceiling fan somehow, and I accidentally used salt instead of sugar in my first batch. She just laughed and said, “Now you’re really learning.”
That first successful loaf came out of the oven looking like it belonged on a magazine cover. The smell—warm yeast, sweet honey, and a hint of saffron—filled my entire apartment. When I brought it to our Rosh Hashanah dinner that evening, Miriam took a bite, closed her eyes, and nodded. That nod meant more than any compliment. You know that feeling when someone passes down something that isn’t written in a recipe book? It’s in the hands, the patience, the willingness to mess up and try again. This honey challah is my version of that lesson, and I keep making it because every braid reminds me that some things are worth the sticky fingers.
Why You’ll Love This Recipe
This isn’t just another challah recipe you’ll find online. After countless test batches, I’ve dialed in the exact balance of honey, fat, and hydration that gives you a loaf that’s tender enough to pull apart but sturdy enough for the most generous schmear of butter or jam. Here’s why this one stands out:
- Perfectly Sweet, Not Overpowering: The honey adds just enough sweetness to complement the eggy richness without making it taste like dessert. It’s the kind of bread you can serve with dinner or enjoy on its own.
- Foolproof Braiding: I’ve included my tried-and-true technique that even beginners can master. If I can do it with flour on my ceiling fan, you can too.
- Make-Ahead Friendly: The dough rests beautifully in the fridge overnight, which actually improves the flavor. Perfect for busy holiday prep.
- Crowd-Pleasing Texture: The crust is golden and slightly crisp, while the inside stays pillowy soft for days. No dry challah here.
- Symbolic and Meaningful: For Rosh Hashanah, the round shape represents the cycle of the year, and the honey embodies wishes for a sweet new year. Every slice carries intention.
What makes this recipe different from the rest? It’s the technique of blooming the yeast in warm honey water instead of plain sugar water. That small change infuses the entire loaf with a deeper, more complex sweetness that you just can’t get from adding honey at the end. I also use a mix of bread flour and all-purpose flour for that perfect chew without being tough.
This challah isn’t just good—it’s the kind that makes you close your eyes after the first bite. It’s the bread that gets passed around the table twice because everyone wants another piece. Whether you’re celebrating Rosh Hashanah or just want a beautiful, delicious loaf to share with people you love, this recipe delivers every time.
What Ingredients You Will Need
This recipe uses simple, wholesome ingredients to deliver that signature challah flavor and texture. Most of these are pantry staples, which makes this a great recipe to whip up even on a whim.
- Active dry yeast (2 ¼ teaspoons or one ¼-ounce packet): This is what makes your challah rise and gives it that airy crumb. I prefer Red Star or SAF instant yeast for consistent results.
- Warm water (½ cup, about 110°F): Not too hot or you’ll kill the yeast. Think warm bath water.
- Honey (⅓ cup, plus extra for brushing): Use a good-quality honey here since it’s the star. Local honey adds a lovely floral note, but any pure honey works.
- Bread flour (3 cups): The higher protein content gives challah its characteristic chew. King Arthur is my go-to, but any brand works.
- All-purpose flour (1 cup): Adds tenderness and balances the chewiness from bread flour.
- Large eggs (3 whole eggs + 1 yolk, room temperature): Eggs give challah its rich color and tender crumb. Save the extra white for brushing the top.
- Vegetable oil (¼ cup): Keeps the bread moist and soft. You can use avocado or grapeseed oil for a neutral flavor.
- Salt (1 ½ teaspoons): Don’t skip this! Salt controls the yeast and enhances all the flavors.
- Optional: Saffron threads (a pinch, steeped in 2 tablespoons warm water): This gives the challah a gorgeous golden hue and subtle floral notes. Totally optional but worth it for special occasions.
- Poppy seeds or sesame seeds (for topping, optional): Adds a nice crunch and visual appeal.
Substitution guidance: If you need a dairy-free version, this recipe is already naturally dairy-free since we use oil instead of butter. For a gluten-free option, use a good gluten-free bread flour blend, but note the texture will be different. You can also swap honey with maple syrup or agave, though the flavor profile will shift slightly.
Equipment Needed
You don’t need a professional bakery setup for this challah. Here’s what I use and what you can substitute if needed:
- Large mixing bowl: Any big bowl works. I use a ceramic one because it retains warmth nicely.
- Stand mixer with dough hook (optional but helpful): You can absolutely knead by hand—it just takes about 10 minutes of arm work. If using a mixer, keep it on medium-low speed.
- Measuring cups and spoons: Accuracy matters in baking, so use proper measuring tools.
- Kitchen scale (optional but recommended): Weighing your flour ensures consistent results every time. 1 cup of bread flour weighs about 120 grams.
- Clean kitchen towel or plastic wrap: For covering the dough while it rises.
- Baking sheet lined with parchment paper: I’ve learned the hard way that parchment prevents sticking and makes cleanup a breeze.
- Pastry brush: For that beautiful egg wash. A silicone brush works great and doesn’t shed bristles.
- Sharp knife or bench scraper: For dividing the dough evenly.
Budget-friendly tip: If you don’t have a stand mixer, kneading by hand is actually a lovely, meditative process. I often choose to do it manually when I need to unwind. Just make sure your surface is lightly oiled, not floured, to keep the dough from drying out.
Preparation Method
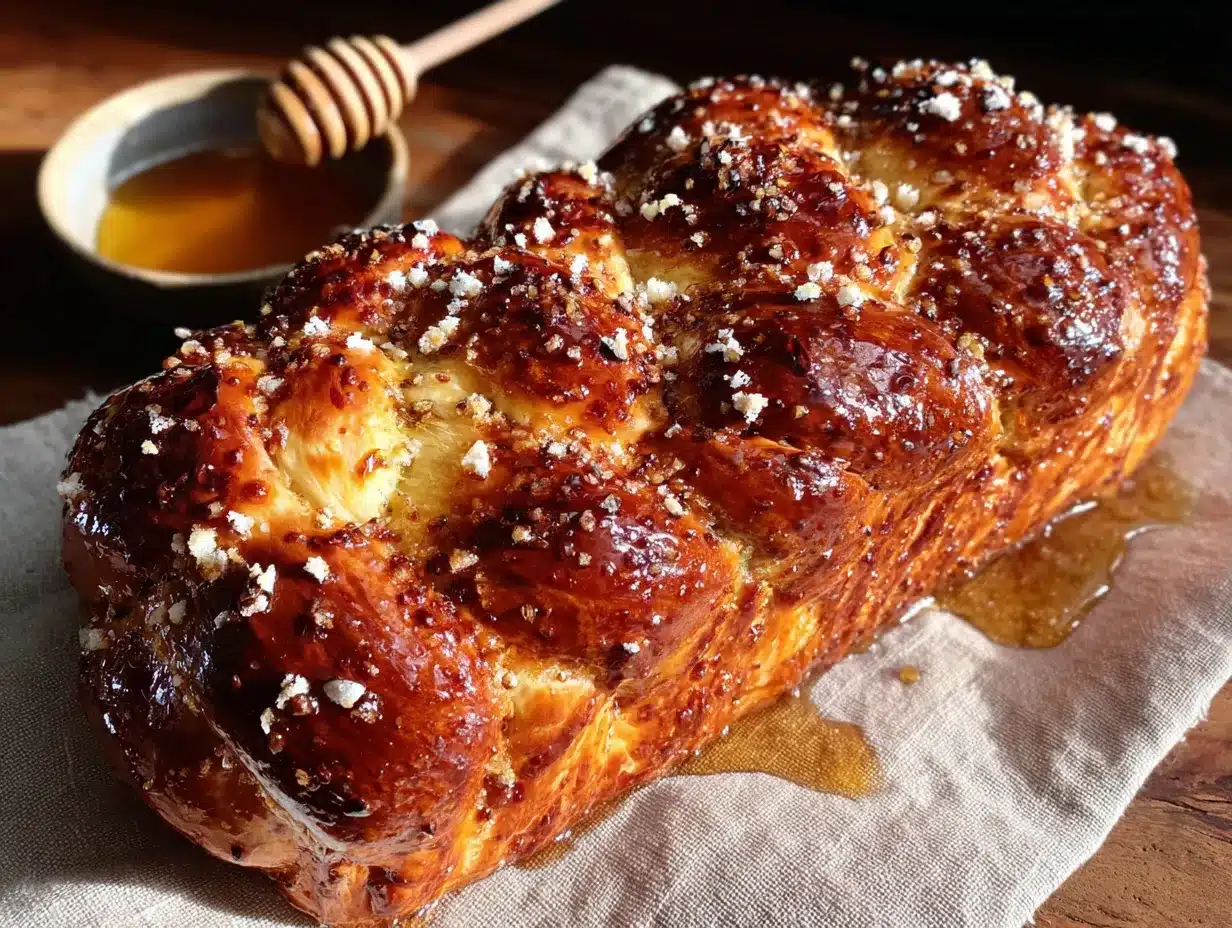
- Bloom the yeast (5 minutes): In a small bowl, combine the warm water (110°F), 1 tablespoon of honey, and the yeast. Stir gently and let it sit for 5-7 minutes until it becomes frothy and smells like warm bread. If it doesn’t foam, your yeast might be dead—start over with fresh yeast.
- Mix the dough (10 minutes): In your large mixing bowl or stand mixer bowl, whisk together the bread flour, all-purpose flour, and salt. In a separate bowl, whisk 3 whole eggs, the remaining honey, vegetable oil, and the yeast mixture. If using saffron, add the steeped liquid now. Pour the wet ingredients into the dry ingredients and mix until a shaggy dough forms.
- Knead the dough (8-10 minutes by hand, 6-8 minutes with mixer): Turn the dough onto a lightly oiled surface. Knead by pushing the dough away from you with the heel of your hand, then folding it back toward you. The dough should become smooth, elastic, and slightly tacky but not sticky. If it’s too sticky, add flour one tablespoon at a time. If it’s too dry, add water a teaspoon at a time. You’ll know it’s ready when you can stretch a small piece thin enough to see light through without tearing—the windowpane test.
- First rise (1-1.5 hours): Place the dough in a lightly oiled bowl, turning to coat all sides. Cover with a damp kitchen towel or plastic wrap and let it rise in a warm, draft-free spot until doubled in size. I usually put it in my oven with the light on (not the heat!). It should look puffy and feel airy when you gently poke it.
- Punch down and shape (15 minutes): Gently punch down the dough to release the air. Turn it onto a lightly floured surface. Divide the dough into 3 equal pieces for a simple braid, or 4 pieces for a four-strand braid. Roll each piece into a rope about 12-14 inches long, tapering the ends slightly. If the dough resists, let it rest for 5 minutes and try again—it’s being stubborn, not difficult.
- Braid the challah (10 minutes): For a three-strand braid, pinch the tops together, then cross the right strand over the middle, then the left strand over the new middle. Repeat until you reach the ends, then pinch the bottoms together. For a round Rosh Hashanah challah, after braiding, bring the ends together to form a circle and pinch to seal. Place on your parchment-lined baking sheet.
- Second rise (45 minutes to 1 hour): Cover the braided challah loosely with a towel and let it rise again until it’s puffy and nearly doubled. It should look pillowy and feel soft when gently pressed.
- Preheat and prepare (20 minutes before baking): Preheat your oven to 350°F. In a small bowl, beat the reserved egg white with 1 tablespoon of water. Gently brush this egg wash over the entire surface of the challah—be thorough, this gives you that gorgeous golden crust. Sprinkle with poppy seeds or sesame seeds if using.
- Bake (30-35 minutes): Place the challah in the preheated oven and bake until deeply golden brown. The internal temperature should reach 190°F. If the top is browning too quickly, tent loosely with foil after 20 minutes. Your kitchen will smell like heaven at this point.
- Honey glaze (immediately after baking): While the challah is still warm, brush it with 1-2 tablespoons of honey mixed with 1 teaspoon of warm water. This gives it that beautiful shine and extra sweetness. Let it cool on a wire rack for at least 20 minutes before slicing—I know it’s tempting, but cutting too early will make it gummy.
Cooking Tips & Techniques
I’ve made every mistake in the book with challah, so let me save you some trouble. The biggest lesson I learned? Temperature matters more than you think. If your kitchen is cold, your dough will take forever to rise. I’ve resorted to preheating my oven to the lowest setting, turning it off, and then placing the dough inside with the door slightly open. Works like a charm.
Another common mistake is over-flouring the dough during kneading. It’s tempting to keep adding flour when it feels sticky, but a slightly tacky dough produces a much softer challah. Trust the process—it will come together. If you’re really struggling, wet your hands instead of adding more flour.
For the braiding, don’t stress if it’s not perfect. My first few loaves looked like they’d been in a fight. The dough is forgiving, and even a messy braid tastes amazing. If you want practice, make a small batch just for braiding practice—that’s what I did, and I ate the “ugly” challah for breakfast all week.
Timing tip: I often make the dough the night before and let it do its first rise in the fridge overnight. The cold slows down the fermentation, which actually develops more flavor. Just bring it to room temperature for about an hour before shaping and proceeding with the second rise. This makes holiday prep so much less stressful.
One more thing—don’t skip the honey glaze at the end. I forgot it once and the challah was still good, but that extra brush of honey takes it from good to unforgettable. It also helps keep the crust soft for an extra day.
Variations & Adaptations
This recipe is wonderfully adaptable. Here are some variations I’ve tried and loved:
- Whole Wheat Honey Challah: Substitute 1 cup of the bread flour with whole wheat flour. The texture will be slightly denser, but the nutty flavor pairs beautifully with honey. Add an extra tablespoon of water since whole wheat absorbs more liquid.
- Chocolate Chip Challah: After the first rise, gently knead in ¾ cup of mini chocolate chips. The kids in your life will thank you. I made this for a friend’s birthday and it disappeared in minutes.
- Savory Herb Challah: Omit the honey glaze and add 2 teaspoons of dried rosemary, 1 teaspoon of garlic powder, and ½ teaspoon of black pepper to the flour mixture. Brush with olive oil instead of egg wash and top with flaky sea salt. This is incredible with soup.
- Vegan Challah: Replace each egg with a flax egg (1 tablespoon ground flaxseed + 3 tablespoons water, let sit for 5 minutes). Use maple syrup instead of honey for the glaze. The texture is a bit more dense but still delicious.
- Rosh Hashanah Apple Challah: Finely dice one small apple (I use Honeycrisp) and gently fold it into the dough after the first rise. The apple adds little pockets of sweetness and moisture throughout the loaf.
For a gluten-free version, I’ve had decent results using Cup4Cup gluten-free flour blend, though the dough is stickier and harder to braid. You might need to shape it into a simple round loaf instead of a braid.
Serving & Storage Suggestions
This challah is best served warm, but honestly, it’s amazing at room temperature too. For Rosh Hashanah, I love serving it alongside a bowl of honey for dipping and a plate of sliced apples. The combination of sweet challah, crisp apple, and honey is pure tradition and pure joy.
If you’re serving it for Shabbat or any other occasion, challah pairs beautifully with soups, stews, or simply with butter and jam. For breakfast the next day, toast a slice and top it with cream cheese and a drizzle of honey—it’s a game changer.
Storage: Store the challah in a paper bag at room temperature for up to 3 days. Do not store it in plastic—it will make the crust soggy. If you need to keep it longer, wrap it tightly in foil and freeze for up to 3 months. To thaw, leave it at room temperature for a few hours, then reheat in a 300°F oven for 10 minutes to restore the crust.
Reheating: The best way to revive day-old challah is to wrap it in foil and warm it in a 325°F oven for 8-10 minutes. For individual slices, a toaster works perfectly. The flavors actually develop more after a day, so leftover challah can be even better than fresh.
One thing I love about this challah is how well it freezes. I often make a double batch and freeze one loaf for later. Just make sure it’s completely cool before wrapping, and don’t forget to label it with the date!
Nutritional Information & Benefits
Per slice (based on 12 slices per loaf):
- Calories: 220
- Total Fat: 6g
- Saturated Fat: 1g
- Cholesterol: 55mg
- Sodium: 290mg
- Total Carbohydrates: 36g
- Dietary Fiber: 1g
- Sugars: 8g
- Protein: 7g
While challah isn’t health food, it does have some redeeming qualities. The eggs provide high-quality protein and essential vitamins like B12 and D. Honey offers antioxidants and has natural antibacterial properties. Plus, bread made with traditional fermentation methods is easier to digest than commercial bread.
This recipe is dairy-free and nut-free, making it suitable for many dietary restrictions. If you’re watching your sugar intake, you can reduce the honey to ¼ cup, though the flavor and texture will be slightly different. For a lower-carb option, this isn’t the recipe for you—challah is meant to be a celebration bread, so enjoy it in moderation as part of a balanced holiday meal.
Conclusion
This honey challah has become my Rosh Hashanah tradition, and I hope it becomes yours too. It’s more than just bread—it’s a way to slow down, get your hands messy, and create something beautiful that brings people together. Every braid tells a story, every golden crust carries a wish for sweetness in the year ahead.
I’d love to hear how your challah turns out! Did you try a variation? Did your braiding come out perfect on the first try (unlike mine)? Drop a comment below and share your experience. And if you’re looking for more holiday recipes, don’t miss my apple honey cake and slow-cooked holiday brisket for the complete celebration menu.
Remember, the first loaf might not be perfect, and that’s okay. Miriam told me that the best challah is the one made with patience and love. So preheat that oven, get your hands in the dough, and make something that tastes like home. Shana Tova—may your year be as sweet as this honey challah.
Frequently Asked Questions
Can I use instant yeast instead of active dry yeast?
Yes, absolutely! If using instant yeast, you can skip the blooming step and mix it directly with the flour. Use the same amount (2 ¼ teaspoons) and reduce the first rise time by about 15-20 minutes.
Why is my challah dough so sticky?
Sticky dough is actually normal for challah because of the eggs and honey. Resist the urge to add too much flour. Instead, oil your hands and work surface, and keep kneading—the gluten will develop and the dough will become less sticky as you go.
How do I get a perfectly golden crust?
The key is a thorough egg wash (egg white plus a splash of water) applied right before baking. Don’t skimp on it, and make sure you get the sides and crevices. The honey glaze brushed on immediately after baking adds that extra shine and depth of color.
Can I make this challah ahead of time for Rosh Hashanah?
Definitely! You have two options: make the dough through the first rise, punch it down, and refrigerate overnight. The next day, shape, do the second rise, and bake. Or bake the challah completely, cool it, wrap it tightly, and freeze for up to 3 months. Thaw at room temperature and reheat before serving.
My challah came out dense and heavy. What went wrong?
This usually happens for one of three reasons: the dough didn’t rise enough (check your yeast and give it more time), too much flour was added during kneading, or the dough was over-kneaded. Next time, focus on the windowpane test and let the dough rise until truly doubled in size, even if it takes longer than the recipe says.
Pin This Recipe!
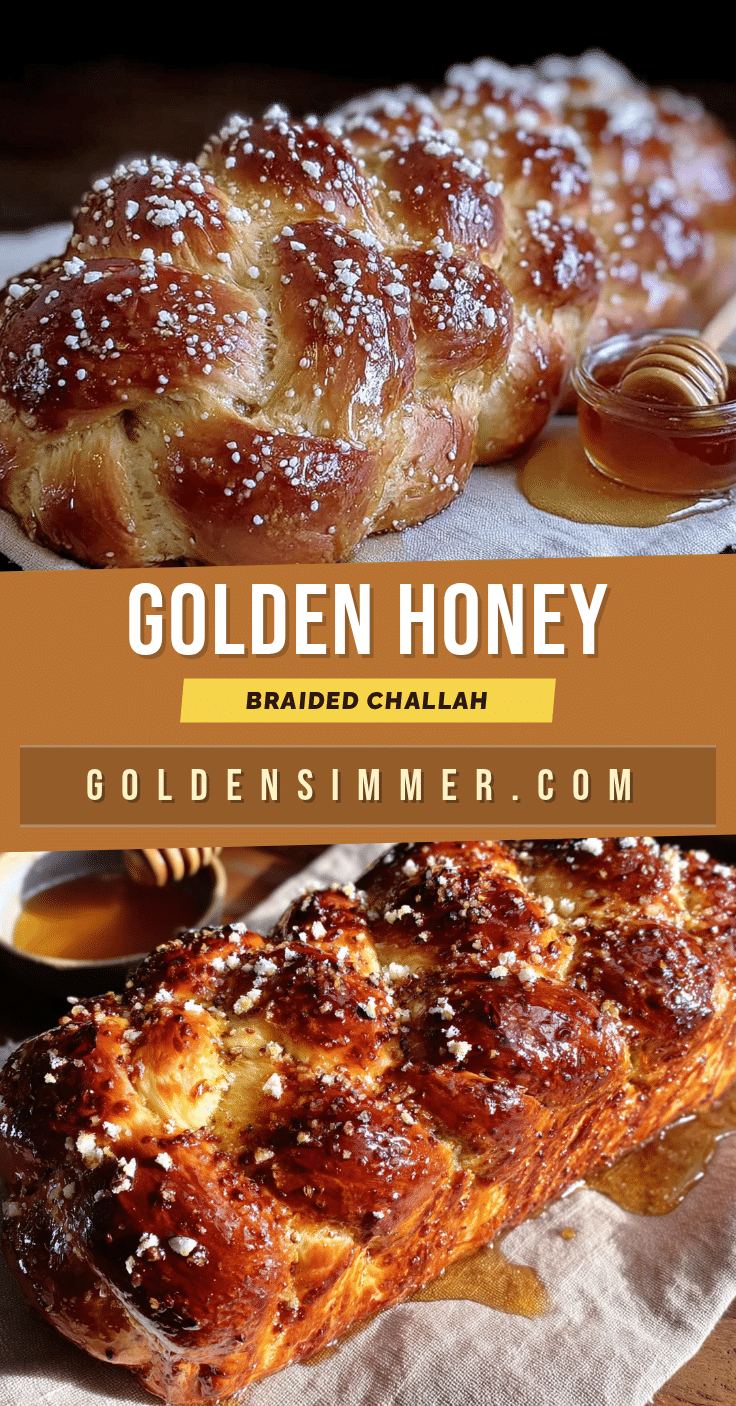
Best Homemade Honey Challah for Rosh Hashanah
This honey challah is tender, golden, and perfectly sweetened with honey. It’s a foolproof recipe that yields a beautiful loaf with a pillowy soft interior and a crisp, shiny crust, perfect for Rosh Hashanah or any special occasion.
- Prep Time: 30 minutes
- Cook Time: 30 minutes
- Total Time: 2 hours 30 minutes
- Yield: 12 servings 1x
- Category: Bread
- Cuisine: Jewish
Ingredients
- 2 ¼ teaspoons active dry yeast (one ¼-ounce packet)
- ½ cup warm water (about 110°F)
- ⅓ cup honey, plus extra for brushing
- 3 cups bread flour
- 1 cup all-purpose flour
- 3 large eggs + 1 yolk (room temperature), reserve the white for egg wash
- ¼ cup vegetable oil
- 1 ½ teaspoons salt
- Optional: a pinch of saffron threads steeped in 2 tablespoons warm water
- Optional: poppy seeds or sesame seeds for topping
Instructions
- Bloom the yeast: In a small bowl, combine warm water (110°F), 1 tablespoon honey, and yeast. Stir gently and let sit for 5-7 minutes until frothy.
- Mix the dough: In a large bowl, whisk together bread flour, all-purpose flour, and salt. In a separate bowl, whisk 3 whole eggs, remaining honey, vegetable oil, and yeast mixture. If using saffron, add the steeped liquid. Pour wet into dry and mix until a shaggy dough forms.
- Knead the dough: Turn onto a lightly oiled surface. Knead for 8-10 minutes by hand (6-8 minutes with a mixer) until smooth, elastic, and slightly tacky. Perform the windowpane test.
- First rise: Place dough in a lightly oiled bowl, cover with a damp towel or plastic wrap, and let rise in a warm spot for 1-1.5 hours until doubled in size.
- Punch down and shape: Gently punch down dough. Divide into 3 or 4 equal pieces. Roll each into a 12-14 inch rope, tapering the ends.
- Braid the challah: For a 3-strand braid, pinch tops together, cross right strand over middle, then left over new middle. Repeat to ends, pinch bottoms. For round challah, bring ends together to form a circle and seal. Place on parchment-lined baking sheet.
- Second rise: Cover loosely with a towel and let rise for 45 minutes to 1 hour until puffy and nearly doubled.
- Preheat and prepare: Preheat oven to 350°F. Beat reserved egg white with 1 tablespoon water. Brush egg wash over entire challah. Sprinkle with seeds if using.
- Bake: Bake for 30-35 minutes until deeply golden brown and internal temperature reaches 190°F. Tent with foil after 20 minutes if browning too quickly.
- Honey glaze: Immediately after baking, brush with 1-2 tablespoons honey mixed with 1 teaspoon warm water. Cool on a wire rack for at least 20 minutes before slicing.
Notes
Temperature matters: if your kitchen is cold, let dough rise in a turned-off oven with the light on. Avoid over-flouring during kneading; a slightly tacky dough yields a softer challah. For a deeper flavor, refrigerate the dough overnight after the first rise. Don’t skip the honey glaze—it adds shine and keeps the crust soft.
Nutrition
- Serving Size: 1 slice
- Calories: 220
- Sugar: 8
- Sodium: 290
- Fat: 6
- Saturated Fat: 1
- Carbohydrates: 36
- Fiber: 1
- Protein: 7
Keywords: honey challah, Rosh Hashanah challah, braided bread, Jewish bread, holiday bread, homemade challah



