Love this? Save it for later!
Share the inspiration with your friends
There used to be a tiny bakery tucked between a vintage shop and a laundromat in my old neighborhood that made the most unforgettable black velvet cupcakes. When they closed their doors two years ago, I honestly felt a little lost. I mean, those cupcakes were my go-to for every Halloween party, every spooky movie night, every time I just needed something that felt a little bit magical. After twelve tries—some crumbly disasters and one that looked like a charcoal briquette—I finally got it.
I’ll never forget the first time I bit into one of those original cupcakes. The cake was impossibly dark, almost velvety black, with a texture so tender it practically melted on my tongue. And the frosting—oh, that orange buttercream—was like a burst of sunshine against all that darkness. The combination was pure Halloween magic, you know? That sweet, tangy citrus cutting through the rich, cocoa-y cake.
So here I am, sharing my hard-won recreation of those spooky black velvet cupcakes with orange buttercream. Honestly, I think my version might even be a little better than the original. The secret is in the balance of cocoa and black food coloring, and the way the buttercream comes together so silky and smooth. Maybe you’ve been there, chasing a flavor memory from a place that no longer exists. If so, you’re going to love these.
These aren’t just any Halloween cupcakes. They’re the kind that make people stop and stare—and then ask for the recipe before they’ve even finished the first bite.
Why You’ll Love This Recipe
Let me tell you why these cupcakes have become my most-requested recipe for October and beyond. I’ve tested this formula more times than I care to admit, and every single batch has confirmed what I suspected from the start: this is the best version of a spooky dessert you’ll ever make.
- Quick & Easy : From start to finish, you’re looking at about 45 minutes. The batter comes together in one bowl, no mixer required for the cake itself. Perfect for those last-minute Halloween party invites.
- Simple Ingredients : Nothing weird here. You probably have most of these items in your pantry right now. The only special purchase is black food coloring, which is easy to find online or at any craft store.
- Perfect for Halloween : Obviously, right? But honestly, these work for any spooky-themed gathering—from October birthdays to horror movie marathons to gothic-themed parties.
- Crowd-Pleaser : Kids go wild for the color contrast, and adults appreciate that they’re not overly sweet. The orange buttercream balances the dark cocoa cake perfectly.
- Unbelievably Delicious : The texture is what gets me every time. That velvety crumb, the way the cake stays moist for days, the bright citrus kick of the frosting—it’s next-level comfort food disguised as a novelty treat.
What makes this recipe different from all the other black velvet recipes out there? It’s the technique. I learned the hard way that adding too much food coloring makes the cake taste bitter. My method uses just enough colorant with a specific cocoa ratio to get that deep, dramatic black without sacrificing flavor. And the orange buttercream? I use a combination of fresh zest and a splash of orange extract for a bright, natural citrus taste that doesn’t feel artificial.
This recipe isn’t just good—it is the kind that makes you close your eyes after the first bite. It’s comfort food reimagined for the spooky season: dramatic, delicious, and deeply satisfying.
What Ingredients You Will Need
This recipe uses simple, mostly pantry-staple ingredients to create that signature velvet texture and dramatic color. Here’s everything you’ll need, broken down by component so you can prep like a pro.
For the Black Velvet Cupcakes
- All-purpose flour, 1 ½ cups (190g) — spoon and level it, don’t scoop straight from the bag or you’ll pack in too much flour.
- Granulated sugar, 1 cup (200g) — standard white sugar works best here for structure and sweetness.
- Unsweetened cocoa powder, ¼ cup (20g) — I recommend Hershey’s Special Dark or Droste for a deeper color and richer flavor. Natural cocoa powder, not Dutch-processed, reacts better with the baking soda.
- Baking soda, 1 teaspoon — this is the leavening agent that gives the cupcakes their rise.
- Salt, ½ teaspoon — just regular table salt to balance the sweetness.
- Buttermilk, ½ cup (120ml), room temperature — this is crucial for the velvet texture. The acidity tenderizes the gluten and activates the baking soda. If you don’t have buttermilk, you can make a quick substitute by adding 1 tablespoon of lemon juice or white vinegar to ½ cup of milk and letting it sit for 5 minutes.
- Vegetable oil, ½ cup (120ml) — keeps the cupcakes incredibly moist. Canola or any neutral oil works fine.
- Large eggs, 2, room temperature — let them sit out for 30 minutes before baking for best incorporation.
- Vanilla extract, 2 teaspoons — real vanilla, not imitation, makes a noticeable difference in the depth of flavor.
- White vinegar, 1 teaspoon — sounds weird, I know, but it reacts with the baking soda for extra lift and tenderness. Trust me on this one.
- Black gel food coloring, about 2 tablespoons (30ml) — use gel, not liquid. Liquid coloring will throw off the liquid ratio and give you a muddy gray instead of true black. I prefer Americolor Super Black or Chefmaster Black.
For the Orange Buttercream
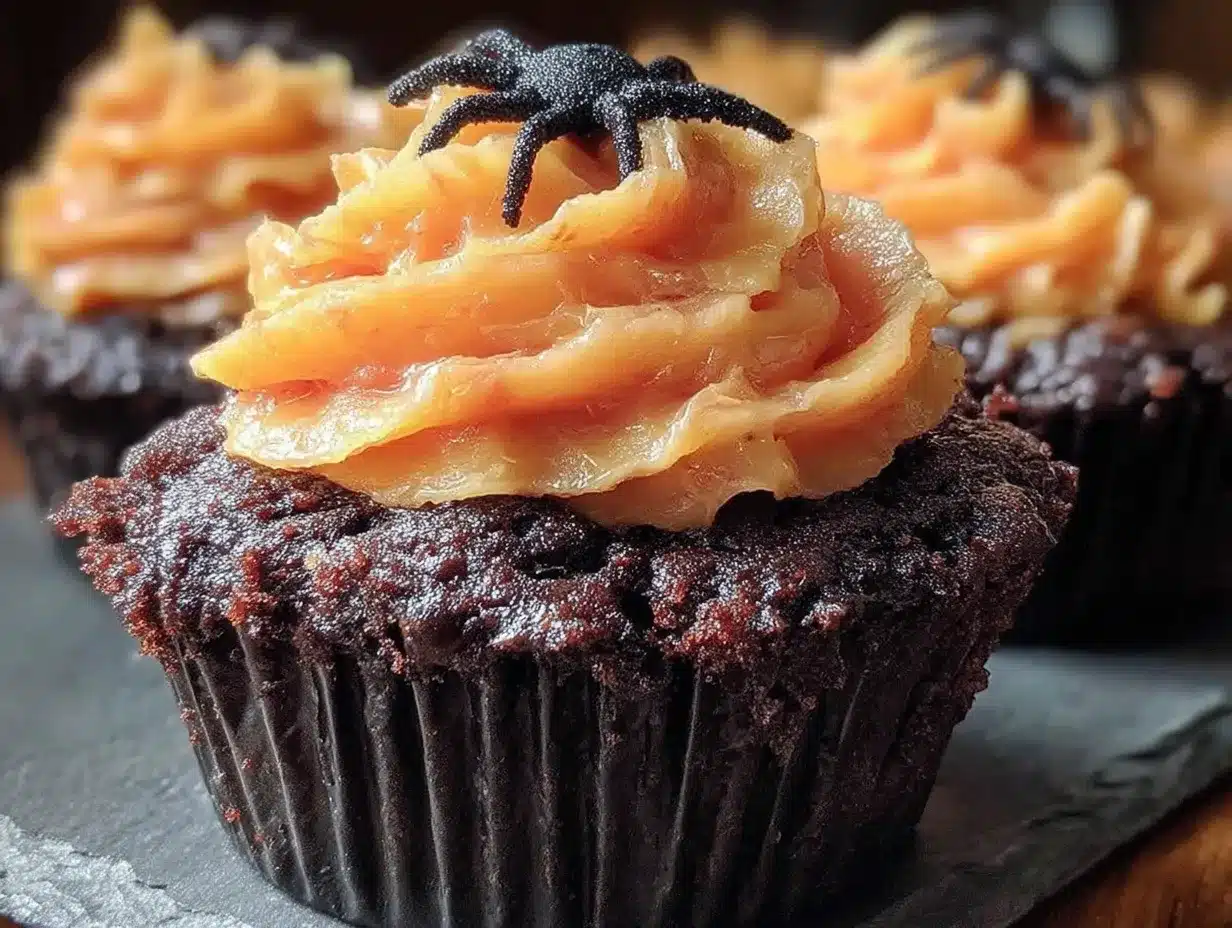
- Unsalted butter, 1 cup (2 sticks, 226g), softened — let it sit at room temperature for at least an hour. It should be soft enough that your finger leaves an indent without resistance.
- Powdered sugar, 3 to 4 cups (360g to 480g) — sifted if it’s lumpy. Start with 3 cups and add more if needed for stiffness.
- Fresh orange zest, 2 tablespoons — from about 2 large oranges. Zest them before juicing, and make sure you only get the orange part, not the bitter white pith.
- Fresh orange juice, 2 tablespoons — freshly squeezed, not from concentrate. The flavor is brighter and more authentic.
- Orange extract, ½ teaspoon — optional but recommended for a stronger citrus punch. I use McCormick or Nielsen-Massey.
- Vanilla extract, ½ teaspoon — rounds out the citrus flavor beautifully.
- Salt, a pinch — to cut the sweetness and intensify the orange flavor.
- Orange gel food coloring, optional — a tiny drop if you want that vibrant Halloween orange color.
For Decoration (Optional)
- Halloween sprinkles — ghosts, pumpkins, bats, whatever you like.
- Candy eyes — those little white and black edible eyes for a spooky touch.
- Black sanding sugar — for extra sparkle and crunch.
Equipment Needed
You don’t need a professional bakery setup for these cupcakes. Most of these tools you probably already have in your kitchen.
- Standard 12-cup muffin tin — this recipe makes exactly 12 cupcakes. If you only have a 6-cup tin, just bake in batches.
- Paper cupcake liners — I recommend using black or orange liners to really lean into the spooky theme. White liners work too, but they’ll show every crumb.
- Large mixing bowl — for the dry ingredients and the batter.
- Medium mixing bowl — for whisking the wet ingredients.
- Whisk — for combining dry ingredients and mixing the batter by hand.
- Rubber spatula — for scraping down the bowl and folding in the food coloring.
- Electric hand mixer or stand mixer — for the buttercream. You could whisk it by hand, but your arm will thank you for using a mixer.
- Cooling rack — wire rack for cooling the cupcakes completely before frosting. If you don’t have one, you can use a clean dish towel laid flat.
- Piping bag with star tip — for that beautiful swirl of buttercream. A Wilton 1M or 2D tip works beautifully. If you don’t have a piping bag, a zip-top bag with the corner snipped off works in a pinch.
- Microplane or fine grater — for zesting the oranges. A box grater works too, but a microplane gives you finer zest that incorporates better.
- Offset spatula — for smoothing frosting if you’re not piping. A butter knife works fine too.
I’ve made these cupcakes with a cheap hand mixer and a fancy stand mixer, and honestly, the results are the same. Don’t feel like you need expensive equipment. The one thing I do recommend splurging on is a good set of measuring spoons—accurate measurements matter in baking.
Preparation Method
Let’s get baking! Follow these steps carefully, and you’ll have perfect spooky black velvet cupcakes every time.
- Preheat your oven to 350°F (175°C). Line your muffin tin with 12 cupcake liners. Set aside.
- In a large bowl, whisk together the dry ingredients: flour, sugar, cocoa powder, baking soda, and salt. Make sure there are no lumps of cocoa. If your cocoa is particularly clumpy, sift it in. Set the bowl aside.
- In a medium bowl or large liquid measuring cup, combine the wet ingredients: buttermilk, vegetable oil, eggs, vanilla extract, and white vinegar. Whisk until the eggs are fully incorporated and the mixture is smooth. It should look pale and slightly frothy.
- Pour the wet ingredients into the dry ingredients. Stir with a rubber spatula or whisk until just combined. Do not overmix! A few small lumps are okay. Overmixing will make the cupcakes tough. The batter will be thin—that’s normal for velvet cakes.
- Now for the magic: add the black gel food coloring. Start with about 1 ½ tablespoons (22ml) and stir it in thoroughly. The batter will look dark gray at first. Add more gel, a teaspoon at a time, until you reach a deep, true black. I usually end up using about 2 tablespoons total. Stir gently until the color is uniform. This is the step where patience pays off—keep stirring until you don’t see any streaks of gray.
- Divide the batter evenly among the 12 cupcake liners. Fill each about ⅔ full. I use a cookie scoop or a ¼-cup measure for even portions. Tap the pan gently on the counter to release any air bubbles.
- Bake for 18 to 22 minutes. Start checking at 18 minutes. Insert a toothpick into the center of a cupcake—it should come out clean or with a few moist crumbs, not wet batter. The tops should spring back when lightly touched. Important: Because the batter is so dark, you can’t rely on visual cues like browning. The toothpick test is your best friend here.
- Cool in the pan for 5 minutes. Then transfer the cupcakes to a wire cooling rack to cool completely. Do not frost them while they’re still warm, or the buttercream will melt into a sad puddle. I know it’s tempting, but wait. Patience, my friend.
- While the cupcakes cool, make the orange buttercream. In a large bowl with an electric hand mixer (or in the bowl of a stand mixer with the paddle attachment), beat the softened butter on medium speed until creamy and smooth, about 2 minutes. It should be pale and fluffy.
- Add the powdered sugar, one cup at a time, beating on low speed after each addition to avoid a sugar cloud. After all the sugar is incorporated, add the orange zest, orange juice, orange extract, vanilla extract, and a pinch of salt. Beat on medium-high speed for 3 to 4 minutes until the frosting is light, fluffy, and spreadable. If it’s too stiff, add another teaspoon of orange juice. If it’s too soft, add more powdered sugar, 2 tablespoons at a time.
- If you want a brighter orange color, add a tiny drop of orange gel food coloring and beat until combined. Remember, a little goes a long way with gel colors.
- Once the cupcakes are completely cool, frost them. Fit a piping bag with a star tip and fill it with the buttercream. Pipe a generous swirl onto each cupcake, starting from the outside edge and working inward in a spiral. Or simply spread the frosting with an offset spatula for a more rustic look.
- Decorate as desired. Add Halloween sprinkles, candy eyes, or a dusting of black sanding sugar while the frosting is still soft so everything sticks.
And there you have it—twelve spooky, gorgeous, absolutely delicious black velvet cupcakes with orange buttercream.
Cooking Tips & Techniques
I’ve made every mistake in the book with these cupcakes so you don’t have to. Here are my hard-earned tips for perfect results every time.
Room temperature ingredients matter. Cold eggs and cold buttermilk won’t emulsify properly with the oil, leading to a denser, less tender crumb. Set everything out on the counter 30 to 45 minutes before you start baking. If you’re in a rush, you can warm the buttermilk gently in the microwave for 10 seconds and place the eggs in a bowl of warm water for 5 minutes.
Don’t overmix the batter. I cannot stress this enough. Stir until the flour is just incorporated—a few streaks of flour are okay. Overmixing develops gluten, and too much gluten makes tough cupcakes instead of tender, velvety ones. Velvet cake is supposed to be delicate, not chewy.
Get the right black color. Gel food coloring is non-negotiable. Liquid food coloring will never give you true black, and you’d need so much that the batter would become watery. Americolor Super Black is my favorite because it’s concentrated—you use less and get a deeper color. Also, the color deepens as the cupcakes bake, so don’t panic if the batter looks more dark gray than black. Trust the process.
Use the toothpick test. Because the batter is black, you can’t tell if the cupcakes are done by looking at them. Set a timer for 18 minutes and start checking. A toothpick inserted in the center should come out clean or with a few moist crumbs. If it comes out with wet batter, give them another 2 minutes and check again.
Let the cupcakes cool completely. I know it’s hard to wait, but warm cupcakes + buttercream = melted disaster. The buttercream needs a firm surface to stick to. If you’re in a hurry, you can pop the cooled cupcakes in the fridge for 15 minutes to firm them up before frosting.
For the buttercream, don’t skip the beating time. Beating the butter for a full 2 minutes before adding sugar creates a light, airy base. And beating the finished frosting for 3 to 4 minutes incorporates air and makes it silky smooth. Under-beaten buttercream tastes greasy and dense.
One more thing: I once tried to make these with Dutch-processed cocoa powder because that’s what I had on hand. The cupcakes turned out flat and the color was more brownish-gray than black. Natural cocoa powder is essential here because its acidity reacts with the baking soda for proper rise. Learn from my mistake.
Variations & Adaptations
These spooky black velvet cupcakes are wonderfully adaptable. Here are some variations I’ve tried and loved.
Gluten-Free Version: Substitute the all-purpose flour with a 1:1 gluten-free baking flour blend that contains xanthan gum. I’ve had great results with King Arthur Measure for Measure. The texture is slightly more tender, but the flavor is spot-on. No other adjustments needed.
Dairy-Free Version: Replace the buttermilk with ½ cup of unsweetened almond milk or oat milk mixed with 1 tablespoon of lemon juice. Let it sit for 5 minutes to curdle. Use a dairy-free butter substitute like Earth Balance or Miyoko’s for the buttercream. The texture will be slightly less tender, but still delicious.
Different Citrus Buttercream: Swap the orange for lemon, lime, or even grapefruit. Use the same amount of zest and juice. Lemon is especially lovely—bright and tangy against the dark chocolate cake. I made a lime version for a friend’s tropical-themed party and it was a hit.
Spice It Up: Add ½ teaspoon of cinnamon and ¼ teaspoon of cayenne pepper to the dry ingredients for a Mexican chocolate-inspired twist. The warmth of the spices pairs beautifully with the orange buttercream. Just be careful with the cayenne—a little goes a long way.
Chocolate Buttercream: If you want to go full dark mode, skip the orange buttercream and make a black cocoa buttercream instead. Add ¼ cup of black cocoa powder to the buttercream along with the powdered sugar. The result is intensely dark and deeply chocolatey—perfect for a gothic-themed party.
Cupcake to Cake: This batter also works beautifully as a two-layer 8-inch cake. Bake in two greased and floured 8-inch round pans for 25 to 30 minutes. Double the buttercream recipe and use it as a filling and frosting. The black and orange contrast is stunning for Halloween parties.
Mini Cupcakes: For bite-sized treats, use a mini muffin tin and bake for 10 to 12 minutes. This recipe makes about 36 mini cupcakes. Perfect for classroom parties or snack tables where you want people to grab and go.
Serving & Storage Suggestions
These cupcakes are best enjoyed at room temperature, when the cake is tender and the buttercream is soft and creamy. If you’ve refrigerated them, let them sit out for 20 to 30 minutes before serving.
Presentation ideas: Arrange the cupcakes on a black cake stand or a dark wooden board for maximum spooky effect. Add some fake spiderwebs, plastic spiders, or battery-operated tealights around the base for a dramatic Halloween display. I like to sprinkle a few orange and black sprinkles on the plate for extra color.
What to serve with them: A glass of cold milk is the classic pairing, but these also go beautifully with a hot cup of coffee or a spiced chai latte. For an adult gathering, a dark stout beer or a bourbon old fashioned complements the chocolate and orange flavors wonderfully.
Storage: Store unfrosted cupcakes in an airtight container at room temperature for up to 3 days. Frosted cupcakes should be stored in the refrigerator in an airtight container for up to 5 days. The buttercream will firm up in the fridge, so let them come to room temperature before serving for the best texture.
Freezing: You can freeze unfrosted cupcakes for up to 3 months. Wrap each cupcake individually in plastic wrap, then place them in a freezer-safe bag. Thaw at room temperature for about an hour before frosting. The buttercream can also be frozen for up to 3 months. Thaw it in the refrigerator overnight, then re-whip it with a mixer to restore its fluffy texture before piping.
Flavor development: Honestly, these cupcakes taste even better the day after baking. The flavors meld together and the texture becomes even more tender. So don’t stress about making them a day ahead—it’s actually the optimal timing.
Nutritional Information & Benefits
Let’s be real: these are indulgent cupcakes, not health food. But here’s the estimated nutritional breakdown for one cupcake with buttercream, based on 12 servings.
| Nutrient | Amount per Cupcake |
|---|---|
| Calories | 385 |
| Total Fat | 22g |
| Saturated Fat | 10g |
| Cholesterol | 65mg |
| Sodium | 280mg |
| Total Carbohydrates | 45g |
| Dietary Fiber | 1g |
| Sugars | 34g |
| Protein | 3g |
On the bright side, these cupcakes do offer a few small nutritional perks. The cocoa powder is rich in antioxidants called flavonoids, which can support heart health. The orange zest and juice provide a dose of vitamin C, which supports immune function. And the buttermilk adds calcium and probiotics.
If you’re looking to lighten them up a bit, you can reduce the sugar in the buttercream by using just 3 cups of powdered sugar instead of 4. The frosting will be slightly less stiff but still delicious. You can also use a low-fat buttermilk or replace half the oil with unsweetened applesauce—though the texture will be slightly less tender.
These cupcakes contain wheat (gluten), dairy, and eggs. They are not suitable for vegans or those with allergies to these ingredients without the substitutions mentioned in the variations section.
Conclusion
These spooky black velvet cupcakes with orange buttercream are more than just a Halloween treat—they’re a little piece of edible magic. That dramatic black cake against the bright citrus frosting, the tender crumb, the way the flavors come together in perfect harmony—it’s the kind of dessert that makes people stop mid-conversation and just savor.
I love that this recipe brings back that bakery memory for me every single time I make it. And now it can become part of your traditions too. Whether you’re baking for a Halloween party, a spooky movie night, or just because you want something that feels a little bit special, these cupcakes deliver.
Don’t be afraid to make them your own. Add extra orange zest if you love citrus. Go heavy on the sprinkles. Swap the buttercream for chocolate if that’s your jam. The beauty of a good recipe is that it’s a starting point, not a rulebook.
I’d love to hear how yours turn out! Drop a comment below and let me know if you tried any fun variations, or tag me in your photos on social media. Happy baking, and may your Halloween be deliciously spooky!
Frequently Asked Questions
Can I use regular liquid food coloring instead of gel?
I don’t recommend it. Liquid food coloring will make the batter too thin and you’ll end up with a muddy gray color rather than true black. Gel food coloring is concentrated, so you need much less of it, and it won’t affect the liquid ratio of the batter. It’s worth the small investment.
Why did my cupcakes turn out gray instead of black?
This usually happens when you don’t use enough food coloring or when you use liquid coloring instead of gel. The color also deepens as the cupcakes bake, so make sure your batter looks very dark gray before baking. If you’re still getting gray results, try adding a teaspoon of black cocoa powder to the dry ingredients for an extra color boost.
Can I make these cupcakes without a mixer?
Absolutely! The cupcake batter comes together by hand with a whisk or spatula—no mixer needed. For the buttercream, you can beat it by hand with a wooden spoon, but it will take some serious elbow grease. A hand mixer makes the buttercream much easier and gives you a fluffier result.
How far in advance can I make these cupcakes?
You can bake the cupcakes up to 3 days in advance and store them unfrosted in an airtight container at room temperature. The buttercream can be made up to 5 days ahead and stored in the refrigerator. When you’re ready to serve, let the buttercream come to room temperature, re-whip it briefly, and frost the cupcakes. For best results, frost within 24 hours of serving.
Can I use this recipe to make a cake instead of cupcakes?
Yes! The batter works beautifully as a two-layer 8-inch cake. Bake in greased and floured pans at 350°F for 25 to 30 minutes. You’ll need to double the buttercream recipe to have enough for filling and frosting the cake. The visual impact of a black cake with orange buttercream is stunning for Halloween parties.
Pin This Recipe!
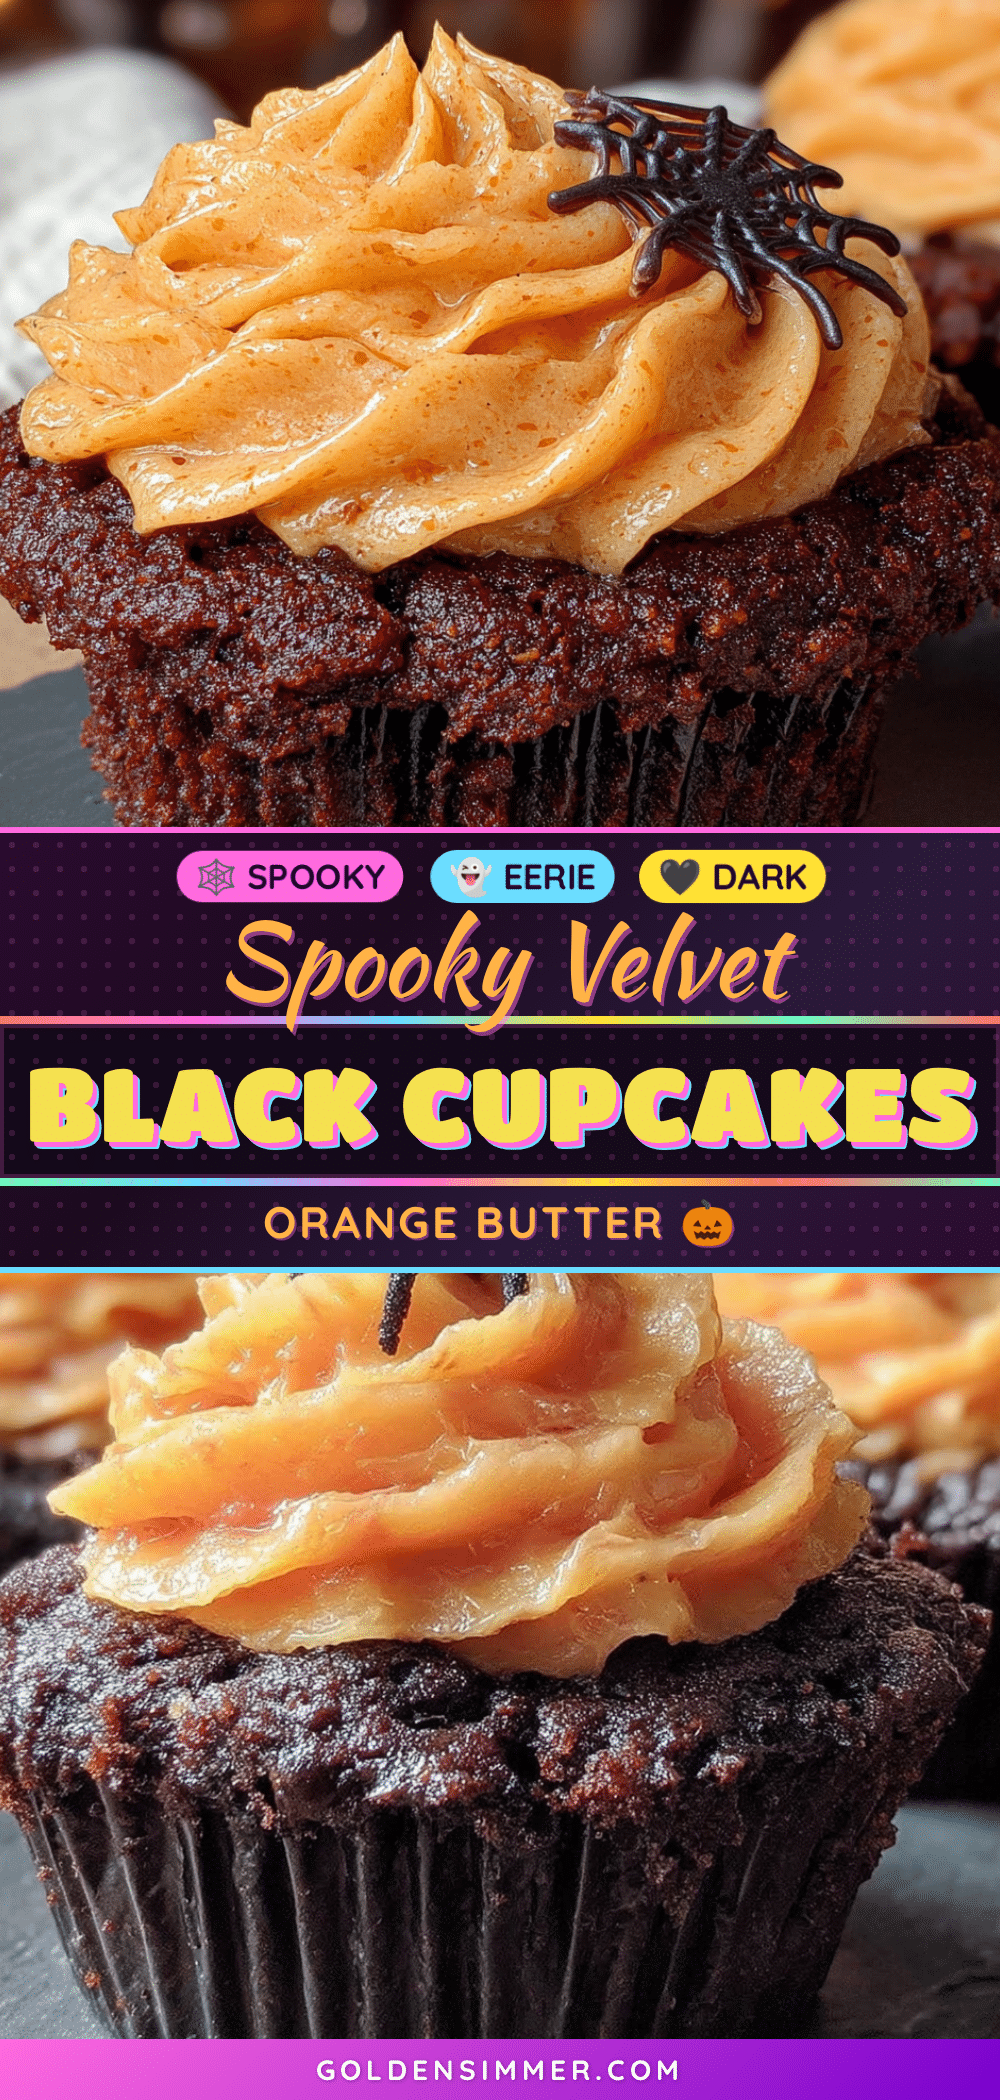
Best Spooky Black Velvet Cupcakes with Easy Orange Buttercream
These spooky black velvet cupcakes with orange buttercream are a Halloween treat with a tender, velvety crumb and bright citrus frosting. Perfect for parties, movie nights, or any time you want a little edible magic.
- Prep Time: 15 minutes
- Cook Time: 20 minutes
- Total Time: 45 minutes
- Yield: 12 cupcakes 1x
- Category: Dessert
- Cuisine: American
Ingredients
- 1 ½ cups (190g) all-purpose flour
- 1 cup (200g) granulated sugar
- ¼ cup (20g) unsweetened cocoa powder (natural, not Dutch-processed)
- 1 teaspoon baking soda
- ½ teaspoon salt
- ½ cup (120ml) buttermilk, room temperature
- ½ cup (120ml) vegetable oil
- 2 large eggs, room temperature
- 2 teaspoons vanilla extract
- 1 teaspoon white vinegar
- 2 tablespoons (30ml) black gel food coloring
- 1 cup (2 sticks, 226g) unsalted butter, softened
- 3 to 4 cups (360g to 480g) powdered sugar, sifted if lumpy
- 2 tablespoons fresh orange zest
- 2 tablespoons fresh orange juice
- ½ teaspoon orange extract (optional)
- ½ teaspoon vanilla extract
- Pinch of salt
- Orange gel food coloring (optional, for brighter color)
- Halloween sprinkles (optional, for decoration)
- Candy eyes (optional, for decoration)
- Black sanding sugar (optional, for decoration)
Instructions
- Preheat your oven to 350°F (175°C). Line a 12-cup muffin tin with paper liners.
- In a large bowl, whisk together the flour, sugar, cocoa powder, baking soda, and salt until no lumps remain.
- In a medium bowl or large liquid measuring cup, whisk together the buttermilk, vegetable oil, eggs, vanilla extract, and white vinegar until smooth and slightly frothy.
- Pour the wet ingredients into the dry ingredients and stir with a rubber spatula or whisk until just combined. Do not overmix; a few small lumps are okay. The batter will be thin.
- Add the black gel food coloring, starting with 1 ½ tablespoons (22ml), and stir until the batter is a deep, true black. Add more gel, a teaspoon at a time, if needed (about 2 tablespoons total).
- Divide the batter evenly among the 12 liners, filling each about ⅔ full. Tap the pan gently on the counter to release air bubbles.
- Bake for 18 to 22 minutes, until a toothpick inserted in the center comes out clean or with a few moist crumbs. Cool in the pan for 5 minutes, then transfer to a wire rack to cool completely.
- While the cupcakes cool, make the orange buttercream: In a large bowl, beat the softened butter with an electric mixer on medium speed until creamy and smooth, about 2 minutes.
- Add the powdered sugar, one cup at a time, beating on low speed after each addition. Then add the orange zest, orange juice, orange extract (if using), vanilla extract, and a pinch of salt. Beat on medium-high speed for 3 to 4 minutes until light, fluffy, and spreadable. If desired, add a tiny drop of orange gel food coloring and beat until combined.
- Once the cupcakes are completely cool, frost them using a piping bag fitted with a star tip (or spread with an offset spatula). Decorate with Halloween sprinkles, candy eyes, or black sanding sugar as desired.
Notes
Gel food coloring is essential for true black color; liquid coloring will not work. Natural cocoa powder is required for proper rise. Room temperature ingredients ensure best texture. Do not overmix the batter. Cool cupcakes completely before frosting to prevent melting. The buttercream can be made up to 5 days ahead and stored in the refrigerator; re-whip before using. Unfrosted cupcakes can be stored at room temperature for up to 3 days; frosted cupcakes keep in the refrigerator for up to 5 days. Freeze unfrosted cupcakes for up to 3 months.
Nutrition
- Serving Size: 1 cupcake
- Calories: 385
- Sugar: 34
- Sodium: 280
- Fat: 22
- Saturated Fat: 10
- Carbohydrates: 45
- Fiber: 1
- Protein: 3
Keywords: black velvet cupcakes, orange buttercream, Halloween cupcakes, spooky cupcakes, black velvet cake, orange frosting, Halloween dessert, easy cupcakes



