Love this? Save it for later!
Share the inspiration with your friends
The last thing I expected to find wedged between a 1977 guide to macrame plant hangers and a stained copy of “Better Homes and Gardens” was a life-changing dinner recipe. I was at an antique mall on a rainy Saturday, killing time while my partner browsed vintage vinyl. The booth smelled like old paper and dust, and honestly, I was just flipping through a beat-up community cookbook from some church in Ohio. That’s where I saw it—a handwritten note taped to the inside cover. “Best quick dinner for crazy nights,” it said in loopy cursive. No name, no date. Just a list of ingredients that looked suspiciously like the contents of my own pantry.
I copied it down on a napkin from the coffee shop next door. The woman behind the counter saw me scribbling and said, “Oh, that old book? My grandma used to donate her recipe cards to that place every year.” She laughed and told me her grandmother swore by a one-skillet cheesy beef and rice dish that saved her sanity on busy weeknights. I mean, when the universe hands you a recipe from someone’s grandma via a stranger in a coffee shop, you make it. So I did.
That first night, I was skeptical. Rice from a skillet? Cheese melted into ground beef? It felt too simple to be good. But let me tell you—the way that cheese stretched when I lifted the lid, the way the rice soaked up every bit of flavor, the way my kitchen smelled like pure comfort? I was hooked. I’ve tweaked it over the years, swapped in better cheese, added a little garlic, adjusted the broth. But the heart of it? That belongs to a grandma from Ohio I’ll never meet. And honestly? That makes it taste even better. Maybe you’ve been there—finding a recipe in the most unexpected place and knowing immediately it was meant for your kitchen.
Why You’ll Love This Recipe
Let’s be real for a second. Weeknights are chaotic. Between work, school pickups, and that endless pile of laundry, the last thing you want is a complicated dinner that leaves you scrubbing pots for an hour. This cheesy beef rice skillet fixes all of that. It’s the kind of meal that makes you look like you tried harder than you actually did.
Here’s why this one-pan wonder deserves a permanent spot in your dinner rotation:
- Quick and Easy: From stove to table in exactly 30 minutes. No marinating, no complicated steps, no waiting around. Just a straight shot to dinner.
- Simple Ingredients: You probably already have 80% of these in your kitchen right now. Ground beef, rice, cheese, broth, a few seasonings. No fancy grocery store detours required.
- Perfect for Cozy Nights: This is the meal you want when the weather turns chilly, when you’re craving something warm and satisfying, or when you just need a hug in a bowl. It’s seasonally perfect for fall and winter, but honestly? I make it year-round.
- Crowd-Pleaser: Kids devour it. Adults ask for seconds. Even my picky-eating friend who “doesn’t do casseroles” cleaned her plate and asked for the recipe.
- Unbelievably Delicious: The cheese gets all melty and gooey. The rice absorbs the beefy, savory broth. Every bite has that perfect balance of creamy, cheesy, and savory. It’s next-level comfort food disguised as a simple skillet dinner.
What makes this version different from all the other cheesy rice skillets out there? It’s the technique. Instead of cooking the rice separately and mixing it in at the end, we cook everything together in one pan. That means the rice absorbs all the flavor from the beef and broth as it simmers. The result? Every single grain is infused with savory goodness. Plus, I’ve perfected the cheese-to-rice ratio so you get maximum creaminess without it turning into a greasy mess. This isn’t just another recipe—it’s the best version.
You know that feeling when you take a bite and just close your eyes for a second? That’s what this dish does. It’s comfort food reimagined—faster, simpler, but with the same soul-soothing satisfaction. Perfect for impressing your family on a Tuesday night or turning a regular dinner into something memorable without breaking a sweat.
What Ingredients You Will Need
This recipe uses simple, wholesome ingredients that work together to create something truly special. Most of these are pantry staples, which is exactly what you want in a last-minute dinner situation.
For the Skillet Base
- 1 pound ground beef (80/20 works best for flavor, but 90/10 is fine too)—I prefer grass-fed beef from a local farm when I can get it, but any quality ground beef does the trick
- 1 medium yellow onion, diced (about 1 cup)—this adds a sweet, savory foundation
- 3 cloves garlic, minced—fresh garlic makes a difference here, trust me
- 1 cup long-grain white rice (uncooked)—basmati or jasmine work beautifully; avoid instant rice as it gets mushy
- 2 cups beef broth (low-sodium recommended)—I like using Better Than Bouillon mixed with water for deeper flavor
- 1 can (14.5 oz) diced tomatoes, undrained—fire-roasted adds a nice smoky note if you can find them
- 1 teaspoon salt (or to taste)
- 1/2 teaspoon black pepper
- 1 teaspoon paprika—smoked paprika adds a lovely depth
- 1/2 teaspoon garlic powder
- 1/2 teaspoon onion powder
- 1/4 teaspoon red pepper flakes (optional, for a little heat)
For the Cheesy Finish
- 1 1/2 cups shredded cheddar cheese (sharp or medium)—shred your own from a block if you can; pre-shredded has anti-caking agents that affect meltability
- 1/2 cup shredded mozzarella cheese—this adds that perfect stretchy texture
- 2 tablespoons cream cheese, softened—this is my secret ingredient for extra creaminess (adds richness)
For Garnish (Optional but Recommended)
- 2 tablespoons fresh parsley, chopped—for color and freshness
- Green onions, sliced—a nice pop of flavor on top
Ingredient Selection Tips: For the best texture, use a good-quality long-grain rice. I’ve tested this with jasmine rice from Lundberg Family Farms and it turns out perfectly fluffy every time. If you’re using a different rice variety, you may need to adjust the liquid slightly—brown rice requires more broth and a longer cooking time.
Substitution Guidance: Feel free to swap the ground beef for ground turkey or chicken if you prefer a leaner option. For a vegetarian version, use plant-based ground meat and vegetable broth. If you’re dairy-free, use your favorite dairy-free shredded cheese blend and omit the cream cheese. The texture will be slightly different but still delicious.
Equipment Needed
One of the best things about this recipe? It only requires a few basic kitchen tools. No fancy gadgets required.
- Large skillet or deep frying pan (12-inch with a lid is ideal)—a cast-iron skillet works beautifully for even heat distribution and that nice browned bottom
- Wooden spoon or spatula for stirring and breaking up the meat
- Sharp knife and cutting board for prepping your onion and garlic
- Measuring cups and spoons
- Box grater (if you’re shredding your own cheese—which I highly recommend)
If you don’t have a lid that fits your skillet, a large piece of aluminum foil works perfectly as a makeshift cover. I’ve done this more times than I care to admit, and it works like a charm. Just crimp the edges tightly to trap the steam.
For budget-friendly options, a basic non-stick skillet from any grocery store will work fine. You don’t need an expensive pan to make this dish shine. I actually learned this recipe using a $15 skillet from a discount store, and it turned out just as good as it does now with my fancy cast iron.
One tip: if using a stainless steel pan, make sure to deglaze the bottom after browning the beef. That browned bit stuck to the pan? That’s pure flavor waiting to be released.
Preparation Method
Alright, let’s get cooking. This comes together fast, so I recommend having all your ingredients prepped and measured before you start. Trust me on this one—it makes the whole process smoother.
- Brown the beef (5 minutes): Place your skillet over medium-high heat. Add the ground beef and break it up with your wooden spoon. Cook for about 4-5 minutes, stirring occasionally, until it’s nicely browned and no longer pink. Don’t drain all the fat—leave about a tablespoon in the pan for flavor. If you’re using lean beef, add a splash of olive oil to prevent sticking.
- Sauté the aromatics (2 minutes): Push the beef to one side of the pan. Add the diced onion to the empty space and cook for about 2 minutes, until it starts to soften and turn translucent. Add the minced garlic and stir everything together. Cook for another 30 seconds until you can smell that incredible garlic aroma. Pro tip: if the garlic starts to brown too quickly, lower the heat. Burnt garlic tastes bitter.
- Toast the rice (1 minute): Sprinkle the uncooked rice over the beef and onion mixture. Stir it around for about a minute. This toasts the rice slightly and helps it hold its shape during cooking. You’ll notice a nutty smell—that’s what we’re after.
- Add the liquids and seasonings (1 minute): Pour in the beef broth and the can of diced tomatoes (undrained). Add the salt, pepper, paprika, garlic powder, onion powder, and red pepper flakes if using. Stir everything together until well combined. Scrape the bottom of the pan to release any browned bits—that’s flavor gold right there.
- Simmer and cook (18-20 minutes): Bring the mixture to a boil, then reduce the heat to low. Cover the skillet with a tight-fitting lid and let it simmer gently. Set a timer for 18 minutes. Important: don’t lift the lid during cooking! That steam is what cooks the rice perfectly. After 18 minutes, check the rice. It should be tender and most of the liquid should be absorbed. If it’s still a bit firm, cover and cook for another 2-3 minutes.
- Add the cheese (2 minutes): Once the rice is cooked, remove the lid. Drop the cream cheese in small dollops over the top, then sprinkle the shredded cheddar and mozzarella evenly across the surface. Cover the pan again and let it sit off the heat for 2 minutes. The residual heat will melt the cheese into a glorious, gooey blanket.
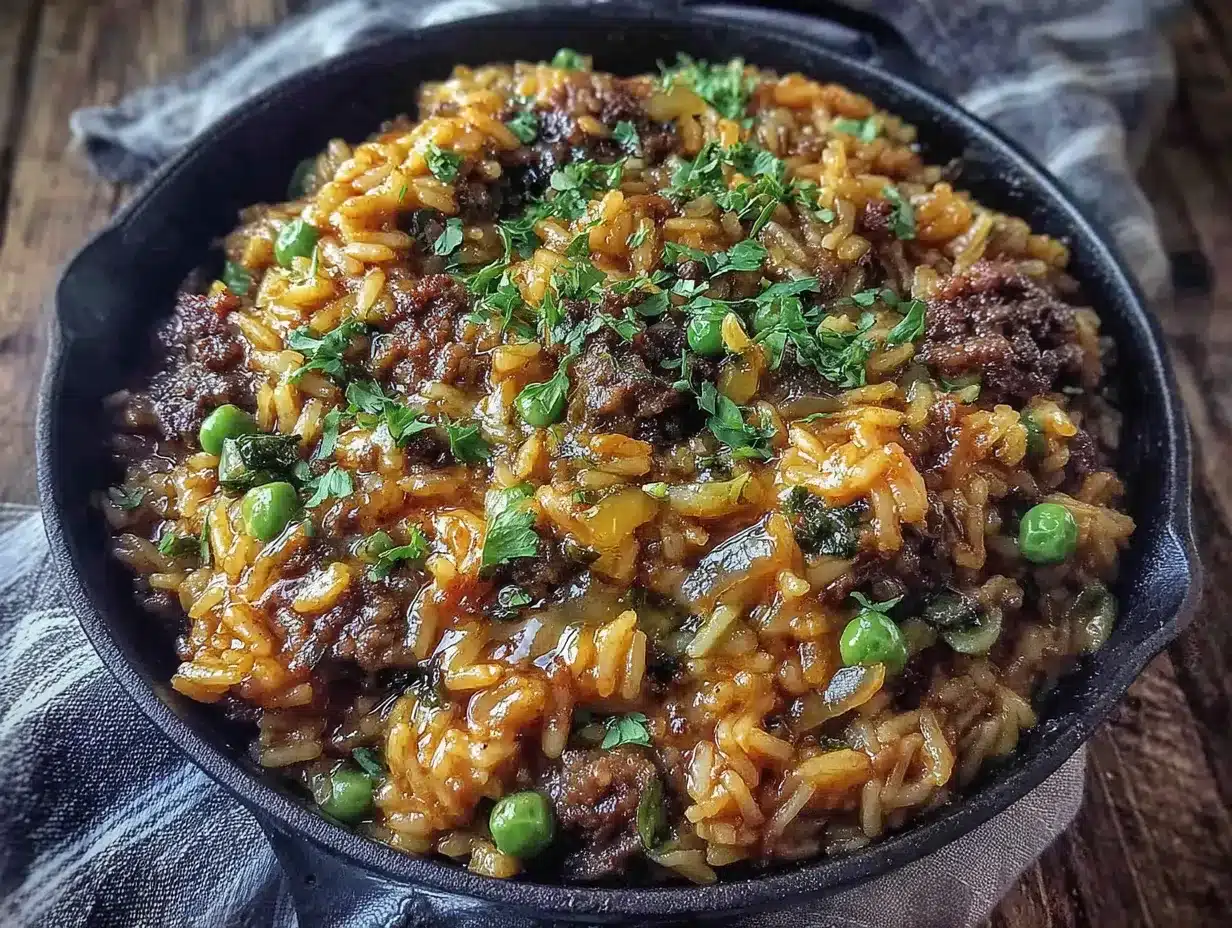
- Finish and serve (1 minute): Remove the lid and give everything a gentle stir to incorporate the melted cheese. The rice should be creamy, the beef tender, and the whole thing should look like pure comfort. Garnish with fresh parsley and sliced green onions if you’re feeling fancy.
Sensory cue check: At step 5, you should hear a gentle bubbling sound—that’s the rice simmering happily. The kitchen will smell like savory beef, garlic, and tomatoes. When you lift the lid at step 6, you’ll see steam rising and the cheese will be perfectly melted and stretchy. The final dish should look like a creamy, cheesy risotto but with the heartiness of a one-pan meal.
Cooking Tips & Techniques
After making this dish probably fifty times (I’m not exaggerating), I’ve learned a few things the hard way. Let me save you the trouble.
Don’t rush the browning: I know you’re hungry, but taking the time to really brown the beef makes a huge difference. You want those deep brown bits forming on the bottom of the pan. That’s called the Maillard reaction, and it’s where all the savory flavor comes from. If you crowd the pan or stir too often, the meat steams instead of browns. Give it space. Let it get crispy edges.
Rice matters: I’ve made this with long-grain white rice, jasmine, basmati, and even sushi rice (don’t ask—I was out of everything else). Long-grain white rice works best. It holds its shape, absorbs liquid evenly, and doesn’t turn into mush. If you only have brown rice, you’ll need to increase the broth to 2 1/2 cups and cook for about 35-40 minutes. And whatever you do, don’t use instant rice. It turns into glue. I learned that lesson on a particularly desperate Tuesday night.
The lid is your friend: I cannot stress this enough. Once you put that lid on, leave it alone. Every time you lift it, steam escapes, and that steam is what cooks the rice. I know it’s tempting to peek. Don’t do it. Set the timer and walk away. Maybe fold that laundry you’ve been avoiding.
Cheese strategy: Shredding your own cheese takes an extra two minutes but the difference in texture is night and day. Pre-shredded cheese is coated with cellulose to prevent clumping, and that same coating prevents it from melting smoothly. If you want that perfectly creamy, stretchy cheese pull, buy a block and grate it yourself. I promise it’s worth it.
Multitasking tip: While the rice is simmering, use those 18 minutes to wash the cutting board and knife, wipe down the counter, and set the table. By the time the cheese melts, your kitchen is clean and dinner is ready. That’s the kind of efficiency that makes you feel like a domestic superhero.
Variations & Adaptations
One of the things I love about this recipe is how flexible it is. Here are some ways to make it your own.
Dietary Variations
- Gluten-Free: This recipe is naturally gluten-free as written, but double-check your beef broth label. Some brands add wheat-based ingredients. I use Pacific Foods or Kitchen Basics for guaranteed gluten-free broth.
- Low-Carb/Keto: Swap the rice for cauliflower rice. Sauté the cauliflower rice separately and stir it in at the end with the cheese. You’ll lose the “rice cooking in broth” texture, but the flavors still work beautifully.
- Dairy-Free: Use dairy-free shredded cheese and skip the cream cheese. The texture will be slightly less creamy, but still delicious. I’ve used Daiya cheddar-style shreds with good results.
Flavor Twists
- Tex-Mex Version: Add 1 teaspoon cumin, 1/2 teaspoon chili powder, and a can of drained black beans. Top with salsa and avocado.
- Italian-Inspired: Swap the paprika for Italian seasoning, use Italian diced tomatoes, and add a handful of fresh spinach at the end. Top with Parmesan instead of cheddar.
- Spicy Kick: Add a diced jalapeño with the onions and use pepper jack cheese instead of cheddar. This is my personal favorite when I’m cooking just for myself.
Different Cooking Methods
- Instant Pot: Use the sauté function to brown the beef and onions. Add the remaining ingredients (except cheese), pressure cook on high for 5 minutes, then quick release. Stir in the cheese.
- Slow Cooker: Brown the beef on the stove first, then transfer everything except the rice and cheese to the slow cooker. Cook on low for 4-6 hours. Add cooked rice and cheese 15 minutes before serving.
I once made this with leftover taco meat and a random bag of Mexican blend cheese I found in the back of the fridge. It was honestly one of the best versions I’ve ever had. Don’t be afraid to experiment—this recipe is forgiving.
Serving & Storage Suggestions
This dish is best served hot, straight from the skillet. There’s something deeply satisfying about bringing the pan to the table and watching everyone dig in.
Serving temperature and presentation: Serve it piping hot, right after the cheese has melted. I like to garnish with fresh parsley and a sprinkle of extra black pepper. If I’m feeling fancy, I’ll add a dollop of sour cream on top and some sliced avocado on the side. The cool creaminess of the sour cream against the warm, cheesy rice is a beautiful thing.
What to serve with it: This skillet is hearty enough to be a complete meal on its own, but it pairs beautifully with a simple side salad dressed with lemon vinaigrette. The acidity cuts through the richness. Steamed green beans or roasted broccoli also work well. For a truly cozy night, serve it with crusty bread to soak up any cheesy bits left in the pan.
Storage instructions: Leftovers keep well in an airtight container in the refrigerator for up to 4 days. The rice will absorb more liquid as it sits, so the texture will be slightly less fluffy on day two. That said, the flavors actually deepen overnight. I sometimes think it tastes even better the next day.
Reheating methods: The best way to reheat this is in a skillet over medium-low heat with a splash of beef broth or water. Stir occasionally until heated through, about 5-7 minutes. The microwave works in a pinch—just cover the bowl with a damp paper towel to add moisture back. Add 30-second intervals, stirring between each.
Freezer instructions: This dish freezes surprisingly well. Let it cool completely, then transfer to a freezer-safe container. It will keep for up to 3 months. Thaw overnight in the refrigerator and reheat in a skillet as described above. The texture won’t be quite as perfect as fresh, but it’s still a solid weeknight win.
Flavor development note: Something magical happens overnight. The rice continues to absorb the broth, and the flavors meld together in a way that feels more cohesive. If you have the foresight, making this a day ahead and reheating it is actually a pro move.
Nutritional Information & Benefits
Let’s talk numbers. This recipe makes about 4 generous servings. Here’s the estimated nutritional breakdown per serving:
| Nutrient | Amount per Serving |
|---|---|
| Calories | 485 |
| Protein | 32g |
| Carbohydrates | 42g |
| Fat | 20g |
| Saturated Fat | 10g |
| Fiber | 2g |
| Sugar | 4g |
| Sodium | 780mg |
Health benefits: This dish packs a solid protein punch thanks to the ground beef, which provides iron, zinc, and B vitamins. The tomatoes add lycopene, a powerful antioxidant. The calcium from the cheese supports bone health. And the rice provides quick energy for busy evenings.
Dietary considerations: As mentioned, this recipe is naturally gluten-free. It’s also nut-free and egg-free. If you’re watching your sodium, use low-sodium broth and reduce the added salt. The cheese adds plenty of flavor on its own.
Personal wellness perspective: I’m not one to pretend a cheesy beef skillet is a health food. But I do believe that food should nourish both body and soul. This dish satisfies a deep craving for comfort and connection. When I serve it to my family, I’m not thinking about macros. I’m thinking about the smiles around the table. And honestly? That’s a kind of nutrition too.
Conclusion
This cozy 30-minute cheesy beef rice skillet is everything I want in a weeknight dinner. It’s fast, it’s forgiving, and it delivers that deep, satisfying comfort that makes you forget you spent less than half an hour making it. The recipe came to me from a stranger in an antique mall, passed down from a grandma who knew exactly what busy families needed. And now I’m passing it to you.
I hope you make this your own. Add your favorite spices, swap in whatever cheese you have, serve it with whatever side makes you happy. That’s the beauty of a simple recipe—it leaves room for you to play. The first time I made this, I burned the garlic and added too much salt. It was still delicious. Because when you cook with heart, even the mistakes taste good.
So here’s my invitation: try this recipe on a night when you need a win. When you’re tired, when the kitchen feels like the last place you want to be, when you just need something warm and good. Let this skillet do the heavy lifting. And when you take that first cheesy, savory bite, think about all the hands that brought it to your table. The grandma from Ohio. The coffee shop stranger. And now, you.
I’d love to hear how it turns out. Drop a comment below and tell me your favorite variation, or tag me in your photos if you share them online. Happy cooking!
Frequently Asked Questions
Can I use ground turkey instead of beef?
Absolutely! Ground turkey works great in this recipe. Just keep in mind that turkey is leaner, so you may want to add a tablespoon of olive oil when browning to keep things moist. The flavor will be a bit milder, so consider adding an extra pinch of paprika or garlic powder.
Why is my rice still hard after 18 minutes?
A few things could be happening. Your heat might be too low—make sure it’s at a gentle simmer, not just barely bubbling. Or your lid might not be sealing properly, letting steam escape. If the rice is still firm, add a splash more broth, cover tightly, and cook for another 5 minutes. Also, different rice brands absorb liquid differently, so you may need to adjust next time.
Can I make this in advance for meal prep?
Yes! This is actually a great meal prep recipe. Cook it as directed, let it cool completely, and portion it into containers. It keeps in the fridge for up to 4 days. When reheating, add a splash of broth or water to bring back the moisture. The texture won’t be quite as perfect as fresh, but the flavor is still fantastic.
What can I use instead of cream cheese?
If you don’t have cream cheese, try using 2 tablespoons of sour cream or Greek yogurt stirred in at the end. You can also just skip it entirely and use an extra 1/2 cup of shredded cheese. The cream cheese adds extra creaminess, but the dish still works without it.
Can I add vegetables to this dish?
Definitely! This is a great recipe for sneaking in extra veggies. Try adding a cup of frozen peas and carrots with the broth, or stir in a handful of fresh spinach right before adding the cheese. Diced bell peppers sautéed with the onions also work beautifully. Just keep the total veggie amount reasonable so you don’t throw off the liquid ratio.
Pin This Recipe!

Cozy 30-Minute Cheesy Beef Rice Skillet: Easy One-Pan Dinner

A quick and comforting one-pan dinner featuring ground beef, rice, and melted cheese, ready in just 30 minutes. Perfect for busy weeknights.
- Prep Time: 10 minutes
- Cook Time: 20 minutes
- Total Time: 30 minutes
- Yield: 4 servings 1x
- Category: Main Course
- Cuisine: American
Ingredients
- 1 pound ground beef (80/20 recommended)
- 1 medium yellow onion, diced (about 1 cup)
- 3 cloves garlic, minced
- 1 cup long-grain white rice, uncooked
- 2 cups low-sodium beef broth
- 1 can (14.5 oz) diced tomatoes, undrained
- 1 teaspoon salt
- 1/2 teaspoon black pepper
- 1 teaspoon paprika
- 1/2 teaspoon garlic powder
- 1/2 teaspoon onion powder
- 1/4 teaspoon red pepper flakes (optional)
- 1 1/2 cups shredded cheddar cheese (sharp or medium)
- 1/2 cup shredded mozzarella cheese
- 2 tablespoons cream cheese, softened
- 2 tablespoons fresh parsley, chopped (for garnish)
- Green onions, sliced (for garnish)
Instructions
- Brown the beef: Place a large skillet over medium-high heat. Add the ground beef and break it up with a wooden spoon. Cook for 4-5 minutes until browned and no longer pink. Leave about 1 tablespoon of fat in the pan.
- Sauté the aromatics: Push the beef to one side. Add the diced onion and cook for 2 minutes until softened. Add the minced garlic and stir together for 30 seconds until fragrant.
- Toast the rice: Sprinkle the uncooked rice over the beef and onion mixture. Stir for about 1 minute until the rice is slightly toasted and smells nutty.
- Add liquids and seasonings: Pour in the beef broth and diced tomatoes (undrained). Add salt, pepper, paprika, garlic powder, onion powder, and red pepper flakes (if using). Stir to combine, scraping the bottom of the pan to release any browned bits.
- Simmer and cook: Bring the mixture to a boil, then reduce heat to low. Cover with a tight-fitting lid and simmer for 18-20 minutes. Do not lift the lid during cooking.
- Add the cheese: Once the rice is tender and liquid is absorbed, remove the lid. Drop the cream cheese in small dollops over the top, then sprinkle the shredded cheddar and mozzarella evenly. Cover and let sit off the heat for 2 minutes until the cheese is melted.
- Finish and serve: Remove the lid and gently stir to incorporate the melted cheese. Garnish with fresh parsley and sliced green onions if desired. Serve hot.
Notes
For best results, shred your own cheese from a block to avoid anti-caking agents. Do not lift the lid while the rice is simmering. If using brown rice, increase broth to 2 1/2 cups and cook for 35-40 minutes. Leftovers keep in the refrigerator for up to 4 days.
Nutrition
- Serving Size: 1 serving (about 1 1
- Calories: 485
- Sugar: 4
- Sodium: 780
- Fat: 20
- Saturated Fat: 10
- Carbohydrates: 42
- Fiber: 2
- Protein: 32
Keywords: cheesy beef rice skillet, one-pan dinner, 30-minute meal, ground beef recipe, easy weeknight dinner, comfort food



