Love this? Save it for later!
Share the inspiration with your friends
This was supposed to be a simple crumble. Just a quick, no-fuss dessert to use up the apples I’d picked up at the farmer’s market that morning. I had the whole thing planned out in my head—a classic oat topping, some cinnamon, maybe a little lemon zest. But then I got distracted. My phone rang, it was my sister, and while I was trying to find a pen to write down her grocery list, I grabbed the wrong block of butter from the fridge. Instead of the cold, cubed butter my recipe called for, I accidentally grabbed the entire stick and tossed it into a hot saucepan. I stared at it for a solid five seconds, watching it melt and foam, realizing my mistake. The plan was already out the window. I was already late for picking up my kid from school. Honestly, I almost just dumped it and started over.
But the smell. Have you ever stood over a pan of butter as it turns from yellow to a deep, nutty gold? It’s a whole thing. It smells like toasted hazelnuts and caramel and something almost like vanilla. I couldn’t throw it away. So, I just went with it. I poured that liquid gold over the sliced apples, tossed in some brown sugar, and figured, well, let’s see what happens. What came out of the oven was nothing like the plan. It was better. The brown butter gave the apples this incredible, almost savory depth, and it soaked into the oat topping in a way that made the whole thing taste like a warm hug. Maybe you’ve been there—when a kitchen mistake turns into the thing you’ll crave all season long. That’s this crisp for me.
Every fall since, I make this crisp. Not the original one I planned, but this one. The one born from a distracted moment and a happy, golden accident. It’s the dessert that tells you to slow down, that sometimes the best things happen when you stop trying so hard. It’s cozy, it’s rich, and it tastes like everything I love about this season. Let me tell you, it’s the kind of recipe that makes you close your eyes after the first bite.
Why You’ll Love This Recipe
I’ve tested this brown butter apple crisp more times than I can count. Each time, I tweaked something—a little more salt, a different apple variety, a longer bake time. I wanted it to be perfect, but not fussy. The result is a dessert that feels both special and incredibly simple. Here’s why I think you’re going to absolutely love it.
- Deep, Nutty Flavor: The brown butter is the star. It adds a toasty, caramelized richness that plain butter just can’t match. It’s what makes this crisp taste like it took hours, when it really didn’t.
- Perfectly Soft Apples: The apples cook down to a tender, jammy filling without turning into complete mush. They hold their shape just enough, giving you a satisfying bite every time.
- Crunchy, Buttery Topping: The oat topping gets perfectly golden and crisp, thanks to the brown butter and a little bit of cinnamon. It’s the ideal textural contrast to the soft fruit below.
- Simple, Pantry-Friendly Ingredients: No weird, hard-to-find items here. You probably have everything you need in your kitchen right now. It’s the kind of recipe you can decide to make on a whim.
- Perfect for Cozy Fall Evenings: This is the dessert you want after a chilly day, with a scoop of vanilla ice cream melting on top. It’s a crowd-pleaser for Thanksgiving, a casual dinner party, or just a quiet Tuesday night.
This isn’t just another apple crisp recipe. The special technique of browning the butter adds a layer of flavor that’s completely unexpected and utterly addictive. It’s comfort food reimagined—a little bit richer, a little bit more complex, but with the same soul-soothing satisfaction that makes you feel good. It’s the kind of dessert that makes you feel like you’ve accomplished something wonderful, even though it was almost no work at all.
What Ingredients You Will Need
This recipe uses simple, wholesome ingredients that come together to create something truly special. The magic is in the technique, not a long shopping list. Here’s what you’ll need to gather.
For the Apple Filling
- 6 cups apples, peeled, cored, and sliced (about 6 medium apples; I recommend a mix of Granny Smith and Honeycrisp for the best balance of tart and sweet)
- 1/2 cup granulated sugar (adds sweetness and helps the apples break down)
- 2 tablespoons all-purpose flour (helps thicken the juices as they cook)
- 1 teaspoon ground cinnamon
- 1/4 teaspoon ground nutmeg (freshly grated is best, adds a warm, aromatic note)
- 1 tablespoon lemon juice (prevents the apples from browning and brightens the flavor)
- 1/2 cup unsalted butter (this is the butter you will brown)
For the Crisp Topping
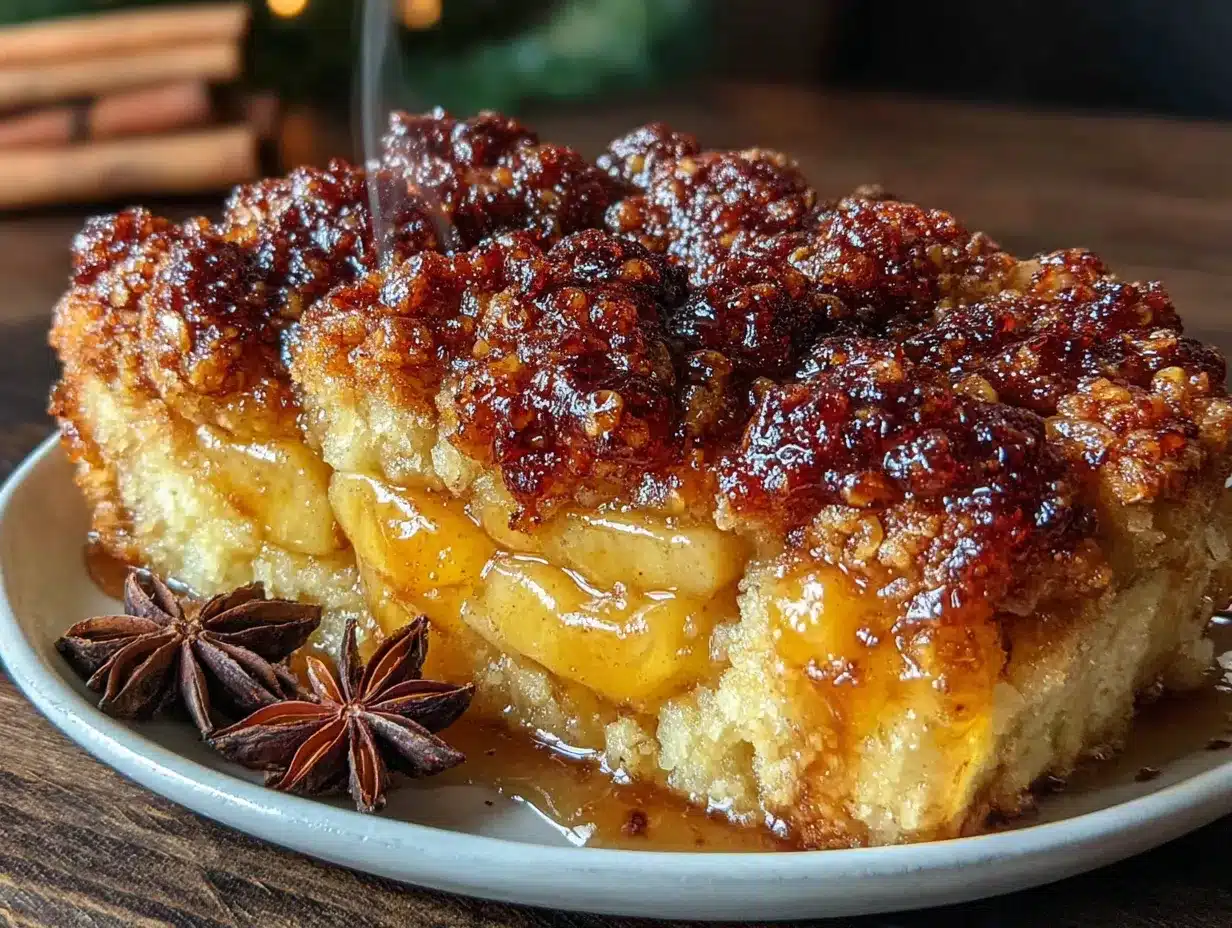
- 1 cup old-fashioned rolled oats (do not use quick oats; they get too soft)
- 3/4 cup all-purpose flour
- 1/2 cup packed light brown sugar (adds moisture and a deeper caramel flavor)
- 1/2 cup chopped pecans or walnuts (optional, but I love the extra crunch)
- 1/2 teaspoon ground cinnamon
- 1/4 teaspoon salt (don’t skip this—it balances the sweetness)
- 1/2 cup unsalted butter, melted (you’ll use the butter you already browned, plus a little more if needed)
Ingredient Tips: For the best texture, I recommend using a mix of apples. Granny Smith holds its shape well and provides a nice tartness, while Honeycrisp adds sweetness and a tender bite. If you can find them, Braeburn or Pink Lady apples also work beautifully. I personally prefer the flavor of Land O’Lakes butter for browning, but any good quality unsalted butter will work. For a gluten-free option, simply use a 1:1 gluten-free all-purpose flour blend in both the filling and the topping.
Equipment Needed
You don’t need a ton of fancy equipment for this recipe, which is part of its charm. Here’s what you’ll need to have on hand.
- Large skillet or saucepan: For browning the butter. A light-colored pan is best so you can see the butter change color.
- 8×8-inch or 9×9-inch baking dish: This is the perfect size for this crisp. A 9-inch pie plate also works well.
- Mixing bowls: One large bowl for the apples, one medium bowl for the topping.
- Sharp knife and cutting board: For peeling and slicing the apples.
- Measuring cups and spoons: For accuracy.
- Wooden spoon or spatula: For stirring the butter and mixing the filling.
- Whisk: To combine the dry ingredients for the topping.
If you don’t have a light-colored pan, just keep a close eye on the butter. It can go from brown to burnt very quickly. I’ve definitely ruined a batch of butter by looking away for just a second. Also, a good quality baking dish will help the crisp cook evenly. I’ve used a cheap glass dish before, and the edges burned while the middle was still runny. A ceramic or metal dish is a worthwhile investment for even baking.
Preparation Method
Alright, let’s get to the good part. This method might seem a little different because of the brown butter, but I promise it’s worth the extra step. Take your time and enjoy the process—the smell alone is half the reward.
- Preheat your oven to 375°F (190°C). Get this going first so the oven is nice and hot when you’re ready to bake. Place a rack in the center of the oven.
- Brown the butter. In a large skillet or saucepan over medium heat, add the 1/2 cup of unsalted butter. Let it melt completely, swirling the pan occasionally. The butter will start to foam and sputter. Keep a close eye on it. After a few minutes, the foam will subside, and you’ll see little brown specks forming at the bottom of the pan. The butter will smell nutty and toasty. This whole process takes about 5-7 minutes. Once it’s a golden amber color and smells amazing, immediately remove it from the heat and pour it into a heat-safe bowl to stop it from cooking. Don’t walk away from it—burnt butter is a sad thing.
- Prepare the apple filling. While the butter is cooling slightly, peel, core, and slice your apples. I like to slice them about 1/4-inch thick. In a large bowl, toss the apple slices with the granulated sugar, 2 tablespoons of flour, cinnamon, nutmeg, and lemon juice. Make sure every slice is coated. Pour in the browned butter (yes, all of it!) and toss again. The butter will coat the apples in a glorious, nutty sheen.
- Make the crisp topping. In a separate medium bowl, whisk together the rolled oats, 3/4 cup of flour, brown sugar, chopped pecans (if using), cinnamon, and salt. Pour in the remaining 1/2 cup of melted butter (you can use the same pan you browned the butter in—just wipe it clean) and stir with a fork until the mixture is crumbly and everything is moistened. It should look like wet sand with some clumps.
- Assemble the crisp. Pour the apple mixture into your greased 8×8-inch baking dish. Spread it into an even layer. Sprinkle the oat topping evenly over the apples. Don’t press it down—just let it fall naturally. You want those little clumps to stay clumpy for a crunchy top.
- Bake. Place the dish on a baking sheet to catch any drips (trust me on this one). Bake for 40-45 minutes, or until the topping is golden brown and the filling is bubbly around the edges. If the topping is browning too quickly, tent the dish loosely with foil for the last 10 minutes. The apples should be tender when pierced with a fork.
- Cool and serve. Let the crisp cool on a wire rack for at least 15-20 minutes. This is the hardest part, I know, but it’s important. The filling needs time to set up, otherwise it will be a soupy mess. Serve warm, with a big scoop of vanilla ice cream or a drizzle of heavy cream.
My Personal Tip: Don’t skip the lemon juice! I once forgot it, and the apples turned a sad, brownish color. The lemon keeps them looking fresh and bright, and it balances all that sweetness perfectly.
Cooking Tips & Techniques
Over the years, I’ve learned a thing or two about making the perfect apple crisp. Here are some of my best tips, straight from my kitchen to yours.
- Watch the Butter Like a Hawk: Browning butter is not a set-it-and-forget-it task. It goes from perfect to burnt in about 30 seconds. Swirl the pan constantly and watch for the color change. The smell is your best indicator—when it smells nutty and toasted, it’s done.
- Don’t Overcrowd the Pan: When browning the butter, use a pan that’s large enough for the butter to move around. If the pan is too small, the butter will cook unevenly and may burn before it’s fully browned.
- Use a Mix of Apples: As I mentioned, a mix of tart and sweet apples gives the best flavor and texture. Granny Smith for structure, Honeycrisp or Fuji for sweetness. Don’t use just one type.
- Let It Rest: I cannot stress this enough. Letting the crisp rest for at least 15 minutes after baking allows the juices to thicken. If you dig in right away, you’ll have a delicious but soupy mess. Patience is a virtue, especially with dessert.
- Toast Your Nuts: If you’re adding pecans or walnuts to the topping, toast them in a dry skillet for 2-3 minutes before adding them to the mixture. It brings out their flavor and adds an extra layer of crunch.
I once forgot to let my crisp cool and served it immediately. The filling literally ran off the plate and onto the table. My kids thought it was hilarious, but I learned my lesson. Now, I set a timer to remind myself to be patient. It’s a small step that makes a huge difference.
Variations & Adaptations
One of the best things about this recipe is how easy it is to make it your own. Here are a few of my favorite ways to change it up.
- Gluten-Free Version: Swap the all-purpose flour in both the filling and the topping with a good quality 1:1 gluten-free flour blend. I’ve used Bob’s Red Mill with great results. Make sure your oats are certified gluten-free as well.
- Add Some Warm Spices: Besides cinnamon and nutmeg, try adding a pinch of ground ginger, cardamom, or allspice to the apple mixture. A little goes a long way, but it adds a lovely complexity.
- Make it a Berry-Apple Crisp: Toss in a cup of fresh or frozen cranberries, blueberries, or raspberries with the apples. The tart berries are a beautiful contrast to the sweet, nutty brown butter.
- Try a Different Nut: If you don’t have pecans or walnuts, try using sliced almonds, chopped hazelnuts, or even pepitas (pumpkin seeds) for a nut-free crunch.
- Individual Ramekins: For a fancy presentation, divide the apple mixture and topping among 4-6 greased ramekins. Bake for 20-25 minutes, or until bubbly and golden. They’re perfect for a dinner party.
My personal favorite variation is adding a handful of fresh cranberries. The tart pop of flavor against the sweet, buttery apples is just incredible. I first tried it one Thanksgiving when I had leftover cranberries, and now I make it that way every chance I get.
Serving & Storage Suggestions
This crisp is best served warm, but it’s also delicious at room temperature the next day. Here’s how to make the most of it.
Serving: Scoop the warm crisp into bowls and top with a generous scoop of vanilla bean ice cream. The cold, creamy ice cream melting into the warm, buttery apples is a match made in heaven. A drizzle of heavy cream or a dollop of whipped cream is also fantastic. For an extra touch, dust with a little cinnamon or flaky sea salt right before serving.
Storage: Store any leftover crisp in the refrigerator, covered tightly with foil or plastic wrap. It will keep for up to 4 days. The topping will soften slightly, but it will still be delicious.
Reheating: To reheat, place individual portions in the microwave for 30-45 seconds. For a crispier topping, reheat in a 350°F (175°C) oven for 10-15 minutes. I actually prefer the leftovers cold, straight from the fridge, but I know I’m in the minority on that one.
Freezing: You can freeze the unbaked crisp for up to 3 months. Assemble the crisp in a freezer-safe dish, wrap it tightly in plastic wrap and then foil. To bake, thaw it overnight in the refrigerator, then bake as directed, adding 10-15 minutes to the baking time. The flavors actually develop and deepen as it sits, so a frozen crisp can be even more delicious.
Nutritional Information & Benefits
While this is definitely a treat, it’s made with real, whole ingredients. Here’s a quick look at what’s inside.
- Estimated per serving (1/6 of recipe): Calories: 420, Fat: 22g, Carbohydrates: 55g, Fiber: 5g, Sugar: 32g, Protein: 4g.
- Apples: A great source of fiber and vitamin C. They also contain antioxidants that are good for your heart.
- Oats: Provide soluble fiber, which can help lower cholesterol and keep you feeling full.
- Nuts: (if using) Packed with healthy fats, protein, and vitamin E.
This recipe can be made dairy-free by using a plant-based butter alternative. It’s also naturally nut-free if you skip the pecans or walnuts. It’s a dessert that feels indulgent but uses ingredients that are actually good for you. I love that I can feel good about serving it to my family, even on a weeknight.
Conclusion
This brown butter apple crisp is more than just a dessert—it’s a feeling. It’s the warmth of a kitchen on a chilly evening, the smell of cinnamon and nutmeg filling the air, and the simple joy of sharing something delicious with the people you love. It started as a mistake, but it’s become a fall tradition I look forward to every single year.
I hope you give it a try and make it your own. Don’t be afraid to tweak the spices, swap in different fruits, or double the topping (I won’t judge). The best recipes are the ones that feel like yours. When you make it, I’d love to hear how it goes. Leave a comment below and tell me about your own happy kitchen accidents, or share a photo of your crisp on Pinterest. Tag me so I can see your creation!
Go on, get your apples ready. Your cozy fall evening is waiting.
Frequently Asked Questions
Can I use pre-sliced apples from the store?
You can, but they tend to be drier and don’t have the same fresh texture. For the best results, I recommend peeling and slicing your own apples right before you use them.
Do I have to peel the apples?
No, you don’t have to. The peel adds fiber and a bit of texture. However, if you prefer a smoother, more tender filling, go ahead and peel them. I usually peel mine for a classic crisp.
Can I make this crisp ahead of time?
Absolutely! You can assemble the crisp (without baking) a day in advance. Cover it and store it in the refrigerator. When you’re ready to bake, add about 10 minutes to the baking time since it’s starting from cold.
Why is my topping not crunchy?
This can happen if the topping is too wet or if the crisp isn’t baked long enough. Make sure your butter is fully melted but not hot, and that you’re using old-fashioned oats, not quick oats. Also, make sure the topping is golden brown before you take it out of the oven.
Can I use salted butter instead of unsalted?
Yes, you can. Just reduce or omit the added salt in the topping recipe. The salt in the butter will help balance the sweetness. I prefer unsalted so I can control the salt level myself.
Pin This Recipe!
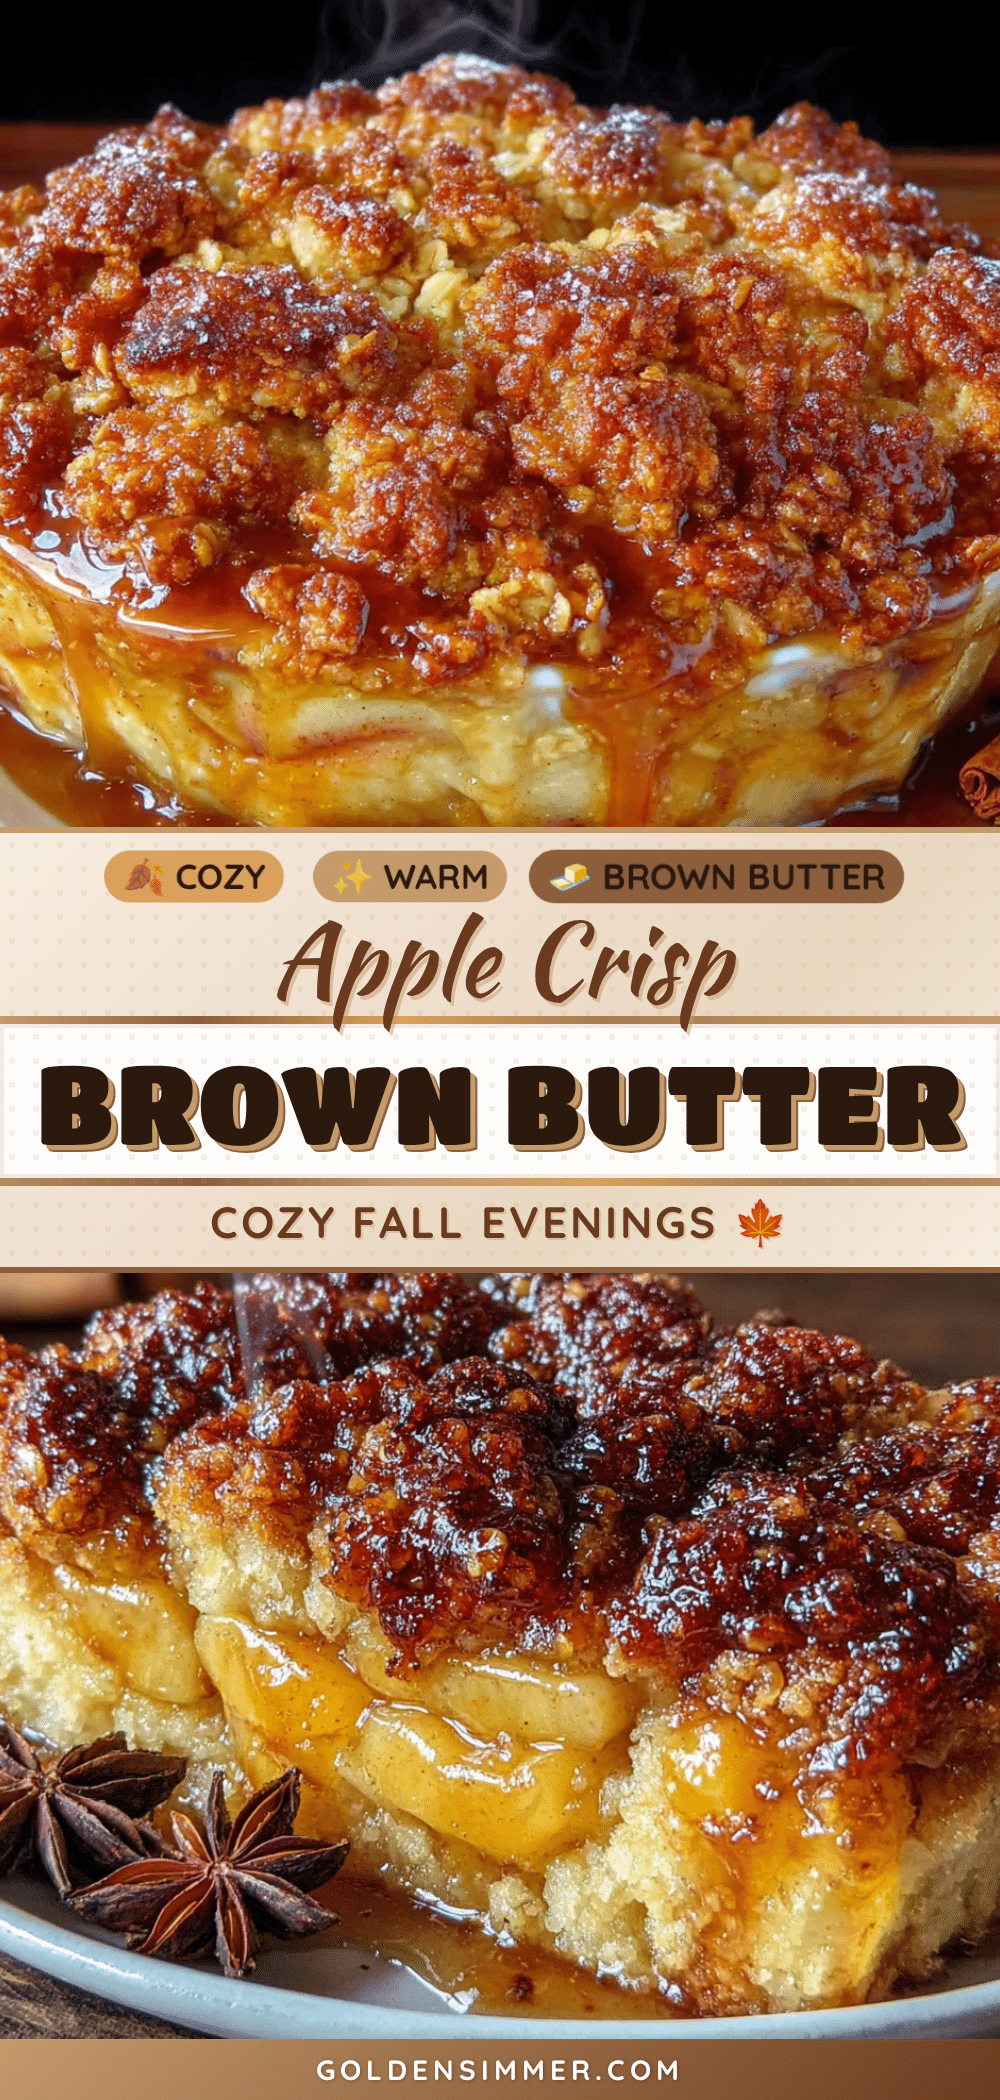
Cozy Brown Butter Apple Crisp: Best Fall Dessert Recipe

This brown butter apple crisp is a cozy fall dessert with deep, nutty flavor from browned butter, tender apples, and a crunchy oat topping. It’s a simple, pantry-friendly recipe that turns a happy kitchen accident into a seasonal tradition.
- Prep Time: 20 minutes
- Cook Time: 45 minutes
- Total Time: 1 hour 5 minutes
- Yield: 6 servings 1x
- Category: Dessert
- Cuisine: American
Ingredients
- 6 cups apples, peeled, cored, and sliced (about 6 medium apples; a mix of Granny Smith and Honeycrisp recommended)
- 1/2 cup granulated sugar
- 2 tablespoons all-purpose flour
- 1 teaspoon ground cinnamon
- 1/4 teaspoon ground nutmeg (freshly grated is best)
- 1 tablespoon lemon juice
- 1/2 cup unsalted butter (for browning)
- 1 cup old-fashioned rolled oats (do not use quick oats)
- 3/4 cup all-purpose flour
- 1/2 cup packed light brown sugar
- 1/2 cup chopped pecans or walnuts (optional)
- 1/2 teaspoon ground cinnamon
- 1/4 teaspoon salt
- 1/2 cup unsalted butter, melted (use the browned butter plus additional if needed)
Instructions
- Preheat your oven to 375°F (190°C). Place a rack in the center of the oven.
- Brown the butter: In a large skillet or saucepan over medium heat, add 1/2 cup unsalted butter. Let it melt completely, swirling occasionally. The butter will foam and sputter. After a few minutes, the foam will subside and brown specks will form at the bottom. When it’s a golden amber color and smells nutty (about 5-7 minutes), immediately remove from heat and pour into a heat-safe bowl.
- Prepare the apple filling: While the butter cools slightly, peel, core, and slice apples about 1/4-inch thick. In a large bowl, toss apple slices with granulated sugar, 2 tablespoons flour, cinnamon, nutmeg, and lemon juice. Pour in the browned butter and toss again.
- Make the crisp topping: In a medium bowl, whisk together rolled oats, 3/4 cup flour, brown sugar, chopped pecans (if using), cinnamon, and salt. Pour in 1/2 cup melted butter and stir with a fork until crumbly and moistened.
- Assemble the crisp: Pour the apple mixture into a greased 8×8-inch or 9×9-inch baking dish. Spread evenly. Sprinkle the oat topping over the apples without pressing down.
- Bake: Place the dish on a baking sheet. Bake for 40-45 minutes, until the topping is golden brown and the filling is bubbly around the edges. If topping browns too quickly, tent loosely with foil for the last 10 minutes. Apples should be tender when pierced with a fork.
- Cool and serve: Let the crisp cool on a wire rack for at least 15-20 minutes. Serve warm with vanilla ice cream or a drizzle of heavy cream.
Notes
Don’t skip the lemon juice—it prevents the apples from browning and brightens the flavor. Let the crisp rest for at least 15 minutes after baking to allow the juices to thicken. For a gluten-free version, use a 1:1 gluten-free all-purpose flour blend and certified gluten-free oats. To make ahead, assemble the crisp (without baking) and refrigerate for up to 1 day; add 10 minutes to baking time. For individual servings, divide among greased ramekins and bake for 20-25 minutes.
Nutrition
- Serving Size: 1/6 of recipe
- Calories: 420
- Sugar: 32
- Sodium: 150
- Fat: 22
- Saturated Fat: 12
- Carbohydrates: 55
- Fiber: 5
- Protein: 4
Keywords: brown butter apple crisp, apple crisp, fall dessert, apple recipe, easy apple crisp, brown butter dessert, cozy dessert



