Love this? Save it for later!
Share the inspiration with your friends
There used to be a tiny bakery tucked into a strip mall on the edge of town called The Gilded Whisk that made the most incredible pumpkin snickerdoodle cookies I have ever tasted. When they closed their doors two years ago—honestly, the owner just up and retired to Florida—I felt a genuine pang of loss. After twelve tries—some burnt, some flat, one that tasted suspiciously like pumpkin pie filling gone rogue—I finally got it.
The secret, as it turns out, was brown butter. I mean, I should have known. Brown butter makes everything better, doesn’t it? That nutty, almost caramel-like depth was exactly what was missing from every other recipe I attempted. Let me tell you, the day I nailed it, I actually texted my sister a blurry photo with the caption “We’re back, baby.” She didn’t get it, but that’s okay.
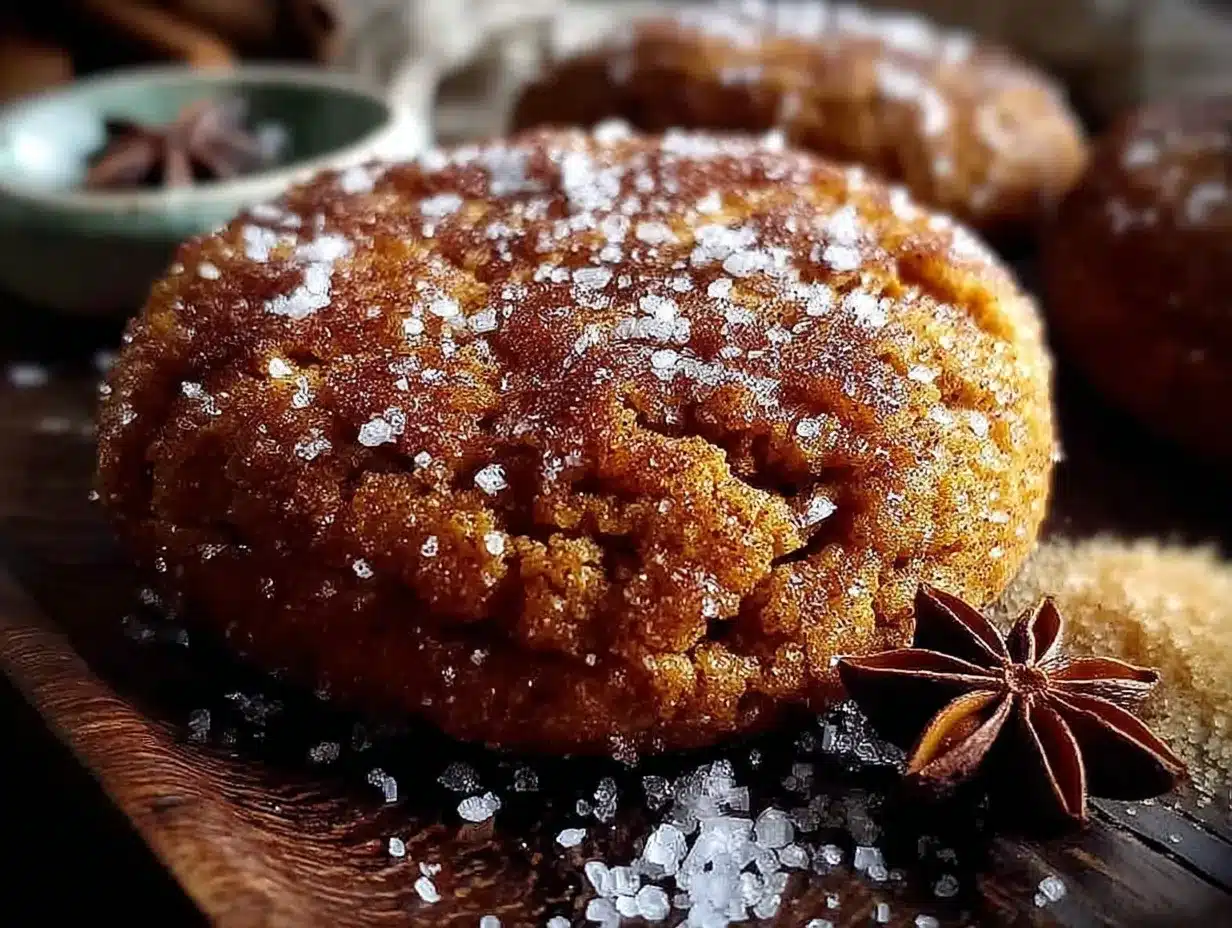
These cozy brown butter pumpkin snickerdoodle cookies are the kind of cookie you make when you want fall to taste like a hug. The edges are perfectly chewy, the centers are soft, and that cinnamon-sugar coating gives you that classic snickerdoodle crackle. I honestly think the original bakery would approve. Maybe you’ve been there—that feeling of losing a food you loved and having to recreate it yourself? It’s a labor of love, but let me tell you, this one was worth every single burnt batch.
Why You’ll Love This Recipe
These aren’t your average pumpkin cookies. I’ve tested this recipe more times than I care to admit, and here’s why I keep coming back to it.
- Quick & Easy: Comes together in under 30 minutes, perfect for those sudden fall cravings or unexpected guests.
- Simple Ingredients: No fancy grocery trips needed; you likely already have everything in your kitchen except maybe the pumpkin puree.
- Perfect for Fall Baking: Great for Halloween parties, Thanksgiving dessert tables, or cozy Sunday afternoons with a cup of coffee.
- Crowd-Pleaser: Always gets rave reviews from kids and adults alike—I’ve never brought a plate of these anywhere that didn’t come back empty.
- Unbelievably Delicious: The texture and flavor combo is next-level comfort food.
What makes these different from every other pumpkin snickerdoodle recipe out there? It’s the brown butter. I know, I know—everyone says that. But trust me, browning the butter adds a nutty, toasty depth that completely transforms the cookie. It’s not just another version of a pumpkin cookie; it’s the best version. The kind that makes you close your eyes after the first bite. It’s comfort food reimagined—faster, easier, but with the same soul-soothing satisfaction. Perfect for impressing guests without stress, or turning a simple Tuesday into something memorable.
What Ingredients You Will Need
This recipe uses simple, wholesome ingredients to deliver bold flavor and satisfying texture without the fuss. Most of these are pantry staples, which makes these cookies dangerously easy to whip up on a whim.
- Unsalted butter, 1 cup (2 sticks) – browned and cooled slightly. I recommend using a good quality butter like Kerrygold for the richest flavor.
- Granulated sugar, 1 cup – for sweetness and that perfect chewy texture.
- Light brown sugar, ½ cup, packed – adds moisture and a subtle molasses depth that pairs beautifully with pumpkin.
- Pumpkin puree, ½ cup – not pumpkin pie filling! Make sure it’s 100% pure pumpkin. I prefer Libby’s for its consistent texture.
- Large egg, 1, at room temperature – helps bind everything together.
- Vanilla extract, 1 teaspoon – pure, not imitation, for the best flavor.
- All-purpose flour, 2 cups – spooned and leveled for accuracy.
- Cream of tartar, 2 teaspoons – this is the secret to that classic snickerdoodle tang and chewy texture. Don’t skip it!
- Baking soda, 1 teaspoon – for a little lift.
- Salt, ½ teaspoon – to balance the sweetness.
- Pumpkin pie spice, 1 teaspoon – or make your own with cinnamon, nutmeg, ginger, and cloves.
- Cinnamon, 1 teaspoon – for warmth.
For the coating:
- Granulated sugar, ¼ cup
- Cinnamon, 1 tablespoon
- Pinch of nutmeg – optional, but I love the extra warmth it adds.
Ingredient Tips: If you only have salted butter, just reduce the added salt to ¼ teaspoon. For a dairy-free version, you can use vegan butter, but the browning step will be slightly different—watch it carefully so it doesn’t burn. And please, for the love of all things cozy, don’t use pumpkin pie filling. It has added sugar and spices that will throw off the whole balance.
Equipment Needed
You don’t need a fancy kitchen to make these cookies, but a few specific tools make the process much smoother.
- Large skillet or saucepan – for browning the butter. A light-colored pan helps you see the color change.
- Mixing bowls – one large, one medium.
- Electric mixer or wooden spoon – I use a hand mixer, but a good wooden spoon and some elbow grease work fine.
- Whisk – for the dry ingredients.
- Cookie scoop – a 1.5-tablespoon scoop gives consistent cookies. I learned this the hard way after making oddly shaped cookies for years.
- Baking sheets – lined with parchment paper or a silicone baking mat.
- Cooling rack – essential for getting that perfect texture.
Budget-friendly alternatives: No cookie scoop? Use two spoons. No cooling rack? A clean wire oven rack works in a pinch. No parchment paper? Grease the baking sheet lightly, though the bottoms might brown a touch more.
Preparation Method
- Brown the butter. In a large skillet or saucepan over medium heat, melt the butter. Swirl the pan occasionally. It will start to foam, then the milk solids will turn golden brown and smell nutty—this takes about 5-7 minutes. Watch it carefully; burnt butter is a tragedy. Once it’s golden and smells amazing, pour it into a heatproof bowl to stop the cooking. Let it cool for 10 minutes.
- Mix the wet ingredients. In a large bowl, combine the browned butter, granulated sugar, and brown sugar. Beat until well combined—it will look a bit grainy, that’s okay. Add the pumpkin puree, egg, and vanilla extract. Mix until smooth and creamy. The batter will look a little shiny and smell incredible already.
- Whisk the dry ingredients. In a separate bowl, whisk together the flour, cream of tartar, baking soda, salt, pumpkin pie spice, and cinnamon. Make sure there are no lumps, especially with the cream of tartar—it can be clumpy.
- Combine wet and dry. Gradually add the dry ingredients to the wet mixture, mixing on low speed or stirring with a wooden spoon until just combined. Do not overmix! Stop as soon as you don’t see any more flour streaks. The dough will be soft and slightly sticky, almost like a thick batter.
- Chill the dough. This is a non-negotiable step. Cover the bowl and refrigerate for at least 30 minutes. Chilling prevents the cookies from spreading too much and deepens the flavor. I’ve been impatient before and skipped this—flat, sad cookies were my reward.
- Preheat and prepare. Preheat your oven to 350°F (175°C). Line two baking sheets with parchment paper.
- Make the coating. In a small bowl, mix the ¼ cup sugar, 1 tablespoon cinnamon, and a pinch of nutmeg.
- Scoop and roll. Using a 1.5-tablespoon cookie scoop, portion out the dough. Roll each portion into a ball between your palms—the dough will be slightly sticky, so work quickly. Roll each ball generously in the cinnamon-sugar mixture until fully coated.
- Bake. Place the coated dough balls on the prepared baking sheets, spacing them about 2 inches apart. Bake for 10-12 minutes, until the edges are set and the centers look slightly puffy and crackled. The cookies will look underdone in the middle—that’s what you want. They continue baking on the hot sheet.
- Cool. Let the cookies cool on the baking sheet for 5 minutes. This is crucial for them to set properly. Then transfer to a wire rack to cool completely. Or, you know, eat one warm. I won’t tell.
Cooking Tips & Techniques
Let me save you from the mistakes I made. First, browning butter is an art. Don’t walk away from the pan. It goes from perfectly golden to burnt in about 30 seconds. Swirl, watch, and trust your nose—when it smells like toasted hazelnuts, you’re there.
Second, measure your flour correctly. Spoon it into the measuring cup and level it off with a knife. Scooping directly from the bag packs the flour and leads to dry, crumbly cookies. I learned this after a particularly sad batch that crumbled into dust.
Third, don’t skip the cream of tartar. It’s not just for show—it gives snickerdoodles that signature tangy flavor and chewy texture. No substitutions here. If you don’t have it, honestly, make a different cookie.
Fourth, chilling the dough isn’t optional. I know you want cookies right now, but trust the process. The cold butter in the dough means less spreading, thicker cookies, and a better texture. Plus, the flavors meld together while it rests.
Finally, underbake slightly. Pull the cookies out when the edges are set but the centers still look soft and puffy. They’ll continue cooking on the hot baking sheet. This gives you that perfect soft, chewy center with slightly crisp edges.
Variations & Adaptations
One of my favorite things about this recipe is how adaptable it is. Here are some variations I’ve tried and loved.
- Gluten-Free Version: Substitute the all-purpose flour with a 1:1 gluten-free baking flour blend. I’ve used Bob’s Red Mill with great results. Add an extra tablespoon of flour if the dough feels too sticky.
- Vegan Option: Use vegan butter (though browning it is tricky—watch carefully) and a flax egg (1 tablespoon ground flaxseed mixed with 3 tablespoons water, let sit for 5 minutes). The texture will be slightly different, but still delicious.
- Spice It Up: Add ¼ teaspoon of ground ginger or cardamom to the dough for a more complex flavor profile. I tried this on a whim one rainy afternoon and it was a revelation.
- Add-Ins: Fold in ½ cup of white chocolate chips, chopped pecans, or dried cranberries after mixing the dough. My sister swears by the white chocolate and cranberry combo.
- Pumpkin Seed Topping: Before baking, press a few pumpkin seeds into the top of each cookie for a crunchy, seasonal touch.
Serving & Storage Suggestions
These cookies are best served slightly warm, when the centers are still soft and the cinnamon-sugar coating is fragrant. A glass of cold milk is the classic pairing, but they’re also incredible with a hot cup of chai or a pumpkin spice latte.
Storage: Keep the cookies in an airtight container at room temperature for up to 5 days. Place a slice of bread in the container to keep them soft—the cookies will absorb the moisture from the bread. Replace the bread slice every other day.
Freezing: You can freeze the baked cookies for up to 3 months. Layer them between sheets of parchment paper in a freezer-safe container. Thaw at room temperature for about 30 minutes before serving. Or, freeze the unbaked dough balls on a baking sheet, then transfer to a freezer bag. Bake from frozen, adding 2-3 minutes to the baking time.
Flavor Development: Honestly, these cookies taste even better the next day. The spices meld together, and the texture softens slightly. If you can resist eating them all on day one, you’re in for a treat on day two.
Nutritional Information & Benefits
Per cookie (based on 24 cookies): Approximately 160 calories, 8g fat, 22g carbohydrates, 1g fiber, 12g sugar, 2g protein.
While these are definitely a treat, the pumpkin puree adds a dose of vitamin A and fiber. Pumpkin is also rich in antioxidants like beta-carotene, which supports eye health and immune function. The cinnamon in the coating has anti-inflammatory properties and may help regulate blood sugar levels. So, you know, there’s that.
Dietary Considerations: This recipe contains gluten, dairy, and eggs. For gluten-free, dairy-free, or vegan adaptations, see the variations section above. The cookies are nut-free as written, making them safe for school bake sales.
I personally love that these cookies feel indulgent but aren’t overly heavy. They’re the kind of treat you can enjoy without feeling like you need a nap afterward. Everything in moderation, right?
Conclusion
These cozy brown butter pumpkin snickerdoodle cookies are everything I wanted them to be—and more. They’re the result of persistence, a little bit of kitchen science, and a whole lot of love for a lost bakery. The nutty brown butter, the warm pumpkin spice, the crackly cinnamon-sugar coating—it all comes together in one perfect, chewy bite.
I hope you give these a try and make them your own. Maybe add some white chocolate chips, or press a few pumpkin seeds on top. The beauty of baking is that every batch tells your story. And honestly, I’d love to hear yours. Drop a comment below and let me know how they turned out, or tag me in your photos if you share them online. Happy baking, friends—you’ve got this.
Frequently Asked Questions
Can I use pumpkin pie filling instead of pumpkin puree?
No, please don’t. Pumpkin pie filling has added sugar and spices that will throw off the balance of the recipe. Stick with 100% pure pumpkin puree for the best results.
Why did my cookies turn out flat?
The most common reasons are skipping the chilling step, using butter that’s too warm, or overmixing the dough. Make sure to chill for at least 30 minutes and handle the dough gently.
Can I freeze the dough for later?
Absolutely! Scoop the dough into balls, roll them in the cinnamon-sugar coating, and freeze on a baking sheet. Once solid, transfer to a freezer bag. Bake from frozen, adding 2-3 minutes to the baking time.
What can I substitute for cream of tartar?
Unfortunately, there’s no great substitute for cream of tartar in snickerdoodles. It provides the unique tangy flavor and chewy texture. If you don’t have it, you might want to choose a different cookie recipe.
How do I know when the cookies are done baking?
Look for set edges and puffy, slightly crackled centers. The cookies will look underdone in the middle—that’s exactly what you want. They’ll continue baking on the hot sheet as they cool.
Pin This Recipe!
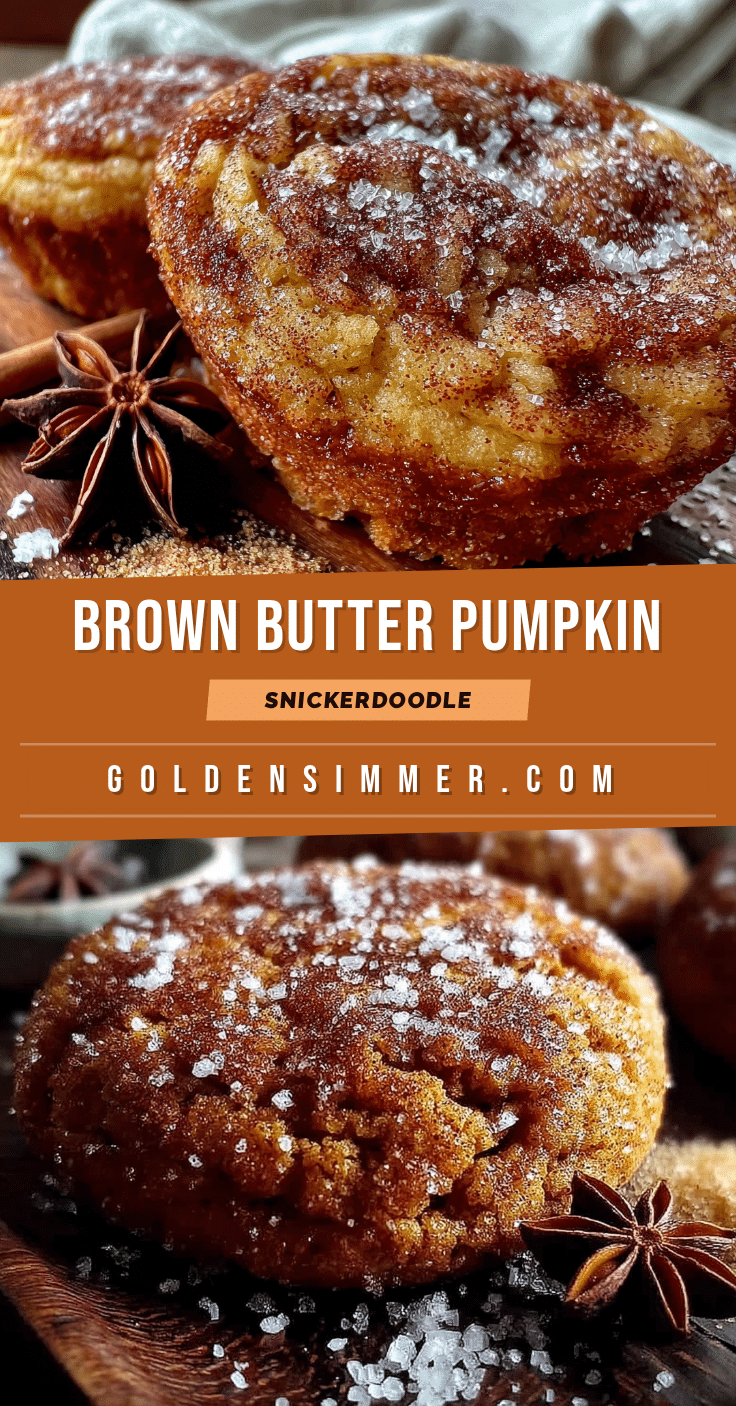
Cozy Brown Butter Pumpkin Snickerdoodle Cookies
These cozy brown butter pumpkin snickerdoodle cookies are the kind of cookie you make when you want fall to taste like a hug. The edges are perfectly chewy, the centers are soft, and that cinnamon-sugar coating gives you that classic snickerdoodle crackle.
- Prep Time: 15 minutes
- Cook Time: 12 minutes
- Total Time: 57 minutes (includes 30 minutes chilling)
- Yield: 24 cookies 1x
- Category: Dessert
- Cuisine: American
Ingredients
- 1 cup (2 sticks) unsalted butter, browned and cooled slightly
- 1 cup granulated sugar
- ½ cup light brown sugar, packed
- ½ cup pumpkin puree (not pumpkin pie filling)
- 1 large egg, at room temperature
- 1 teaspoon vanilla extract (pure)
- 2 cups all-purpose flour, spooned and leveled
- 2 teaspoons cream of tartar
- 1 teaspoon baking soda
- ½ teaspoon salt
- 1 teaspoon pumpkin pie spice
- 1 teaspoon cinnamon
- For the coating:
- ¼ cup granulated sugar
- 1 tablespoon cinnamon
- Pinch of nutmeg (optional)
Instructions
- Brown the butter. In a large skillet or saucepan over medium heat, melt the butter. Swirl the pan occasionally. It will start to foam, then the milk solids will turn golden brown and smell nutty—this takes about 5-7 minutes. Watch it carefully; burnt butter is a tragedy. Once it’s golden and smells amazing, pour it into a heatproof bowl to stop the cooking. Let it cool for 10 minutes.
- Mix the wet ingredients. In a large bowl, combine the browned butter, granulated sugar, and brown sugar. Beat until well combined—it will look a bit grainy, that’s okay. Add the pumpkin puree, egg, and vanilla extract. Mix until smooth and creamy.
- Whisk the dry ingredients. In a separate bowl, whisk together the flour, cream of tartar, baking soda, salt, pumpkin pie spice, and cinnamon. Make sure there are no lumps, especially with the cream of tartar.
- Combine wet and dry. Gradually add the dry ingredients to the wet mixture, mixing on low speed or stirring with a wooden spoon until just combined. Do not overmix! Stop as soon as you don’t see any more flour streaks. The dough will be soft and slightly sticky.
- Chill the dough. Cover the bowl and refrigerate for at least 30 minutes. Chilling prevents the cookies from spreading too much and deepens the flavor.
- Preheat and prepare. Preheat your oven to 350°F (175°C). Line two baking sheets with parchment paper.
- Make the coating. In a small bowl, mix the ¼ cup sugar, 1 tablespoon cinnamon, and a pinch of nutmeg.
- Scoop and roll. Using a 1.5-tablespoon cookie scoop, portion out the dough. Roll each portion into a ball between your palms. Roll each ball generously in the cinnamon-sugar mixture until fully coated.
- Bake. Place the coated dough balls on the prepared baking sheets, spacing them about 2 inches apart. Bake for 10-12 minutes, until the edges are set and the centers look slightly puffy and crackled. The cookies will look underdone in the middle—that’s what you want.
- Cool. Let the cookies cool on the baking sheet for 5 minutes. Then transfer to a wire rack to cool completely.
Notes
Brown butter is the secret to the nutty, caramel-like depth. Don’t skip chilling the dough—it prevents spreading and deepens flavor. Underbake slightly for soft, chewy centers. For best results, use 100% pure pumpkin puree, not pumpkin pie filling. Cream of tartar is essential for the classic snickerdoodle tang and chewy texture.
Nutrition
- Serving Size: 1 cookie
- Calories: 160
- Sugar: 12
- Sodium: 120
- Fat: 8
- Saturated Fat: 5
- Carbohydrates: 22
- Fiber: 1
- Protein: 2
Keywords: pumpkin snickerdoodle, brown butter cookies, fall cookies, pumpkin cookies, snickerdoodle recipe



