Love this? Save it for later!
Share the inspiration with your friends
I was standing in the spice aisle of my local grocery store last October, staring at a jar of pumpkin pie spice I didn’t need, when the smell hit me. Not from the jar — from somewhere deeper, somewhere in my memory. It was the warm, gingery, almost peppery scent of crushed cookies, and suddenly I was seven years old in my neighbor Mrs. Kowalski’s kitchen, her hands dusted with golden crumbs as she pressed them into a pan. She wasn’t my grandmother, not even a relative. Just the lady next door who let me sit on her counter and lick the spatula. She passed away years ago, and I hadn’t thought about those afternoons in forever. But there I was, holding a box of gingersnaps, feeling that exact mix of butter and spice on my tongue like it was yesterday. I bought three boxes. Maybe you’ve had that happen — where a random moment yanks you right back to a specific person and a specific place? That’s how these pumpkin cheesecake bars were born. I wanted to recreate not just the crust she made, but that feeling of being small and safe in a warm kitchen while the wind rattled the windows outside. Honestly, it took me four tries to get it right. The first batch had a crust so hard I could have used it as a frisbee. But when I finally bit into one that had that perfect snap followed by creamy, spiced pumpkin — I closed my eyes and there she was. That’s why I keep making them. That’s why you will too.
Why You’ll Love This Recipe
Let me tell you why these pumpkin cheesecake bars have become my most-requested fall dessert. I’ve tested this recipe at least a dozen times, tweaking temperatures and ratios until everything clicked. The result is a dessert that feels fancy but comes together with almost no stress.
- Quick & Easy : You only need about 20 minutes of active prep time. The oven does the rest of the work while you sip your coffee or answer emails.
- Simple Ingredients : No fancy grocery trips needed. Pumpkin puree, cream cheese, and a box of store-bought gingersnaps — you probably have most of this already.
- Perfect for Fall Gatherings : These bars are made for Thanksgiving, Halloween parties, or cozy Sunday afternoons when you want something that smells like autumn.
- Crowd-Pleaser : I’ve brought these to potlucks and watched grown adults argue over the last piece. Kids love them too — the gingersnap crunch is irresistible.
- Unbelievably Delicious : The contrast between the spicy, crunchy crust and the silky, tangy pumpkin filling is honestly next-level comfort food.
What makes this recipe different from every other pumpkin cheesecake bar out there? It’s the crust. Most recipes use graham crackers, which are fine but forgettable. Gingersnaps bring a deep, molasses-y warmth that makes the pumpkin taste richer. I also blend cottage cheese into the filling — trust me on this one. It adds creaminess without making the bars too heavy, and you won’t taste it at all. Just silky, dreamy texture.
This isn’t just another pumpkin dessert. It’s the kind that makes people close their eyes after the first bite. The kind that turns a regular Tuesday into something special. And honestly? It’s easier than making a full cheesecake, but it looks just as impressive on a plate.
What Ingredients You Will Need
This recipe uses simple, wholesome ingredients that come together to create something truly special. Most of these are pantry staples during fall, and the ones that aren’t are easy to find at any grocery store.
For the Gingersnap Crust
- 2 cups (240g) crushed gingersnap cookies — about 30 cookies. I recommend Nabisco or a bakery brand for the best spicy kick. You can crush them in a food processor or by hand in a zip-top bag.
- 6 tablespoons (85g) unsalted butter, melted — use real butter here, not margarine. It makes the crust hold together better and adds richness.
- 2 tablespoons (25g) granulated sugar — just a touch to balance the spice from the cookies.
- ¼ teaspoon salt — enhances all the warm flavors.
For the Pumpkin Cheesecake Filling
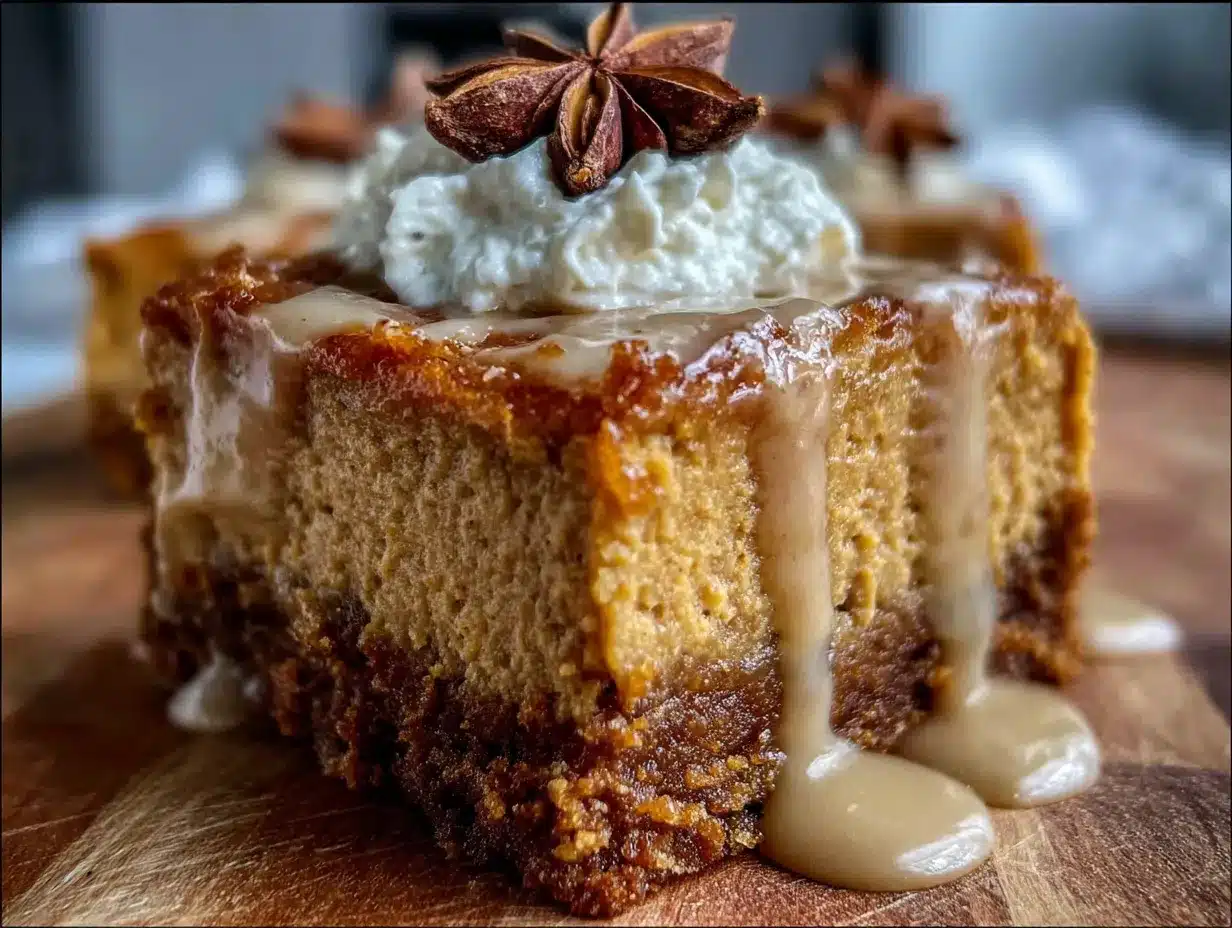
- 16 ounces (452g) cream cheese, softened — full-fat is best for that luscious texture. Let it sit on the counter for at least an hour before starting.
- ½ cup (100g) granulated sugar — adds just the right sweetness without overpowering the pumpkin.
- ¼ cup (50g) packed brown sugar — light or dark works. Dark adds more molasses flavor.
- 1 cup (240g) pumpkin puree — not pumpkin pie filling. Libby’s is my go-to brand for consistent results.
- ½ cup (120g) cottage cheese — full-fat or 2% both work. Blend it until completely smooth before adding. This is my secret ingredient for extra creaminess.
- 2 large eggs — room temperature so they incorporate smoothly.
- 1 teaspoon vanilla extract — pure, not imitation.
- 1½ teaspoons pumpkin pie spice — or make your own with cinnamon, ginger, nutmeg, and cloves.
- ½ teaspoon cinnamon — because you can never have too much.
- ¼ teaspoon salt — balances the sweetness.
For the Topping (Optional but Recommended)
- ½ cup (120ml) heavy cream — for whipping into clouds of goodness.
- 1 tablespoon powdered sugar — just enough to sweeten the cream.
- Crushed gingersnaps or cinnamon — for sprinkling on top.
Equipment Needed
You don’t need a professional kitchen to make these bars. Here’s what you’ll need:
- 9×9-inch baking pan — an 8×8 works too, but the bars will be slightly thicker and may need a few extra minutes in the oven.
- Food processor — for crushing cookies and blending the cottage cheese. A blender works for the cottage cheese, and a rolling pin works for the cookies if you want a mini workout.
- Electric mixer — hand or stand mixer both work. A whisk and strong arm can get the job done, but your arm will thank you for using a mixer.
- Parchment paper — makes lifting the bars out of the pan so much easier. Leave overhang on two sides for handles.
- Mixing bowls — you’ll need at least two medium bowls.
- Spatula — for scraping every last bit of filling into the pan.
- Measuring cups and spoons — precise measurements matter in baking.
I’ve made this recipe with a cheap hand mixer that cost fifteen dollars and it turned out perfectly. Don’t let fancy equipment stop you from trying.
Preparation Method
Step 1: Preheat and Prepare the Pan
Preheat your oven to 350°F (175°C). Line your 9×9-inch baking pan with parchment paper, leaving about 2 inches of overhang on two opposite sides. These will be your handles for lifting the bars out later. Lightly spray the parchment with non-stick spray just to be safe.
Step 2: Make the Gingersnap Crust
Place the gingersnap cookies in your food processor and pulse until they become fine crumbs. You should have about 2 cups. Pour the crumbs into a medium bowl, then add the melted butter, sugar, and salt. Stir with a fork until every crumb is coated and the mixture looks like wet sand. Press this mixture firmly into the bottom of your prepared pan. I use the bottom of a measuring cup to really pack it down — a loose crust will fall apart when you cut the bars. Bake the crust for 10 minutes, then set it aside to cool slightly while you make the filling. Your kitchen will smell incredible right about now.
Step 3: Blend the Cottage Cheese
While the crust cools, add the cottage cheese to your food processor or blender. Blend for about 30 seconds until it’s completely smooth with no lumps. This step is important — nobody wants a chunk of cottage cheese in their cheesecake. Scrape down the sides and blend again if needed. Set this aside.
Step 4: Make the Cheesecake Filling
In a large mixing bowl, beat the softened cream cheese with an electric mixer on medium speed until it’s smooth and fluffy — about 2 minutes. Scrape down the sides and the bottom of the bowl. Add both sugars and beat for another minute until everything is combined and creamy. Add the pumpkin puree, the blended cottage cheese, vanilla extract, pumpkin pie spice, cinnamon, and salt. Mix on low speed until just combined — don’t overmix or the filling can become dense. Add the eggs one at a time, mixing on low after each addition until the yolk disappears. The filling should be smooth, thick, and a beautiful pale orange color.
Step 5: Assemble and Bake
Pour the filling over the pre-baked crust. Use your spatula to spread it evenly into all the corners. Give the pan a gentle tap on the counter to release any air bubbles. Bake at 350°F (175°C) for 35 to 40 minutes. The edges should look set and slightly puffed, but the center should still jiggle just a little when you gently shake the pan. This is normal — it will continue to set as it cools. If the top starts browning too quickly, tent the pan loosely with foil after 25 minutes.
Step 6: Cool and Chill
Place the pan on a wire rack and let it cool completely at room temperature — this takes about 1 to 2 hours. Once cool, cover the pan with plastic wrap and refrigerate for at least 4 hours, but overnight is better. I know it’s hard to wait, but this step is non-negotiable. The bars need time to firm up so you can cut clean slices.
Step 7: Cut and Serve
When you’re ready to serve, use the parchment handles to lift the entire block out of the pan. Place it on a cutting board and use a sharp knife to cut into 9 or 16 squares. Wipe the knife clean between cuts for the neatest edges. Serve cold or at room temperature with a dollop of whipped cream and a sprinkle of crushed gingersnaps on top.
Cooking Tips & Techniques
I’ve made this recipe enough times to know exactly where things can go wrong. Let me save you the trouble.
Don’t skip the cottage cheese blending. The first time I made these, I added the cottage cheese straight from the container without blending it. Big mistake. The filling had weird little white lumps that didn’t look appetizing at all. Blending it smooth takes thirty seconds and makes a huge difference.
Room temperature ingredients matter. Cold cream cheese creates lumps that are nearly impossible to get rid of. Cold eggs can make the filling curdle. I learned this the hard way when I was rushing to make these for a party and ended up with a grainy texture. Set everything out on the counter an hour before you start.
Watch the baking time carefully. Every oven runs a little differently. My old oven would bake these in exactly 35 minutes. My new one takes 38. Start checking at 30 minutes by giving the pan a gentle shake. The center should wobble like Jell-O, not slosh like liquid. Overbaking makes the cheesecake dry and cracked.
Use a hot knife for clean cuts. Run your knife under hot water, dry it off, then make your cut. Wipe and repeat between each slice. This gives you those gorgeous, bakery-style edges that make people think you spent hours on presentation.
Let them chill overnight. I know, I know. But the texture really does improve after a full night in the fridge. The flavors meld together, the crust softens just slightly, and the bars become infinitely easier to cut. Make them the day before you need them — your future self will thank you.
Variations & Adaptations
One of the best things about this recipe is how easy it is to adapt. Here are some variations I’ve tried and loved:
Gluten-Free Version : Use gluten-free gingersnap cookies for the crust. I’ve tested this with several brands and they all work well. Just make sure to check your pumpkin puree label — most are naturally gluten-free.
Dairy-Free Adaptation : Substitute the cream cheese with a high-quality dairy-free version, use dairy-free butter for the crust, and replace the cottage cheese with silken tofu (blended until smooth). The texture will be slightly less rich but still delicious.
Pumpkin Spice Latte Twist : Add 1 tablespoon of instant espresso powder dissolved in 1 teaspoon of hot water to the filling. The coffee flavor deepens the pumpkin spice and makes these taste like your favorite fall drink in bar form.
Chocolate Lover’s Version : Melt ½ cup of dark chocolate chips and drizzle it over the cooled bars before refrigerating. The chocolate and ginger combination is surprisingly amazing.
Mini Bar Option : Make these in a mini muffin tin for bite-sized treats. Press about a tablespoon of crust into each well, fill with cheesecake mixture, and bake for 15 to 18 minutes. Perfect for holiday cookie exchanges.
Serving & Storage Suggestions
These bars are incredibly versatile when it comes to serving. I love them cold straight from the fridge on a warm fall afternoon. But they’re also fantastic at room temperature, especially if you’re serving them after a big Thanksgiving dinner when everyone wants something that isn’t piping hot.
For presentation, I arrange the bars on a wooden board or a white platter and top each one with a rosette of whipped cream. A light dusting of cinnamon or pumpkin pie spice on top adds visual appeal. If I’m feeling fancy, I add a few candied pecans or a drizzle of caramel sauce.
These pair beautifully with coffee, chai tea, or a glass of cold milk. For an adult gathering, try them with a dessert wine like Moscato or a spiced rum cocktail.
Storage Instructions : Store any leftover bars in an airtight container in the refrigerator for up to 5 days. They actually taste better on day two or three as the flavors continue to develop. You can also freeze them for up to 3 months. Wrap each bar individually in plastic wrap, then place them in a freezer-safe bag. Thaw overnight in the refrigerator before serving.
To reheat, I don’t recommend microwaving — it makes the crust soggy. Instead, let them sit at room temperature for about 15 minutes before serving. The texture will be perfect.
Nutritional Information & Benefits
Here’s the approximate nutritional breakdown for one bar (based on 9 servings):
- Calories: 385
- Total Fat: 24g
- Saturated Fat: 14g
- Cholesterol: 105mg
- Sodium: 320mg
- Total Carbohydrates: 38g
- Dietary Fiber: 2g
- Sugars: 26g
- Protein: 8g
These bars aren’t health food, but they do offer some nutritional benefits. Pumpkin is packed with vitamin A and fiber, which supports eye health and digestion. The cottage cheese adds protein and calcium, and the ginger in the crust has anti-inflammatory properties. Plus, making them at home means you control the quality of ingredients — no preservatives or artificial flavors.
If you’re watching your sugar intake, you can reduce the sugar in the filling by ¼ cup without affecting the texture too much. The pumpkin adds natural sweetness that helps compensate.
Conclusion
These pumpkin cheesecake bars with gingersnap crust have become a staple in my fall baking rotation, and I have a feeling they’ll become one in yours too. They capture everything I love about autumn — the warmth, the spice, the comfort of being in a kitchen while the world outside turns golden and crisp.
What I love most about this recipe is that it’s forgiving. You don’t need to be a pastry chef to pull it off. You just need good ingredients, a little patience while they chill, and maybe someone to share them with. I’ve made these for Thanksgiving dinners, for casual Sunday afternoons, and for no reason at all except that the weather turned cool and I wanted something cozy.
So go ahead and make them your own. Add extra cinnamon if that’s your thing. Skip the whipped cream. Double the crust because you love ginger as much as I do. That’s the beauty of baking — every batch tells a slightly different story.
I’d love to hear how yours turn out. Drop a comment below and let me know if you tried any variations, or tag me in your photos on social media. Happy baking, friend!
Frequently Asked Questions
Can I use pumpkin pie filling instead of pumpkin puree?
No, I wouldn’t recommend it. Pumpkin pie filling already has sugar and spices added, which will throw off the sweetness and texture of these bars. Stick with 100% pure pumpkin puree for the best results.
Why did my cheesecake bars crack on top?
Cracks usually happen from overbaking or sudden temperature changes. Make sure you pull the bars out while the center still jiggles slightly. Also, let them cool gradually on the counter before moving them to the fridge. A quick temperature drop can cause cracking.
Can I make these bars without a food processor?
Absolutely. Put the gingersnaps in a zip-top bag and crush them with a rolling pin or the bottom of a heavy pan. For the cottage cheese, you can blend it in a regular blender or even press it through a fine-mesh strainer with a spoon. It takes a little more effort, but it works.
How do I know when the bars are done baking?
The edges should look set and slightly puffed, but the center should still wobble when you gently shake the pan. Think of it like Jell-O — it should move as one unit, not ripple like liquid. If a toothpick inserted in the center comes out clean, you’ve overbaked them.
Can I freeze these pumpkin cheesecake bars?
Yes, they freeze beautifully. Wrap each bar individually in plastic wrap, then place them in a freezer-safe bag or container. They’ll keep for up to 3 months. Thaw overnight in the refrigerator before serving. The texture stays creamy and delicious.
Pin This Recipe!
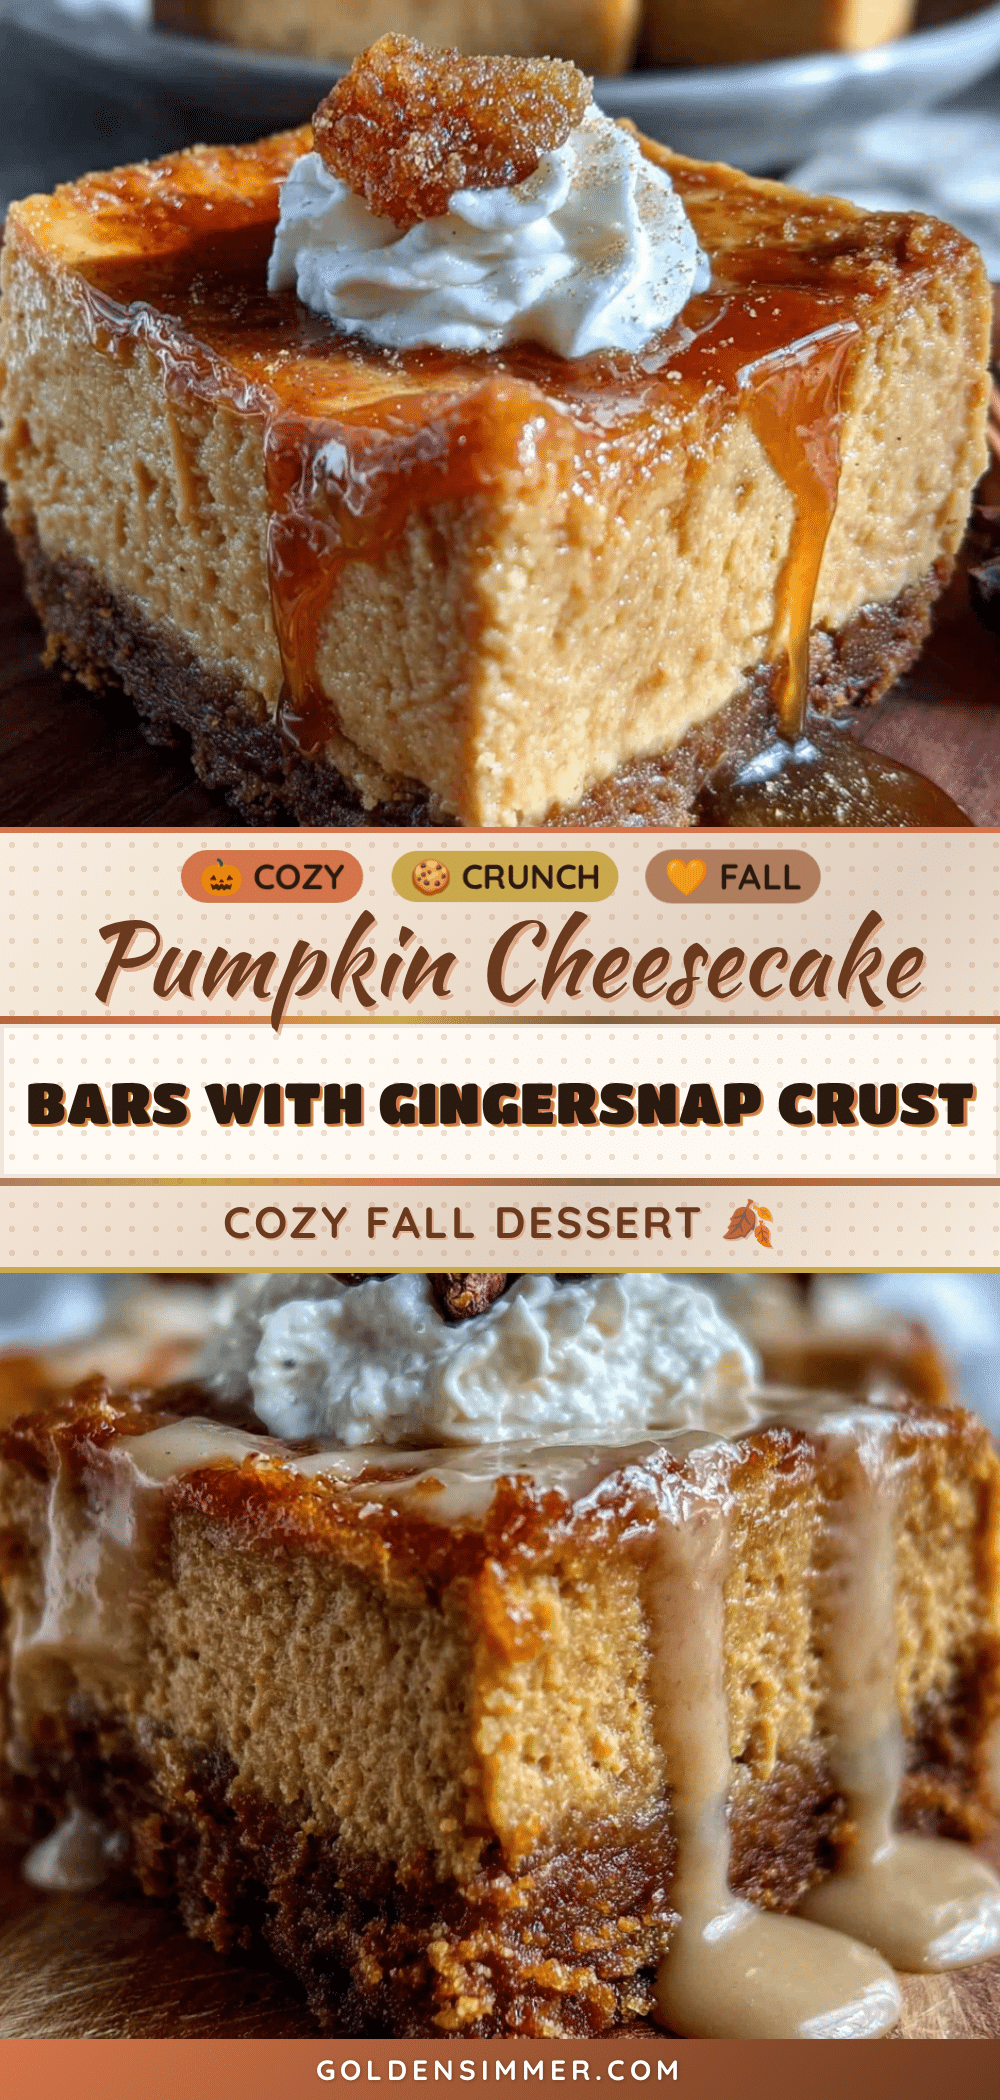
Cozy Pumpkin Cheesecake Bars with Gingersnap Crust
These pumpkin cheesecake bars feature a spicy gingersnap crust and a creamy, tangy pumpkin filling. They’re easy to make, perfect for fall gatherings, and guaranteed to be a crowd-pleaser.
- Prep Time: 20 minutes
- Cook Time: 35-40 minutes
- Total Time: 4 hours 55 minutes (includes chilling)
- Yield: 9-16 servings 1x
- Category: Dessert
- Cuisine: American
Ingredients
- 2 cups (240g) crushed gingersnap cookies (about 30 cookies)
- 6 tablespoons (85g) unsalted butter, melted
- 2 tablespoons (25g) granulated sugar
- ¼ teaspoon salt
- 16 ounces (452g) cream cheese, softened
- ½ cup (100g) granulated sugar
- ¼ cup (50g) packed brown sugar (light or dark)
- 1 cup (240g) pumpkin puree (not pumpkin pie filling)
- ½ cup (120g) cottage cheese (full-fat or 2%)
- 2 large eggs, room temperature
- 1 teaspoon vanilla extract
- 1½ teaspoons pumpkin pie spice
- ½ teaspoon cinnamon
- ¼ teaspoon salt
- ½ cup (120ml) heavy cream (for topping, optional)
- 1 tablespoon powdered sugar (for topping, optional)
- Crushed gingersnaps or cinnamon (for topping, optional)
Instructions
- Preheat oven to 350°F (175°C). Line a 9×9-inch baking pan with parchment paper, leaving overhang on two sides. Lightly spray with non-stick spray.
- Make the crust: Pulse gingersnap cookies in a food processor until fine crumbs. In a medium bowl, combine crumbs with melted butter, 2 tablespoons sugar, and ¼ teaspoon salt. Press firmly into the bottom of the prepared pan. Bake for 10 minutes. Set aside to cool slightly.
- Blend cottage cheese in a food processor or blender until completely smooth (about 30 seconds). Set aside.
- Make the filling: In a large bowl, beat softened cream cheese with an electric mixer on medium speed until smooth and fluffy (about 2 minutes). Add both sugars and beat for 1 minute. Add pumpkin puree, blended cottage cheese, vanilla, pumpkin pie spice, cinnamon, and ¼ teaspoon salt. Mix on low until just combined. Add eggs one at a time, mixing on low after each addition until just incorporated.
- Pour filling over the pre-baked crust. Spread evenly. Tap the pan gently on the counter to release air bubbles. Bake for 35-40 minutes, until edges are set and center jiggles slightly. If top browns too quickly, tent with foil after 25 minutes.
- Cool the pan on a wire rack to room temperature (1-2 hours). Cover with plastic wrap and refrigerate for at least 4 hours, preferably overnight.
- To serve, use parchment handles to lift the block out of the pan. Cut into 9 or 16 squares with a sharp knife (wipe clean between cuts). Serve cold or at room temperature with whipped cream and crushed gingersnaps, if desired.
Notes
Don’t skip blending the cottage cheese for a smooth texture. Use room temperature ingredients for best results. Watch baking time carefully to avoid overbaking. For clean cuts, use a hot knife wiped between slices. Chilling overnight improves texture and flavor.
Nutrition
- Serving Size: 1 bar (based on 9 se
- Calories: 385
- Sugar: 26
- Sodium: 320
- Fat: 24
- Saturated Fat: 14
- Carbohydrates: 38
- Fiber: 2
- Protein: 8
Keywords: pumpkin cheesecake bars, gingersnap crust, fall dessert, Thanksgiving dessert, easy cheesecake bars



