Love this? Save it for later!
Share the inspiration with your friends
My neighbor Marta watched me struggling with a piping bag one rainy October afternoon. I was trying to get the perfect swirl on a batch of cupcakes, and honestly, it was a disaster. Buttercream was leaking out the bottom, my hands were shaking, and I was about to toss the whole thing in the trash. She didn’t say anything at first. She just stood at her kitchen window, a cup of tea in hand, watching me through the glass with this knowing little smile. Then she tapped on the window and motioned for me to come over.
When I walked into her kitchen, she was already pulling butter out of the fridge. “Forget the swirl,” she said, wiping her hands on her apron. “Let me show you something better. Something with a little… personality.” She handed me a cold stick of butter and a bag of almonds. “We’re making witch fingers,” she said. “For the kids. For the fun of it.” I had never made anything like them before. I mean, I’d made shortbread, sure. But shortbread that looked like creepy, knobby witch fingers? That was new territory.
We spent the next two hours in her cozy kitchen, rain tapping against the windows, the smell of butter and vanilla filling the air. She showed me how to shape the dough into long, uneven fingers, how to use a knife to create knuckle lines, and how to press an almond gently into the tip for a fingernail. She laughed when I made mine too fat. “They look like sausage fingers, not witch fingers,” she joked. But she didn’t fix them. She let me keep them that way. “Imperfect is better,” she said. “Witches aren’t perfect. That’s the whole point.”
That day, those cookies became more than a recipe. They became a memory. And now, every fall, I make a batch of these Cozy Witch Finger Shortbread Cookies with Almond Fingernails. They’re spooky but not scary, fun but not fussy, and they always, always make people smile. Maybe you’ve been there — standing in your kitchen, trying to make something perfect, and realizing that the imperfect version is actually the one worth keeping. That’s what these cookies are all about.
Why You’ll Love This Recipe
Let me tell you why these cookies have become my go-to Halloween treat. First off, they are ridiculously easy to make. The dough comes together in about 10 minutes with just a handful of ingredients you probably already have in your pantry. No stand mixer required. No fancy techniques. Just butter, sugar, flour, and a little patience.
- Spooky but Sweet: These cookies look like creepy witch fingers, but they taste like buttery, melt-in-your-mouth shortbread. The almond “fingernail” adds a lovely crunch and a subtle nutty flavor that balances the sweetness perfectly.
- Perfect for Halloween Parties: Whether you’re hosting a spooky soiree or just want to surprise your kids, these cookies are guaranteed to get a reaction. They’re playful without being gory, which makes them great for all ages.
- Simple Ingredients: No weird extracts, no specialty flours, no food coloring if you don’t want it. You can find everything at your regular grocery store.
- Crowd-Pleaser: I’ve brought these to work potlucks and family gatherings, and they always disappear first. People love the novelty, and they stay for the taste.
- Make-Ahead Friendly: The dough freezes beautifully, so you can prep them weeks in advance and bake them fresh when you need them.
What makes these different from other spooky cookies? It’s the texture. This shortbread is not too crumbly, not too soft — it’s just right. The almond at the tip isn’t just decoration; it becomes this wonderful little surprise when you bite into it. And the best part? You don’t need to be a professional baker to make them look good. In fact, the more uneven and lumpy they are, the more realistic they look. So if you’re someone who gets stressed about perfect baking, this recipe is for you. It’s forgiving. It’s fun. And it tastes like a cozy hug in cookie form.
What Ingredients You Will Need
This recipe calls for simple, pantry-friendly ingredients that come together to create a buttery, tender shortbread with just the right amount of sweetness. Here’s what you’ll need and why each one matters.
- 1 cup (226g) unsalted butter, softened: Butter is the soul of shortbread. It gives the cookies their rich flavor and tender crumb. Make sure it’s at room temperature — not melted, not cold. If you forget to take it out of the fridge, cut it into small cubes and let it sit for 20 minutes. I prefer using a good quality European-style butter like Kerrygold for extra richness, but any unsalted butter works fine.
- ½ cup (100g) granulated sugar: Shortbread is not overly sweet, so this amount is just right. You want the butter flavor to shine. If you prefer a slightly sweeter cookie, you can add an extra tablespoon, but I wouldn’t go overboard.
- 1 large egg yolk: The yolk adds richness and helps bind the dough. Save the egg white for something else, like a quick omelet or to brush on top of another bake.
- 1 teaspoon vanilla extract: Use pure vanilla extract if you can. It adds warmth and depth that imitation vanilla just can’t match. If you’re feeling fancy, you can use vanilla bean paste for those little specks.
- ½ teaspoon almond extract: This is optional, but I love it. It complements the almond fingernails and gives the cookies a subtle, almost marzipan-like flavor. Be careful not to add too much — almond extract is potent.
- 2 cups (250g) all-purpose flour: Regular all-purpose flour works perfectly here. Don’t use bread flour; it has too much protein and will make the cookies tough. If you need a gluten-free version, I’ve had good results with a 1:1 gluten-free baking flour blend.
- ¼ teaspoon salt: Salt balances the sweetness and enhances the butter flavor. I use fine sea salt. If you’re using salted butter, reduce this to a tiny pinch or omit it entirely.
- ¾ cup (about 60-70) whole almonds, blanched or raw: These become the fingernails. Blanched almonds (with the skin removed) look more realistic, but raw almonds with the skin on work too — they just look a little darker. You can also use sliced almonds for a thinner nail, but whole almonds are more dramatic.
- Red jam or food coloring (optional): A tiny dab of red jam at the base of the almond creates a “bloody” cuticle effect. I use raspberry jam because it’s the right color and adds a hint of fruity sweetness. You can also use red food coloring mixed with a little corn syrup.
That’s it. No complicated ingredients. No special trips to a baking supply store. You probably have most of this in your kitchen right now, except maybe the almonds. And honestly, you could even skip the almonds and just press a dent into the tip of each finger — they’d still look creepy and delicious.
Equipment Needed
You don’t need a lot of fancy equipment for this recipe, which is one of the reasons I love it. Here’s what you’ll need:
- Mixing bowls: One large bowl for the dough and one small bowl for the egg yolk mixture.
- Electric hand mixer or stand mixer: You can cream the butter and sugar by hand with a wooden spoon, but it takes some elbow grease. A hand mixer makes it much easier. If you’re using a stand mixer, use the paddle attachment.
- Measuring cups and spoons: For accurate measurements. I recommend using a kitchen scale for the flour — it’s more precise and prevents dry cookies.
- Baking sheets: Two large baking sheets lined with parchment paper or silicone baking mats. Parchment paper is cheaper and works great.
- Plastic wrap: For chilling the dough. You can also use a reusable beeswax wrap if you’re trying to reduce waste.
- Butter knife or bench scraper: For creating the knuckle lines on the cookies. A regular butter knife works perfectly.
- Small brush (optional): For applying the jam or food coloring to the “cuticles.” I use a clean art paintbrush that I keep just for baking.
- Cooling rack: To let the cookies cool completely. If you don’t have one, you can cool them on the baking sheet, but they’ll take longer and might get a little soggy on the bottom.
I’ve made these cookies with just a bowl and a fork before. It’s not ideal, but it works. So don’t stress if you don’t have a stand mixer. Your hands are the most important tool you have.
Preparation Method
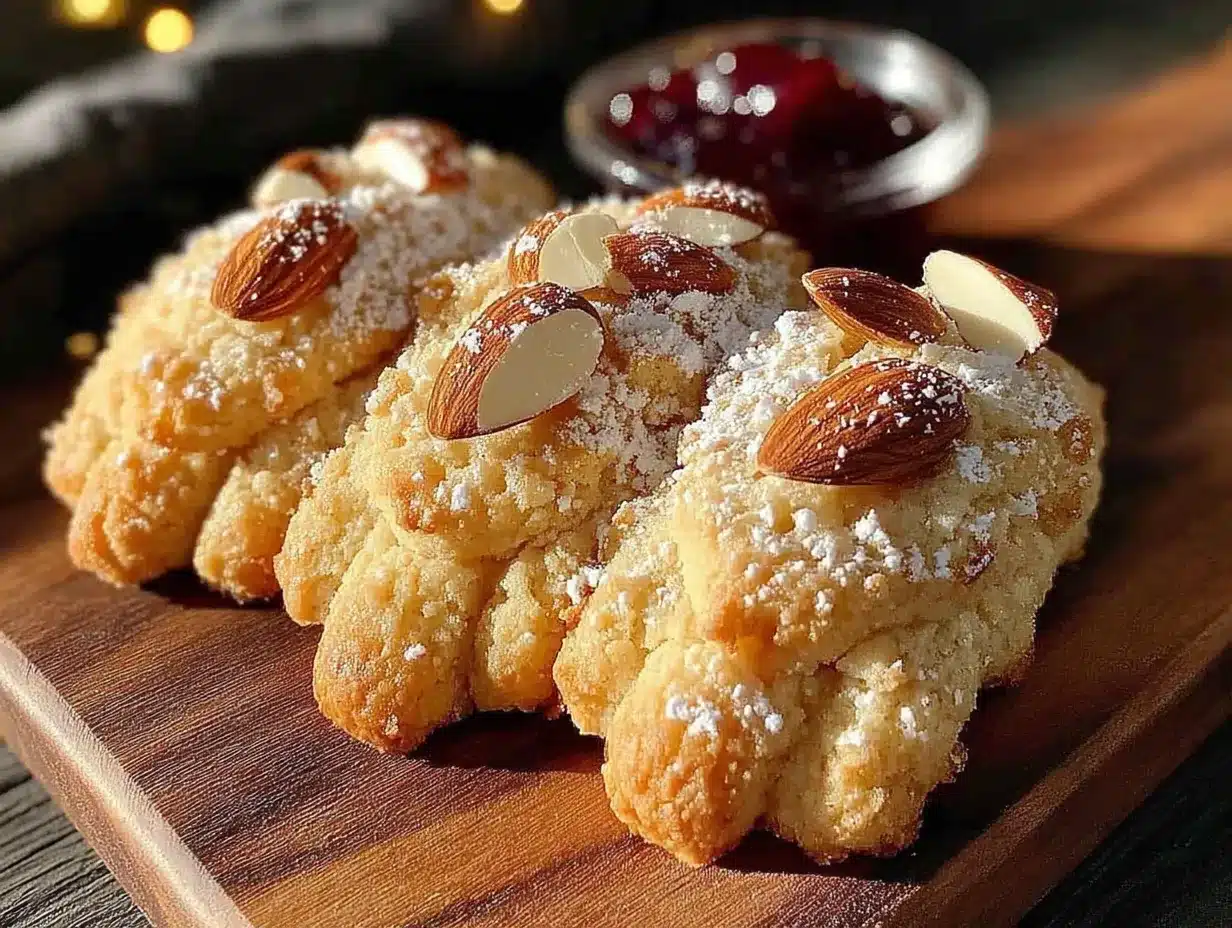
- Cream the butter and sugar: In a large mixing bowl, beat the softened butter and granulated sugar together until light and fluffy. This takes about 2-3 minutes with an electric mixer on medium speed. You want the mixture to look pale and airy. Scrape down the sides of the bowl once or twice.
- Add the wet ingredients: Beat in the egg yolk, vanilla extract, and almond extract (if using) until well combined. The mixture might look a little curdled at this point — that’s normal. Don’t panic.
- Mix in the dry ingredients: In a separate bowl, whisk together the flour and salt. Gradually add the flour mixture to the butter mixture, mixing on low speed until just combined. You should have a soft, slightly sticky dough. If it feels too sticky to handle, add another tablespoon of flour. If it feels too dry, add a teaspoon of cold water.
- Chill the dough: Turn the dough out onto a piece of plastic wrap. Pat it into a disc, wrap it tightly, and refrigerate for at least 30 minutes. Chilling is crucial — it makes the dough easier to shape and helps the cookies hold their form while baking. You can chill it for up to 3 days if you want to prep ahead.
- Preheat the oven: About 15 minutes before you’re ready to bake, preheat your oven to 325°F (163°C). Line two baking sheets with parchment paper.
- Shape the fingers: Take the chilled dough and pinch off a piece about the size of a walnut. Roll it between your palms into a long, uneven log — about 3-4 inches long and slightly thicker at one end (that’s the base of the finger). Place it on the prepared baking sheet. Repeat with the remaining dough, spacing the fingers about 2 inches apart. They don’t spread much, so you can fit quite a few on each sheet.
- Create the knuckles: Using the back of a butter knife, gently press lines into each finger to create knuckles. Make 2-3 lines per finger. Don’t press too deep — you want the lines to be visible but not cut all the way through the dough. You can also gently squeeze the dough between your thumb and forefinger to create a slightly wider knuckle shape.
- Add the fingernails: Press a whole almond firmly into the tip of each finger. The pointed end of the almond should face outward, like a nail. Press gently but firmly so it sticks. If the almond falls off during baking, it wasn’t pressed in enough.
- Optional: Add “blood”: If you want a gory touch, use a small brush to dab a tiny bit of red jam or food coloring at the base of each almond, where it meets the dough. This creates a “bloody cuticle” effect. I do this for Halloween parties but skip it for family baking.
- Bake: Bake for 12-15 minutes, or until the cookies are just set and the edges are barely golden. Shortbread should not be deeply browned. The cookies will look pale, and that’s exactly what you want. Let them cool on the baking sheet for 5 minutes, then transfer to a cooling rack to cool completely.
A quick note: The cookies will be very soft when they come out of the oven. They firm up as they cool, so don’t try to move them too soon. And if some of the almonds fall off during baking, just press them back on while the cookies are still warm. It happens to me almost every batch.
Cooking Tips & Techniques
I’ve made these cookies more times than I can count, and I’ve learned a few things along the way. Let me share some tips that will save you from my mistakes.
Don’t overmix the dough. This is the number one mistake people make with shortbread. Overmixing develops the gluten in the flour, which makes the cookies tough instead of tender. Mix just until the flour disappears into the dough. A few streaks of flour are fine — they’ll work themselves out when you shape the dough.
Chill the dough thoroughly. I know I said this already, but it’s worth repeating. Warm dough is sticky and impossible to shape. If you’re in a hurry, you can pop the dough in the freezer for 15 minutes instead of the fridge for 30. But don’t skip the chilling step entirely. Trust me, I’ve tried. The cookies spread into blobs, and your witch fingers end up looking like witch pancakes.
Keep your hands cool. If the dough starts getting sticky while you’re shaping the fingers, wash your hands in cold water and dry them thoroughly. The heat from your hands can soften the butter in the dough, making it harder to work with. You can also chill the shaped cookies on the baking sheet for 10 minutes before baking to help them hold their shape.
Vary the shapes. Real fingers aren’t all the same size, so don’t make your cookies uniform. Make some short and stubby, some long and thin, some with crooked knuckles. The more varied they are, the more realistic (and creepy) they look. I once made a batch where I intentionally bent a few fingers at odd angles, and they were the first ones to get eaten.
Watch the bake time. Ovens vary wildly. My oven runs hot, so I start checking at 11 minutes. You want the cookies to be set but not browned. If the edges start turning golden, they’re overbaked. The cookies will continue to cook on the hot baking sheet after you take them out, so err on the side of underbaking.
One more thing — I once forgot to add the sugar. Yes, the entire half cup. I realized my mistake when I tasted the dough and it was just salty butter and flour. I had to start over. So double-check your ingredients before you mix. Learn from my absent-mindedness.
Variations & Adaptations
One of the best things about this recipe is how easy it is to adapt. Here are some variations I’ve tried and loved.
Chocolate Witch Fingers: Replace ¼ cup of the flour with unsweetened cocoa powder. The cookies will be darker and look even more realistic — like aged, withered witch fingers. The chocolate flavor pairs beautifully with the almond fingernails. I made these for a Halloween party last year, and they were a huge hit.
Gluten-Free Version: Use a 1:1 gluten-free baking flour blend (the kind that contains xanthan gum). I’ve tried this with Bob’s Red Mill 1:1 Baking Flour, and the texture was surprisingly close to the original. The cookies might be slightly more crumbly, so handle them gently.
Vegan Adaptation: Substitute the butter with a high-quality vegan butter (like Miyoko’s or Earth Balance) and use a flax egg (1 tablespoon ground flaxseed mixed with 3 tablespoons water, let sit for 5 minutes). The texture won’t be exactly the same — vegan shortbread tends to be a bit more fragile — but the flavor is still wonderful.
Different “Nails”: If you don’t have almonds, you can use pecan halves, walnut pieces, or even a whole cashew. Each nut gives a different look. Pecans are longer and more elegant, walnuts are chunkier and more gnarled. You can also use sliced almonds for a more delicate nail shape.
Spooky Glaze: After the cookies cool, drizzle them with a simple powdered sugar glaze (1 cup powdered sugar mixed with 2 tablespoons milk) and add a drop of black food coloring for a gray, withered look. It adds sweetness and makes them look even more Halloween-appropriate.
My personal favorite variation is the chocolate version with a tiny dab of raspberry jam at the cuticle. The dark chocolate “skin” with the red “blood” is just the right amount of creepy for a Halloween party. Plus, chocolate and raspberry is a classic combination that never disappoints.
Serving & Storage Suggestions
These cookies are best served at room temperature, but they’re also delicious slightly warm. The texture is tender and buttery, and the almond adds a nice crunch. Arrange them on a platter in a way that looks a little chaotic — fingers pointing in different directions, some overlapping — for maximum creepiness. I like to serve them on a black or dark purple plate to enhance the spooky vibe.
For a Halloween party, arrange the cookies on a platter with a few “severed” fingers scattered around. You can even prop one up in a small glass of milk for a dramatic effect. Kids love it. Adults love it too, even if they pretend to be grossed out.
These cookies pair wonderfully with a warm drink. A cup of hot apple cider, a spiced chai latte, or even a simple glass of cold milk are all excellent choices. The buttery shortbread balances the spice of the cider or the warmth of the chai.
Storage: Store the cookies in an airtight container at room temperature for up to 5 days. They’ll stay fresh and tender. If you live in a humid climate, add a piece of bread to the container to absorb excess moisture — it helps keep the cookies crisp.
Freezing: You can freeze the baked cookies for up to 3 months. Place them in a single layer in a freezer-safe container, with parchment paper between layers. To thaw, let them sit at room temperature for about 30 minutes. You can also freeze the unbaked dough. Shape the fingers, place them on a baking sheet, and freeze until solid. Then transfer them to a freezer bag. When you’re ready to bake, add 2-3 minutes to the baking time — no need to thaw first.
One note: The almond fingernails can soften slightly after a day or two in storage. If you want them to stay crunchy, add the almonds after baking. Press them into the warm cookies right out of the oven, and they’ll stick without softening.
Nutritional Information & Benefits
Let’s be real — these are cookies. They’re a treat, not a health food. But here’s the nutritional breakdown per cookie (based on 30 cookies):
- Calories: Approximately 110-120
- Fat: 7g (4g saturated)
- Carbohydrates: 12g (4g sugar)
- Protein: 2g
- Fiber: 0.5g
- Sodium: 40mg
The almonds provide a small amount of healthy fats, vitamin E, and magnesium. The butter, while high in saturated fat, does contain some vitamin A and butyrate, which is beneficial for gut health in small amounts. But honestly, the main benefit here is the joy they bring. Baking these cookies is a fun activity to do with kids, and sharing them with friends and family creates memories that last longer than any nutritional value.
If you’re watching your sugar intake, you can reduce the sugar to ⅓ cup (66g) without significantly affecting the texture. The cookies will be less sweet, but still delicious. For a lower-fat version, you can replace half the butter with Greek yogurt, but the texture will be more cake-like than shortbread.
These cookies contain gluten, dairy, and nuts (almonds). If you have allergies, please use the substitutions mentioned in the Variations section.
Conclusion
These Cozy Witch Finger Shortbread Cookies with Almond Fingernails are more than just a Halloween treat. They’re a reminder that baking doesn’t have to be perfect to be wonderful. The lumpy fingers, the uneven knuckles, the almond that falls off and gets pressed back on — those are the things that make these cookies special. They’re handmade. They’re human. And they’re absolutely delicious.
I hope you give this recipe a try. Make them with your kids, your friends, or just for yourself on a cozy fall evening. Customize them however you like — add chocolate, switch up the nuts, go wild with the red jam. There’s no wrong way to make a witch finger.
When you do make them, I’d love to hear about it. Leave a comment below and tell me how they turned out. Did you make them spooky or sweet? Did your kids scream or laugh? Did you eat three before anyone else got a chance? (I won’t judge.) Share a photo on social media and tag me — I love seeing your creations. Now go preheat your oven and make some magic. Happy Halloween!
Frequently Asked Questions
Can I make these cookies ahead of time?
Absolutely. You can make the dough up to 3 days in advance and keep it refrigerated. You can also freeze the shaped cookies for up to 3 months. Bake them straight from the freezer, just add a couple of minutes to the baking time.
Why did my cookies spread and lose their shape?
This usually happens when the dough isn’t chilled enough. Make sure you chill the dough for at least 30 minutes before shaping, and chill the shaped cookies for 10 minutes before baking. Also, make sure your butter isn’t too soft when you start.
Can I use salted butter instead of unsalted?
Yes, you can. Just reduce or omit the added salt in the recipe. If you’re using salted butter, skip the ¼ teaspoon of salt entirely, or use just a tiny pinch.
My almonds keep falling off during baking. What am I doing wrong?
You need to press the almond firmly into the dough. Make a small indent with your finger first, then press the almond in so it’s partially embedded. If they still fall off, you can press them back on while the cookies are still warm out of the oven.
Can I make these cookies without almond extract?
Of course. The almond extract is optional. The cookies will still taste like buttery shortbread, and the almond fingernails will provide plenty of almond flavor. If you don’t have almond extract, just add an extra ½ teaspoon of vanilla extract instead.
Pin This Recipe!
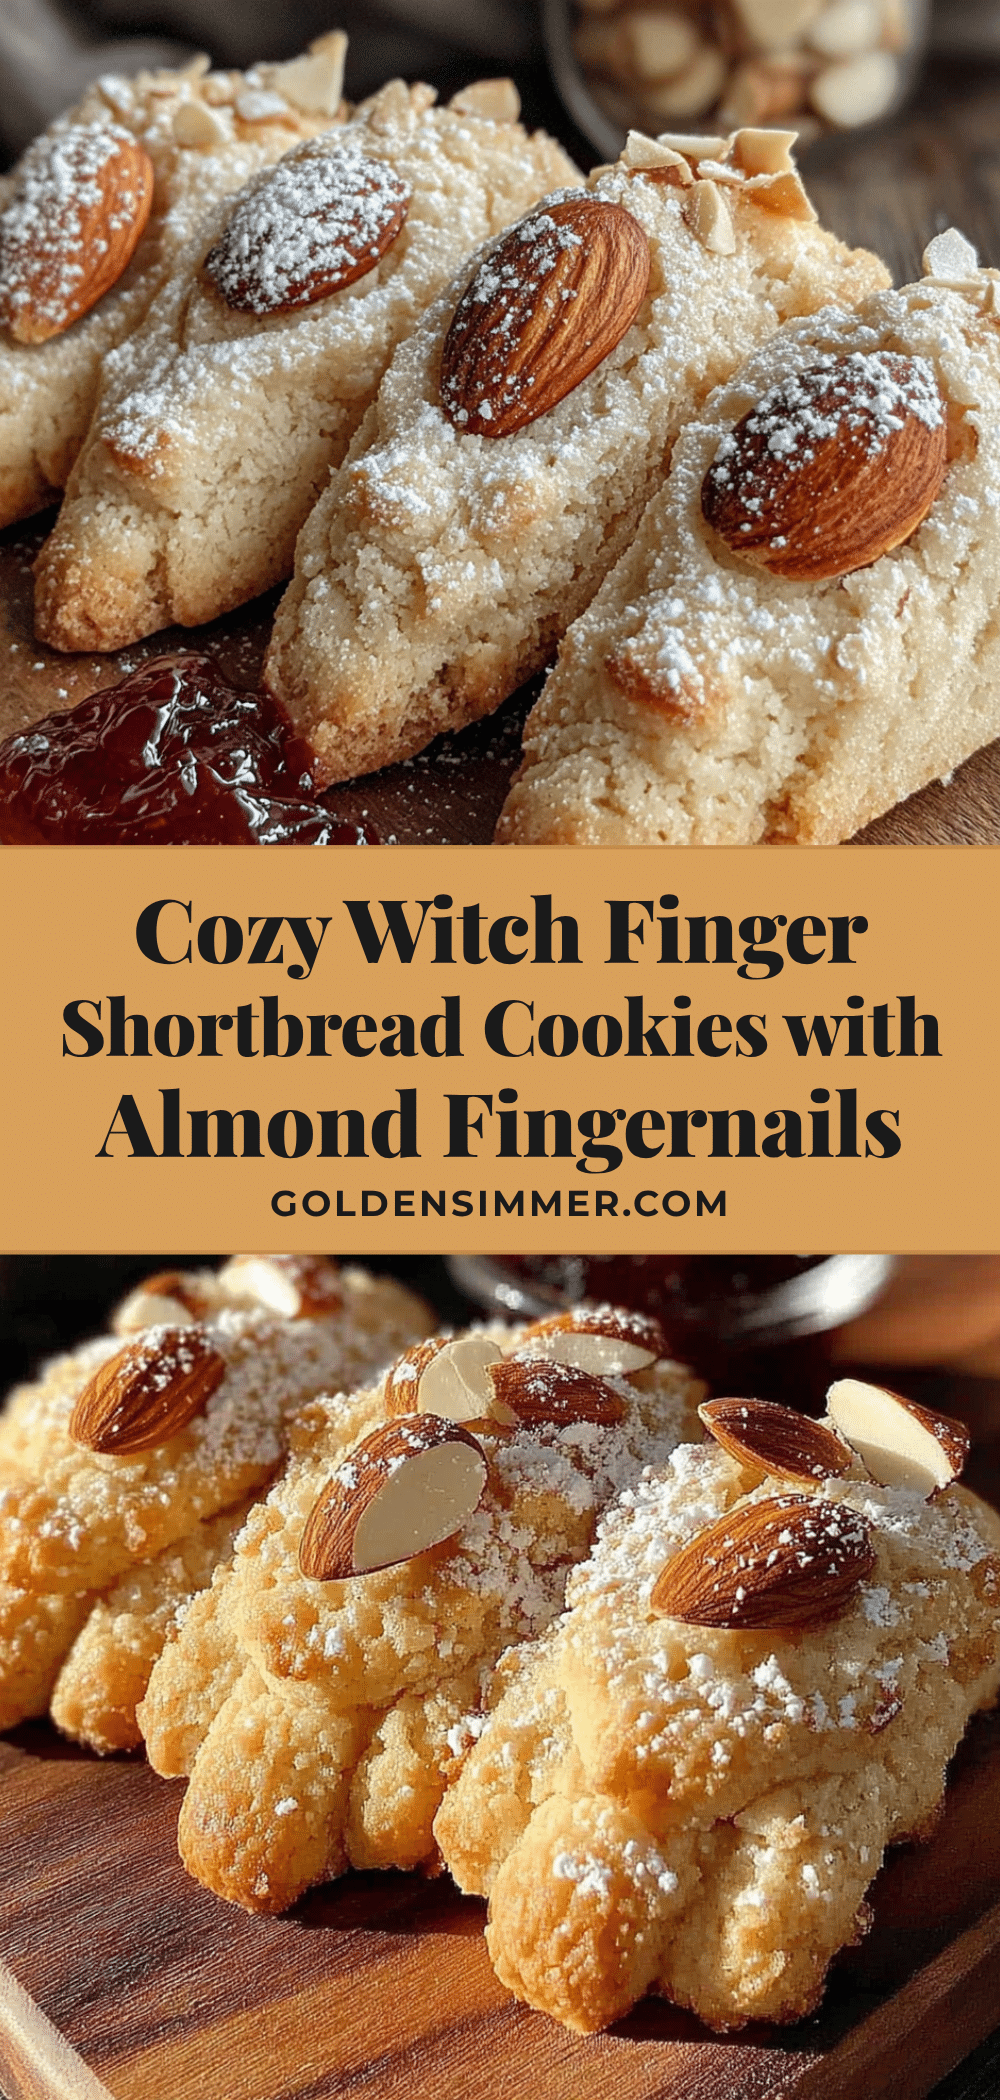
Cozy Witch Finger Shortbread Cookies with Almond Fingernails
These spooky but sweet shortbread cookies look like creepy witch fingers with almond fingernails. They’re easy to make, fun to decorate, and perfect for Halloween parties or cozy fall baking.
- Prep Time: 15 minutes
- Cook Time: 15 minutes
- Total Time: 1 hour (including chilling)
- Yield: 30 cookies 1x
- Category: Dessert
- Cuisine: American
Ingredients
- 1 cup (226g) unsalted butter, softened
- ½ cup (100g) granulated sugar
- 1 large egg yolk
- 1 teaspoon vanilla extract
- ½ teaspoon almond extract (optional)
- 2 cups (250g) all-purpose flour
- ¼ teaspoon salt
- ¾ cup (about 60-70) whole almonds, blanched or raw
- Red jam or food coloring (optional)
Instructions
- Cream the butter and sugar: In a large mixing bowl, beat the softened butter and granulated sugar together until light and fluffy, about 2-3 minutes on medium speed.
- Add the wet ingredients: Beat in the egg yolk, vanilla extract, and almond extract (if using) until well combined.
- Mix in the dry ingredients: In a separate bowl, whisk together the flour and salt. Gradually add to the butter mixture, mixing on low speed until just combined. The dough should be soft and slightly sticky.
- Chill the dough: Turn the dough out onto plastic wrap, pat into a disc, wrap tightly, and refrigerate for at least 30 minutes (up to 3 days).
- Preheat the oven: About 15 minutes before baking, preheat oven to 325°F (163°C). Line two baking sheets with parchment paper.
- Shape the fingers: Pinch off walnut-sized pieces of dough and roll into 3-4 inch long uneven logs, slightly thicker at one end. Place on prepared baking sheets, spacing 2 inches apart.
- Create the knuckles: Use the back of a butter knife to gently press 2-3 lines into each finger to create knuckles. Gently squeeze between thumb and forefinger to widen knuckles.
- Add the fingernails: Press a whole almond firmly into the tip of each finger, pointed end outward.
- Optional: Add ‘blood’: Use a small brush to dab a tiny bit of red jam or food coloring at the base of each almond for a bloody cuticle effect.
- Bake: Bake for 12-15 minutes, until just set and edges are barely golden. Cool on baking sheet for 5 minutes, then transfer to a cooling rack to cool completely.
Notes
Chill the dough thoroughly to prevent spreading. Keep hands cool if dough gets sticky. Vary finger shapes for realism. Watch bake time to avoid overbrowning. If almonds fall off, press back on while cookies are warm.
Nutrition
- Serving Size: 1 cookie
- Calories: 115
- Sugar: 4
- Sodium: 40
- Fat: 7
- Saturated Fat: 4
- Carbohydrates: 12
- Fiber: 0.5
- Protein: 2
Keywords: witch finger cookies, Halloween cookies, shortbread cookies, almond fingernails, spooky cookies, easy Halloween treat



