Love this? Save it for later!
Share the inspiration with your friends
Introduction
“Last Saturday afternoon, I popped over to my neighbor’s place just to borrow a cup of sugar, and before I even stepped inside, this warm, inviting scent of roasted green chiles and melted cheese pulled me in from the porch. My neighbor, Carlos, wasn’t making a big deal out of it—just casually rolling tortillas and stirring a creamy sauce like it was no big thing. Honestly, I stood there for a good five minutes, watching how effortlessly he whipped up these creamy green chile chicken enchiladas with Hatch chile sauce, while chatting about his weekend plans. It hit me how sometimes the best recipes don’t come from fancy dinners or holiday gatherings, but the quiet, everyday moments where someone’s cooking what they love without fuss.
What really stuck with me was the simplicity and that little twist of Hatch chile sauce—something I hadn’t seen done quite like that before. You know that feeling when a recipe surprises you by being both comforting and exciting? That’s exactly what happened. I tried to jot down his steps, made a small mess in my own kitchen afterward, and now this recipe has become a staple in my rotation. Maybe you’ve been there—caught off guard by a smell or a flavor that just feels like home. Well, if you love a creamy, slightly spicy chicken enchilada that’s easy enough for a casual weeknight but special enough to impress, this one’s for you.”
Why You’ll Love This Recipe
- Quick & Easy: Ready in under 45 minutes, perfect for busy evenings or when you’re craving comfort food without the wait.
- Simple Ingredients: No fancy or hard-to-find items—mostly pantry staples and Hatch chiles, which you can find fresh or canned depending on the season.
- Perfect for Any Occasion: Whether it’s a casual family dinner, a potluck, or just because you deserve something delicious.
- Crowd-Pleaser: Kids and adults alike fall for the creamy texture with a gentle kick from the green chile sauce.
- Unbelievably Delicious: The combination of tender shredded chicken, creamy sauce, and the smoky, slightly spicy Hatch chile flavor makes it unforgettable.
This isn’t just another chicken enchilada recipe. The Hatch chile sauce is the real game-changer here—it adds a fresh, smoky brightness that balances the creaminess without overpowering. Plus, the sauce is easy to make from scratch, so you avoid the jarred sauces that often taste one-dimensional. I’ve tested this recipe multiple times to get that perfect balance of spice and creaminess, and I promise it’ll have you closing your eyes on the first bite. It’s comfort food with a bit of a southwest twist that feels both familiar and exciting at the same time.
What Ingredients You Will Need
This recipe is built on wholesome, straightforward ingredients that come together in a way that feels special without being complicated. Most of these you probably have on hand, and the Hatch chiles add that unique punch that makes this dish stand out.
- For the Chicken Filling:
- 2 cups cooked chicken, shredded (rotisserie chicken works great here)
- 1 cup shredded Monterey Jack cheese (melts beautifully)
- 1/2 cup diced onions (adds sweetness and texture)
- 1 teaspoon garlic powder (for subtle depth)
- Salt and pepper to taste
- For the Hatch Chile Sauce:
- 4-5 fresh or canned Hatch green chiles, roasted, peeled, and chopped (fresh is best in season; canned works year-round)
- 2 tablespoons unsalted butter
- 2 tablespoons all-purpose flour (use gluten-free flour if needed)
- 2 cups whole milk (or dairy-free milk like almond if preferred)
- 1/2 cup sour cream (for creaminess; can swap with Greek yogurt)
- 1/2 teaspoon ground cumin (adds warm earthiness)
- Salt and freshly ground black pepper, to taste
- For Assembly:
- 8-10 soft corn tortillas (warmed to prevent cracking; use flour tortillas if preferred)
- 1 cup shredded cheddar cheese (for topping)
- Fresh cilantro, chopped (optional garnish)
For the Hatch chiles, I personally recommend grabbing fresh ones from a trusted farmer’s market if it’s late summer or early fall. If not, the canned Hatch chiles from brands like Green Chile Company or Santa Fe work well and save you time. When choosing cheese, Monterey Jack from brands like Tillamook gives a nice creamy melt, but feel free to go with your favorite. The sour cream adds a subtle tang that balances the richness, but Greek yogurt is a great swap if you want a lighter touch.
Equipment Needed
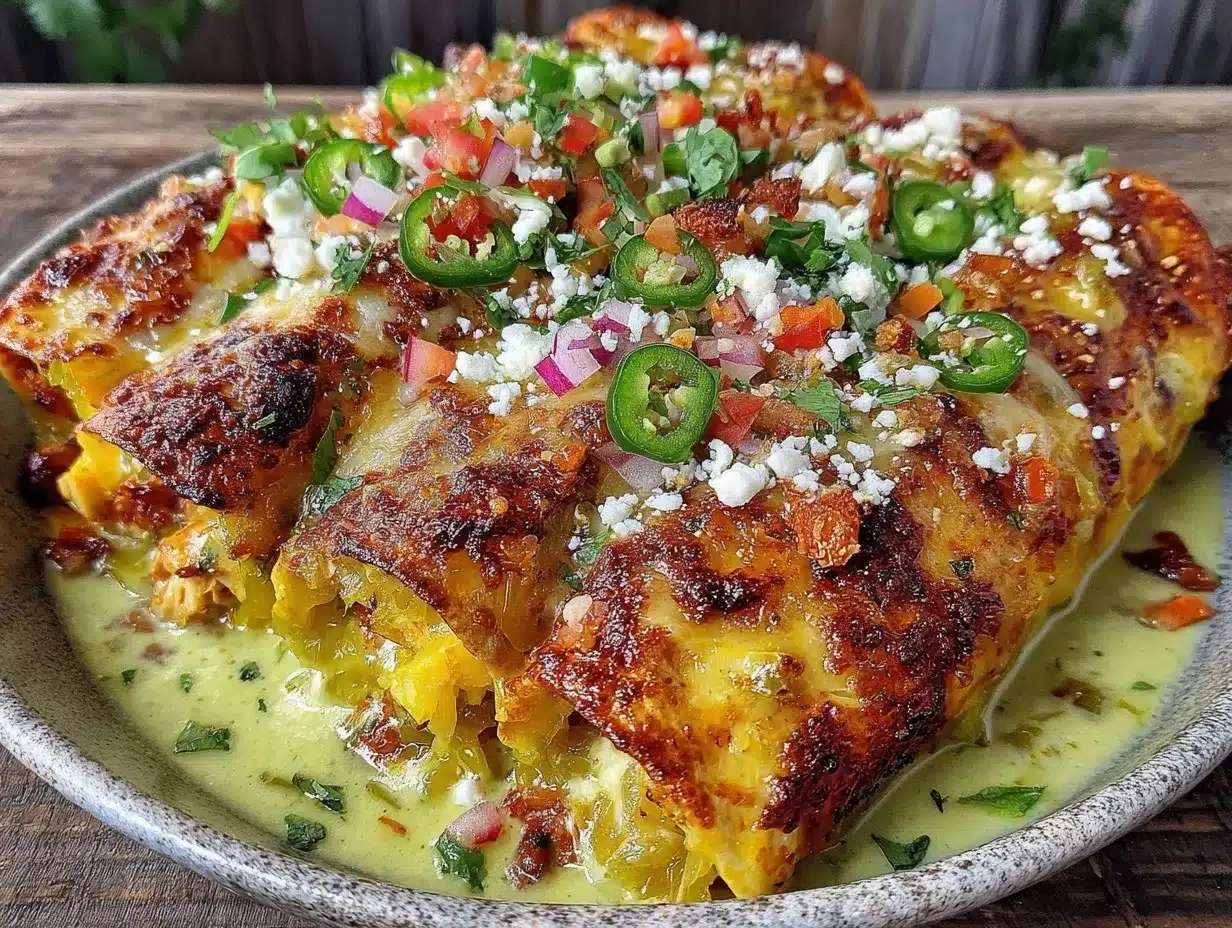
- Large skillet or sauté pan (for making the Hatch chile sauce and sautéing onions)
- Medium mixing bowl (to combine chicken filling)
- Measuring cups and spoons (accuracy helps with the sauce consistency)
- Roasting pan or baking dish (approximately 9×13 inches, to bake the enchiladas)
- Chef’s knife and cutting board (for chopping chiles and onions)
- Spatula or wooden spoon (for stirring sauce)
- Optional: Blender or food processor (to puree the sauce smooth, though not necessary if you like some texture)
If you don’t have a skillet, a heavy-bottomed saucepan works fine for the sauce. For roasting Hatch chiles, you can use your oven broiler or a gas stove flame if you’re comfortable with that. I once tried making the sauce in a microwave in a pinch—not ideal, but it worked! For budget options, basic non-stick pans get the job done without fuss.
Preparation Method
- Prepare the Hatch Chiles: Roast fresh Hatch chiles under the broiler or over an open flame until the skin blisters and chars (about 5-7 minutes). Place them in a sealed bowl or plastic bag to steam for 10 minutes, then peel off skins, remove seeds, and chop roughly. If using canned, drain and chop. (Prep time: 15 minutes)
- Make the Sauce Base: In a large skillet, melt 2 tablespoons of unsalted butter over medium heat. Add 2 tablespoons of flour, whisking constantly to form a roux. Cook for about 1-2 minutes until slightly golden but not browned. Slowly whisk in 2 cups of milk, stirring constantly to avoid lumps. Cook until thickened and creamy, about 5 minutes. (Tip: If sauce gets too thick, add a splash more milk.)
- Add Chiles & Seasoning: Stir in the chopped Hatch chiles, 1/2 teaspoon cumin, salt, and pepper. Simmer on low for 3-4 minutes to meld flavors. Then, remove from heat and stir in 1/2 cup sour cream until smooth and creamy. (The sauce should be velvety with a gentle spicy kick.)
- Prepare the Filling: In a bowl, combine shredded chicken, diced onions, 1 cup Monterey Jack cheese, garlic powder, salt, and pepper. Mix well. (This filling brings a nice balance—cheesy, savory, with a touch of sweetness from the onions.)
- Warm the Tortillas: To prevent cracking, warm each tortilla in a dry skillet or microwave wrapped in a damp towel for 20 seconds. This makes rolling easier and prevents breakage.
- Assemble the Enchiladas: Spread about 1/4 cup of Hatch chile sauce on the bottom of your baking dish. Place a warmed tortilla on a plate, spoon about 1/3 cup of chicken filling onto the center, and roll tightly. Place seam-side down in the baking dish. Repeat with remaining tortillas and filling.
- Top and Bake: Pour the remaining Hatch chile sauce evenly over the rolled enchiladas. Sprinkle 1 cup shredded cheddar cheese on top. Bake at 375°F (190°C) for 20-25 minutes, until bubbly and golden on the edges. (Watch closely in last 5 minutes to avoid over-browning.)
- Garnish and Serve: Remove from oven and let cool for 5 minutes before serving. Sprinkle with fresh cilantro if desired. (The sauce thickens slightly as it cools, helping the enchiladas hold together.)
Pro tip: If you want ultra-smooth sauce, you can blend the chile sauce before adding sour cream, but honestly, I like a bit of texture to keep it rustic. Also, if your sauce feels too spicy, a splash of milk can mellow it out without losing flavor.
Cooking Tips & Techniques
Getting creamy green chile chicken enchiladas just right is a balance of technique and a little patience. Let me share some tips I’ve picked up from multiple tries (and a few kitchen mishaps):
- Roasting the Chiles: Don’t rush this step—charring the skins adds that smoky flavor that sets this sauce apart. If you skip peeling the skins, the sauce can get bitter.
- Making the Roux: Stir the butter and flour constantly on medium heat to avoid burning. A burnt roux will ruin the sauce’s flavor and texture.
- Thickening the Sauce: If it gets too thick, just add a splash of milk slowly. Remember, it will also thicken more as it bakes.
- Warming Tortillas: Skipping this causes cracking and messy enchiladas. Warm tortillas are much easier to roll, trust me.
- Shredding Chicken: Using rotisserie chicken is a time-saver, but shredding it finely helps it blend better with the filling so you get a consistent bite every time.
- Cheese Choice: Monterey Jack melts beautifully and has a mild flavor that complements the Hatch chiles. Cheddar adds sharpness for topping, but feel free to adjust based on preferences.
- Timing: You can prep the sauce and filling ahead of time, then assemble and bake right before dinner. It really helps when juggling a busy schedule.
Variations & Adaptations
This recipe is super flexible depending on your dietary needs or flavor preferences. Here are a few ways I’ve switched it up:
- Vegetarian Version: Skip the chicken and use roasted vegetables like zucchini, corn, and black beans with the same sauce. It’s just as creamy and satisfying.
- Spice Level: If you want more heat, add diced jalapeños or a pinch of cayenne to the sauce. For milder, reduce the amount of Hatch chiles or use mild green chiles instead.
- Dairy-Free: Swap butter with olive oil, use almond or oat milk, and replace sour cream with coconut yogurt. Use dairy-free cheese alternatives for topping.
- Gluten-Free: Use gluten-free flour for the roux and gluten-free tortillas. Corn tortillas are naturally gluten-free, making this recipe easy to adapt.
- Alternative Proteins: Ground turkey or shredded pork both work well here if you want a different protein.
One of my favorite tweaks is adding a handful of fresh corn kernels to the filling for a little sweet crunch, especially when Hatch chiles are in season. It keeps the dish feeling fresh and adds a nice contrast to the creamy sauce.
Serving & Storage Suggestions
These creamy green chile chicken enchiladas are best served hot, fresh out of the oven, with a sprinkle of cilantro and maybe a dollop of sour cream or guacamole on the side. They make a great main dish with a simple side salad or Mexican rice to round out the meal.
If you have leftovers, store them covered in the refrigerator for up to 3 days. To reheat, cover with foil and warm in a 350°F (175°C) oven until heated through, about 15-20 minutes. Microwaving works too, but the sauce might separate slightly.
The flavors actually deepen after a day or two, so if you can wait, the next-day enchiladas taste even better. Just beware that the tortillas might soak up more sauce and get softer, which some people love and others not so much. For longer storage, you can freeze the assembled but unbaked enchiladas in an airtight container for up to 2 months. Thaw overnight in the fridge before baking as directed.
Nutritional Information & Benefits
Each serving of these creamy green chile chicken enchiladas packs approximately:
| Nutrient | Amount per Serving |
|---|---|
| Calories | 380-420 kcal |
| Protein | 30g |
| Fat | 18g |
| Carbohydrates | 25g |
| Fiber | 3g |
The Hatch green chiles bring antioxidants and vitamins A and C, while the chicken supplies lean protein. Using sour cream or Greek yogurt adds probiotics and calcium. The recipe can be adjusted to be lower-carb by swapping corn tortillas for low-carb or almond flour tortillas.
Keep in mind, if you have dairy allergies, the cheese and sour cream are key allergen sources here, but substitutions are easy with plant-based options.
Personally, I find this recipe hits a great balance between comfort and nutrition—rich flavors without being overly heavy, so it’s a crowd-pleaser that doesn’t leave you feeling weighed down.
Conclusion
Honestly, creamy green chile chicken enchiladas with Hatch chile sauce are one of those recipes that feel like a warm hug after a long day. It’s straightforward enough to whip up without stress but packed with flavors that make it special and memorable. I love how the smoky Hatch chile sauce brings something different to the table while still feeling like classic comfort food.
Feel free to tweak the spice level, swap proteins, or try dairy-free versions until it’s just right for your taste. I hope this recipe becomes as much a favorite for you as it is for me—something you can make effortlessly and enjoy every bite of.
If you give it a try, drop a comment below sharing your thoughts or any delicious twists you come up with. Don’t forget to share this recipe with friends who love cozy, flavorful meals. Happy cooking!
FAQs
Can I use canned green chiles instead of fresh Hatch chiles?
Yes! Canned Hatch or green chiles are a convenient year-round option and work well in the sauce. Just drain and chop them before adding.
What can I substitute for sour cream in the sauce?
Greek yogurt is a great substitute for a tangy but lighter option. For dairy-free, coconut yogurt works but changes the flavor slightly.
Can I make this recipe ahead of time?
Absolutely. Prepare the sauce and filling in advance, assemble the enchiladas, then refrigerate or freeze before baking. Bake just before serving for best results.
Are corn or flour tortillas better for this recipe?
Both work! Corn tortillas add authentic flavor but can break if not warmed properly. Flour tortillas are more pliable and easier to roll if you prefer a softer texture.
How spicy is the Hatch chile sauce?
Hatch chiles have a mild to medium heat with smoky flavor. You can adjust spice by adding more chiles for heat or using milder green chiles for less. The creaminess also helps mellow the spice.
Pin This Recipe!
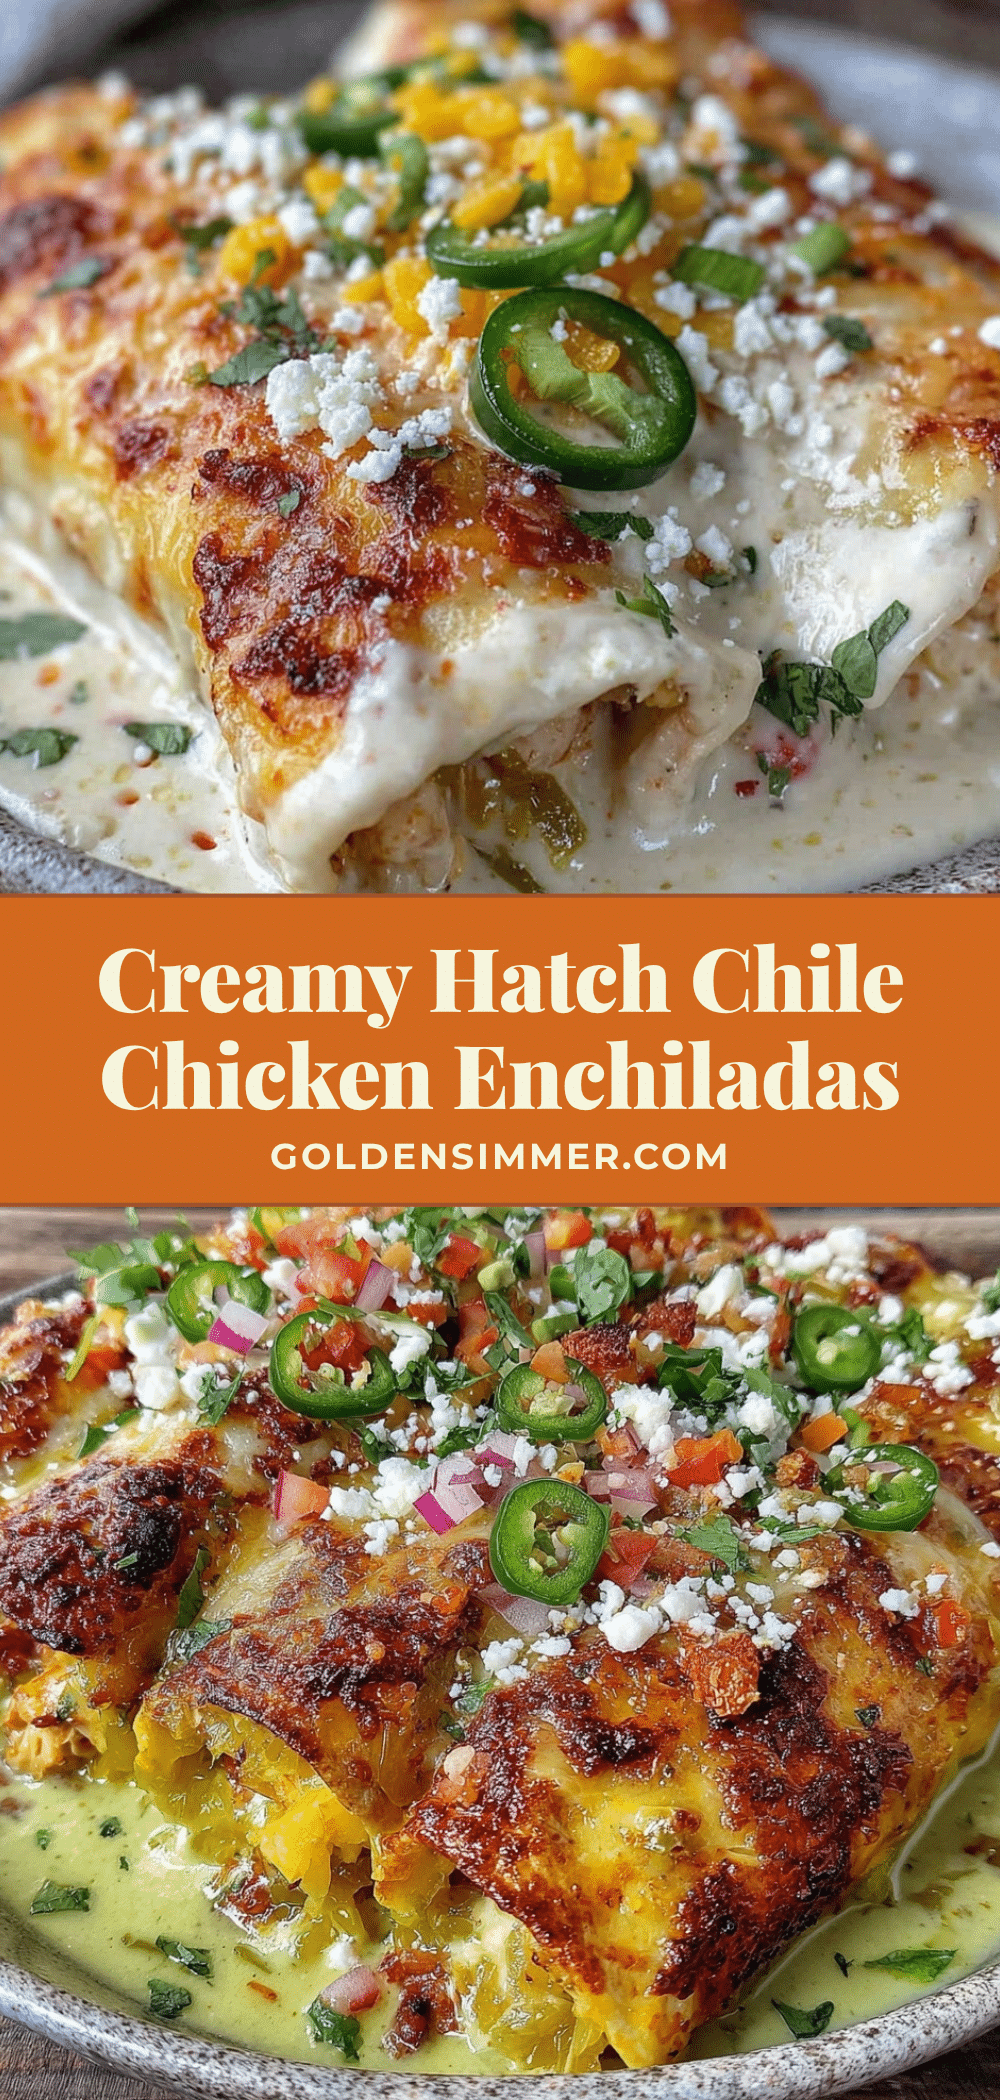
Creamy Green Chile Chicken Enchiladas Recipe with Easy Hatch Chile Sauce

A comforting and creamy chicken enchilada recipe featuring a smoky, slightly spicy Hatch chile sauce that’s quick and easy to prepare, perfect for busy weeknights or special occasions.
- Prep Time: 15 minutes
- Cook Time: 25 minutes
- Total Time: 40 minutes
- Yield: 8 servings 1x
- Category: Main Course
- Cuisine: Southwestern / Mexican
Ingredients
- 2 cups cooked chicken, shredded (rotisserie chicken works great)
- 1 cup shredded Monterey Jack cheese
- 1/2 cup diced onions
- 1 teaspoon garlic powder
- Salt and pepper to taste
- 4–5 fresh or canned Hatch green chiles, roasted, peeled, and chopped
- 2 tablespoons unsalted butter
- 2 tablespoons all-purpose flour (use gluten-free flour if needed)
- 2 cups whole milk (or dairy-free milk like almond if preferred)
- 1/2 cup sour cream (can swap with Greek yogurt)
- 1/2 teaspoon ground cumin
- Salt and freshly ground black pepper, to taste
- 8–10 soft corn tortillas (warmed; use flour tortillas if preferred)
- 1 cup shredded cheddar cheese (for topping)
- Fresh cilantro, chopped (optional garnish)
Instructions
- Roast fresh Hatch chiles under the broiler or over an open flame until the skin blisters and chars (about 5-7 minutes). Place them in a sealed bowl or plastic bag to steam for 10 minutes, then peel off skins, remove seeds, and chop roughly. If using canned, drain and chop.
- In a large skillet, melt 2 tablespoons of unsalted butter over medium heat. Add 2 tablespoons of flour, whisking constantly to form a roux. Cook for about 1-2 minutes until slightly golden but not browned. Slowly whisk in 2 cups of milk, stirring constantly to avoid lumps. Cook until thickened and creamy, about 5 minutes.
- Stir in the chopped Hatch chiles, 1/2 teaspoon cumin, salt, and pepper. Simmer on low for 3-4 minutes to meld flavors. Remove from heat and stir in 1/2 cup sour cream until smooth and creamy.
- In a bowl, combine shredded chicken, diced onions, 1 cup Monterey Jack cheese, garlic powder, salt, and pepper. Mix well.
- Warm each tortilla in a dry skillet or microwave wrapped in a damp towel for 20 seconds to prevent cracking.
- Spread about 1/4 cup of Hatch chile sauce on the bottom of a baking dish. Place a warmed tortilla on a plate, spoon about 1/3 cup of chicken filling onto the center, and roll tightly. Place seam-side down in the baking dish. Repeat with remaining tortillas and filling.
- Pour the remaining Hatch chile sauce evenly over the rolled enchiladas. Sprinkle 1 cup shredded cheddar cheese on top.
- Bake at 375°F (190°C) for 20-25 minutes, until bubbly and golden on the edges. Watch closely in last 5 minutes to avoid over-browning.
- Remove from oven and let cool for 5 minutes before serving. Sprinkle with fresh cilantro if desired.
Notes
Roast Hatch chiles carefully to avoid bitterness from unpeeled skins. Stir roux constantly to prevent burning. Add milk if sauce thickens too much. Warm tortillas to prevent cracking. Use rotisserie chicken for convenience. Sauce can be blended for smoothness or left textured. Adjust spice level by varying Hatch chile amount or adding jalapeños. Dairy-free and gluten-free substitutions are easy to make.
Nutrition
- Serving Size: 1 enchilada
- Calories: 400
- Fat: 18
- Carbohydrates: 25
- Fiber: 3
- Protein: 30
Keywords: green chile chicken enchiladas, Hatch chile sauce, creamy enchiladas, easy chicken enchiladas, Mexican comfort food, weeknight dinner, rotisserie chicken recipe



