Love this? Save it for later!
Share the inspiration with your friends
I was standing in the checkout line at the grocery store, three days before Halloween, with a cart full of candy and a sinking feeling. My neighbor, an older woman named Gloria who I only ever see at the market on Tuesday mornings, watched me toss a bag of tortilla chips onto the conveyor belt. She didn’t say anything at first. Then she leaned over and pointed at my chips. “You’re forgetting the cheese,” she said, like it was the most obvious thing in the world. I laughed and told her I was just grabbing snacks for the kids before trick-or-treating. She shook her head and told me about a dip she used to make for her own kids every Halloween—something fast, something fun, something that looked like a mummy. I honestly thought she was joking. But she walked me right over to the canned goods aisle, grabbed a can of black beans, and said, “This is where you start.”
That conversation stuck with me. I mean, here was a woman I barely knew, sharing a family tradition in the middle of a grocery store, and it felt more generous than any wrapped candy I’d ever bought. I went home, threw together my version of her black bean taco dip, shaped it like a mummy, and watched my kids lose their minds. It was that easy. Maybe you’ve been there—staring down a weeknight dinner on a holiday that’s supposed to be fun but mostly just feels chaotic. This Easy Black Bean Mummy Taco Dip is the answer. It takes about fifteen minutes, uses stuff you probably already have, and honestly, it’s the kind of dinner that makes everyone smile before they even take a bite.
Why You’ll Love This Easy Black Bean Mummy Taco Dip
Let me tell you why this Easy Black Bean Mummy Taco Dip has become our go-to Halloween dinner. I’ve tested it on my own family, on a few skeptical neighbors, and even on a group of kids who were more interested in candy than vegetables. It passed every test. Here’s what makes it special:
- Quick & Easy: This comes together in under 15 minutes. No joke. You can make it between the school pickup and the first trick-or-treaters ringing your bell.
- Simple Ingredients: Canned black beans, taco seasoning, sour cream, and cheese. You probably have most of this in your pantry right now.
- Perfect for Halloween: It looks like a mummy, so it’s festive without requiring any fancy decorating skills.
- Crowd-Pleaser: Kids love the silly presentation, and adults love that it’s actually filling and flavorful.
- Unbelievably Delicious: The creamy black bean base with the tangy sour cream “bandages” and melted cheese is next-level comfort food.
What makes this Easy Black Bean Mummy Taco Dip different from every other taco dip you’ve seen is the texture. I blend half the black beans until they’re smooth, which gives the dip a creamy, almost refried bean consistency without any extra work. The other half stays whole for a little bite. It’s a small trick, but it makes a huge difference. This isn’t just another Halloween snack—it’s the kind of thing that makes you close your eyes after the first bite because it tastes like actual dinner, not just a gimmick.
I made this on a Tuesday night when I had about twenty minutes between getting home from work and needing to get the kids into their costumes. It saved me. No stress, no complicated steps, just a warm, cheesy, silly dinner that made everyone happy. That’s the whole point, right?
What Ingredients You Will Need for Easy Black Bean Mummy Taco Dip
This Easy Black Bean Mummy Taco Dip uses simple, wholesome ingredients to deliver bold flavor and satisfying texture without the fuss. Most of these are pantry staples, which is exactly what you want on a busy weeknight.
- Black beans – 1 can (15 oz), drained and rinsed. I use Goya or Bush’s Best for consistent texture. (Half will be blended, half stays whole for texture.)
- Taco seasoning – 2 tablespoons. You can use a store-bought packet or make your own with chili powder, cumin, garlic powder, and paprika. I like McCormick for convenience.
- Cream cheese – 4 oz, softened. This gives the dip its creamy, spreadable base. (Use dairy-free cream cheese if needed.)
- Sour cream – 1/2 cup. This is what you’ll use to make the mummy “bandages” on top. (Greek yogurt works great as a substitute.)
- Shredded cheddar cheese – 1 cup. I prefer sharp cheddar for more flavor, but a Mexican blend works beautifully too.
- Salsa – 1/2 cup. Use your favorite jarred salsa. I like Pace for a mild option, but go with Herdez if you want more heat.
- Green onions – 2-3, sliced thin. These go on top for color and a little freshness.
- Black olives – 1/4 cup, sliced. These become the mummy’s eyes. (Optional, but honestly, it’s the best part.)
- Tortilla chips – For serving. Use sturdy chips that won’t break when you scoop.
Ingredient selection tip: Look for black beans that are firm, not mushy. I always drain and rinse them well to remove the canned liquid, which can make the dip watery. If you’re using dried black beans, cook them until tender but not falling apart—about 1 1/2 hours on the stove.
Substitution guidance: You can swap the black beans with pinto beans or refried beans if that’s what you have. Use dairy-free cream cheese and sour cream for a vegan version. For a gluten-free option, just check your taco seasoning label—most are gluten-free, but it’s worth confirming.
Equipment Needed
- Baking dish – An 8×8 inch square dish works perfectly. I’ve also used a round pie plate for a more mummy-like shape.
- Food processor or blender – For blending half the black beans. A small food processor is ideal, but an immersion blender works too.
- Mixing bowl – One medium bowl for combining the dip base.
- Spatula – For spreading the dip evenly in the dish.
- Piping bag or zip-top bag – For creating the sour cream bandages. A zip-top bag with a tiny corner snipped off works perfectly.
- Measuring cups and spoons – Standard set for accuracy.
I used my trusty Pyrex 8×8 dish for this, and it worked great. If you don’t have a food processor, you can mash half the black beans with a fork—it takes a few extra minutes but gets the job done. Honestly, the only specialized tool here is the piping bag, and a zip-top bag is a perfect budget-friendly alternative.
Preparation Method for Easy Black Bean Mummy Taco Dip

Let’s make this Easy Black Bean Mummy Taco Dip. I’ll walk you through every step so you get it right the first time.
- Preheat your oven to 375°F (190°C). While it’s heating, drain and rinse your black beans. Give them a good shake to remove excess water.
- Blend half the black beans. Put about 3/4 cup of the drained black beans into your food processor or blender. Add 2 tablespoons of salsa and pulse until smooth. It should look like thick, creamy refried beans. (If it’s too thick, add one more tablespoon of salsa.)
- Mix the dip base. In a medium mixing bowl, combine the softened cream cheese, the blended black bean mixture, the remaining whole black beans, 1/2 cup of shredded cheddar cheese, and 2 tablespoons of taco seasoning. Stir until everything is well combined. The mixture should be thick and spreadable. (If it seems too stiff, add a tablespoon of water or salsa.)
- Spread the dip in your baking dish. Use a spatula to spread the mixture evenly into your 8×8 dish. Smooth the top as much as possible—this gives you a nice surface for the mummy design.
- Bake the dip. Place the dish in the preheated oven and bake for 10-12 minutes, until the dip is hot and bubbly around the edges. The center should be warm and slightly puffed. (Don’t overbake or it can dry out.)
- Prepare the sour cream bandages. While the dip bakes, put the 1/2 cup of sour cream into a small zip-top bag. Snip off a tiny corner—I mean tiny, like the size of a pinhead. This gives you control over the lines. (If you cut too much, the sour cream will come out in a blob.)
- Create the mummy face. Once the dip is out of the oven, let it cool for 2 minutes. Then, pipe the sour cream in horizontal lines across the dip, leaving a gap in the middle for the eyes. Don’t worry about making them perfect—mummies are supposed to look a little messy. Place two black olive slices in the gap for the eyes. (I like to add a tiny dot of sour cream in the center of each olive for a spooky pupil effect.)
- Add the finishing touches. Sprinkle the remaining 1/2 cup of shredded cheddar cheese around the edges of the dip (not on the mummy face) and top with sliced green onions. The cheese will melt slightly from the residual heat.
- Serve immediately. Place the dish on a trivet or cutting board, surrounded by tortilla chips. Let everyone dig in while it’s warm.
Sensory cue: When you pull the dip out of the oven, you should smell warm beans and melted cheese—that comforting, savory aroma that says dinner is ready. The top should be slightly golden around the edges, and the dip should jiggle just a little when you move the dish.
Cooking Tips & Techniques for Easy Black Bean Mummy Taco Dip
I’ve made this Easy Black Bean Mummy Taco Dip about a dozen times now, and I’ve learned a few things the hard way. Here’s what I wish I’d known from the start.
Don’t skip draining the beans. The first time I made this, I was in a hurry and didn’t rinse the black beans well. The dip turned out watery, and the mummy bandages slid right off. Rinsing removes the starchy liquid that can make your dip runny.
Soften your cream cheese. I forgot to take mine out of the fridge once and tried to mix it cold. It was a disaster—lumpy and impossible to spread. Leave it on the counter for 20 minutes, or microwave it for 10 seconds if you’re in a rush.
Use a light hand with the sour cream. I got excited and piped thick bandages the first time. They looked more like a snowman than a mummy. Thin, uneven lines look more authentic. And if you mess up? Just smooth it out and start over—the dip is forgiving.
Make the eyes pop. I tried using peppercorns once for the eyes, and they just sank into the hot dip. Olive slices work because they’re flat and stay put. For extra spookiness, use black olive slices with a tiny dot of sour cream in the center.
Time your baking. This dip is best served straight from the oven. If you’re making it ahead, prepare the dip base, spread it in the dish, and refrigerate. Bake it right before serving. The sour cream bandages should go on after baking—if you pipe them on before, they’ll melt into a white puddle.
Variations & Adaptations
This Easy Black Bean Mummy Taco Dip is incredibly flexible. Here are a few ways I’ve adapted it for different needs.
- Vegetarian Version: It’s already vegetarian! But if you want to add more protein, throw in some cooked lentils or chopped mushrooms with the black beans.
- Spicy Version: Use hot salsa and add a diced jalapeño to the dip base. My husband loves this version—he says it wakes up the whole dish.
- Dairy-Free Version: Swap the cream cheese for dairy-free cream cheese (I like Kite Hill), use vegan sour cream, and use a dairy-free shredded cheese. It works surprisingly well.
- Gluten-Free Version: Most taco seasonings are gluten-free, but double-check the label. Serve with gluten-free tortilla chips or veggie sticks.
- Make It a Meal: I’ve turned this into a full dinner by serving it over rice or quinoa. Just spread the dip on a bed of grains and top with avocado and cilantro.
- Different Shapes: Not feeling the mummy? Use the same dip base to make a spider web (pipe sour cream in concentric circles and drag a toothpick through them) or a jack-o’-lantern face.
My personal favorite variation? I add a layer of seasoned ground beef or turkey under the black bean mixture. It turns the dip into a complete meal and makes it even more filling for hungry kids (and adults).
Serving & Storage Suggestions
Serve this Easy Black Bean Mummy Taco Dip warm, straight from the oven. The cheese should be melted and the dip should be hot all the way through. I like to set it on a wooden cutting board surrounded by sturdy tortilla chips. The contrast of the warm dip and the crunchy chips is perfect.
For drinks, this dip pairs beautifully with a cold beer (a light lager or Mexican beer works great) or a margarita. For the kids, apple cider or sparkling water with a lime wedge is a fun addition.
Storage: If you have leftovers (which is rare in my house), let the dip cool completely, then cover the dish with plastic wrap or transfer to an airtight container. Store in the refrigerator for up to 3 days.
Reheating: The best way to reheat is in the oven at 350°F (175°C) for 10-15 minutes, until hot and bubbly. You can also microwave individual portions for 30-60 seconds, but the texture won’t be as good. The sour cream bandages will lose their shape during reheating, so don’t worry if it looks messy—it’ll still taste great.
Flavor development: Honestly, this dip tastes even better the next day. The flavors meld together overnight, making it richer and more complex. I’ve been known to make a double batch just for leftovers.
Nutritional Information & Benefits
Here’s an estimated nutritional breakdown for one serving of this Easy Black Bean Mummy Taco Dip (based on 8 servings):
| Nutrient | Amount per Serving |
|---|---|
| Calories | 210 |
| Total Fat | 12g |
| Saturated Fat | 7g |
| Cholesterol | 35mg |
| Sodium | 480mg |
| Total Carbohydrates | 18g |
| Dietary Fiber | 6g |
| Sugars | 3g |
| Protein | 9g |
Black beans are a fantastic source of plant-based protein and fiber, which helps keep you full and supports digestive health. They’re also rich in iron, magnesium, and folate. The cream cheese and cheddar add calcium, while the salsa provides a boost of vitamin C from the tomatoes.
Dietary considerations: This recipe is naturally vegetarian and can be made gluten-free with a simple seasoning check. To reduce sodium, use low-sodium black beans and make your own taco seasoning. For a lower-fat version, use reduced-fat cream cheese and sour cream.
I love that this dip feels indulgent but actually has some real nutritional value. It’s comfort food that doesn’t leave you feeling guilty—and on a busy Halloween night, that’s exactly what I need.
Conclusion
This Easy Black Bean Mummy Taco Dip has become a Halloween tradition in my house, and I honestly think it will in yours too. It’s fast, it’s fun, and it uses ingredients you probably already have in your pantry. The best part? It’s not just a gimmick—it’s genuinely delicious food that happens to look like a mummy.
I encourage you to make this your own. Add more spice if you like heat, swap the beans for something else, or change the face design. The base recipe is forgiving, and the possibilities are endless. I’d love to hear how it turns out for you—drop a comment below and tell me about your Halloween dinner. Did your kids love it? Did you add a twist? Share your photos and tag me on social media. Let’s make this Halloween a little less stressful and a lot more delicious.
Thanks for cooking with me tonight. Now go make that mummy dip—your family will thank you.
Frequently Asked Questions
Can I make this Easy Black Bean Mummy Taco Dip ahead of time?
Yes! You can prepare the dip base, spread it in the baking dish, and refrigerate it up to 24 hours in advance. Just bake it right before serving and add the sour cream bandages after baking.
Can I use refried beans instead of black beans?
Absolutely. Canned refried beans work great in this recipe. You’ll skip the blending step since they’re already smooth. Just mix them with the cream cheese and taco seasoning as directed.
How do I make the mummy face look good?
Use a zip-top bag with a tiny corner snipped off for the sour cream bandages. Pipe thin, uneven lines across the dip, leaving a gap in the center for the eyes. Use black olive slices for the eyes and add a tiny dot of sour cream in the center for a spooky pupil effect.
Can I freeze this dip?
I don’t recommend freezing this dip because the dairy components (cream cheese and sour cream) can separate and become grainy when thawed. It’s best made fresh or stored in the refrigerator for up to 3 days.
What can I serve with this dip besides tortilla chips?
Try serving with carrot sticks, celery, bell pepper strips, or cucumber slices for a lower-carb option. It also works great as a topping for baked potatoes or nachos.
Pin This Recipe!
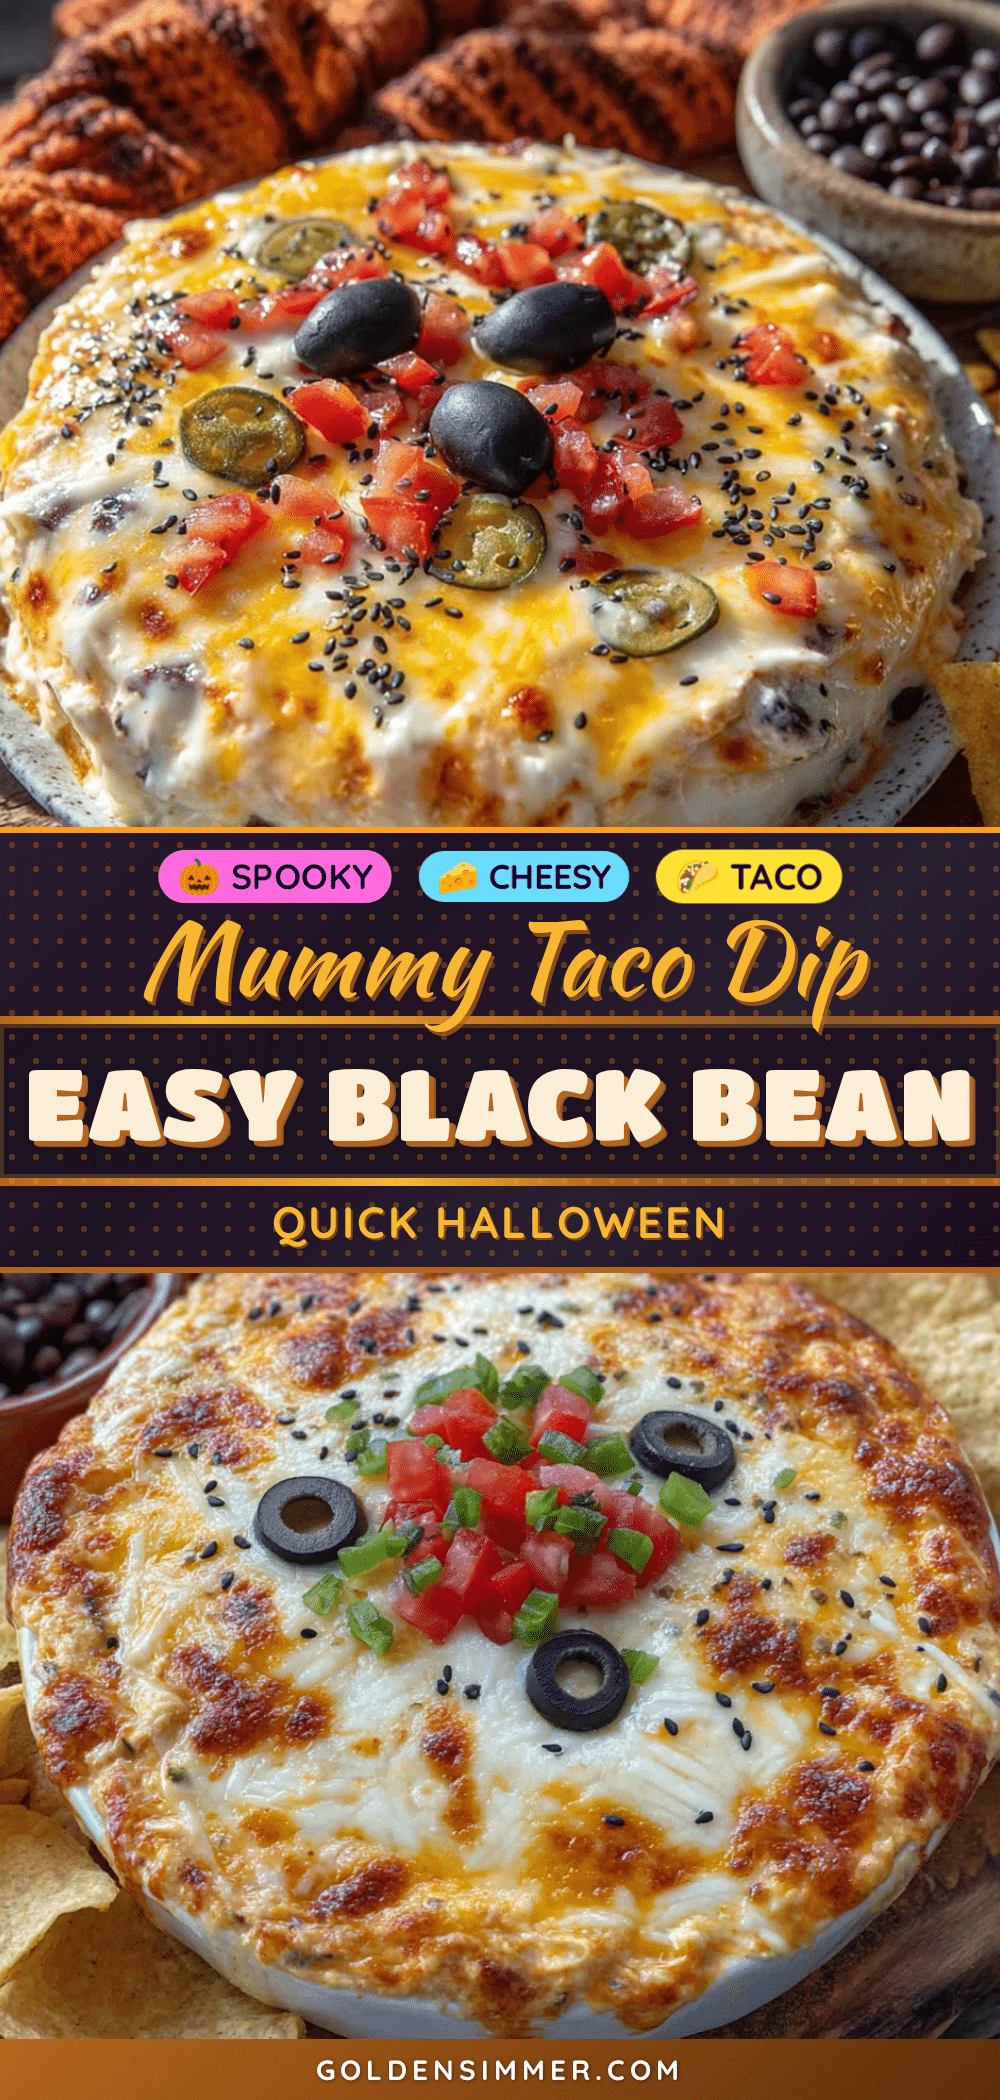
Easy Black Bean Mummy Taco Dip

A quick and fun Halloween dinner that looks like a mummy, made with black beans, cream cheese, taco seasoning, and sour cream bandages. Ready in under 15 minutes, it’s a crowd-pleaser for kids and adults alike.
- Prep Time: 15 minutes
- Cook Time: 12 minutes
- Total Time: 27 minutes
- Yield: 8 servings 1x
- Category: Appetizer
- Cuisine: Mexican
Ingredients
- 1 can (15 oz) black beans, drained and rinsed
- 2 tablespoons taco seasoning
- 4 oz cream cheese, softened
- 1/2 cup sour cream
- 1 cup shredded cheddar cheese
- 1/2 cup salsa
- 2–3 green onions, sliced thin
- 1/4 cup black olives, sliced
- Tortilla chips for serving
Instructions
- Preheat your oven to 375°F (190°C). Drain and rinse the black beans.
- Blend half the black beans: Put about 3/4 cup of the drained black beans into a food processor or blender. Add 2 tablespoons of salsa and pulse until smooth.
- Mix the dip base: In a medium mixing bowl, combine the softened cream cheese, the blended black bean mixture, the remaining whole black beans, 1/2 cup of shredded cheddar cheese, and 2 tablespoons of taco seasoning. Stir until well combined.
- Spread the dip in an 8×8 inch baking dish. Smooth the top with a spatula.
- Bake for 10-12 minutes, until hot and bubbly around the edges.
- While the dip bakes, put the 1/2 cup of sour cream into a small zip-top bag. Snip off a tiny corner.
- Once the dip is out of the oven, let it cool for 2 minutes. Pipe the sour cream in horizontal lines across the dip, leaving a gap in the middle for the eyes. Place two black olive slices in the gap for the eyes. Add a tiny dot of sour cream in the center of each olive for a spooky pupil effect.
- Sprinkle the remaining 1/2 cup of shredded cheddar cheese around the edges of the dip and top with sliced green onions.
- Serve immediately with tortilla chips.
Notes
Don’t skip draining the beans to avoid watery dip. Soften cream cheese for easy mixing. Use thin, uneven sour cream lines for a more authentic mummy look. The dip can be prepared ahead and refrigerated for up to 24 hours before baking. Add sour cream bandages after baking.
Nutrition
- Serving Size: 1 serving
- Calories: 210
- Sugar: 3
- Sodium: 480
- Fat: 12
- Saturated Fat: 7
- Carbohydrates: 18
- Fiber: 6
- Protein: 9
Keywords: Halloween, mummy, taco dip, black bean, quick dinner, easy, festive



