Love this? Save it for later!
Share the inspiration with your friends
There used to be a little dive bar called The Rusty Nail on the corner of 5th and Elm in my old neighborhood that made these insane jalapeño poppers. I’m not talking about your standard breaded-and-fried deal—these were wrapped in something flaky, almost like a puff pastry, and they came out looking like little ghosts. When the place closed down after the landlord sold the building, I honestly felt a little pang of loss. You know that feeling when a place just *gets* it, and then poof, it’s gone?
After 11 tries—and let me tell you, try number 4 was a complete grease bomb that I’m still a little embarrassed about—I finally cracked the code. The secret wasn’t some fancy dough. It was crescent rolls. And the shape? That came from a half-empty tube of Halloween-themed cookie cutters I found shoved in the back of my baking drawer. These Crowd-Pleasing Mummy Jalapeño Popper Crescent Wraps are my love letter to The Rusty Nail, and honestly, they might be even better than the original. I mean, no bar peanuts required.
The first time I brought a tray of these to a friend’s Halloween party, they vanished in under ten minutes. Someone actually asked me if I had a “ghost chef” in my kitchen. I laughed, but secretly, I was just thrilled that the memory of those poppers was finally getting the encore it deserved. Maybe you’ve been there, chasing a flavor from a place that’s gone. This is that recipe—the one you make, share, and watch disappear.
Why You’ll Love This Recipe
Let’s be real for a second. When you’re hosting a party, the last thing you need is a recipe that requires a culinary degree and a dozen specialty ingredients. These wraps are the opposite of that. They’re designed to make you look like a rockstar with minimal effort, which is exactly what you want when you’re trying to actually enjoy your own gathering.
- Insanely Easy to Assemble: We’re talking 15 minutes of active prep time. The crescent dough does all the heavy lifting, and the filling comes together in one bowl. No fuss, no stress.
- Simple, Pantry-Friendly Ingredients: Cream cheese, jalapeños, bacon, and a can of crescent rolls. That’s it. You probably have half of this stuff in your fridge right now, and if you don’t, a quick trip to the store won’t break the bank.
- Perfect for Halloween Parties & Football Gatherings: These little mummies are the ultimate crowd-pleaser. They’re spooky enough for a Halloween bash but hearty enough to hold their own on a game day snack table. I’ve even brought them to a potluck in July, and nobody complained.
- A True Crowd-Pleaser: I’ve seen people who swear they don’t like spicy food go back for thirds. The cream cheese tames the heat of the jalapeño, and the bacon adds that smoky, salty punch that everyone loves. They’re addictive, plain and simple.
- Unbelievably Delicious: The texture is a dream. You get that flaky, buttery crescent roll exterior, a creamy, tangy filling, and those little pops of heat from the jalapeño. It’s a flavor and texture combo that’s just next-level comfort food.
What makes this recipe different from the dozens of other jalapeño popper recipes out there? It’s the presentation. The mummy wrapping isn’t just for show—it actually helps the filling stay perfectly contained, so you don’t end up with a molten cheese explosion on your baking sheet. Plus, using crescent dough instead of breading or puff pastry gives you that soft, pillowy texture that’s just so satisfying. It’s comfort food reimagined—faster, easier, and way more fun to look at.
This isn’t just another appetizer. It’s the kind that makes you close your eyes after the first bite, the kind that gets texted around the next day asking for the recipe. It’s perfect for impressing guests without any stress, or turning a simple snack into something memorable.
What Ingredients You Will Need
This recipe uses simple, wholesome ingredients to deliver bold flavor and satisfying texture without the fuss. Most of these are pantry or fridge staples, and I’ve included a few substitution notes so you can adapt it to what you have on hand.
For the Filling
- 8 oz cream cheese, softened (I recommend Philadelphia for the creamiest texture—the block, not the whipped kind)
- 1 cup shredded sharp cheddar cheese (or Monterey Jack for a milder flavor; shred it yourself for best melting)
- 4-5 medium jalapeños, seeded and finely diced (leave a few seeds in if you like more heat; remove the white membranes for less)
- 6 slices of bacon, cooked and crumbled (I like thick-cut applewood-smoked bacon for the best flavor; you can also use turkey bacon or vegetarian bacon bits)
- 1/4 cup chopped green onions (optional, but adds a nice fresh bite)
- 1/2 teaspoon garlic powder
- 1/4 teaspoon salt
- 1/4 teaspoon black pepper
For the Wraps
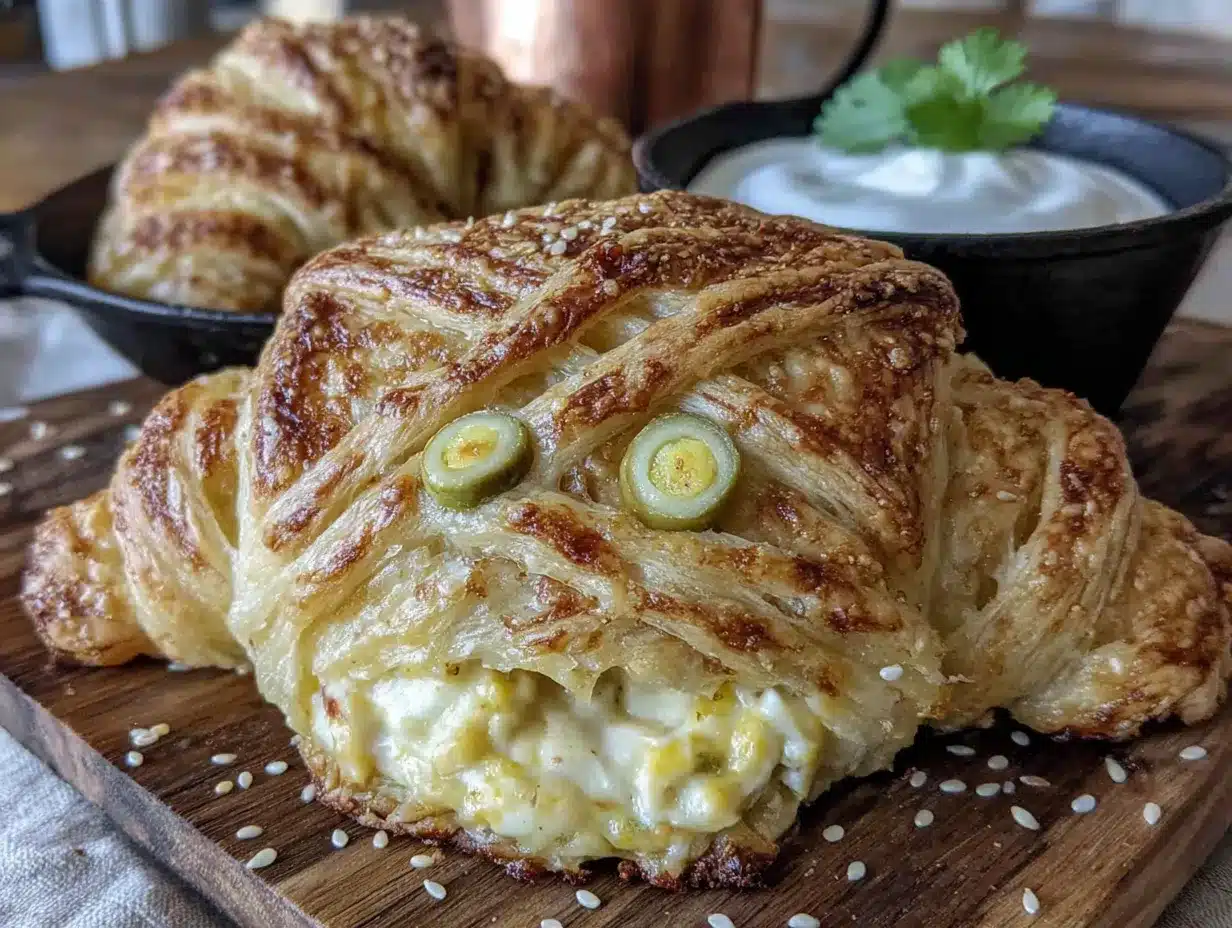
- 2 cans (8 oz each) refrigerated crescent roll dough (I use Pillsbury, but any brand works; look for the sheets if you want to cut your own strips)
- 1 large egg, beaten (for the egg wash; this gives them that beautiful golden color)
- 24 candy eyeballs (optional, but highly recommended for the mummy look; you can find them at most grocery stores or craft stores)
- Everything bagel seasoning (optional, for a little extra crunch and flavor on top)
Ingredient Selection Tips: When picking jalapeños, look for ones that are firm and have smooth, shiny skin. The smaller ones tend to be spicier than the larger ones. If you’re sensitive to heat, you can swap the jalapeños for poblano peppers, which are much milder. For the cream cheese, make sure it’s really softened to room temperature—if it’s cold, your filling will be lumpy and hard to spread.
Substitution Guidance: For a gluten-free version, use a gluten-free crescent roll dough (there are a few brands available now). For a dairy-free option, use a plant-based cream cheese and shredded vegan cheddar. The texture will be slightly different, but the flavor will still be fantastic. And if you’re not a bacon fan, you can leave it out entirely or substitute with finely chopped cooked mushrooms for a similar umami kick.
Equipment Needed
You don’t need a lot of fancy equipment for this recipe, which is part of its charm. Here’s what you’ll need:
- Baking sheet(s): One large rimmed baking sheet (half-sheet size works best) or two smaller ones. I use my favorite Nordic Ware sheet pans—they don’t warp in the oven, and the edges are perfect for catching any filling that might escape.
- Parchment paper or silicone baking mat: This is non-negotiable. The filling can get a little oozy, and parchment paper makes cleanup a breeze. Silicone mats are reusable and work great too.
- Mixing bowls: One medium bowl for the filling and one small bowl for the egg wash.
- Sharp knife and cutting board: For dicing the jalapeños and green onions. A sharp knife is key to getting clean cuts without crushing the peppers.
- Skillet: For cooking the bacon. I prefer cast iron for even heating and that perfect crispiness.
- Pastry brush: For applying the egg wash. If you don’t have one, you can use a paper towel or even your fingers in a pinch.
- Small spoon or cookie scoop: For portioning the filling. A 1-tablespoon cookie scoop is perfect for getting consistent-sized balls of filling.
- Pizza cutter or sharp knife: For cutting the crescent dough into strips. A pizza cutter makes this step super quick and easy.
If you don’t have a pastry brush, don’t sweat it. You can just dip your fingers in the egg wash and gently dab it on the dough. It’s not as precise, but it works. And if you don’t have a cookie scoop, just use two spoons—one to scoop and one to scrape the filling off. Budget-friendly options are totally fine here; the recipe is forgiving.
Preparation Method
Alright, let’s get to the good part. Here’s how to make these little guys. I’ve broken it down into clear steps with all the sensory cues so you know exactly what you’re looking for at each stage.
Step 1: Prep the Filling (10 minutes)
First things first, cook your bacon. I like to do this in a skillet over medium heat, flipping occasionally, until it’s nice and crispy—about 8-10 minutes. You want it to be crunchy enough that it crumbles easily. While the bacon is cooking, dice your jalapeños. Remember to wear gloves or wash your hands thoroughly after handling them—trust me on this one. I’ve made the mistake of rubbing my eye after chopping jalapeños, and it’s not a memory I want to relive. Once the bacon is cool enough to handle, crumble it into a medium mixing bowl. Add the cream cheese, shredded cheddar, diced jalapeños, green onions (if using), garlic powder, salt, and pepper. Stir everything together until it’s well combined. The mixture should be thick and creamy, with little flecks of green and red from the peppers and bacon. Give it a taste—you want it to be flavorful and slightly tangy from the cream cheese.
Step 2: Prep the Dough (5 minutes)
Preheat your oven to 375°F (190°C). Line your baking sheet with parchment paper or a silicone mat. Open the cans of crescent roll dough. Instead of separating them into triangles, keep the dough as one big rectangle. If you’re using the perforated sheets, just gently press the seams together to seal them. Using a pizza cutter or sharp knife, cut the dough lengthwise into 6 long strips per can, for a total of 12 strips. Each strip should be about 1 to 1.5 inches wide. If the dough feels a little sticky, dust your work surface with a tiny bit of flour.
Step 3: Assemble the Mummies (15 minutes)
Now for the fun part. Using your small cookie scoop or a spoon, portion out the cream cheese mixture into 12 equal balls, each about the size of a walnut. Place one ball of filling at the end of one crescent dough strip. Gently wrap the strip of dough around the filling, overlapping it slightly as you go, like you’re wrapping a tiny mummy. Leave a small gap at the top where the “face” will be. Don’t worry if it’s not perfect—the mummy look is supposed to be a little rough and rustic. Place the wrapped mummy on the prepared baking sheet, seam-side down. Repeat with the remaining dough strips and filling. You should have 12 mummies total, spaced about 2 inches apart on the sheet.
Step 4: Egg Wash and Bake (12-15 minutes)
In a small bowl, beat the egg with a tablespoon of water. Using your pastry brush, gently brush the egg wash over each mummy wrap. This will give them that gorgeous golden-brown color. If you’re using the everything bagel seasoning, sprinkle a little on top now. Bake for 12-15 minutes, or until the dough is puffed up and deep golden brown. The filling should be bubbly and hot. You’ll know they’re done when the kitchen smells absolutely incredible—like buttery, cheesy, bacony goodness.
Step 5: Add the Eyes and Serve (2 minutes)
Let the mummies cool on the baking sheet for about 5 minutes. This is important—the filling will be molten hot straight out of the oven. Once they’re cool enough to handle but still warm, gently press two candy eyeballs into the exposed filling at the top of each mummy. If the filling has puffed up too much, you can make a small indentation with your finger first. Serve them warm, and watch them disappear.
Cooking Tips & Techniques
I’ve made this recipe about a dozen times now, and I’ve picked up a few tricks along the way. Here are my best tips for getting perfect results every time.
Don’t overfill the wraps. I know it’s tempting to cram as much filling as possible into each one, but trust me—less is more here. If you overfill, the dough won’t seal properly, and you’ll end up with a cheesy mess on your baking sheet. Use about 1 to 1.5 tablespoons of filling per wrap. That’s the sweet spot.
Keep the dough cold. Crescent roll dough gets sticky and hard to work with if it gets too warm. If you’re a slow wrapper, pop the dough back in the fridge for 5 minutes between batches. This makes a huge difference, especially if your kitchen is warm.
Seal the seams well. When you’re wrapping the dough around the filling, make sure the end of the strip is tucked underneath the wrap. This prevents it from unraveling during baking. Press gently but firmly to seal it.
Use a timer, not your eyes. I’ve learned the hard way that crescent dough can go from perfectly golden to burnt in about 30 seconds. Set your timer for 12 minutes, check them, and then add more time in 1-minute increments if needed. Every oven is different.
My biggest failure: The first time I made these, I forgot to cook the bacon first. I just mixed raw bacon bits into the filling, thinking they would cook in the oven. They did not. The bacon stayed chewy and greasy, and the whole batch was a sad, soggy mess. Learn from my mistake—always pre-cook your bacon until it’s crispy.
Timing strategy for parties: You can assemble these up to 24 hours in advance. Just put the assembled (but unbaked) mummies on the baking sheet, cover them tightly with plastic wrap, and store them in the fridge. When your guests arrive, just pop them in the oven. Fresh, hot appetizers with zero stress. That’s the dream, right?
Variations & Adaptations
One of the things I love about this recipe is how easy it is to customize. Here are a few variations I’ve tried and loved.
Spicy Mummy Wraps: For those who like it hot, add 1/4 teaspoon of cayenne pepper to the cream cheese mixture, or use habanero peppers instead of jalapeños. You can also drizzle the finished wraps with a little hot honey for a sweet-heat combo that’s absolutely killer.
Veggie Mummy Wraps: Skip the bacon and add 1/2 cup of finely chopped sautéed mushrooms and 1/4 cup of roasted red peppers. The mushrooms add that same umami depth, and the roasted peppers bring a touch of sweetness. I made these for a vegetarian friend’s party, and they were gone before the bacon version.
Cheesy Ranch Mummy Wraps: Mix 1 tablespoon of ranch seasoning into the cream cheese mixture. It adds a tangy, herby flavor that pairs perfectly with the jalapeño and bacon. This version is dangerously addictive—I’m not kidding.
Breakfast Mummy Wraps: Swap the jalapeños for cooked breakfast sausage crumbles and add 1/4 cup of chopped chives. Serve them at brunch with a side of scrambled eggs. The crescent dough makes them feel like a cross between a sausage roll and a croissant.
Gluten-Free Adaptation: Use a gluten-free crescent roll dough. The texture will be a little more crumbly, but the flavor is still fantastic. Just be extra gentle when wrapping, as gluten-free dough can be more fragile.
Serving & Storage Suggestions
These mummy wraps are best served warm, right out of the oven. The contrast between the flaky, golden dough and the creamy, hot filling is what makes them so special. I like to arrange them on a platter with a small bowl of ranch dressing or sour cream for dipping. The cool, tangy dip is a perfect counterpoint to the spicy, cheesy filling.
What to serve alongside: These are fantastic on a Halloween snack board alongside other finger foods like deviled eggs, mini meatballs, and veggie sticks. For a game day spread, pair them with buffalo chicken dip and loaded nachos. They also go surprisingly well with a crisp, cold beer or a spicy Bloody Mary.
Storage: If you have leftovers (which, let’s be honest, is rare), store them in an airtight container in the refrigerator for up to 3 days. The dough will soften a bit, but they’re still delicious.
Reheating: The best way to reheat these is in the oven or an air fryer. Pop them in a 350°F (175°C) oven for 5-7 minutes, or until they’re heated through and the dough crisps back up. You can also use a microwave, but the dough will be soft and a little chewy. If you’re in a hurry, the microwave works—just don’t expect the same texture.
Flavor development: Honestly, these are at their peak right after baking. The filling is molten, the dough is flaky, and the candy eyes are still perfectly placed. That said, the flavors do meld together nicely after a day in the fridge. They’re still tasty cold, straight from the fridge, if you’re into that kind of thing.
Nutritional Information & Benefits
Let’s be real—these are a treat, not a health food. But that doesn’t mean they don’t have some redeeming qualities. Here’s a rough estimate of the nutritional breakdown per wrap (based on 12 servings):
| Nutrient | Amount per Wrap |
|---|---|
| Calories | ~220 |
| Total Fat | 16g |
| Saturated Fat | 8g |
| Cholesterol | 45mg |
| Sodium | 380mg |
| Total Carbohydrates | 12g |
| Dietary Fiber | 1g |
| Sugars | 3g |
| Protein | 8g |
Health benefits: The jalapeños contain capsaicin, which has been shown to boost metabolism and reduce inflammation. They’re also a good source of vitamin C. The cream cheese provides calcium and a little bit of protein. And the bacon? Well, it adds flavor and makes people happy. Sometimes that’s enough.
Dietary considerations: This recipe is not gluten-free (unless you use gluten-free dough) and contains dairy. It can be adapted to be vegetarian by omitting the bacon. If you’re watching your sodium, use low-sodium bacon and reduce or omit the added salt.
Conclusion
These Crowd-Pleasing Mummy Jalapeño Popper Crescent Wraps are more than just a fun Halloween appetizer. They’re a little piece of culinary nostalgia, recreated and improved, and they’re guaranteed to be the star of your next gathering. Whether you’re hosting a spooky costume party, a casual football watch party, or just a weeknight dinner that needs a little pizzazz, these little mummies deliver.
I love this recipe because it reminds me that the best food doesn’t have to be complicated. It just has to be made with a little bit of heart—and a lot of cheese. I encourage you to make these your own. Swap in your favorite cheese, add extra spice, or skip the bacon if that’s your thing. The beauty of this recipe is its flexibility.
So go ahead, give them a try. I promise you’ll be glad you did. And when your friends ask for the recipe (and they will), just smile and say it’s a family secret. Or better yet, send them this post. Happy cooking, and happy haunting!
Frequently Asked Questions
Can I make these ahead of time?
Absolutely! You can assemble the mummies up to 24 hours in advance. Just keep them covered in the fridge, and bake them right before serving. This is a total lifesaver for parties.
Can I freeze these?
Yes, you can freeze them either before or after baking. To freeze unbaked mummies, place them on a baking sheet and freeze until solid, then transfer to a freezer bag. Bake from frozen, adding 5-7 minutes to the cooking time. To freeze baked mummies, let them cool completely, then freeze in a single layer in a freezer bag. Reheat in the oven at 350°F until warmed through.
How do I prevent the filling from leaking out?
The key is to not overfill and to make sure the dough is sealed well. Tuck the end of the dough strip underneath the wrap, and press gently to seal. Also, make sure your baking sheet is lined with parchment paper just in case any filling does escape.
Can I use a different type of pepper?
Definitely! Poblano peppers are milder and have a great earthy flavor. Serrano peppers are spicier. You can even use bell peppers for a completely mild version. Just adjust the amount based on the heat level you prefer.
What can I use instead of crescent roll dough?
You can use puff pastry sheets, cut into strips, for a flakier, more buttery texture. You can also use refrigerated pizza dough for a chewier result. Just adjust the baking time as needed—puff pastry usually takes a few minutes longer, and pizza dough might need a little less time.
Pin This Recipe!
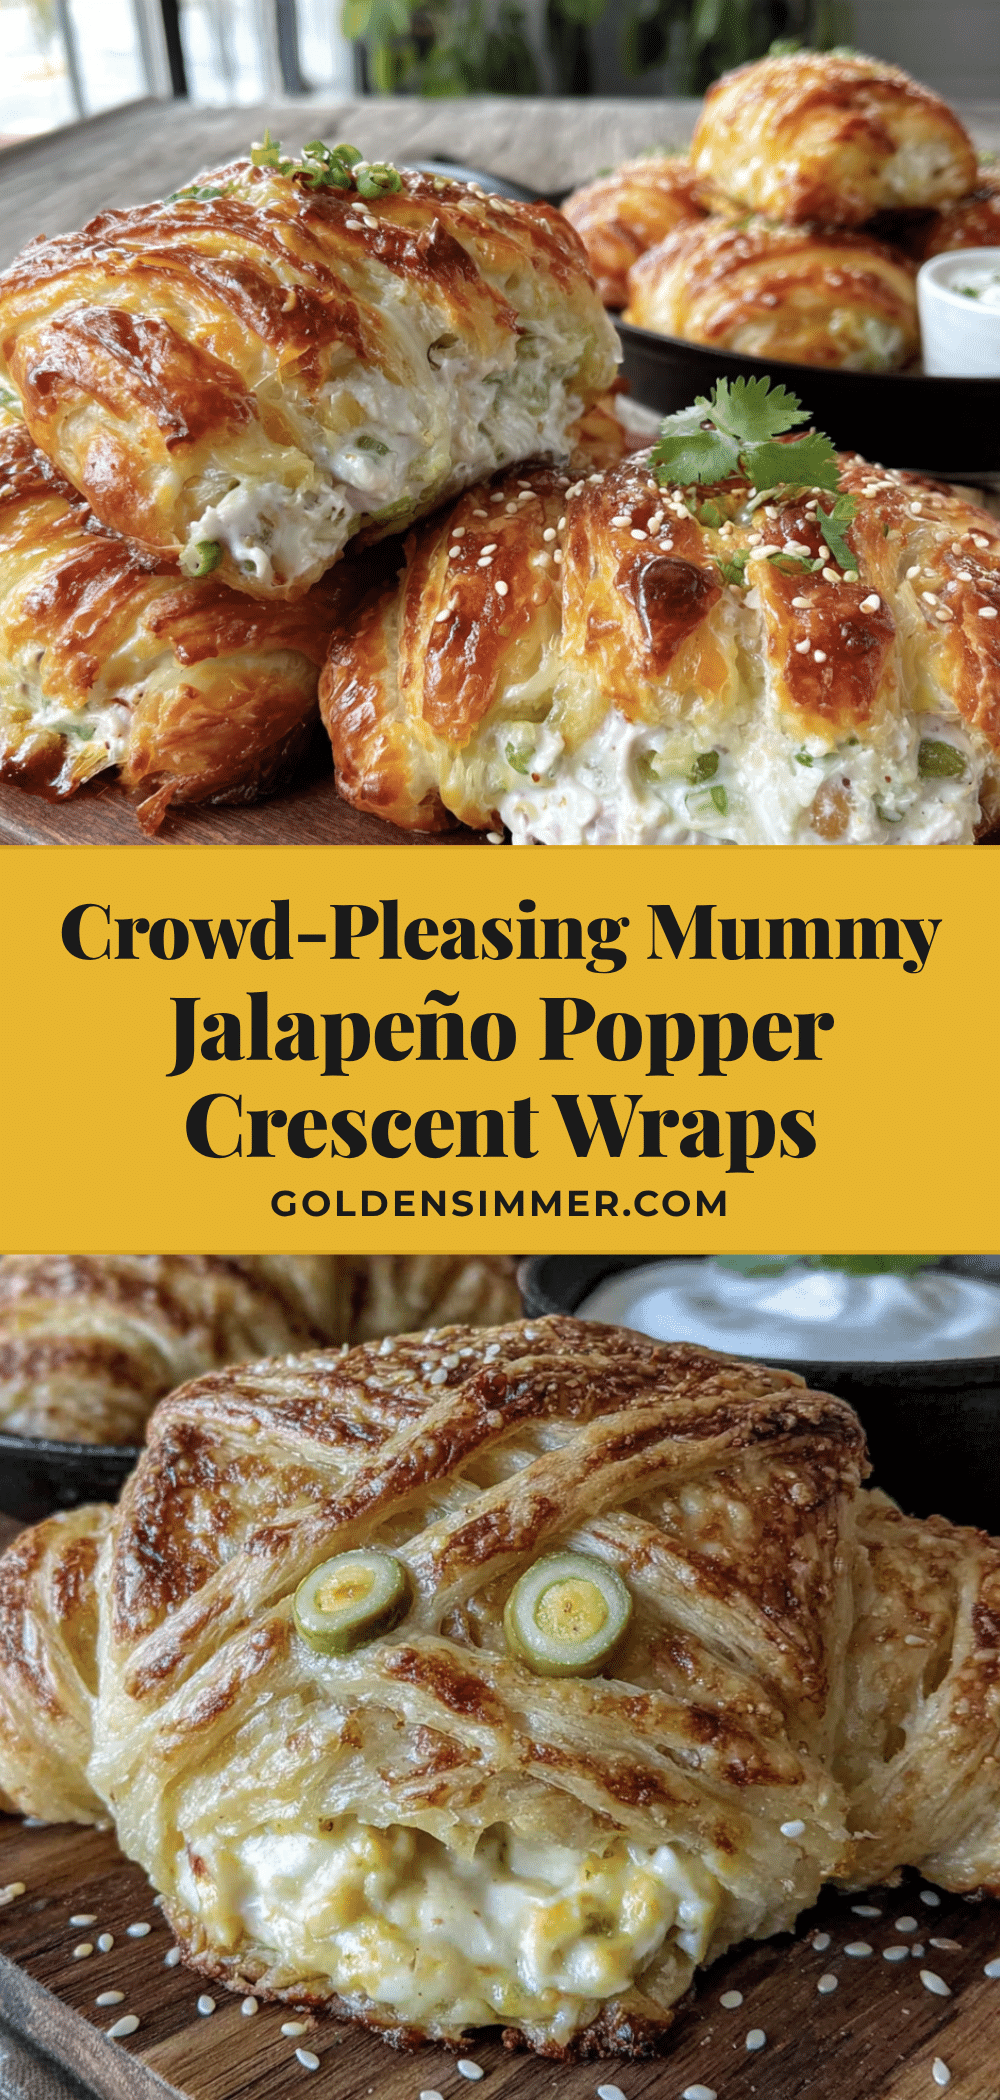
Easy Crowd-Pleasing Mummy Jalapeño Popper Wraps Recipe

These flaky, creamy, and spicy mummy-shaped jalapeño popper wraps are made with crescent roll dough and are perfect for Halloween parties or game day gatherings. They’re easy to assemble and vanish in minutes.
- Prep Time: 15 minutes
- Cook Time: 15 minutes
- Total Time: 30 minutes
- Yield: 12 servings 1x
- Category: Appetizer
- Cuisine: American
Ingredients
- 8 oz cream cheese, softened
- 1 cup shredded sharp cheddar cheese
- 4–5 medium jalapeños, seeded and finely diced
- 6 slices bacon, cooked and crumbled
- 1/4 cup chopped green onions (optional)
- 1/2 teaspoon garlic powder
- 1/4 teaspoon salt
- 1/4 teaspoon black pepper
- 2 cans (8 oz each) refrigerated crescent roll dough
- 1 large egg, beaten
- 24 candy eyeballs (optional)
- Everything bagel seasoning (optional)
Instructions
- Cook bacon in a skillet over medium heat until crispy, about 8-10 minutes. Let cool, then crumble.
- In a medium bowl, combine cream cheese, cheddar cheese, diced jalapeños, crumbled bacon, green onions (if using), garlic powder, salt, and pepper. Mix until well combined.
- Preheat oven to 375°F (190°C). Line a baking sheet with parchment paper or a silicone mat.
- Open cans of crescent roll dough. Keep dough as one rectangle; press seams together if needed. Cut each rectangle lengthwise into 6 strips (12 strips total).
- Portion filling into 12 equal balls (about 1 to 1.5 tablespoons each). Place one ball at the end of a dough strip and wrap the strip around the filling, overlapping slightly, leaving a small gap at the top for the ‘face’. Place seam-side down on prepared baking sheet. Repeat with remaining strips and filling.
- In a small bowl, beat egg with 1 tablespoon water. Brush egg wash over each mummy wrap. Sprinkle with everything bagel seasoning if desired.
- Bake for 12-15 minutes, until dough is puffed and deep golden brown.
- Let cool on baking sheet for 5 minutes. Gently press candy eyeballs into the exposed filling at the top of each mummy. Serve warm.
Notes
Don’t overfill the wraps to prevent leaking. Keep dough cold for easier handling. Assemble up to 24 hours in advance and refrigerate until ready to bake. For gluten-free, use gluten-free crescent dough. For dairy-free, use plant-based cream cheese and vegan cheddar.
Nutrition
- Serving Size: 1 wrap
- Calories: 220
- Sugar: 3
- Sodium: 380
- Fat: 16
- Saturated Fat: 8
- Carbohydrates: 12
- Fiber: 1
- Protein: 8
Keywords: jalapeño popper, mummy wraps, Halloween appetizer, crescent roll, bacon, cream cheese, party snack



