Love this? Save it for later!
Share the inspiration with your friends
It was 10:47 PM on a random Tuesday in October, and I had a very specific, slightly ridiculous craving for something that looked like it came out of a cartoon. You know that feeling when you want food that’s fun, not fancy? I was scrolling through my phone, half-asleep, and saw a picture of a mummy hot dog. My brain latched onto it. I wanted one, desperately. But the thing is, I didn’t have any of those fancy pre-made pastry sheets or puff pastry that the ‘real’ recipes call for. I had a can of crescent rolls in the back of the fridge, some hot dogs that were about to hit their expiration date, and a crazy idea that just might work.
Honestly, I wasn’t even sure if it was genius or desperation. I mean, wrapping a hot dog in crescent roll dough and calling it a mummy for my kids felt a little… on the nose. But let me tell you, standing there in my pajamas, pulling apart that cold, sticky dough and wrapping it around a hot dog like a tiny little bandage, I felt a wave of pure, sleepy inspiration. It wasn’t about being a Pinterest-perfect mom. It was about making something that would make my kids laugh the next day. And honestly? It was kind of fun to play with my food when no one was watching.
The dough ripped in a few places, and I got butter all over the counter. I forgot to set out the cream cheese for a dip I had in mind. It was a beautiful, imperfect mess. But when those little mummies came out of the oven, golden and a little bit goofy, I knew I had stumbled onto something special. They looked exactly like I wanted them to—silly, slightly scary, and completely kid-approved. This recipe stayed with me because it proved that you don’t need a special occasion or fancy ingredients to create a moment. Sometimes, the best ideas happen late at night, in a quiet kitchen, with whatever you’ve got on hand. And maybe you’ve been there, too—looking for a way to turn a regular Tuesday into something a little more fun.
Why You’ll Love This Recipe
Let’s be real for a second. Getting dinner on the table that the whole family actually agrees on can feel like a victory. These mummy hot dogs are that victory. They’re not just a meal; they’re an experience that turns a regular weeknight into a little party. Here’s why this is the best version of this idea you’ll find.
- Quick & Easy: From fridge to table in under 25 minutes. This is a lifesaver for those after-school activities or when you just need dinner sorted, fast. No complicated steps, just simple assembly.
- Simple Ingredients: You likely have everything in your kitchen right now. Hot dogs, crescent rolls, and a little mustard or ketchup for the eyes. No special trips to the store needed.
- Perfect for Halloween (and Beyond!): Obviously, these are a smash hit for Halloween parties or a spooky dinner. But honestly? My kids request them all year round. They’re just fun.
- Crowd-Pleaser: I have yet to meet a kid (or adult, for that matter) who can resist a hot dog wrapped in flaky dough. They’re approachable, familiar, and just different enough to be exciting.
- Unbelievably Delicious: The combination of a savory, juicy hot dog and the buttery, flaky layers of a crescent roll is pure comfort food magic. The texture contrast is what gets you every time.
What makes this recipe different from the dozens of others out there? It’s the technique. I’ve tested this a dozen times to get the dough-to-hot-dog ratio perfect so you don’t end up with a giant dough ball. The trick is to cut the crescent roll dough into thin strips and wrap them loosely. This ensures every bite has the perfect balance of soft, flaky dough and salty hot dog. It’s not just another version—it’s the one that works every single time, without fail. This is the kind of meal that makes you feel like a superhero parent, even if you’re just trying to get through a Tuesday.
What Ingredients You Will Need
This recipe uses simple, everyday ingredients to create something truly fun and delicious. No fuss, just flavor. Here’s what you’ll need to grab.
- For the Mummies:
- 1 can (8 oz) refrigerated crescent roll dough (I prefer Pillsbury for the most consistent flakiness)
- 8 beef or turkey hot dogs (look for ones that are plump and juicy)
- 24 candy eyeballs (or use small dots of mustard/ketchup)
- 1 large egg, beaten (for an egg wash that gives a beautiful golden shine)
Ingredient Tips & Substitutions:
- Crescent Rolls: The star of the show! For a gluten-free option, look for a gluten-free crescent roll dough, though the texture will be slightly different. You can also use puff pastry sheets, cut into thin strips, for an extra-buttery version.
- Hot Dogs: Use your family’s favorite brand. Turkey or chicken hot dogs work perfectly for a lighter option. For a vegetarian version, use veggie dogs or even cheese sticks (just be careful not to over-bake them).
- Candy Eyeballs: These are purely for fun, but they make the mummies come alive! If you don’t have them, you can pipe a tiny dot of mustard or ketchup for the eyes. A small dab of sriracha works for a bit of heat for the adults.
- Egg Wash: This is key for that gorgeous, golden-brown color. If you don’t have an egg, you can brush the dough with a little milk or melted butter instead. It won’t be as shiny, but it will still be delicious.
Equipment Needed
You won’t need anything fancy for this recipe, which is part of its beauty. Here’s what you’ll need to get started.
- Baking sheet (I use a standard half-sheet pan)
- Parchment paper or a silicone baking mat (for easy cleanup)
- Sharp knife or pizza cutter (for cutting the dough strips)
- Small bowl (for the egg wash)
- Pastry brush (or just use a clean fingertip to apply the egg wash)
- Cooling rack (optional, but helps keep the bottoms crisp)
Personal Experience: I’ve tried making these with just a butter knife on a cutting board, and let me tell you, a pizza cutter is a game-changer. It makes cutting those thin strips so much faster and cleaner. Also, don’t skip the parchment paper. I learned the hard way that crescent roll dough has a mind of its own and will stick to a bare baking sheet. A silicone mat is my favorite investment for this—nothing sticks, and cleanup is a breeze.
Preparation Method
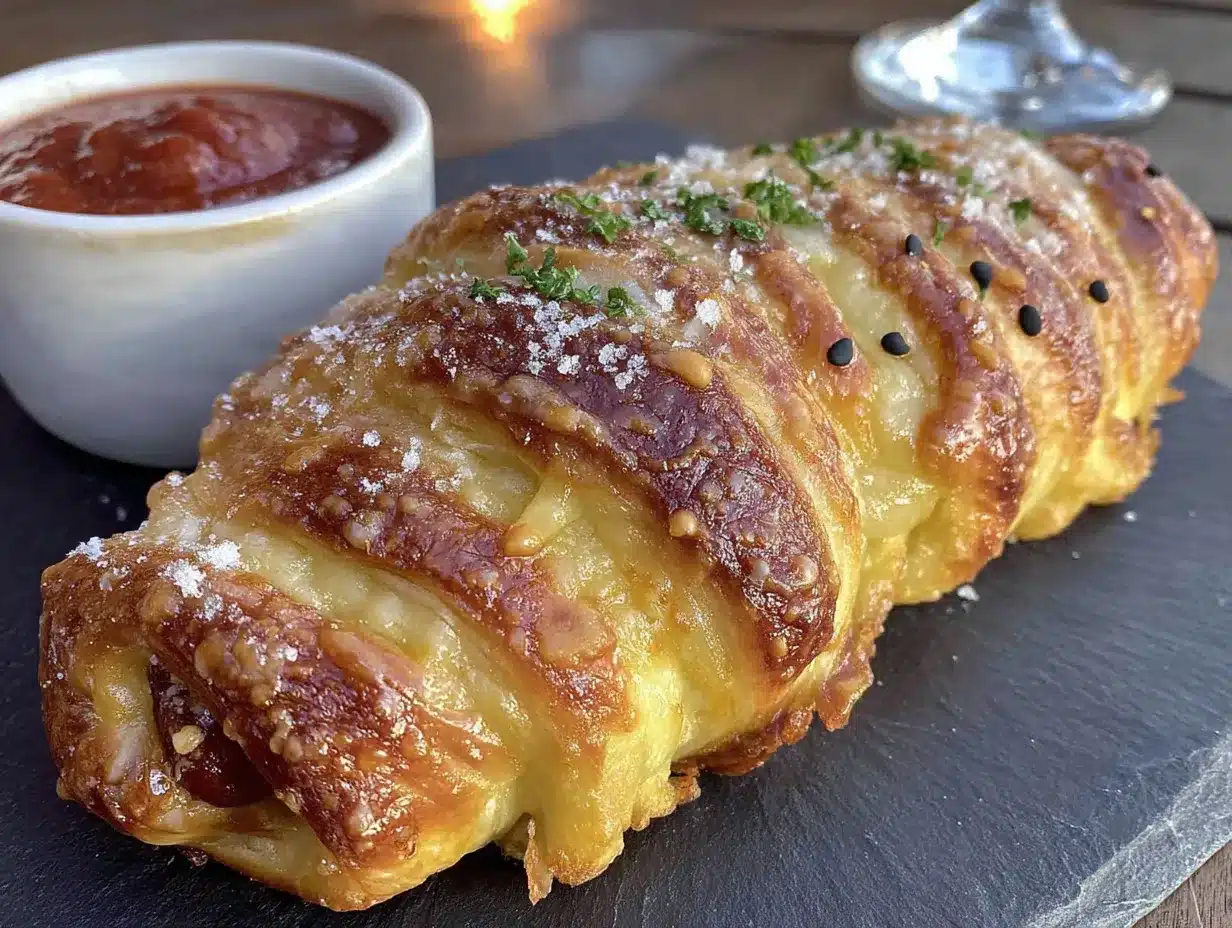
Let’s get to the fun part! This is where you and your little ones can get creative. Follow these steps, and you’ll have a batch of adorable mummies in no time.
- Preheat and Prep: Preheat your oven to 375°F (190°C). Line your baking sheet with parchment paper or a silicone mat. This is non-negotiable for easy cleanup!
- Prepare the Dough: Open the can of crescent roll dough carefully—I hate when it pops! Unroll the dough and separate it along the perforated lines into 8 triangles. Using a sharp knife or pizza cutter, cut each triangle lengthwise into 3 thin strips. You’ll have 24 long, skinny strips of dough. (Time estimate: 2 minutes)
- Wrap the Mummies: Take one hot dog and start wrapping a dough strip around it, starting at one end. Don’t wrap it too tightly—you want to leave small gaps to create the “mummy” look. Overlap the dough slightly as you go. Leave a small space at the top for the eyes. Repeat with all 8 hot dogs. (Time estimate: 5-7 minutes)
- Place and Brush: Place the wrapped hot dogs on your prepared baking sheet, leaving about an inch of space between each one. In a small bowl, beat the egg with a splash of water. Using a pastry brush, gently brush the egg wash over the dough strips. This will give them a beautiful golden color as they bake. (Time estimate: 1 minute)
- Bake to Perfection: Bake for 12-15 minutes, or until the dough is puffed up and a deep golden brown. The hot dogs will be nice and hot. Keep an eye on them after 12 minutes, as ovens can vary. (Time estimate: 12-15 minutes)
- Add the Eyes: Once the mummies are out of the oven, let them cool on the baking sheet for 2-3 minutes. They’ll be very hot! Then, gently press the candy eyeballs into the small gap you left at the top. If the dough has puffed up over the gap, just use your finger to make a small indentation. (Time estimate: 2 minutes)
- Serve and Enjoy: Transfer the mummies to a serving platter or plate. Serve them warm with your favorite dipping sauces like ketchup, mustard, or even some warm nacho cheese sauce. Watch them disappear!
Troubleshooting Tip: If your dough strips are breaking apart as you wrap, don’t panic! Just press the broken piece back together on the hot dog. The heat from the oven will seal it up. Also, if the dough feels too sticky, lightly dust your hands with a little flour.
Cooking Tips & Techniques
I’ve made these mummies more times than I can count, and I’ve learned a few things along the way. Here are my best tips to ensure your mummies come out perfect every time.
- The Dough is the Star: The key to a perfect mummy is the dough-to-hot-dog ratio. If you wrap the dough too tightly, you’ll end up with a dense, doughy center. Leave those little gaps! It looks more like a mummy, and it bakes up lighter and flakier.
- Don’t Overcrowd the Pan: Give your mummies some breathing room on the baking sheet. If they’re too close together, they’ll steam instead of bake, and you’ll lose that beautiful golden-brown crispness. I usually bake 8 mummies on a standard half-sheet pan with no issues.
- The Egg Wash is Your Friend: I know it’s an extra step, but don’t skip the egg wash. It’s what gives the dough that gorgeous, glossy, golden-brown finish that makes them look so appetizing. I once forgot it, and the mummies came out pale and sad. Never again!
- My Biggest Failure: The first time I made these, I used jumbo hot dogs. Big mistake. The dough-to-meat ratio was all off, and they took forever to bake through. Stick with standard-size hot dogs for the best results. It’s a lesson I only had to learn once.
- Multitasking Strategy: While the mummies are baking, set up your dipping sauce station. This is a great job for kids—they love having a choice. It makes the whole process feel like less of a chore and more of an event.
Variations & Adaptations
This recipe is a fantastic base for all sorts of creative twists. Don’t be afraid to make it your own! Here are a few of my favorite ways to change it up.
- Spooky Spider Dogs: Instead of wrapping the whole hot dog, cut the hot dog in half crosswise. Then, make 4-5 shallow cuts along the length of each half to create “legs.” Wrap a small strip of dough around the middle to hold the legs together. Bake as directed and add two eyes for a creepy spider!
- Cheesy Mummies: Before wrapping the hot dog, cut a slit down the center lengthwise, being careful not to cut all the way through. Stuff the slit with a thin strip of cheddar cheese or a cheese stick. Wrap as directed and bake. The cheese melts out in the most delicious way.
- Pizza Mummies: Brush the hot dogs with a little pizza sauce before wrapping them with the dough. After baking, serve them with a side of warm marinara sauce for dipping. It’s a fun, handheld pizza twist.
- Breakfast Mummies: Swap the hot dogs for breakfast sausage links. Wrap them with crescent roll dough and bake. Serve with a side of maple syrup for dipping. It’s a fun, savory-sweet breakfast that kids go crazy for.
- My Personal Favorite: I love adding a sprinkle of everything bagel seasoning to the egg wash before baking. It adds a little savory crunch that is absolutely addictive. It’s a tiny change that makes a big difference.
Serving & Storage Suggestions
These mummies are best served warm, right out of the oven, but they’re still delicious at room temperature. Here’s how to make the most of them.
- Serving: Arrange the mummies on a large platter with a bowl of ketchup and a bowl of mustard in the center for dipping. For a fun Halloween party, serve them alongside a bowl of “witch’s brew” (green punch) and some “monster fingers” (breadstick pretzels).
- Storage: Store any leftover mummies in an airtight container in the refrigerator for up to 3 days. The dough will soften slightly, but they’ll still taste great.
- Reheating: The best way to reheat them is in the oven or an air fryer. Pop them in a 350°F (175°C) oven for 5-7 minutes, or until they’re warmed through and the dough crisps back up. You can also microwave them for 20-30 seconds, but the dough will be a bit softer.
- Freezing: You can freeze the unbaked mummies! Arrange them on a baking sheet and freeze until solid. Then, transfer them to a freezer-safe bag. When you’re ready to bake, add 2-3 minutes to the baking time. You can also freeze baked mummies for up to a month.
- Flavor Development: Honestly, these are best fresh from the oven. The dough is at its flakiest and most delicious. While leftovers are still good, they don’t have that same magical, just-baked texture.
Nutritional Information & Benefits
While these are a fun treat, here’s a look at the nutritional side of things. Remember, these are estimates and can vary based on the brands you use.
- Estimated Nutritional Value (per mummy): Calories: 220, Fat: 14g, Carbohydrates: 18g, Protein: 7g.
- Health Benefits: Hot dogs are a source of protein, which helps keep kids full and satisfied. The crescent roll dough provides carbohydrates for quick energy. You can boost the nutritional value by using turkey or chicken hot dogs, which are lower in fat and calories.
- Dietary Considerations: This recipe is not gluten-free as written, but you can use a gluten-free crescent roll dough. It is also not dairy-free, but you can use a dairy-free milk wash instead of the egg wash. Be sure to check the labels on your hot dogs and dough for any hidden allergens.
- Potential Allergens: This recipe contains wheat (gluten), dairy (in the dough), and eggs. Always check your ingredient labels carefully if cooking for someone with allergies.
- My Wellness Perspective: I believe in balance. These mummy hot dogs are a fun, occasional treat. They’re not meant to be an everyday meal, but they’re a fantastic way to create a joyful memory with your kids. Pair them with a side of apple slices or carrot sticks for a more balanced plate.
Conclusion
So, there you have it. A simple, silly, and absolutely delicious recipe that turns a regular weeknight into a little adventure. These mummy hot dogs are proof that you don’t need to be a professional chef or spend hours in the kitchen to create something that makes your family smile. They’re quick, they’re easy, and they’re guaranteed to be a hit with the kids (and the kid at heart).
I love this recipe because it’s more than just food—it’s a moment. It’s the laughter when you’re wrapping the dough, the excitement when they come out of the oven, and the happy silence when everyone’s munching away. I encourage you to make this recipe your own. Try the spider variation, add some cheese, or just stick with the classic. Whatever you do, have fun with it!
Now, I want to hear from you! Drop a comment below and tell me how your mummies turned out. Did your kids love them? Did you try a fun variation? Share your photos and tag me on Pinterest—I can’t wait to see your creations. Happy cooking, and remember: sometimes the best meals are the ones that make you laugh.
Frequently Asked Questions
Can I make these mummy hot dogs ahead of time?
Yes! You can assemble the mummies up to a day in advance. Just place them on the baking sheet, cover them with plastic wrap, and store them in the refrigerator. When you’re ready to bake, just pop them in the oven. You may need to add an extra minute or two to the baking time since they’ll be starting from cold.
My dough keeps tearing when I wrap it. What am I doing wrong?
Don’t worry, this happens to everyone! Crescent roll dough can be delicate, especially if it’s too cold. Let the dough sit at room temperature for about 5 minutes after opening the can to make it more pliable. If it still tears, just press the torn pieces back together on the hot dog. The heat from the oven will seal everything up perfectly.
Can I use puff pastry instead of crescent rolls?
Absolutely! Puff pastry will give you an even flakier, more buttery result. Thaw the puff pastry according to the package directions, then cut it into thin strips (about 1/2 inch wide). Wrap the hot dogs the same way you would with crescent roll dough. The baking time might be slightly longer, so keep an eye on them.
How do I keep the candy eyeballs from falling off?
The key is to add the eyes while the mummies are still warm, but not piping hot. The residual heat from the dough will help the little icing on the back of the candy eyes soften and stick. If they’re still not sticking, you can use a tiny dab of frosting or even a little bit of mustard as edible glue.
My kids are picky eaters. Will they like these?
Honestly, these are practically designed for picky eaters! They’re familiar (hot dogs!), fun (they look like mummies!), and the texture is something kids love (soft dough, salty hot dog). I’ve had friends with the pickiest of eaters tell me these were a huge hit. Let your kids help with the wrapping—they’re much more likely to eat something they helped create.
Pin This Recipe!
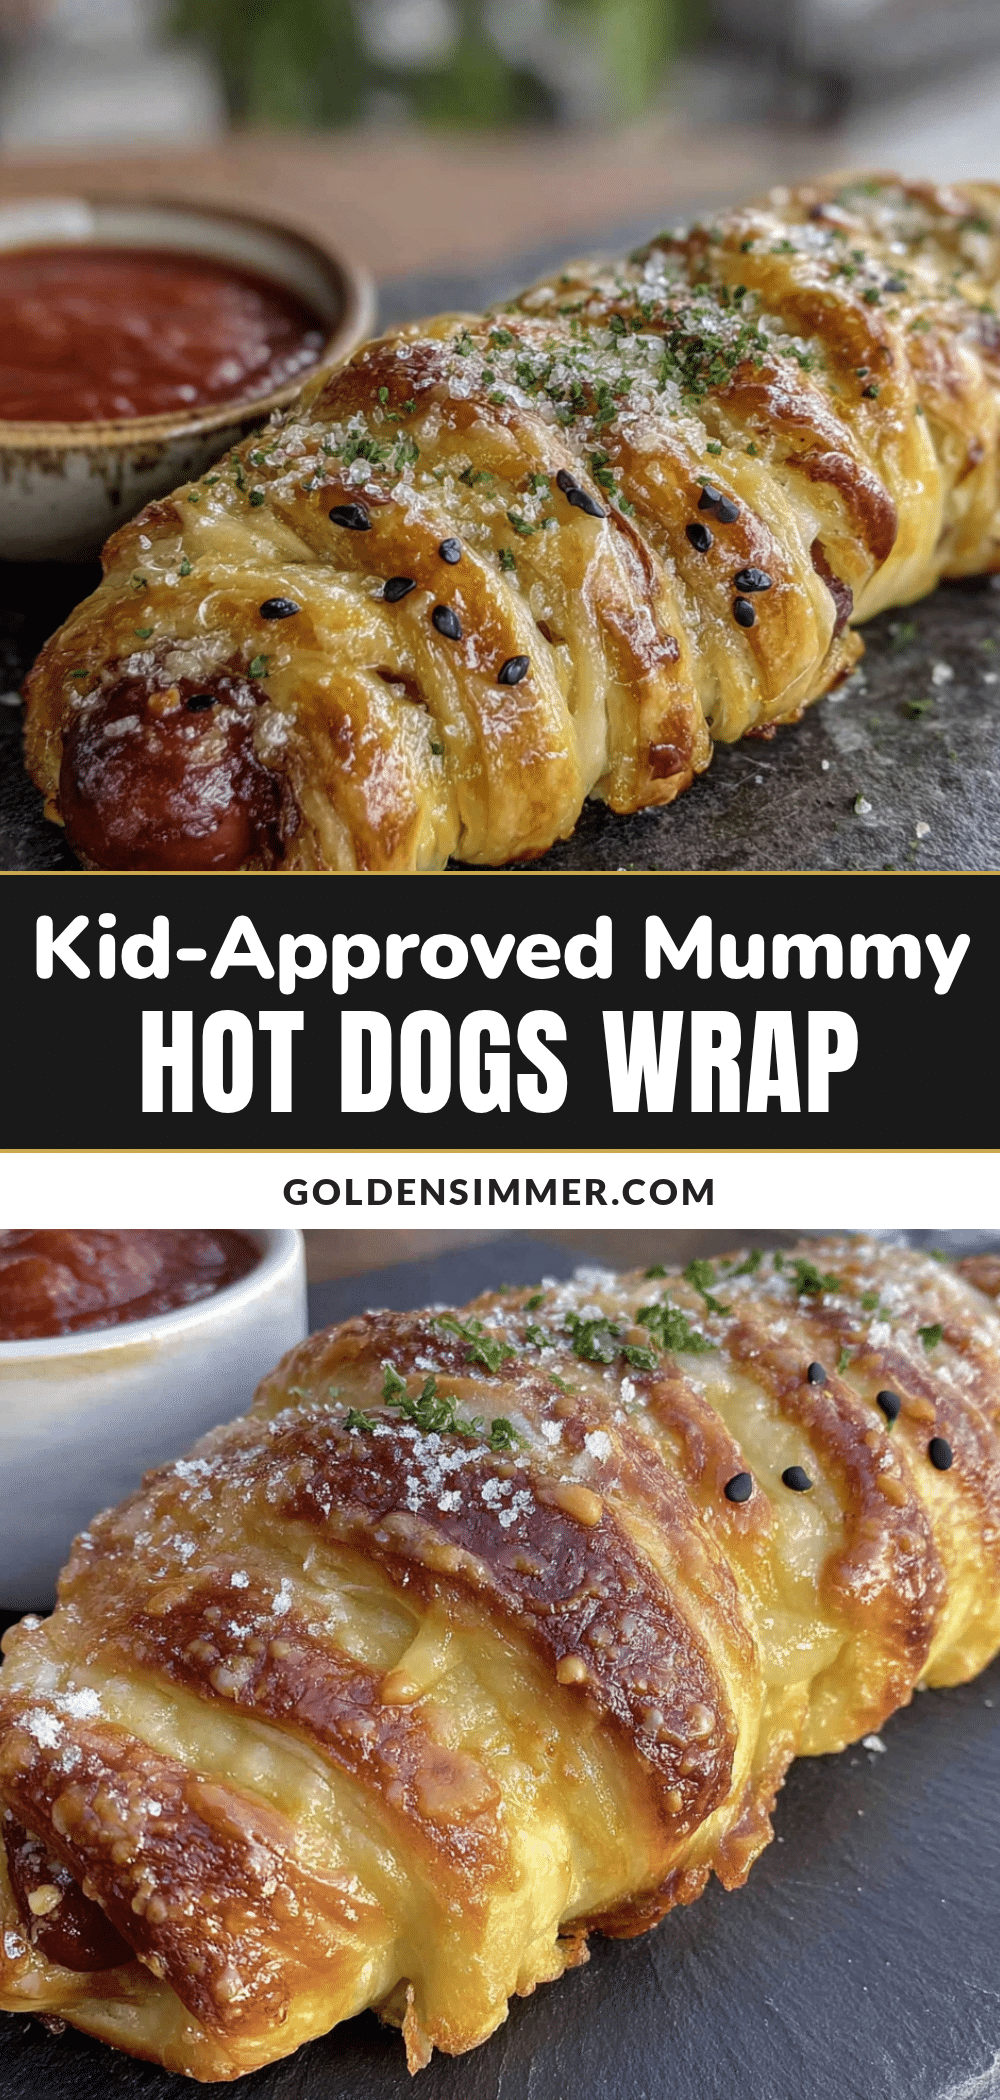
Easy Kid-Approved Mummy Hot Dogs: Best Crescent Roll Recipe

These mummy hot dogs are a quick, fun, and kid-approved dinner that turns a regular weeknight into a little party. Made with simple ingredients like crescent rolls and hot dogs, they’re perfect for Halloween or any day you want to make your family smile.
- Prep Time: 10 minutes
- Cook Time: 15 minutes
- Total Time: 25 minutes
- Yield: 8 servings 1x
- Category: Main Course
- Cuisine: American
Ingredients
- 1 can (8 oz) refrigerated crescent roll dough (Pillsbury recommended)
- 8 beef or turkey hot dogs
- 24 candy eyeballs (or small dots of mustard/ketchup)
- 1 large egg, beaten (for egg wash)
Instructions
- Preheat your oven to 375°F (190°C). Line a baking sheet with parchment paper or a silicone mat.
- Open the can of crescent roll dough and separate it along the perforated lines into 8 triangles. Using a sharp knife or pizza cutter, cut each triangle lengthwise into 3 thin strips, yielding 24 long strips.
- Take one hot dog and start wrapping a dough strip around it, starting at one end. Leave small gaps to create the ‘mummy’ look, overlapping the dough slightly. Leave a small space at the top for the eyes. Repeat with all 8 hot dogs.
- Place the wrapped hot dogs on the prepared baking sheet, leaving about an inch of space between each. In a small bowl, beat the egg with a splash of water. Using a pastry brush, gently brush the egg wash over the dough strips.
- Bake for 12-15 minutes, or until the dough is puffed up and a deep golden brown.
- Let the mummies cool on the baking sheet for 2-3 minutes. Then, gently press the candy eyeballs into the small gap left at the top. If the dough has puffed up, use your finger to make a small indentation.
- Transfer the mummies to a serving platter and serve warm with your favorite dipping sauces like ketchup, mustard, or nacho cheese sauce.
Notes
For best results, use standard-size hot dogs, not jumbo. If dough tears, just press it back together on the hot dog. Add eyes while still warm for better adhesion. Can be assembled up to a day in advance and refrigerated. Freeze unbaked mummies for up to a month.
Nutrition
- Serving Size: 1 mummy
- Calories: 220
- Sugar: 4
- Sodium: 580
- Fat: 14
- Saturated Fat: 5
- Carbohydrates: 18
- Protein: 7
Keywords: mummy hot dogs, crescent roll hot dogs, Halloween dinner, kid-friendly, easy dinner, fun food, hot dog recipe, crescent roll recipe



